Entrée

Pozole Verde a.k.a Pozolillo

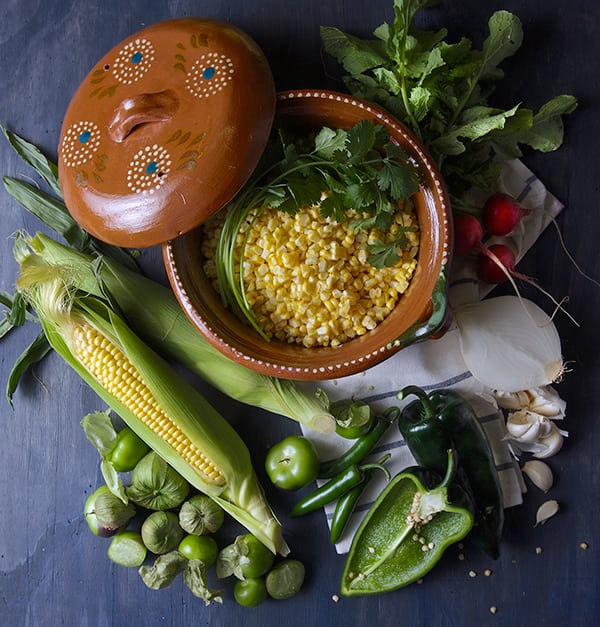
Pozole-Verde_Pozolillo_ingredients~Yes,-more-please!

Pozole is a soup usually made with hominy, pork meat, spices and fresh garnishes that create a wonderful one bowl meal warm soup. Let’s say Pozole Is kind of the Mexican Pho. There are a couple of variations upon regions and availability of ingredients, red chiles , green tomatillos and poblanos, or just garlic and onion. There’s even not so traditional versions using chicken or turkey to make the soup a little lighter and healthier; even vegetarian versions using button mushrooms instead of meat, in my opinion all equally delicious in its own way.

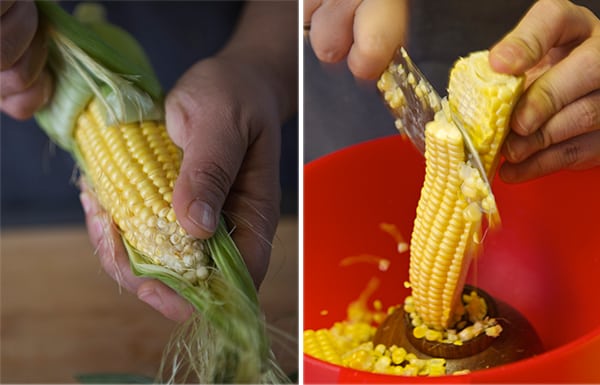
Another variation on this dish would be the fresher version also known as ‘Pozolillo’, that uses fresh white corn in the cob kernels like in Michoacan and Guerrero. Which is the version I prepared.

The hominy used in Pozole is freshly made from dry kernels that are transformed into ‘nixtamal’ this process involves soaking the dry corn kernels  in water and limestone to burn and cook the skin. It is an intense preparation more commonly used in the South of Mexico, Sinaloa, Jalisco, Michoacan, Guerrero, State of Mexico and Distrito Federal. While in the norther mexican states like Sonora, Monterrey, Chihuahua, the proximity with the border has a not so preferred commodity, hominy on a can which to my taste is hard to equal the good flavor from the freshly made.

 Despite the regionalism, Pozole is a classic soup among mexican families, every family has its own recipe and a style; whether is white, red or green, a grandma, sister, mom or aunt who makes it; It is always a great comforting meal that brings family and friends together.

In my family, My Grandma, from my father’s side is my Pozole Guru. She will start to cook the Pozole two days in advance by soaking the dry corn-nixtamal with a bit of lime stone to lose the skins on the kernels, rinse it infinite times and slow cook it for a couple of hours. Grandma Mago used pork shoulder and very meaty pork cuts. Her Pozole was white, meaning she would not add any chiles to tint and flavor the broth, the flavor came from the cosmic union of the extremely well prepared artisanal hominy, tender pork, garlic and onion. Amazing, simply amazing.

On the other side of my family, the Pozole Guru is my Aunt Paloma, she makes the BEST Red Pozole. Absolutely delicious, she uses also pork and red chiles like ancho and guajillo which are very mild chiles that flavor the broth transforming it in this aromatic and savory broth you almost want to use a straw to drink it. Scrumptious.

As you can see I have a mayor task here, So far I’ve cooked both Pozole styles, white and red, I love them equally. And yes, it is the cook hand, what we call “sazon” that makes a dish your dish and the only way to exceed at it is practice,  practice and more practice my little grasshopper.

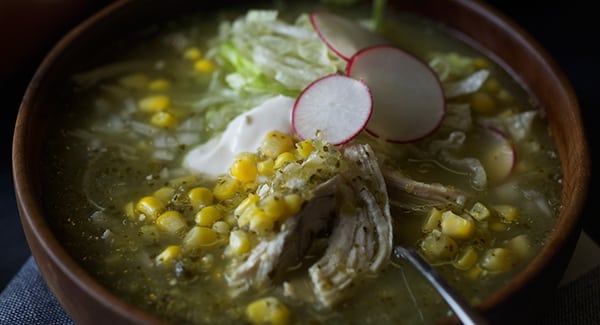
Pozole-Verde_Pozolillo~-Green-tomatillos-~-Yes,-more-please!Pozole-Verde_Pozolillo_warm-corn-mexican-soup~Yes,-more-please!

This time I’m attempted to recreate a Pozole Verde or Pozolillo. First time I had this green gem soup was at a friend’s house she was from Michoacan. I inmediatelly fell in love.
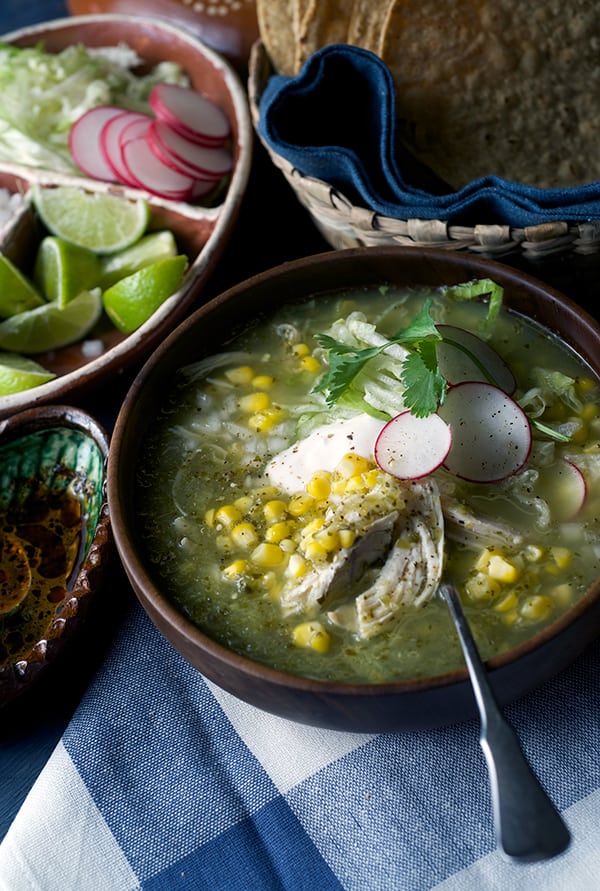
This Pozole Verde is made with white corn kernels instead of hominy and uses tomatillo, serrano and poblano peppers to flavor the broth. What is so special about it? the broth in this Pozole Verde It’s light, fragrant, almost has a herbaceous flavor, and the green tomatillo adds a bit of a thickness to the broth without making it heavy to the palette. The corn kernels make this Pozole a great fresh taste, really unique and very achievable if you lack of a mexican Grandma, Aunt or good quality hominy.

In this recipe, I used sweet corn. Why? Well, Ian is more familiar with the corn flavor than with the hominy. Not a lot of people likes hominy and I strongly believe is because what they have tried is from a can. So what you do? What did I do?..I used what I had freshest available. This week I ran into a good corn sale at the market, it was fresh and tasted sweet, juicy and crunchy good enough to make it into a soup.
Now, I know some people will crucify-me about using sweet yellow corn but, I have to say that the variation came out tasting really good.
Do your best with what you have, use what is freshest available to you, if you find white corn this will be my first option, and if you prefer Hominy, I will encourage you to find “Rancho Gordo hominy”.
This Rancho Gordo California farm grows heirloom beans and grains, the quality and flavor resembles a lot of the hominy you can find in Mexico. Sometimes I can find them at Whole foods or Traders Joe’s. If you plan ahead of time, order them on-line. absolutely divine. http://www.ranchogordo.com/index.htm

Last option will be Juanita’s Mexican style hominy. Yes this particular brand has the best texture, and 3 ingredients, water, hominy, lime stone. Making it the best option. If can is the only option you have, this will taste good.

I used chicken one of my favorite chickens from Smith & Smith Farms, I know chicken again!!! well I do not mind when the quality of it is so good In fact, every other weekend I’ve been buying a whole chicken from this farms, there are so good I crave chicken!.. ridiculous I know…

Any how, easy recipe, one pot wonder, it keeps really well, I have not attempted to make this Pozole Verde on a crock pot, I see no reason why not you could use it. Please, if you do, let me know how it goes.
Keep warm and EAT your SOUP, do not lick the bowl, use a straw!.

Pozole-Verde_Pozolillo~Yes,-more-please!

Pozole Verde a.k.a. Pozolillo

Serves 4 Mexicans 6-8 Green coats.

8 cups /2Lt. chicken stock
3.5-4 lbs. Whole chicken or the meat of a roasted chicken shredded.
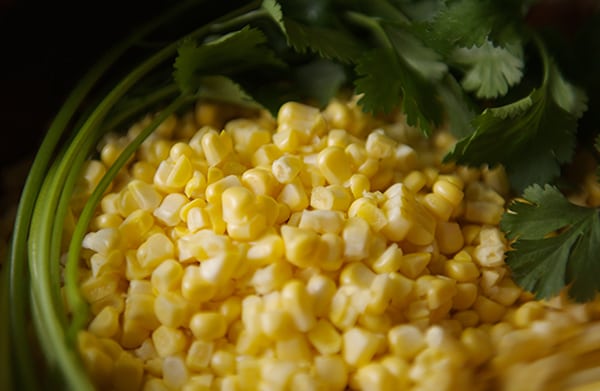
6-8 ears of white corn preferable or yellow corn de-kernel
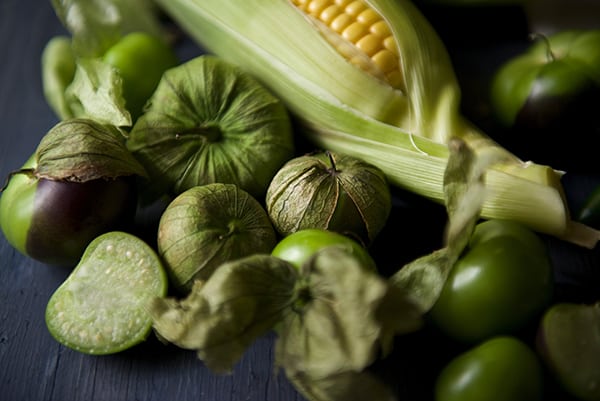
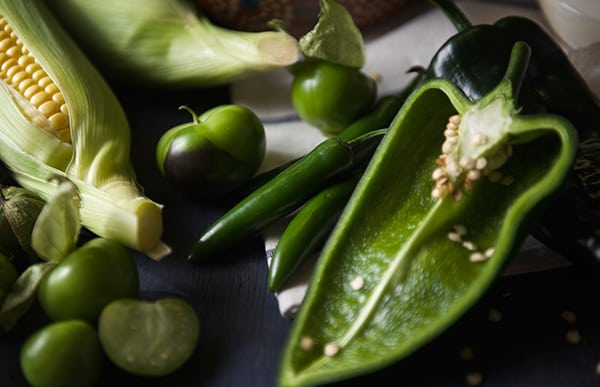
2lbs green tomatillos.
3 poblano peppers remove seeds and deveined.
2-3 serrano peppers
1 large bunch cilantro
½ teaspoon mexican dry oregano
1 medium white onion
1 small head of garlic
2 teaspoons Sea Salt.

Garnish with:

Iceberg Lettuce shredded
Radishes
White Onion finely chopped
1-2 Lime wedges
Mexican Crema
Avocado
Corn Tostadas

Salsa toasted chile de Arbol:

1/4 cup Corn, Sunflower or Vegetable oil
14-20 Dry chiles de Arbol- (remove stems, include seeds)
1-2 medium garlic cloves
1 pinch of sea salt.

Toast in Oil about 14-20 dry red chile de arbol, until they have this mahogany dark color, remove from heat, add 2 garlic cloves cut in half and a good pinch of sea salt. Blend all this until a coarse puree. Add a dash of dis paste when ready to eat.The heat in this sauce-paste is mild, due to the toasting of the chiles, it makes it smoky and mild heat.

Preparation:

If you are using the whole chicken:

1. In a large pot add 8 cups of water ½ medium onion, ½ teaspoon oregano, ½ head of garlic ½ bunch of cilantro, 2 bay leaf, 1/2 teaspoon dry thyme, 2 carrots, 1 sprig of celery, 2 teaspoons sea salt. Add the whole chicken, skin on, cut in pieces, for faster cooking. Bring to a slow simmer; with a ladle remove the white foam that forms as it cooks. Cook for about 35-45 minutes. Until chicken is tender.
2. Once the chicken is cooked, Remove the chicken, herbs, onion, garlic, sieve the broth.
3. Let the chicken to cool down until riches a comfortable temperature to remove the skin and shred the chicken meat. Set aside.

If you are using a Roasted Chicken:

1. Remove skin from roasted chicken and shred. Save the chicken carcasses and set aside.
2. In a large pot add 8 cups of chicken stock, ½ onion, ½ teaspoon oregano, ½ head of garlic ½ bunch of cilantro, 1-2 teaspoon salt and the chicken carcasses from the roasted chicken. Bring to a slow simmer; with a ladle remove the white foam that forms as it cooks. Cook for about 20-25 minutes. Until chicken is tender.
3. Once the chicken broth is seasoned and cooked, Remove the chicken carcasses, herbs, onion, garlic. sieve.

Pozole-Verde_Pozolillo_how-to-cut-Corn-kernels-from-the-cob~Yes-more-please!-Pozole-Verde_Pozolillo_corn_~Yes,-more-please!

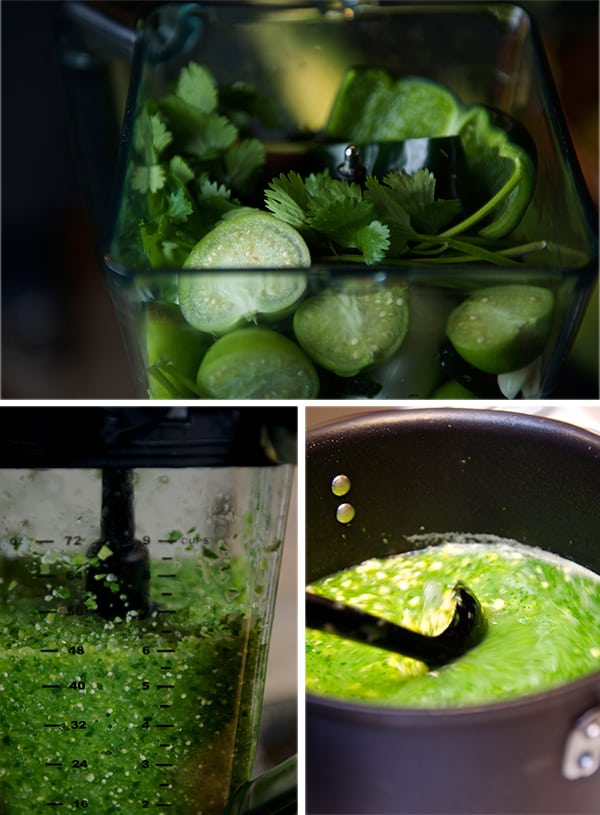
4. Remove the tomatillo husk, wash them and cut in halves. Cut poblano peppers in half remove the green veins, and seeds. In a blender add the tomatillos, poblano peppers, the other ½ onion, 3-4 garlic cloves, the other ½ bunch cilantro, salt, 2-3 serrano peppers. Add one serrano at a time and taste in between blending so you can measure how spicy it is. The serranos in this recipe are used to add flavor not spice, they act like black pepper. Add a little of the chicken broth from the pot to help blend all this. Blend until is pureed.
5. On a large deep pot add 1 tablespoon sunflower oil until oil is hot. Add the tomatillo blended sauce to the oil and cook for 5 minutes (careful it will splatter). Now that the sauce is sautéed, add the 8 cups of chicken stock, along with corn kernels. Bring to a slow simmer. Cook for about 25-35 minutes.The broth will change color from emerald green to a bright sage green. At this point taste to adjust for salt. Add your shredded chicken to warm through.

Pozole-Verde_Pozolillo_ingredients-for-the-sauce~Yes,-more-please!Pozole-Verde_Pozolillo_Green-tomatillo-Sauce~Yes,-more-please!

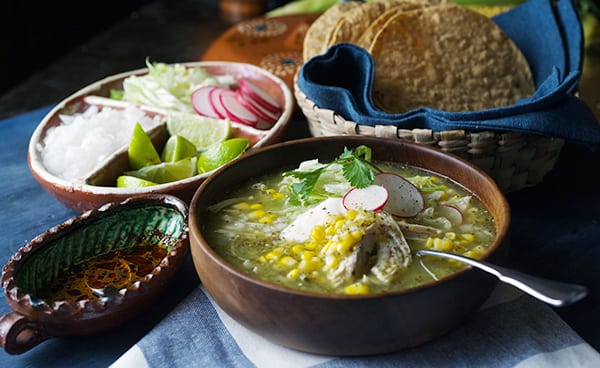
7. Serve piping hot and garnish with shredded lettuce, chopped onions, slices of radishes, squeeze of lime and a dollop of crema. Enjoy!

Pozole-Verde_Pozolillo-Warm-delicious-soup!~Yes,-more-please!

Pozole Verde~Yes, more please!
 

View Post or View Comments 6

Pho Ga Vietnamese Chicken Noodle Soup

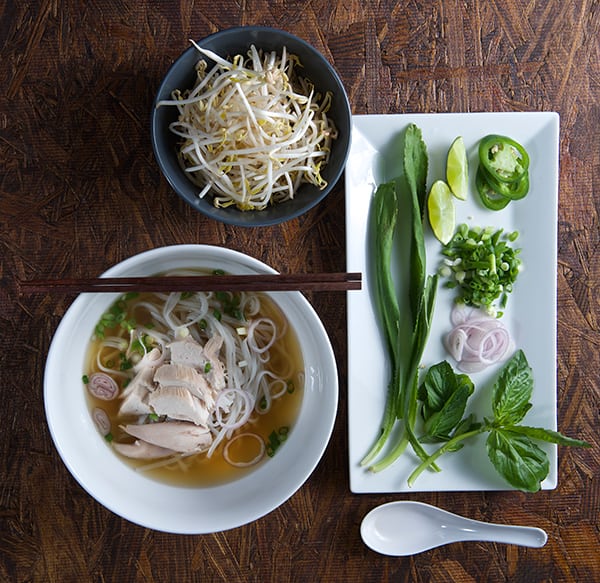
Pho-Ga--Vietnamese-Chicken-Soup_warm-delicious-soupOne of the dishes that can be found in almost every culture is chicken soup. Chicken dumplings, Chicken noodle soup, Mexican Caldo de Pollo, Avgolemeno (Greek) , Penicillin (Jewish), Kerala (Indian), French using aromatics and herbs, German creamy chicken and potato soup. You name it, Chicken soup is the queen of soups.
Vietnamese cuisine features one favorite chicken soup, Pho Ga Vietnamese Chicken Noodle Soup . This cosmic broth can bring the use of all your tastebuds at once. There are two styles of this soup; Pho from Hanoi- phở bắc or “Northern Pho” and Saigon Pho-phở Sài Gòn from the south, both have two ingredient variations. Pho Ga (Chicken), Pho Bo (Beef).
Hanoi Pho uses a wider noodle, lots of green onions, vinegar and spicy chilies to garnish the dish. Saigon Pho uses a thinner noodle. The broth has lots of aromatics and slightly sweeter taste. For garnish they use a wide variety of fresh herbs, soy bean sprouts, lime, and chilli “rooster sauce” (Sriracha).

Saigon style is the one I’m more familiar with. I’ve made a little variations on this recipe. Usually Chicken Pho “Pho Ga”is served with a clear broth flavored with charred onion, ginger, and coriander seeds. While the Beef version “Pho Bo” the broth has notes of cinnamon, cardamom, star anise, and of course the flavor of roasted bones intensify the broth.

I added a few more notes to my chicken broth to accent the chicken flavor and give a little more depth of flavor. I hope you enjoy it. I think it is a fantastic dish, light and great for January with its cold weather. This would be a good recipe for a weekend since it requires a couple of hours worth of preparation and cooking. Now with all the big holiday dinner parties and big calorie dishes gone, I’m craving lighter dishes with a punch of flavor and fresh herbs or vegetables, Pho Ga Vietnamese Chicken Noodle Soup is my cosmic route.

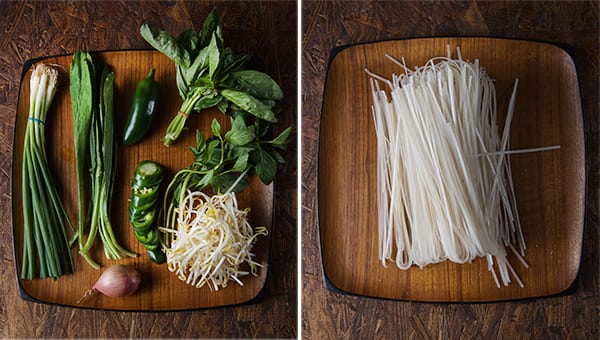
Pho-Ga--Vietnamese-Chicken-Soup_ingredientsPho-Ga--Vietnamese-Chicken-Soup_-herbs-and-noodles

Pho Ga Vietnamese Chicken Noodle Soup

~Saigon Style~

Serves 4-vietnamese portions

For the Broth:

1 ½ medium large yellow onion
1-2 fresh ginger arms about 3 inches long (choose the plumper ones.)

1 whole chicken 3.5-4 lbs. (2-2.5 Kg)
2-3 lbs. extra chicken parts like wings, backbones, neck or any other bony chicken parts.
(if you do not have the time or prefer the short route you can buy no-salt or low sodium organic chicken stock, you will need about 32 oz which equals 1 quart jug of stock)
I cook organic chickens which I purchase locally from the good folks of Smith & Smith farms:
smithandsmithfarms.webs.com

4 quarts of water
5-7 star anise (around 30-35 picks)
10-12 cardamom pods
4-6 cloves
1 tablespoon Coriander seeds
2 sticks Saigon cinnamon
½ teaspoon whole black pepper
2 tablespoons turbinado sugar
1/4-1/2 cup fish sauce (I like this kind)
1-1/2 tablespoons sea salt
1 piece of cheese cloth and cotton string or a large tea ball.


For the Bowls:

1 1/2–2 pounds small flat rice noodles (bánh phở), dry or fresh
Cooked chicken, sliced or shredded at room temperature
1/2 yellow onion, sliced paper-thin, rinsed in cold water, soaked for 30 minutes and drained
or 1 shallot thinly sliced.
4 to 6 scallions, thinly chopped include greens
1/3 cup chopped fresh cilantro, leafy tops only
To Garnish:
4 cups soy bean sprouts
10 to 12 sprigs mint
10 to 12 sprigs Thai basil (if is not in season you can use regular)
12 to 15 fresh culantro leaves
2 or 3 Thai, serrano or jalapeño chiles, thinly sliced
2 or 3 limes, cut into wedges
“Rooster sauce”- Sriracha.

Method:

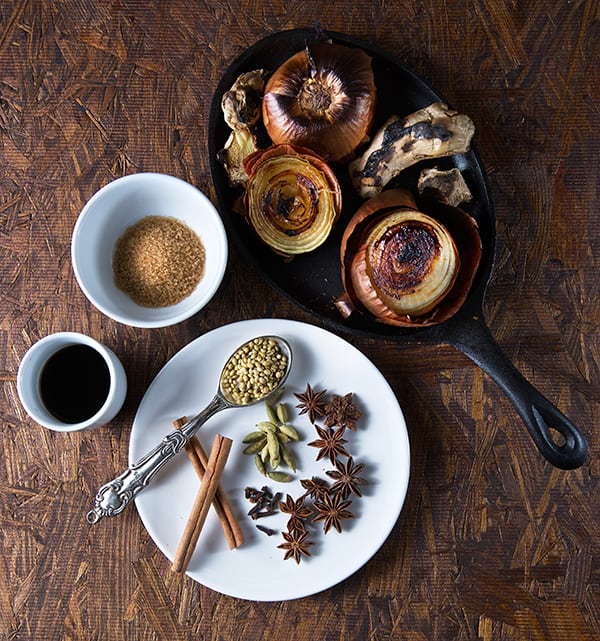
1. Rinse the ginger pieces with the skin on and cut the onions in half leaving the skins on. Place them in a cast iron pan and roast them in the oven at 450F/230C for about 15-20 minutes. Broil them for 2-3 minutes to charred the outside. If you have a gas stove, use direct flame until well charred. Set aside to cool them and peel and remove the ginger and onion skins.
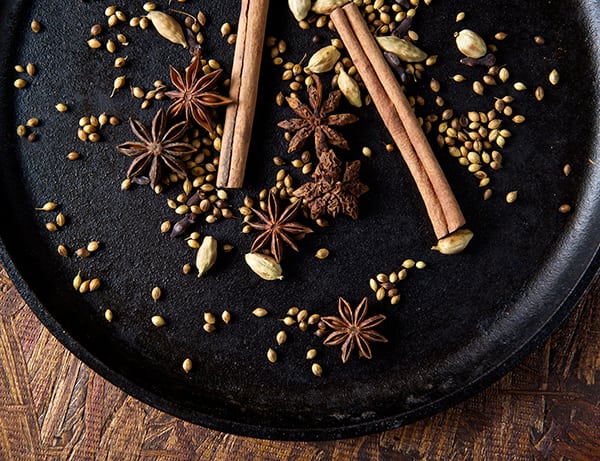
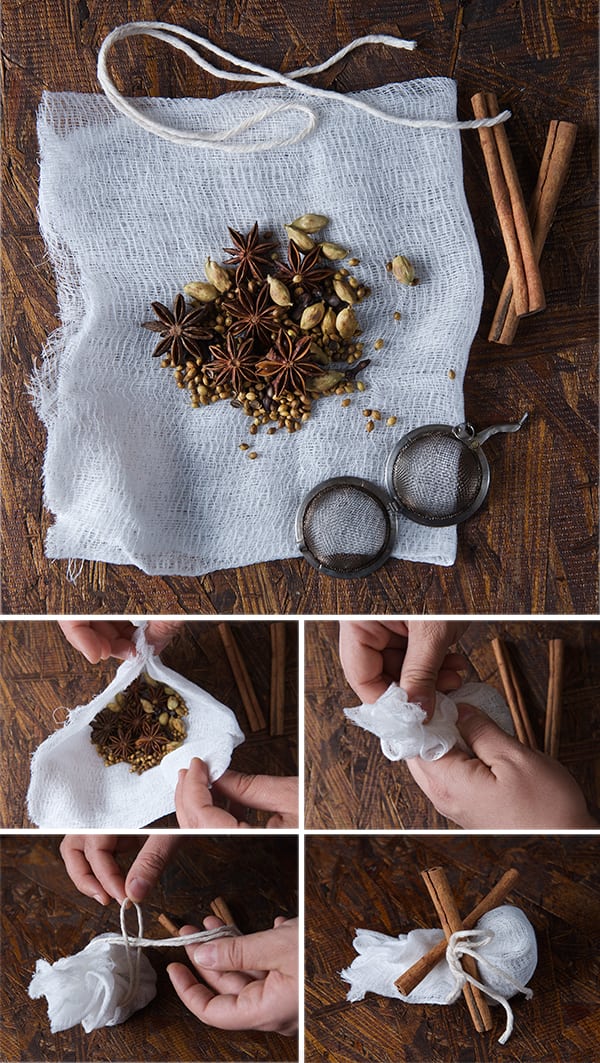
2. Toast your spices, star anise, coriander, cinnamon sticks, cloves, cardamom pods, pepper until they start to release their aromas. Using a piece of cheese cloth, a linen bag or a large tea ball, make a pouch and attach this to the pot making sure the bag is immerse in the water.

Pho-Ga--Vietnamese-Chicken-Soup_toasted-spicesPho-Ga-vietnamise-noodle-Soup_how-to-make-a-spice-pouch

3. Rinse chicken inside and out roughly with warm water. Pat it dry. In a large pot add 4 quarts water.
Add your chicken and let it simmer for 15 minutes. Clean and remove the foam that forms on the top constantly until it no longer forms .This will ensure you to have a nice clear broth. At this point add the pouch of spices, the charred onion and ginger, add sugar and fish sauce,
4. If you are using the extra chicken parts, par boil them in a separate pot for about 15 minutes. At this point toss the water, rinse the chicken parts and add them to the main pot along with the whole chicken. Bring to a slow simmer and simmer uncovered for about 25 minutes. Using a ladle remove any extra foam that might form from the chicken broth. Once that the broth is cleared, cover and simmer for at least 15more minutes.
5. Short Alternative: There are a lot of good quality organic chicken broths available at the super markets. If you prefer to use something already made my only suggestion would be to buy organic and no-salt added or low sodium so you can control the amount of salt in your broth If you are using this route , just add the 32oz. jug of chicken broth to the main chicken and water pot. Bring to a slow simmer with the whole chicken, the pouch of spices, the charred onions and ginger. Simmer uncovered for about 25 minutes. Using a ladle remove any extra foam that might form from the chicken broth. Once that the broth is cleared, cover and simmer for at least 15 more minutes.
6. At this point, the chicken is cooked it should feel firm and juicy. Use a pair of tongs to grab the chicken and transfer it to a large bowl. Rinse the chicken with cold water and drain well. Cover and set aside for 15 to 20 minutes until it is cool enough to handle. Meanwhile, keep the broth at a steady simmer.
7. When the chicken is cool enough to handle remove all the breast meat, leg and thighs keep the flesh in big pieces so it does not dry out, cover with plastic wrap, refrigerate. And remember to bring it to room temperature before assembling your noodle bowl.
8. Return carcass and all other attached parts to the stock pot and keeping in it under slow simmer. Cook the broth for at least one more hour. Adjust salt.
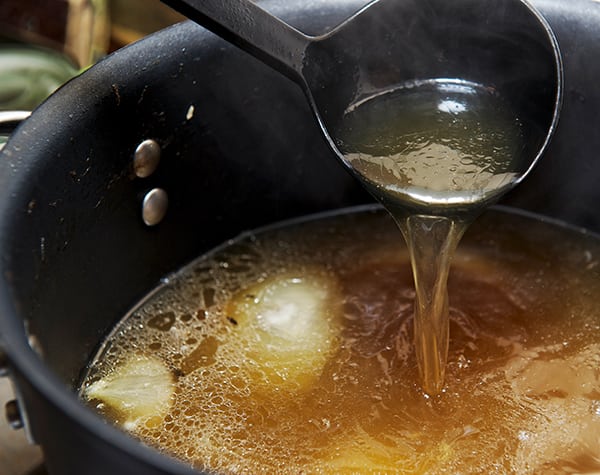
9. Strain the broth through a fine mesh sieve, discard the solids. Use a ladle to skim the broth if it has to much extra fat. Usually if you are using an organic chicken the fat content is way lower than chickens that had been in a faster grow diet. That’s why I will 100% recommend you to use an organic chicken which have less fat and stellar flavor! Return the broth to the stock pot and keep it at a slow simmer. At this point you should have about 4qts to 16 cups of broth left.
The broth should look translucent amber color, glistening and a bit saltier to compensate and balance the saltiness when you add the noodles.

10. Slice, chop, rise and dry your herbs and garnishes, place them in little side dishes on the table so everybody can customize their soup.

Pho-Ga--Vietnamese-Chicken-Soup_brothPho-Ga--Vietnamese-Chicken-Soup_warm-broth-and-rice-noodlesPho-Ga--Vietnamese-Chicken-Soup_warm-delicious-soup

Assembling the Pho Bowls:

1. For dried noodles: cover them with hot tap water and let soak for 15 to 20 minutes, or until they are pliable and opaque. Drain in a colander.
For fresh rice noodles: untangle them, place in a colander, and rinse briefly under cold running water.

2. Slice or shred the chicken removing the meat from the leg bones, remove the skin. Set aside.
3. Warm your bowls in the oven at a low temperature make sure your bowls are oven safe. This is an extra step, but very important if its cold and you want your soup to stay warm longer when its served. I love my white authentic ceramic pho bowls they keep my soup warm!
4. In a large pot bring enough water to a boil and blanch your noodles. Strain them in a colander. And serve immediately into the bowls. (For best results follow the directions on the package. The key point is to leave them al-dente they will keep cooking in the broth when served.)
5. In a warm bowl place the blanched, strained, noodles, top with slices of chicken, sprinkle some green onions, finely sliced yellow onions or shallots, crack some fresh pepper. Add 2-3 ladles of the simmering hot broth or until the broth covers the noodles. Serve immediately and top with the extra garnishes at the table. Enjoy!!!

Pho-Ga--Vietnamese-Chicken-Soup_warm,-delicious-and-rewarding-soup-

Warm up!

View Post or View Comments 11

Warm Acorn Squash Salad

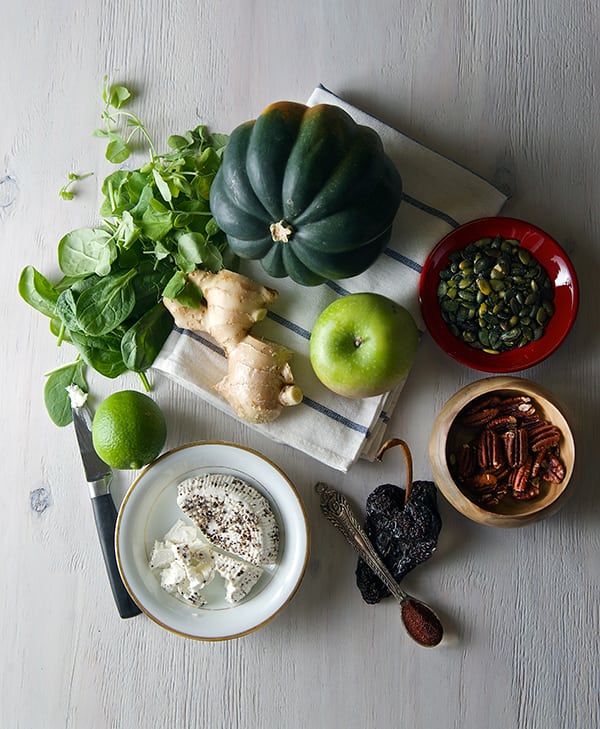
Acorn-Squash-Warm-Salad_ingredients

Full winter here in Austin! Yeah!!! I love cold weather and with it the delicious and comforting warm salads.
This scrumptious Warm Acorn Squash Salad is a great dish to keep up with the winter calories. If you know what I mean… I’m saving calories to spend them at Christmas… hehehe

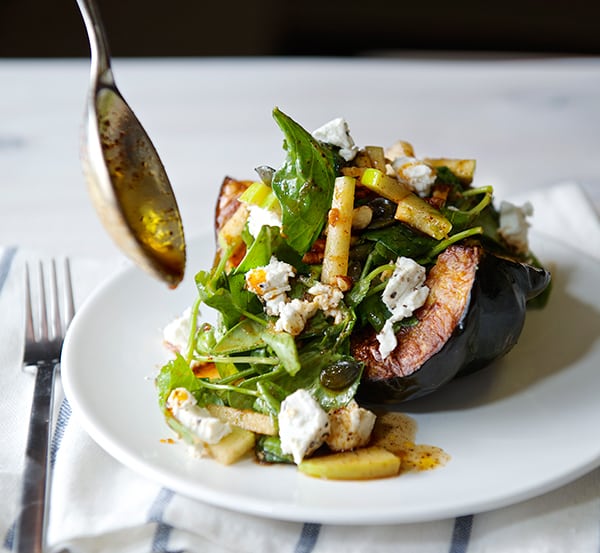
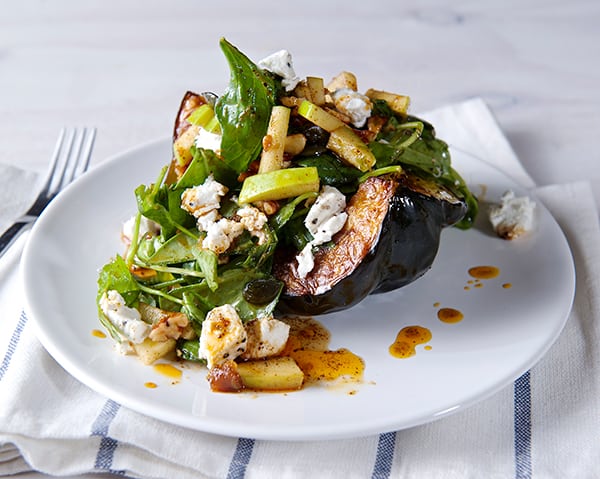
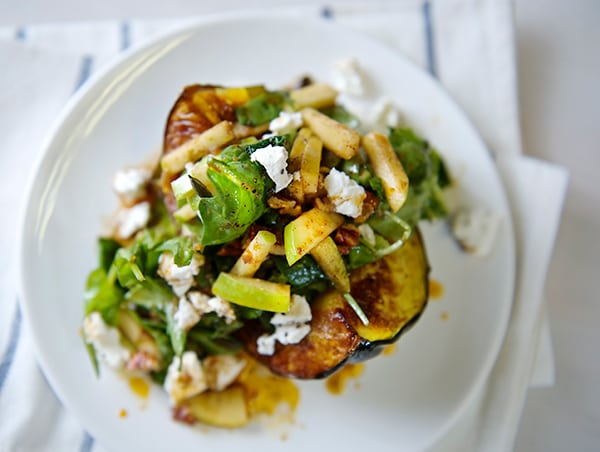
Imagine a roasted wedge of acorn squash, topped with baby spinach watercress, green apples, toasted nuts, creamy goat cheese drizzled with a slightly warm lime-ginger-ancho chilli vinaigrette… super easy, and comforting. This recipe will make you crave salad in the winter.

So, keep warm and I hope you fall in love with this easy and healthy dinner. Enjoy

Acorn-Squash-warm-salad~Yes,-more-please!

Warm Acorn Squash Salad

Serves 4

1 acorn squash cut in 4 pieces
4 cups spinach
2 cups watercress
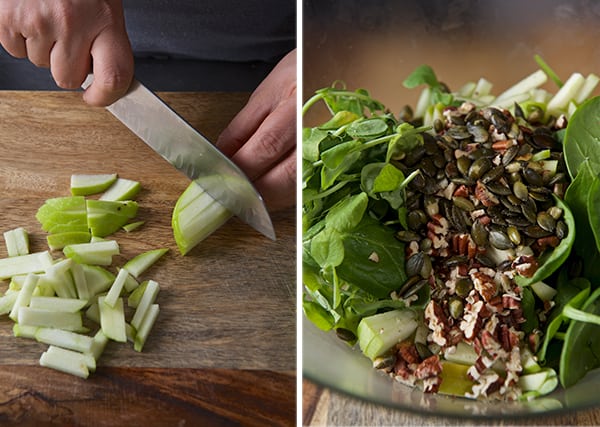
1 granny smith apple cut in long match sticks or similar.
¼ cup toasted chopped pecans
¼ cup salted toasted pumpkin seeds (pepitas)
4-6 oz goat cheese

For the warm vinaigrette:

2 Tablespoons Extra Virgin Olive Oil
2 Tablespoons Agave nectar
1 teaspoon ancho chilli powder
2 teaspoons freshly grated ginger
The zest and juice of one lime
½ teaspoon salt

Preparation:

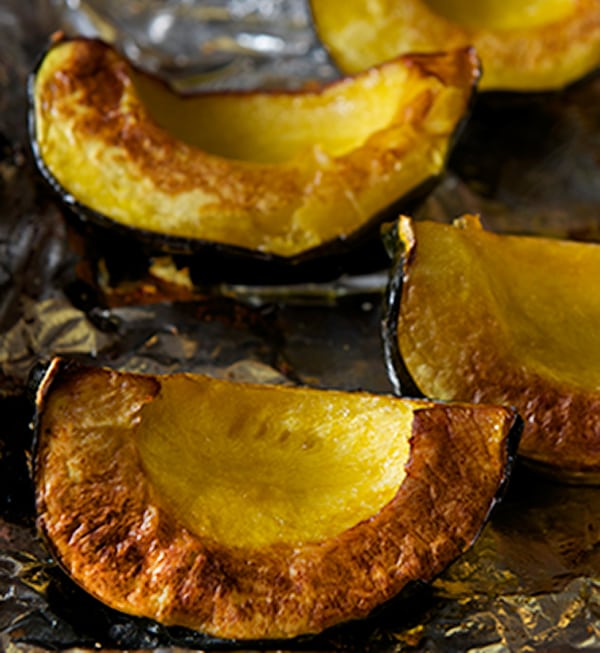
1. Place the 4 acorn squash segments in a baking sheet lined with parchment or aluminum foil, salt and pepper, Roast at 450F for about 25-30 minutes, checking half way thru, rotate the pan. And bake until fork tender.

Acorn-squash-warm-salad_roasted-acorn 2. In a salad bowl combine, the spinach, watercress, cut apples, toasted pecans, toasted pumpkin seeds.
Acor-Squash-warm-salad_match-sticks-apples

3.To make the vinaigrette:
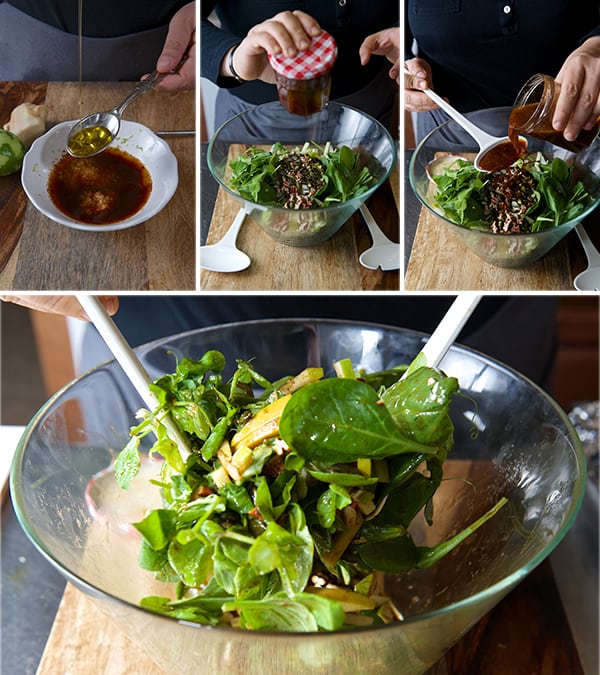
Slightly warm the Extra Virgin Olive Oil (warm to the touch). Add agave nectar, ancho chili, ginger, lemon zest, lemon juice and ½ teaspoon of kosher salt, whisk until well combined. Or place all this ingredients into a small clean glass jar and shake. The warm oil will marry the flavors and develop the aromas, as well to cozy up your greens.

Acorn-squash-warm-salad_making-the-dressing

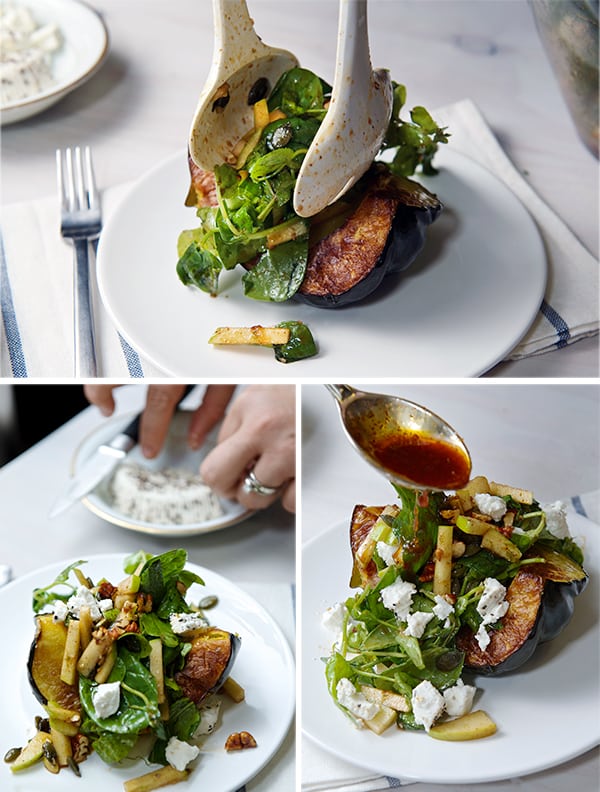
4. Once the Acorn squash is roasted, toss the salad with some of the dressing, and top each acorn squash wedge with the salad.
5. Crumble some goat cheese and drizzle a little more of the vinaigrette.Enjoy!

Acorn-Squash-Warm-Salad_dressing-up-the-salad!

Acorn-Squash-Warm-Salad~Yes,-more-please!-delish

Acorn-Squash-Warm-Salad_above-your-expectations!

Warm Acorn Squash Salad…warm up!~

View Post or View Comments 5

Hibiscus-Orange Glazed Cornish Hens

Hibiscus-Orange-Glazed-Cornish-Hens_aromatics-for-the-recipe_01

Hibiscus-Orange-Glazed-Cornish-Hens_Bay-and-Sage

Have you ever tried hibiscus?… hibiscus is a flower from a tall plant that when dried makes the most fabulous aromatic and vitamin C loaded tea or cold beverage. It is one of my favorite ingredients.
I’m from Mexico and Hibiscus is called “Jamaica” and it is pronounced Ha-my-cah, not to get it confused with the Island. Hibiscus is used in many different preparations, the most common is to prepare “agua fresca”flavored water. Jamaica it is very floral and refreshing, its our natural instant beverage.
It is also used in candy making in Mexico on the Chapala Lake Riviera, in Jalisco. There they make delicious sweet and tart hard candy pieces. If I was to describe the hibiscus flavor, it resembles a little to cranberry. The difference: Hibiscus has this floral notes that makes it so remarkable.

I was thinking of a little spin on Thanksgiving for people who find cranberry too tart so I thought of Jamaica. Then, what to do besides agua fresca and candy? Chutney?.. no… Glaze!

Oh yes I experimented last week glazing some Cornish Hens and it tastes  delicious. My original thought was to glaze some quail, but I look for a good source of quail here in Austin and I was with out luck… so I cooked Cornish Hens…and what a treat!
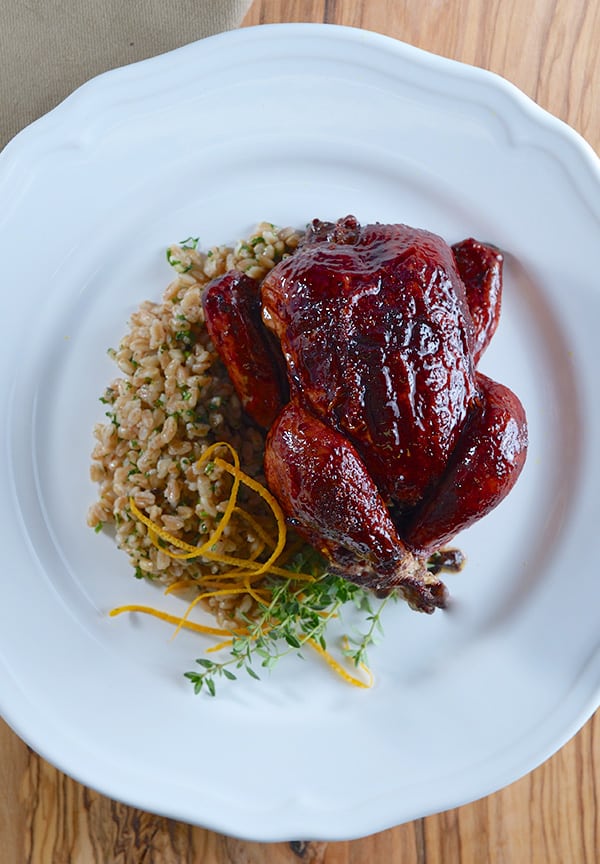
The results?… Well  you have to try it. It’s floral, tart, sweet and I added a hint of orange zest, and ancho powder to give a little spicy kick….Ian loved it!.. and yes I liked it too.. I definitely want to share the recipe with you, let me know what you think!
Try it with Quail if you or some soul around reading this can find some. I think it will be wonderful and if not it’s great on Cornish Hen! And if you are already a Hibiscus Lover, try our recipe  Martini dos Flores… you will fall in love with it! https://yes-moreplease.com/2013/08/martini-dos-flores/

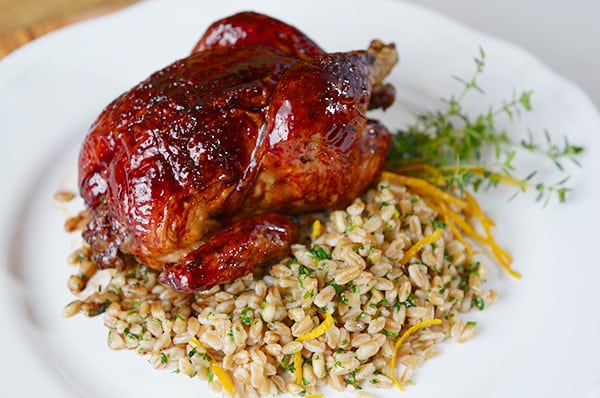
Hibiscus-Orange-Glazed-Cornish-Hens_with-herb-orange-Farro

Hibiscus-Orange Glazed Cornish Hens

Serves 2-4

2 cornish Hens, about 18 to 22 oz each
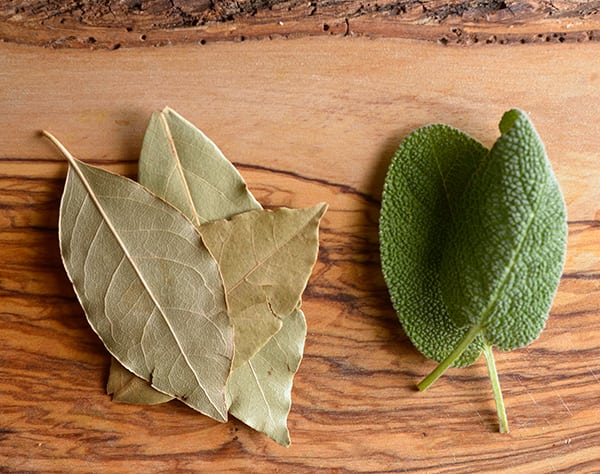
4 sage leaves
4 bay leaf
Sea salt and black pepper

Directions:

To roast the perfect cornish hens, I always follow the following steps:

1. Bring the Cornish Hens to room temperature. Take them out of the refrigerator at least 30 minutes before start cooking.
2. Preheat the Oven at 450 F/ 232 C – cook at 425 F/ 218 C
3. Using paper towels pat dry the hens. Salt, pepper and add 2 bay leaves and 2 sage leaves to each bird cavity.
4. Truss the birds, ensuring legs are tight and the tips of wings are behind the body just like if the bird is taking a nap in the sun. Trussing the Cornish Hens make a more even mass, so they cook more evenly.
5. Place them on a baking sheet or a heavy bottom roasting pan and roast for 30-25 minutes until a meat thermometer, inserted in between the breast and thigh reads 165 F/ 70 C anf juices run clear. 0While the hens are in the oven, make the glaze.

Hibiscus-Orange-Glazed-Cornish-Hens_out-of-the-oven

Hibiscus-Orange Glaze

The first time I made this dish I tried to make the glaze using the Cornish Hens drippings from the pan and de-glaze de pan like when you are making a gravy. I did not like this, the delicate floral flavors from the hibiscus were masked by the chicken fat so I made the glaze separate to keep the floral notes alive.

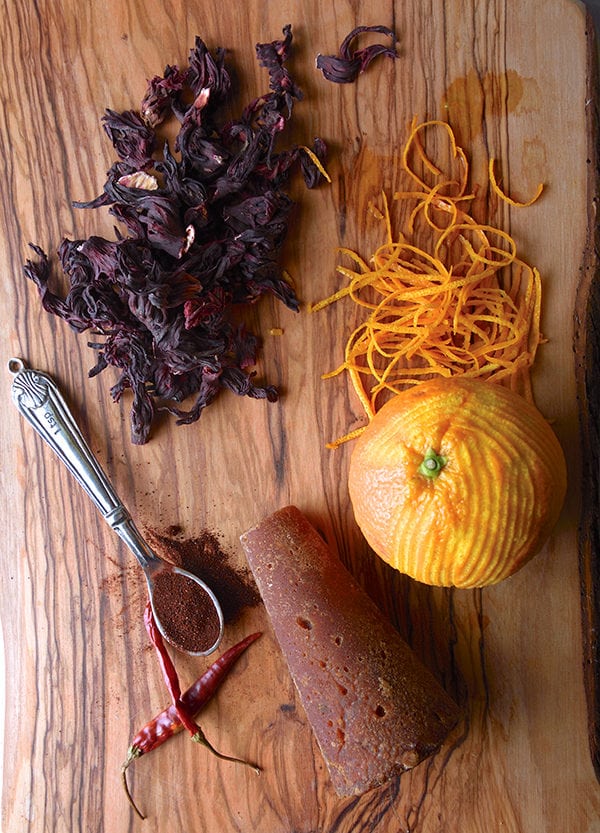
1 cup dry Hibiscus flowers
the zest of ½ medium size valencia orange
½ cone piloncillo, grated
1 aromatic clove
1 chile de arbol
1 teaspoon ancho powder
4-6 sprigs of thyme
1 tablespoon of butter
pinch of sea salt

Directions:

  1. Steep 1 cup dry hibiscus flowers in about 1 ½ cups of simmering water for about 8-10 minutes.
    In a small sauce pan add the concentrated hibiscus tea, piloncillo, clove, chile de arbol, ancho chili powder, orange zest, and thyme. Bring to a slow simmer, simmer for 4-6 minutes.
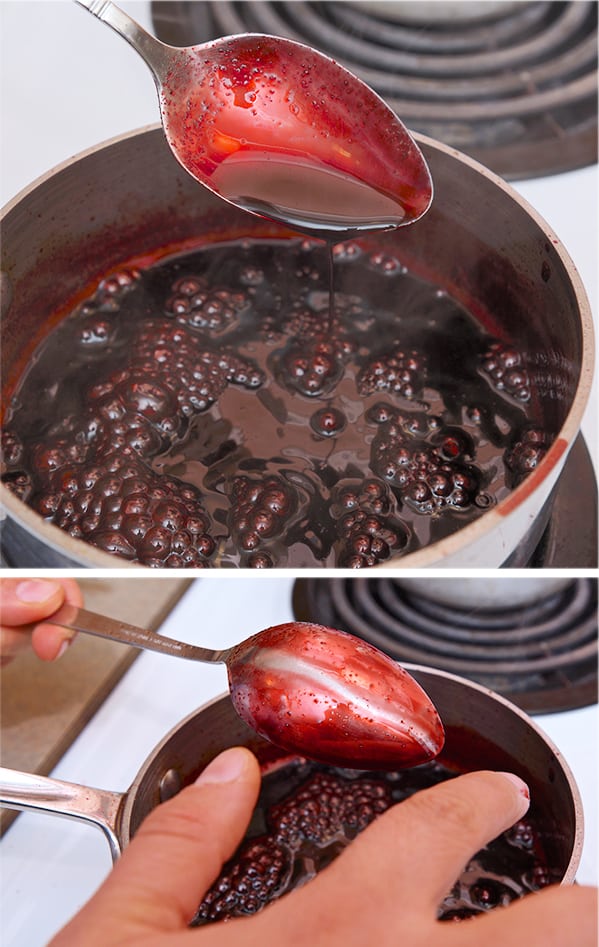
  2. Remove the sprigs of thyme clove and chilies. Bring the glaze to a rapid simmer stir constantly, until the glaze is reduced by half. Check the consistency by dipping a spoon into the glaze and running your finger tip across. If the line stays put, your glaze is ready (see picture below). At this point add 1 tablespoon of butter until melted and well incorporated, set aside.
  3. Check cornish Hens at 35 minutes. If the thermometer reads 160F/70C start glazing.
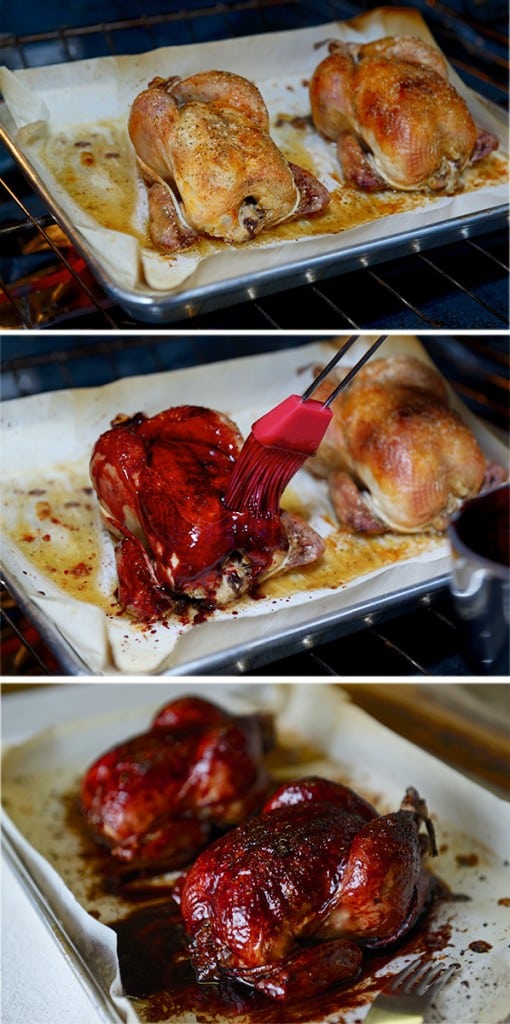
    Use a pastry brush or a rubber brush to varnish them. Apply 1 coat and keep baking for about 2 minutes, apply 2 or 3 glaze coats in total. If necessary turn on the broil on the oven and broil for 1 minute for a shiny glaze finish.7. Check temperature until reads 165F/74C and juices run clear.
    Remove from the oven and let them rest for 10-12 minutes before serving.
  4. Serve over a bed of herbed farro or buttery rice, recipe follows…

    Quick herb-orange farro

    Serves 2

    ½ cup farro perlato
    2 cups water or chicken stock
    ¼ cup finely chopped parsley
    1 teaspoon orange zest
    1 tablespoon butter (or you can use some of the chicken fat from the roasting pan)
    salt & pepper to taste.

    In a small sauce pan, bring water to boil and add farro. Reduce heat to a low simmer.
    Cook for about 20-25 minutes. Check for doneness. It usually takes 30-35 to be al dente,
    at this point add butter, chopped parsley, orange zest, salt and pepper. Toss well, remove from heat and cover with a lid for 5 minutes. Serve warm.
    Note: I love farro done this way, I like it a little al dente, not too mushy, and I like to add the herbs, at the end to keep the flavors fresh and colors vibrant.

Hibiscus-Orange-Glazed-Cornish-Hens_hibiscus-glaze-consistency

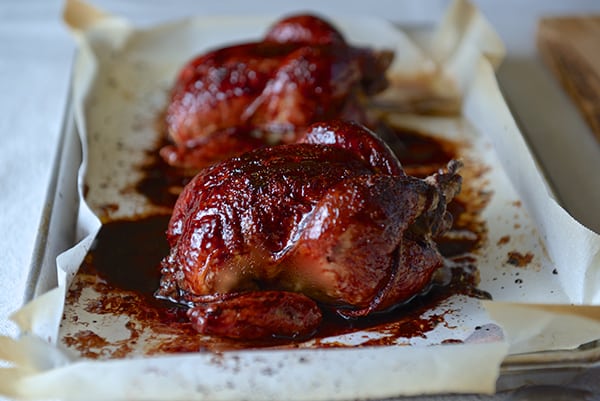
Hibiscus-Orange-Glazed-Cornish-Hens_roasted-cornish-hens_glazing-the-roasted-cornish-hens

Hibiscus-Orange-Glazed-Cornish-Hens_Yes,-more-please!

Enjoy!

Music pairing: Sabor a mi, by Lila Down

View Post or View Comments 0

Sweet Potato Kale and Quinoa Fritters

Kale-Sweet potatoe-and-Quinoa-FrittersKale-Sweet-potatoe-and-Quinoa-Fritters-cooked-quinoa

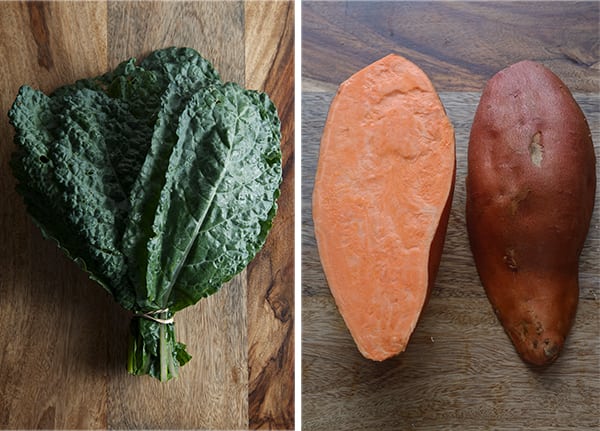
So many Kale… so little time… root vegetables, pumpkins, sweet potatoes, all kinds of potatoes, carrots; an Autumn cornucopia is here and with it Thanksgiving. So gear up! I will be posting side dish appetizers, entrees, and everything with the potential of being on your Thanksgiving table… I think it’s great to add new dishes to the traditional menu, or revamp old recipes. And even if you are not a Thanksgiving celebration type, this seasonal produce is what you will enjoy preparing, whether it’s lunch, or dinner or a simple snak-petizer like this Sweet Potato Kale and Quinoa Fritters.

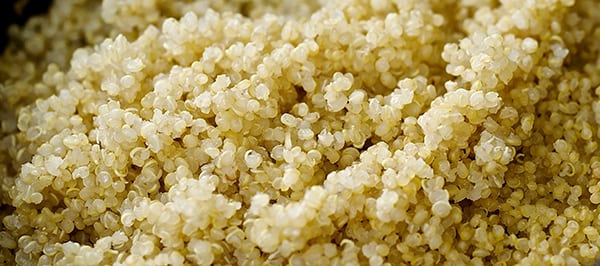
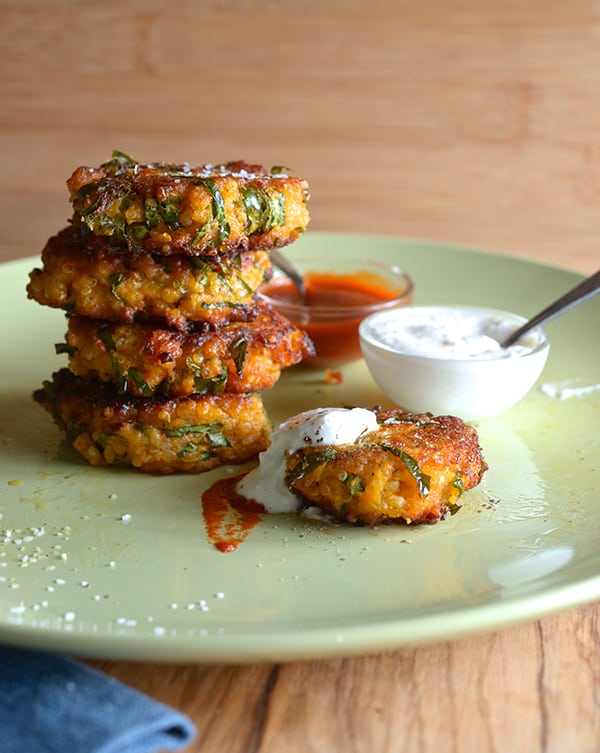
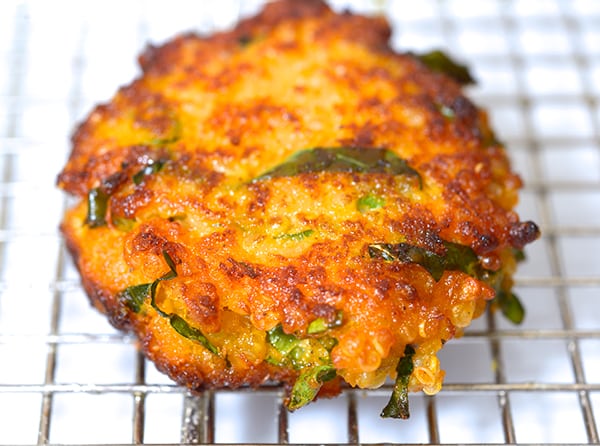
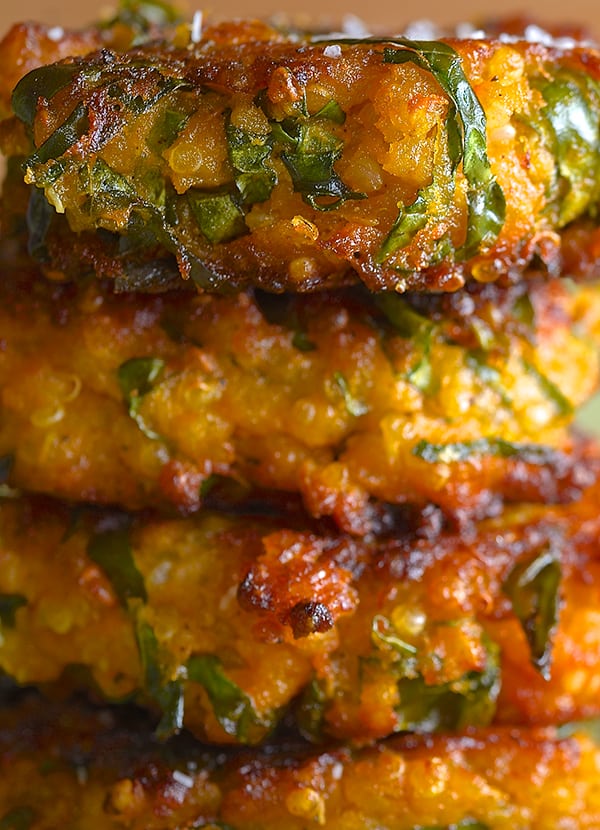
These little fritters are scrumptiously good. Loaded with vitamins and flavor, this little patties that have a crispy exterior and a soft creamy interior. The quinoa adds texture and a little crunch. Call them patties, fritters, creatures; you’re gonna love them. They taste equally good when they are warm or room temperature.
They make for a fabulous appetizer, side dish, or if you make them bigger. Two of these patties can be your lunch or sensible dinner with a salad on the side.

Kale-Sweetpotatoe-and-Quinoa-Fritters_platter-ready-to-eat!

Sweet Potato Kale and Quinoa Fritters

Makes 18-20 / 2”mini patties or 6 / 3.5” side patties

1 large or 2 medium sweet potatoes steamed and pureed. Makes about 3 cups
2 cups cooked Quinoa, you can use red quinoa if you prefer. Approximately 1 cup of uncooked quinoa yields 2.25 cups when cooked.
2 cups kale finely chopped.  I used Lacinto kale, a.k.a. Dinosaur Kale but, any flat kind kale will work.
2 eggs (vegan: substitute 2 tablespoons ground flaxseed + 3 tablespoons of water)
½ cup panko or any kind of plain breadcrumbs. If you have gluten allergies, ground old fashion oats or almond meal will work.
3 teaspoons cornstarch. If using the almond meal add one extra teaspoon.
1 teaspoon grated ginger
1 good pinch paprika or smoked paprika
1 teaspoon freshly ground black pepper
1 teaspoon kosher salt

4-6 tablespoons grapeseed oil, peanut oil, or coconut oil to pan fry them.

*See note for an alternative cooking method on the bottom of the post…

For the dipping sauce:

¼ cup Greek yogurt
1 teaspoon freshly grated ginger
pinch of kosher salt
pinch of black pepper

In a small cup mix all ingredients and chill.

Hot sauce of your preference. I highly recommend Sriracha Sauce.

Directions:

1.-

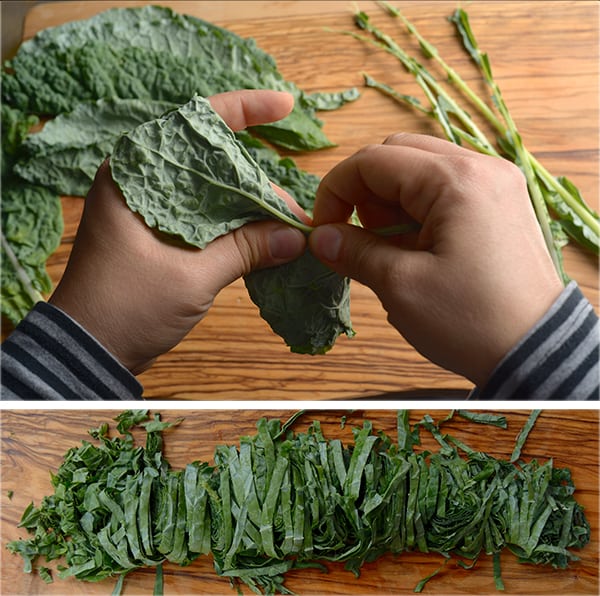
Devein the Kale, make it into a tight roll and chop chiffonade style.

Kale-Sweetpotatoe-and-Quinoa-Fritters_Deveining-and-chiffonade-Kale-

2.-

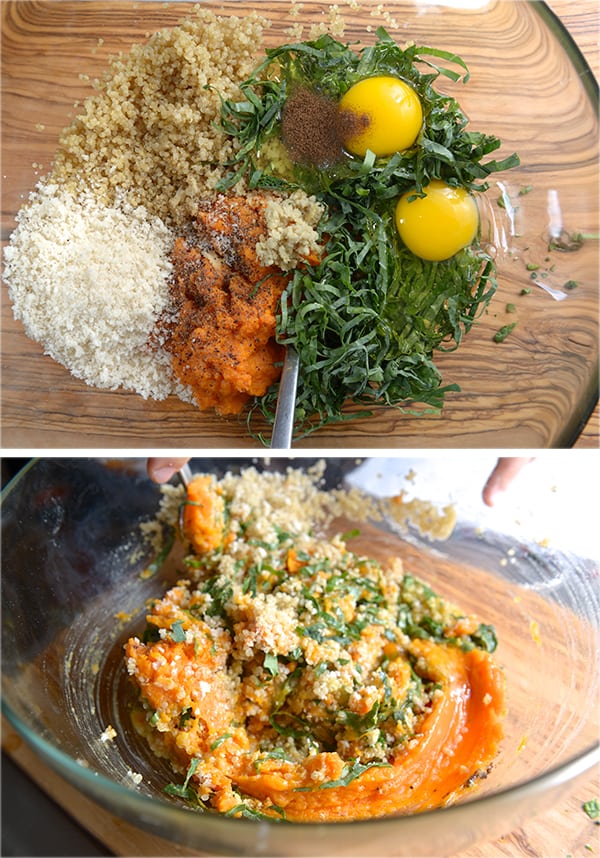
In a medium size bowl, place all ingredients and mix well.

Kale-Sweetpotatoe-and-Quinoa-Fritters_Mixing-ingredients

3.-

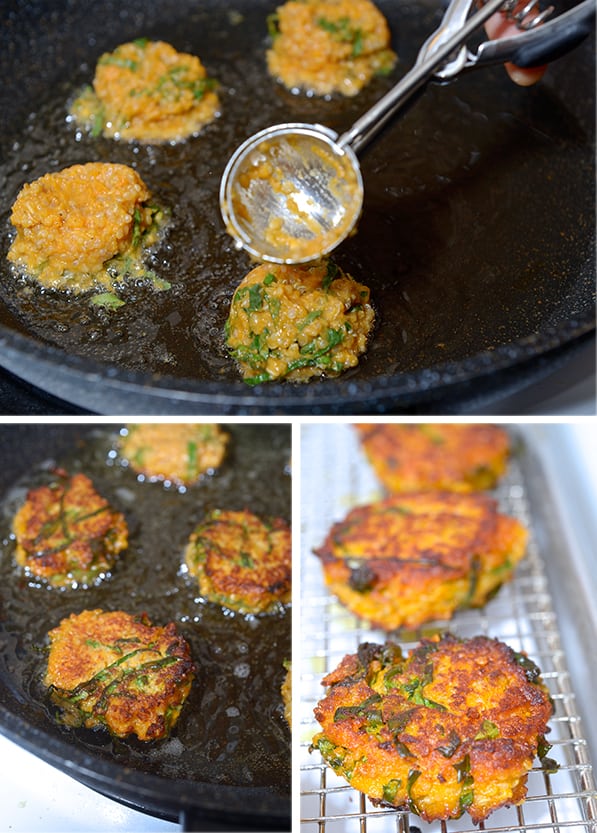
In a medium size pan heat up about 4-6 tablespoons of grape seed oil, peanut oil or coconut oil.
With a small Ice cream scooper scoop about 6 patties into the pan and slightly flatten the tops.
Cook for about 3-4 minutes on each side or until golden brown.

 Kale-Sweet potatoe-and-Quinoa-Fritters_pan frying

4.-

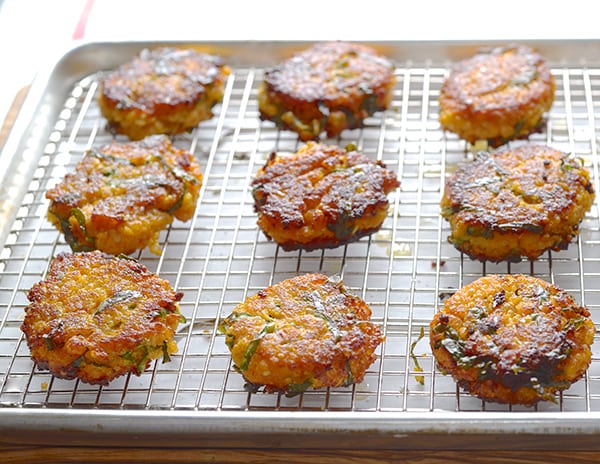
Cool them on a rack.
Serve warm or at room temperature, with the ginger sauce on the side and some hot sauce of your preference. I highly recommend Sriracha…I love it….Enjoy!

Kale-Sweetpotatoe-and-Quinoa-Fritters_-fritters-resting-on-cooling-rack

Kale-Sweet potatoe-and-Quinoa-Fritters-delicious!

Kale-Sweet potatoe-and-Quinoa-Fritters_delicious-texture

Enjoy!!!

 *Note:  Many people have asked me about baking these fritters. It never occurred to me to bake a fritter… So I made a batch and baked half and fried half to see the differences in flavor and texture. Here is the veredict:

Baked Version:

I Baked them at 375F on a sheet pan lined with parchment. I brushed each patty with some grape seed oil and baked for 15-20 minutes flipping them half way.

The results:  Texture is more firm and they hold up more like a patty, where the inside is a little more dense. They do not remind me a fritter at all since they have no crispy outside texture.

Pan Fried: 

Well you see the results, they really do not absorb a lot of oil, I love love the contrast in textures, crispy caramelized outside, and creamy less thight inside. For me this is fritter.

I like them both in their own category… but a fritter its a fritter!

5 from 1 vote
Print

Sweet Potato Kale and Quinoa Fritters

www.yes-moreplease.com

They make for a fabulous appetizer, side dish, or if you make them bigger. Two of these patties can be your lunch or sensible dinner with a salad on the side.

Course Appetizer, Breakfast, Brunch, Lunch, Main Course, Side Dish
Cuisine Healthy, wholesome
Prep Time 20 minutes
Cook Time 30 minutes
Total Time 50 minutes

Ingredients

  • 3 cups Sweet potato, about 1 large-2 medium potatoes, stemmed and pureed.
  • 2 cups Quinoa, cooked
  • 2 cups Lacinato-Dino Kale, chopped chiffonade
  • 2 Eggs
  • 3 teaspoons Cornstarch
  • 1/2 cup Panko Japanese style breadcrumbs, or any kind of plain bread crumbs. If you have gluten allergies, ground old fashion oats or almond meal will work.
  • 1 teaspoon fresh ginger, grated
  • 1 pinch smoked paprika
  • 1 teaspoon fresh ground black pepper
  • 1 teaspoon kosher salt
  • 4-6 tablespoons grape seed oil, or coconut oil, to pan fry them

Dipping Sauce:

  • 1/4 cup Greek yogurt
  • 1 teaspoon freshly grated ginger
  • 1 pinch salt
  • 1 pinch black pepper
  • Sriracha Sauce, to taste.

Instructions

  1. 1. Devein the Kale, make it into a tight roll and chop chiffonade style.

    2. In a medium size bowl, place all ingredients and mix well.

    3. In a medium size pan heat up about 4-6 tablespoons of grape seed oil, peanut oil or coconut oil. With a small Ice cream scooper scoop about 6 patties into the pan and slightly flatten the tops. Cook for about 3-4 minutes on each side or until golden brown.

    4.Cool them on a rack.

    5. Mix all ingredients of the dipping sauce on a small bowl.

    Serve fritters while warm or at room temperature, with the ginger sauce on the side and some hot sauce of your preference. I highly recommend Sriracha…I love it….Enjoy!

    Happy cooking!


Recipe Notes


Music Pairing: Perhaps Perhaps Perhaps by Cake


View Post or View Comments 106

Roasted Vegetable Napoleon with Spicy Bolognese

Roasted-Vegetable-&-Spicy-Bolognese-Napoleon_Vegetables

Roasted-Vegetable-&-Spicy-Bolognese-Napoleon_Bison-Chauvet-Cave,-France

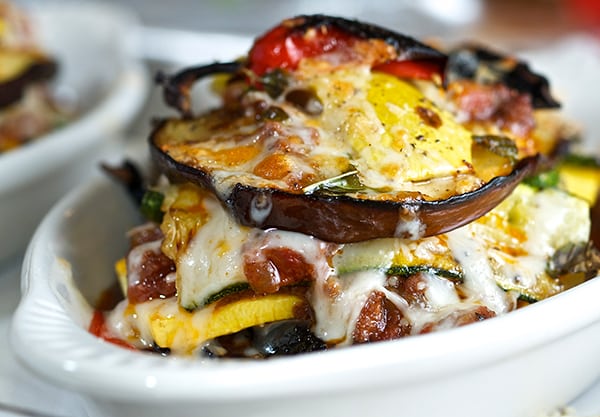
What a crazy title! I think it took me more time to name this dish than to make it. What the title really should say is: Roasted Vegetables stacked with a Bison spicy Bolognese. The “napoleon “part is just a fancy name to say stacked, and this dish by any means is “fancy”…

Well, this was dinner yesterday. They say not to live in the past, always in the now, but memories are important and this meal was one of the memorable ones.

When our carnivorous crave knocks at our door: Lamb, Pork or Beef?… Bison!

Here in Texas that’s what every carnivore should be eating because its extremely remarkable in beef flavor due to its high Iron content. Bison has 80% less fat and 49% less calories than beef. Lets say Bison is the Better Red meat. Just make sure to look for the USDA approval triangle on the front label and look for 100 percent natural-grass feed-hormone free. Keep in mind that you’ll get what you pay for. Tender, flavorful bison costs more to raise, thus it costs a bit more, but one bite and you’ll never go back!… it is indeed a great option.

This is why: Bison spicy bolognese works great because it makes the bolognese sauce lighter yet richer in flavor. And because Bison cooks faster than beef, this 30 minutes spicy bolognese can change your life. You can make a double batch and freeze it for a fast pasta dinner during the week.
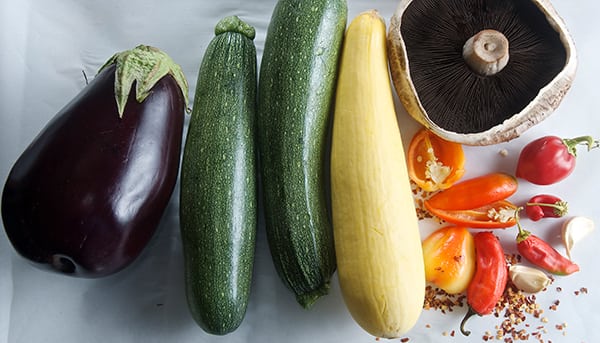
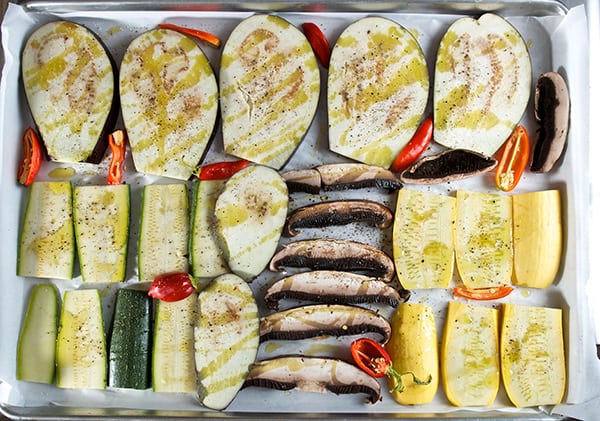
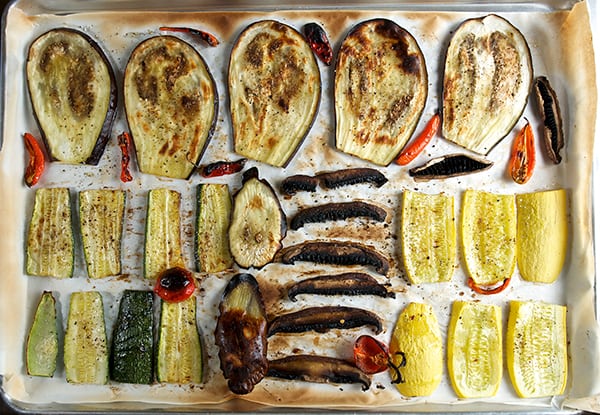
Half inch sliced vegetables, roasted at 475 F temperature for 25 minutes can be magical, all the flavor of the vegetables just seems to concentrate and develop their natural sweetness and caramelization.
All in all this is a great recipe, You can serve it with a green salad on the side, a piece of crusty bread, and a glass of wine… Enjoy!

Vegetarian & Vegan suggestions:

Now, I do think on my vegetarian friends and it is such an easy way to transform the recipe, using a combination of bottom and cremini mushrooms instead of meat.
Or if you are fan you can use texturized soy protein.
For the cheese, a walnut sauce is always a great substitution. Here is the link to a previous post where you can find the recipe.

Roasted-Vegetable-&-Spicy-Bolognese-Napoleon_raw-vegetables

Roasted-Vegetable-&-Spicy-Bolognese-Napoleon_roasted-vegetables

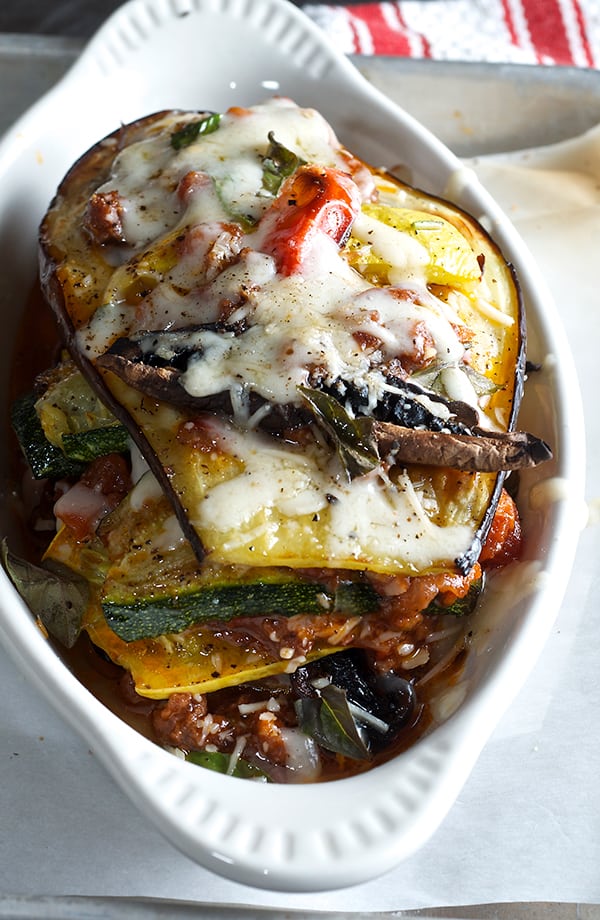
Roasted-Vegetable-&-Spicy-Bolognese-Napoleon_-fontina-&-assiago-cheese-melted


Roasted Vegetable Napoleon with Spicy Bison Bolognese

Serves 2 with room sauce for 4 or you can freeze the rest of the sauce for another night.

1 egg plant
1 green zucchini
1 yellow squash
1 medium large portobello mushroom
3 sweet red peppers
Extra Virgin Olive Oil
Salt and pepper
1/2 cup Assiago
1/2 cup Fontina cheese shredded

For the Mirepoix:

1 cup chopped sweet onions
½ cup carrot small diced
½ cup celery small diced
3 garlic cloves
1 Bay Leaf
1/2 teaspoon of red pepper flakes
1 teaspoon of salt
½ teaspoon freshly ground black pepper
3 tablespoons extra virgin olive oil

For the Spicy Bison Bolognese

1 pound of grass feed-hormone free-Ground Bison (or beef or turkey or texturized soy or cremini mushrooms)
2 cups Red wine (Cabernet-or a rich tempranillo)
1-12 oz. canned San Marzano tomatoes (this is my only exception to the rule on canned products)
1 tablespoon Balsamic vinegar
3 dashes of Worcestershire sauce
1 tablespoon Sriracha* the odd ingredient but it is so good!
Salt and pepper to taste

2 tablespoons of butter optional*

Directions:

1.-

Start by making the sauce;
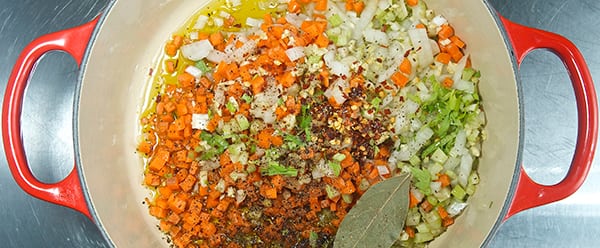
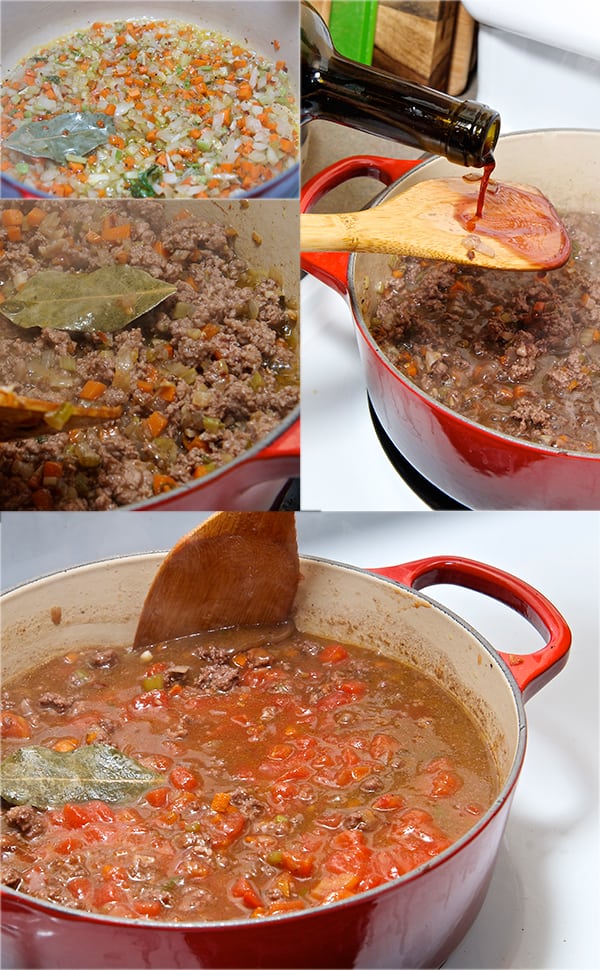
In a Medium- Large sauce pot, saute the mirepoix ingredients in 3 tablespoons of extra virgin olive oil until onions and celery are translucent. Add the ground Bison saute for 3-4 minutes with the help of a wood spatula making sure you incorporate everything avoiding big lumps of meat. Add the wine and let the alcohol evaporate for about 3-5 minutes. Add the can of diced San Marzano tomatoes, the balsamic, Worcestershire sauce, Sriracha sauce, and adjust salt and pepper. Simmer the sauce for about 15-20 minutes or until the excess juices have evaporated. You want a slightly thick consistency. Cover with a lid and keep the sauce on low. At this point you can decide to add 1 or 2 tablespoon of butter this will round off the flavors on the sauce.

Roasted-Vegetable-&-Spicy-Bolognese-Napoleon_MirepoixRoasted-Vegetable-&-Spicy-Bolognese-Napoleon_red-wine-bison-bolognese-

2.-

Once the sauce is ready, preheat the oven at 450-475F  / 230-245 C
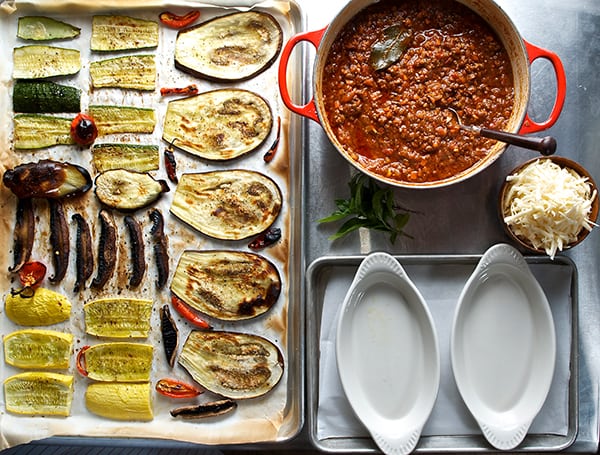
In a large Baking pan lined with parchment paper, arrange the vegetable slices in one single layer. Drizzle some Olive Oil seasoned with salt and pepper. Roast for about 10-15 minutes or until the vegetables have a golden -to dark brown on the edges.
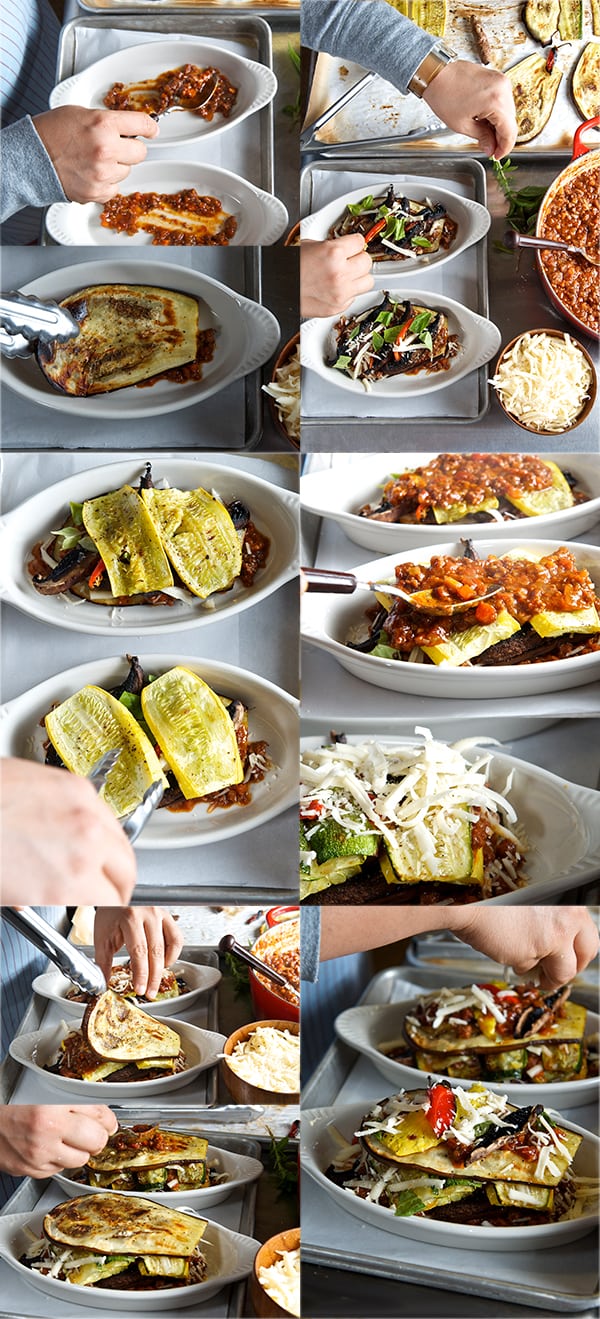
In two oven Ramekins of Pyrex, start layering the vegetables alternating with the sauce and grated cheese. You can add some fresh herbs like basil, parsley or rosemary. Make sure the last layer is cheese and broil in the oven for about 5-6 minutes or until cheese is bubbling and melted. Serve placing the ramekins in a flat plate for safety.

Roasted-Vegetable-&-Spicy-Bolognese-Napoleon_Mise-en-place

Roasted-Vegetable-&-Spicy-Bolognese-Napoleon_How-to-make-a-vegetable-napoleon

Roasted-Vegetable-&-Spicy-Bolognese-Napoleon_gratin

 Roasted Vegetable & Spicy Bolognese Napoleon..ready to serve!


View Post or View Comments 0

Lobster Mac and Brie

Lobster_Macaroni & Brie Cheese_oven tray

I was listening to the B-52’s http://www.youtube.com/watch?v=aepSPpU4S2o when I started to crave Lobster… and then macaroni… and then cheese…eureka! Lobster Mac and Brie cheese!
My cooking process sometimes get fired up in mischievous ways… I definitely was craving macaroni and cheese… “the bad one”, the one that comes in a little blue box with radioactive namaste orange cheese powder…. yes, I must confess sometimes I do crave things that are not to good for me but they bring me a sense of un-complicated comfort…
No, I did not succumb to the blue box, in fact I Rock-ed it out and made a great version of Macaroni, throwing some lobster in it. (There goes my “un-complicated comfort” uh?)
By applying a few macaroni principles you can have the most luscious, silky cheese macaroni.

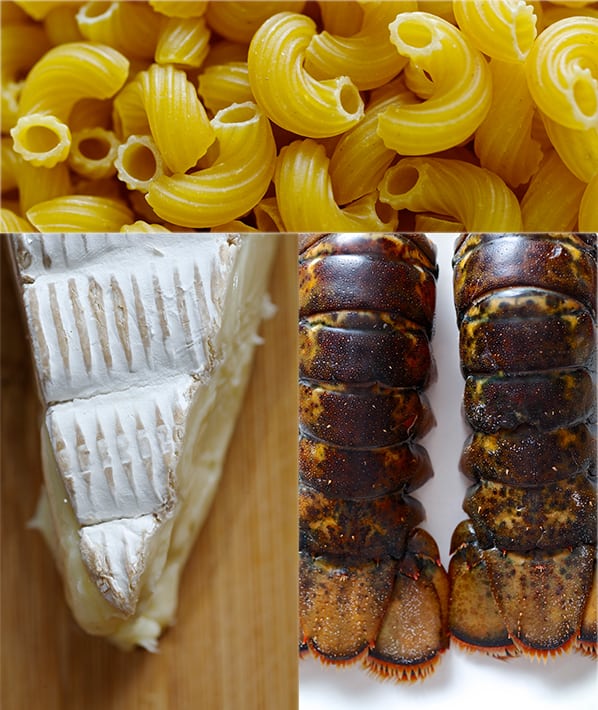
Lobster_Macaroni & Brie cheese_key ingredients

Four Macaroni Commandments:

1-Thou Shall Use Ridged macaroni elbows…

It makes a huge difference, the amount of cheese sauce that sticks to the pasta is extremely desirable.

2- Thou Shall Use No Flour or Rue In Your Sauce…

This is a controversial statement; I’m convinced that if you use the right amount of cheese and cream in the sauce, there is no need to add flour to thicken the sauce, the sauce will not curdle and it will make the sauce light and silky.

3-Thou Marry Thy Ingredients Before Baking….

‘Al dente’ pasta + silky sauce = perfect creamy and light consistency with out over cooking it.
When adding the pasta to the cheese sauce, let them talk to each other for a couple of minutes, this will allow the pasta to absorb the extra liquids in the cheese sauce and flavor the pasta before reaching a high temperature when it hits the oven.

4- Thou Shall Bake the macaroni cheese at a high temperature for a short period of time…

The high temperature will allow to form the desirable outside crust and the short period of time will allow the pasta to keep its creamy gooey inside.
I promise if you stick by these four commandments you will always have a great success in your mac & cheese!
Make sure you are listening to the B-52’s…http://www.youtube.com/watch?v=aepSPpU4S2o

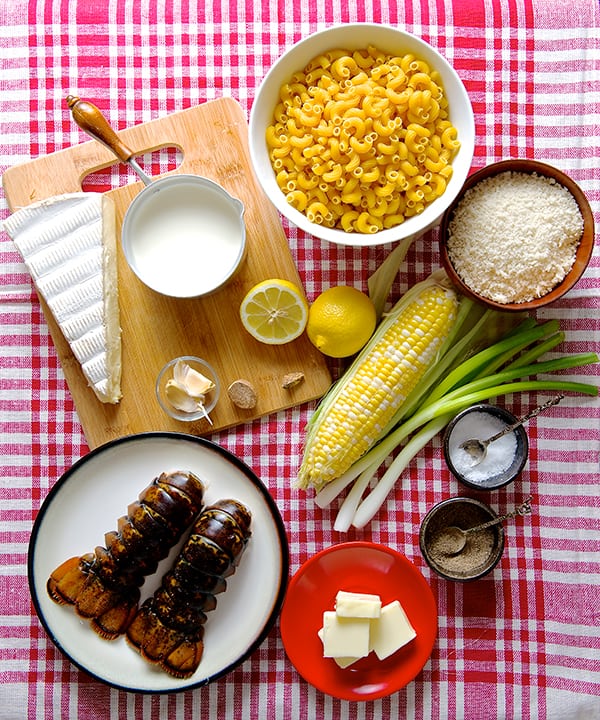
Lobster_Macaroni & Brie_ingredients

Lobster Mac and Brie

Serves 4 mermaids or 2 sailors

3 cups -1 lbs. Ridged macaroni elbows (since the sauce does not have flour, you can easily substitute for any gluten-free pasta like quinoa which has great flavor and texture)
2-4 6oz Lobster tails
1 cup heavy cream
1 cup white wine (California Chardonnay or a Dry Riesling will work great)
8-10 oz triple cream Brie cheese (If you do not like Brie, you can substitute any creamy milder cheese you prefer…like cream cheese or baby cheddar)
2 tablespoons butter
1 garlic clove
1 lemon:
the juice and the zest of ½ a lemon
½ lemon sliced
½ teaspoon dijon mustard
1/8 teaspoon fresh ground nutmeg
1 teaspoon of cornstarch diluted in 1 tablespoon of milk.
2 ears of sweet corn ( approx. 2-3 cups of corn kernels)
1 teaspoon kosher salt /plus more for cooking the pasta
1 teaspoon fresh ground black pepper.

To garnish:

3 green scallions finely chopped
1 or two pinches of smoked paprika
1 cup panko breadcrumbs
2 tablespoons melted butter
1 tablespoon extra virgin olive oil
¼ teaspoon garlic powder.
Lemon wedges

Directions:

Preheat oven to 400 degrees F/205 C

1.-

In a medium pot of boiling salted water add lemon slices and a bay leaf and cook the Lobster tails for about 4-5 minutes. Once cooked, immediately remove them and shock them in an ice cold water bowl to stop the cooking process.
After cooling them in ice water for a few minutes crack the back of the shell open with kitchen shears to make it easier to peel.
(See picture below). Remove the shells and slice into medallions. Set aside. (the lobster should appear a little under done, it will finish cooking in the oven)

LOBSTER-secuence ~ www.yes-moreplease.com

2.-

In a large pot of boiling, salted water cook the pasta to al dente.
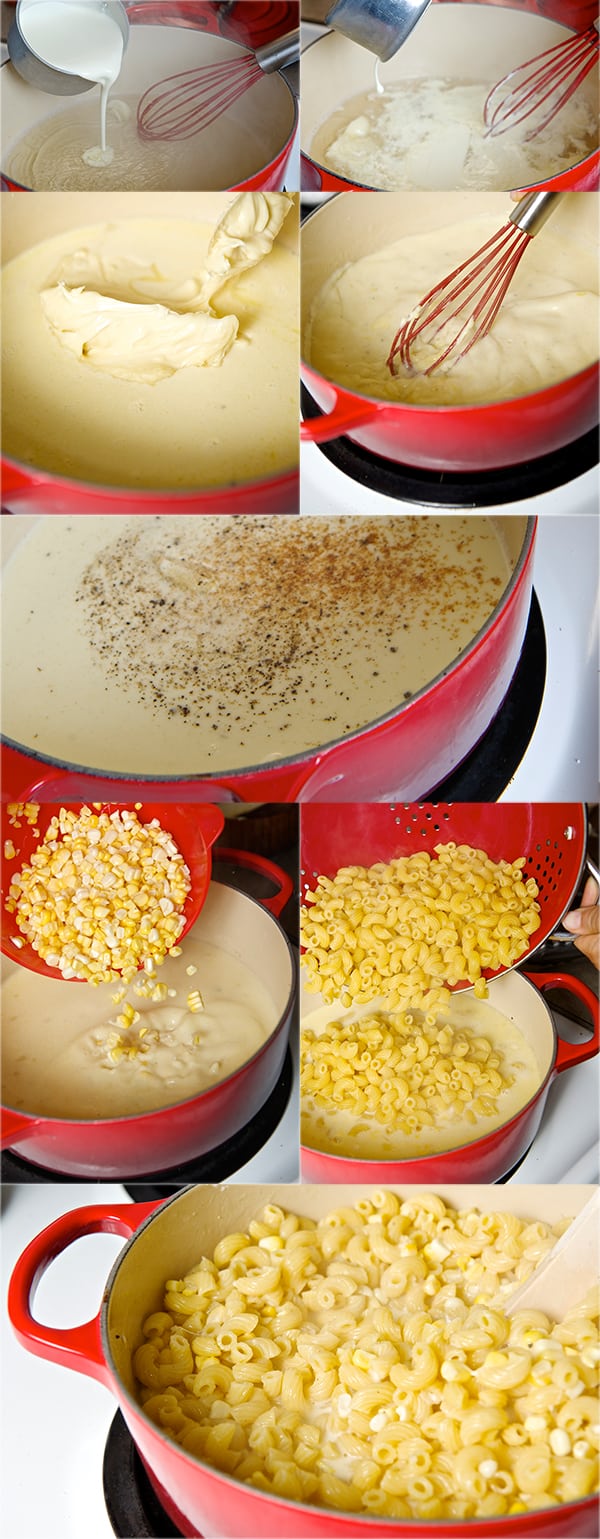
While the pasta is cooking start your sauce in a separate pot. Bring wine to a simmer add garlic clove, turn down the heat and add the heavy cream, butter, salt, black pepper, lemon zest, dijon mustard. Bring to a slow simmer. Whisk in the cornstarch. With a wooden spoon stir slowly for about five minutes. Make sure it’s free of lumps. Simmer for ten more minutes. Remove the garlic clove. Stir in the Brie cheese until well combined. Adjust salt and pepper if needed. Add the corn kernels cook for 3-4 minutes. Fold the macaroni into the sauce, mix, and let it cook, stirring occasional on a low heat for 3-4 minutes until the sauce appears to have a little thicker consistency.

Lobster_Macaroni & Brie_how to make the sauce

3.-

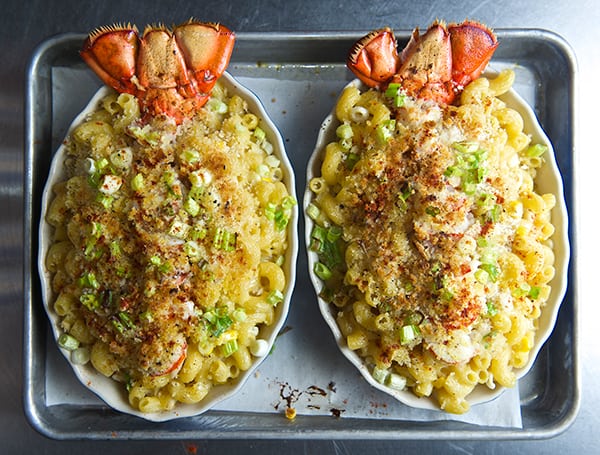
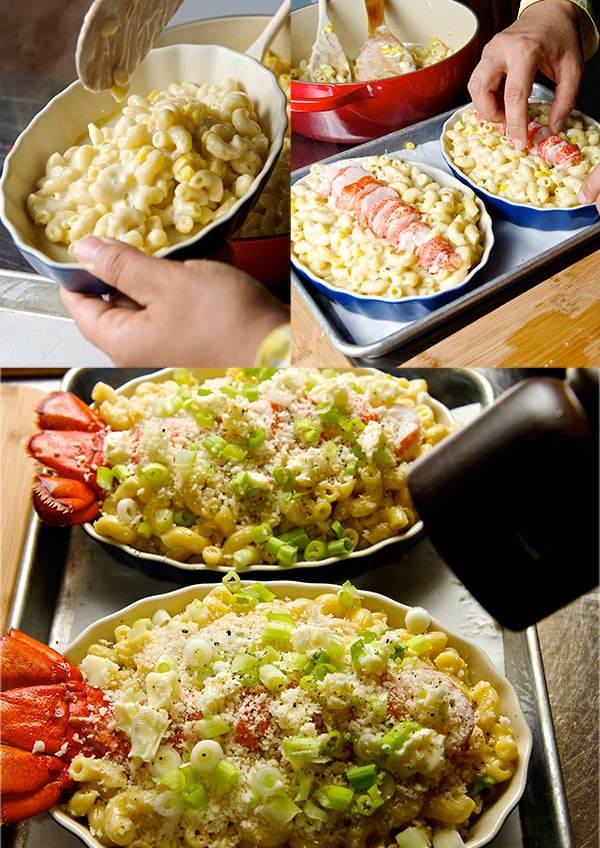
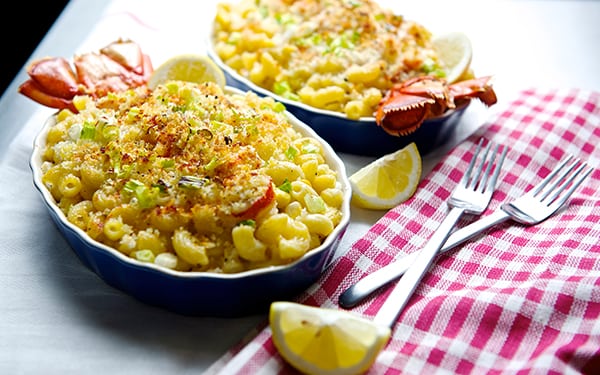
Pour the macaroni into a 2 – 8” oval ramekins / or  4 – 4” ramekin dishes. Arrange the Lobster medallions on top of the macaroni and add a few dices of butter. Save the tales for garnish, see picture below.
Top the macaroni with chopped scallions, a pinch of smoked paprika and the seasoned panko bread crumbs. Bake for 15-18 minutes. Remove from oven and let it rest for 5 minutes before serving.

Lobster_Macaroni & Brie_assambling

Lobster_Macaroni & Brie_ready to eat

ROCK- Lobster Macaroni & Brie Cheese…make it soon!


View Post or View Comments 5

Salmon Sliders with yogurt-cucumber-dill sauce

salmon-sliders-with-yogurt-cucumber-dill-sauceyes-more-please

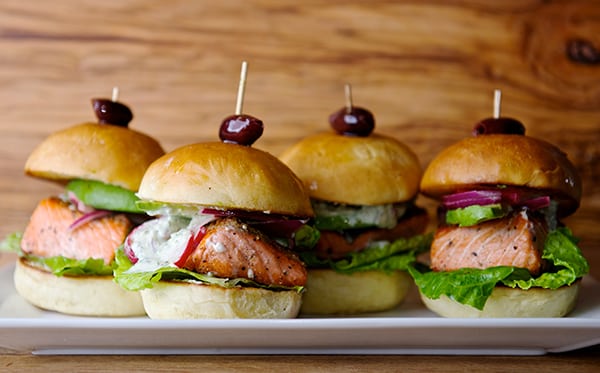
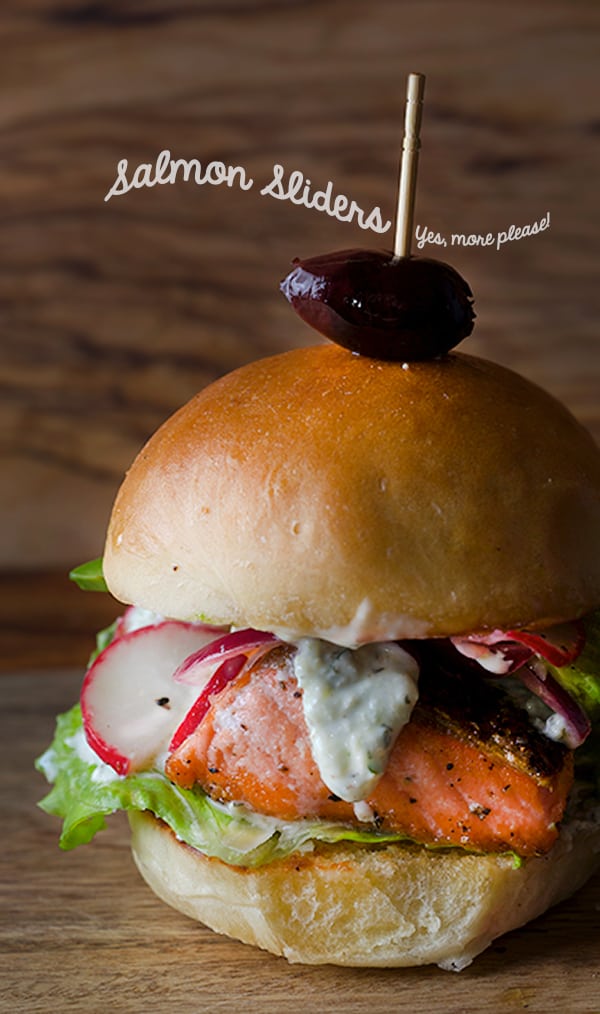
The title says it all, Salmon Sliders… what’s not to like about a small handmade bun filled with seared salmon and topped with yogurt, cucumber, dill sauce? That’s what I call a healthy way to have my buns. This recipe is great for entertaining, pool parties, or a late brunch. They taste great room temperature or right out of the oven.
Making the buns might sound very elaborate, well it’s not! 45 minutes, so easy you will love to make them. You do have to plan ahead of time, but like I said the results are incredible, 100 % worth it to make them. These mini buns are so light and flavorful you are not gonna want to use store-bought any more…
It is so relaxing to knead the dough by hand and enjoy the process. While the dough is proofing you can finish up the prepping for the burgers and in less than you think you will have the best sliders ever. Baking this babies one day before will work too…the beauty of slow cooking.
The buns recipe make about 12-14 mini buns, feel free to combine sizes, I made 2 -5”inches diameter and 8-3”mini buns. I wrapped the extra buns in plastic wrap and freeze them I think the will be good for about 4 to 6 weeks on the freezer, for future Salmon Sliders.
I hope you enjoy making them as much as I did! Have fun.

Salmon Sliders with yogurt-cucumber-dill sauce_delicious mini burgers

Salmon Sliders with yogurt-cucumber-dill sauce

To make 4- 8 mini sliders

1 – 2 pound Salmon fillets cut into 2”x 4” pieces or the best size you can(see picture below)
Path them dry and salt and pepper them both sides right before cooking.
1 recipe of Mini slider buns ( see below)
½ red onion
4-6 Radishes
2 tablespoons of rice vinegar , salt and pepper to taste
1 ripe avocado in slices
3-4 Lettuce leaves
¼ cup Kalamata Olives
6-8 Long bamboo skewers

For the yogurt sauce:

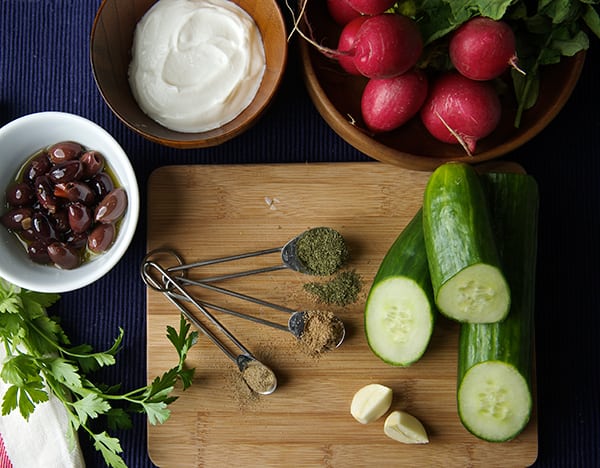
1 cup Greek yogurt
½ English or pickling cucumber
1 tablespoon of dry dill or 2 tablespoons of fresh.
½ teaspoon fresh ground pepper
¼ teaspoon sea salt
¼ teaspoon celery salt
1 small garlic clove
the zest of one yellow lemon
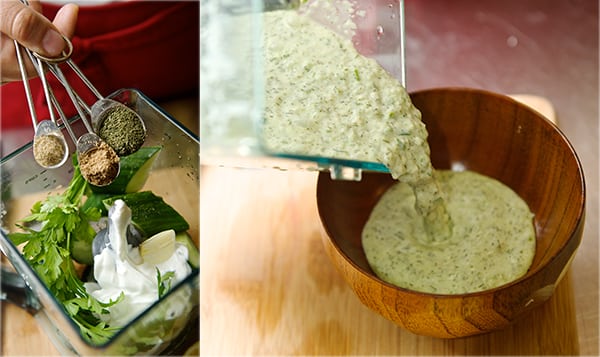
Place everything on a blender or using a hand blender purée into well combined. Keep it chilled.

Salmon Sliders with yogurt-cucumber-dill sauce_ yogurth sauce ingredientsSalmon Sliders with yogurt-cucumber-dill sauce_making yougurt sauce

Slider Buns

Makes 12-14 / 3”- mini buns

½ cup luke water
½ cup luke warm whole milk
1 tablespoon active dry-yeast
2 tablespoons of sugar
1 teaspoon kosher salt
1 large egg room temperature
3 tablespoons of sunflower oil (butter, coconut oil, extra virgin olive oil are good substitutions)
3 1/2 cups unbleached all purpose flour
2 tablespoons of butter

Directions:

1. In a Large metal bowl pour the warm water.Sprinkle the active dry-yeast and sugar. Let it stand for 5 minutes until yeast is dissolved.
2.In a medium size bowl combine the luke warm milk, egg, oil, salt whisk well. Add this mixture to the yeast and combine.
3.Add the flour to this mixture one cup at the time while mixing with your hand or in a stand mixer fitted with a dough hook. Knead for 3 minutes until mostly combined.
4. Place the dough ball into a surface dusted with flour and start kneading it with your hands against the counter in folding movements for about 5-8 minutes min. The dough ball should look smooth and soft. (I’ve find the hand method works best. you can tell when the dough is ready by feeling it and the warmth of your hands helps develop the yeast.)
5.Proceed to shape the dough into a ball, and divide into 12-14 pieces. Shape each piece into a ball. Start by forming a tight ball with each piece using your hand like a scoop against the counter, making circular movements. Place them about 2-3 inches apart into a baking sheet lined with parchment paper giving them enough room for proofing. Cover with a clean cotton kitchen towel and let them rise for about 30 minutes.
6. Preheat the oven 400F/200C
7.Once they have doubled in size, brush them with egg wash and sprinkle some sesame seeds. If you don’t care for sesame seeds, just brush them with butter or olive oil.
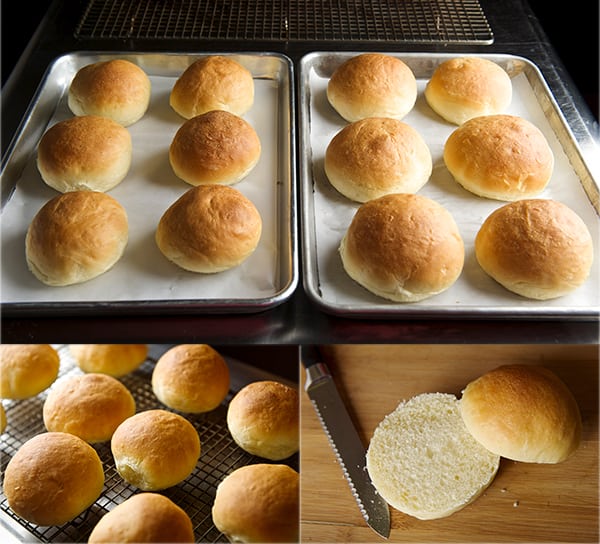
8.Place baking sheet on the middle rack of your oven and bake the buns for about 12-14 minutes or until deep golden brown tops and bottom.

Your kitchen by now smells like heaven!!!
Pull them out of the oven let them rest for 2-3 minutes on the tray and then transfer them into a cooling rack.Salmon Sliders with yogurt-cucumber-dill sauce_Homemade buns

To Assemble:

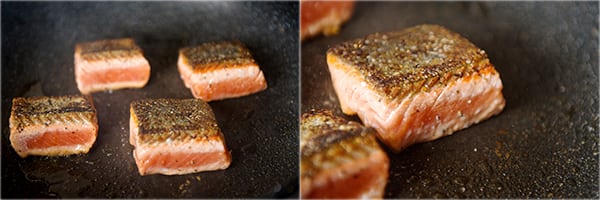
On a very hot skillet sauté the Salmon fillets about 2-3 minutes per side leaving the centers slightly pink. Set them aside.
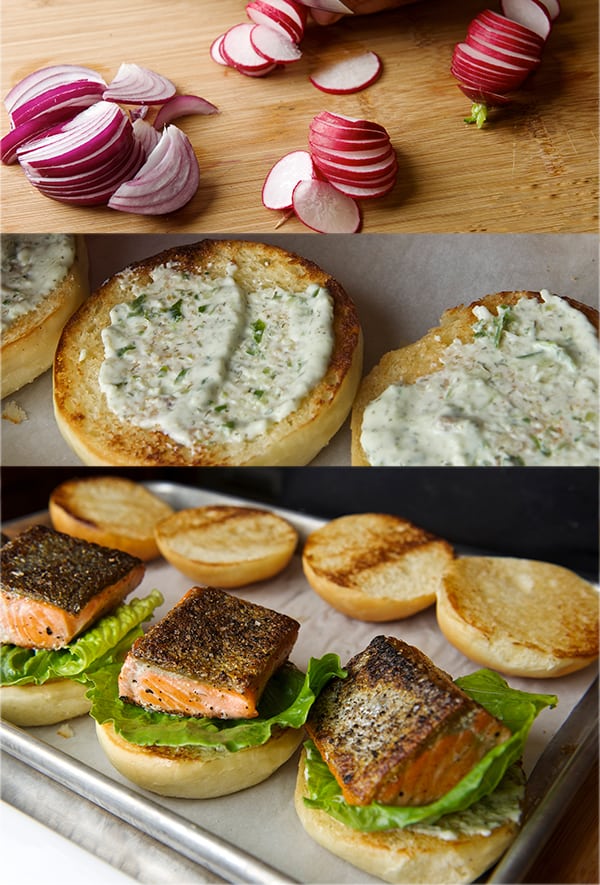
Thinly slice the red onion and radishes and combine them in a small bowl adding a little rice vinegar salt and pepper.
Cut the slider buns in half and slightly toast them , start assembling the sliders.
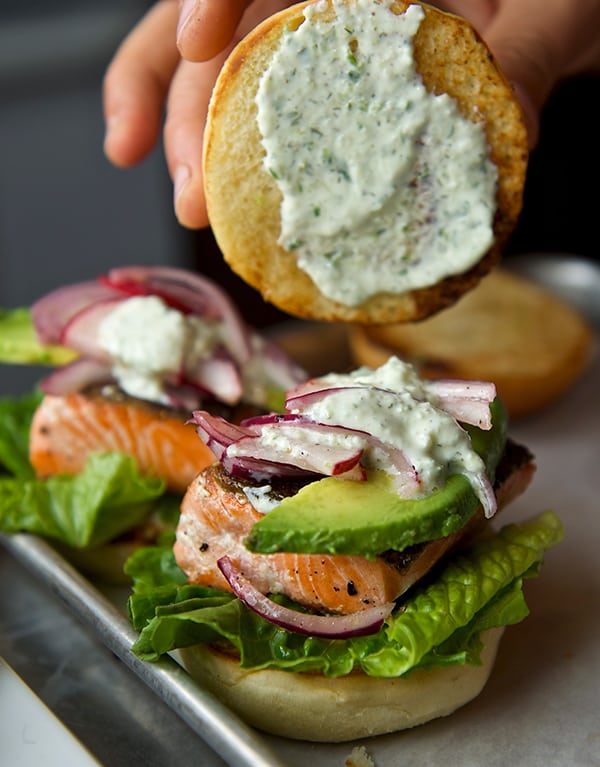
Place the bottom bun , lettuce , salmon , yogurt –cucumber-dill sauce, radishes and onions place the bun top and with a long skewer passing and olive through it and secure the mini buns…. Time to eat!
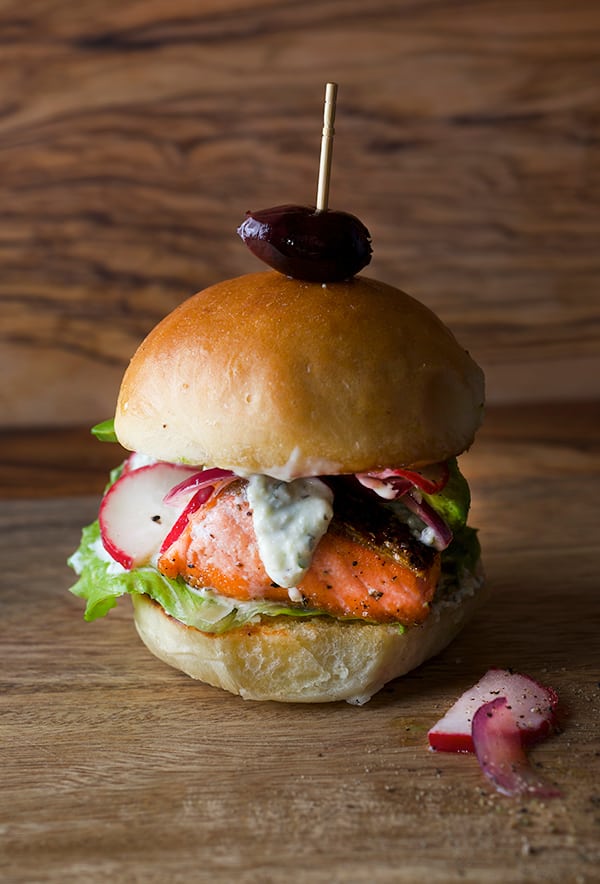
*Assembling the sliders in this order will prevent the bun to get soggy. Always use the lettuce as bun protector.

Salmon Sliders with yogurt-cucumber-dill sauce_seared-salmonSalmon Sliders with yogurt-cucumber-dill sauce_building your salmon sliderSalmon Sliders with yogurt-cucumber-dill sauce_toppingssalmon-sliders-healthy-burger-yes-more-please

Salmon Sliders with yogurt-cucumber-dill sauce ~ Yes, more please!


View Post or View Comments 7

Privacy Policy Contact Us Yes, more please!