Entrée

Chiles en Nogada – Poblano Peppers with Farro and Walnut Sauce…Vegetarian Style

Chiles en Nogada-Poblano Peppers stuffed~ Yes, more please!_seasonal ingredients

The month of September is the time in Mexico when we celebrate Independence Day, Viva Mexico Goat creatures! That’s the way we shout and celebrate along with lots of tequila and food. There are many traditional dishes that are prepared for this celebration, but the one that represent the season and the first celebration of independence is the Chiles en Nogada.

Chiles en Nogada is a regional culinary dish from Puebla. It’s origin dates from 18th century and it is considered a recipe of Baroque style, because of the amount of ingredients and the elaborate and detailed preparation. Many tales and stories argue the origin of this dish. In my curiosity of knowing the most accurate story, I found an article written by Eduardo Merlo Juarez*, from the Investigation Center of INAH-Puebla (INAH-“National Institute of Anthropology and History in Mexico) which I found very credible and congruent. He explains that this dish was made in the Viceroyalty period in Mexican history as a dessert. It was created in the month of August with seasonal ingredients from the region; like Poblano peppers, Nueces de Castilla (walnuts), pomegranates, and stone fruits like peaches, apples, pears that the Friars cultivate in the orchards.

The nuns, Madres Agustinas Recoletas of the Convent of Santa Monica were the ones who originally prepared this dish for the dinner that was given in honor of the Military Commander Agustin de Iturbide, who entered the city of Puebla in triumph after signing the Treaty of Cordova in Veracruz. This event granted the Mexican Independence from Spain. For such an important celebration the nuns used as garnish for the first time, parsley for the green and pomegranate for the red to symbolize the colors of the Mexican Flag.

This dish was probably served as dessert, roasted poblano pepper filled with a concoction of delicious stone fruits, that tamed the spiciness of the chile and the creamy sauce to marry the flavors. As in today the chiles are stuffed with a combination of the stone fruits and a 50% ground pork and beef.

There has been no way to track who added the ground pork and beef to make the sweet picadillo which is now traditionally used as filling. Many arguments have been raised about whether they should or should not be covered in the egg batter as in Chile Relleno style; the truth is you can find them both ways based upon preference. The original sauce was made with walnuts, Goat cheese, a little bit of milk, and a dash of sherry vinegar. It is preferable to serve them at room temperature and the sauce is always best served cold.

In this recipe I wanted to keep the essence of the dish and simplify the preparation time without compromising the flavors, I prepared the filling using Farro to make it lighter (and because it has a meaty texture that resembles to ground pork). I maintain the use of stone fruits and spices. And versus the original long cooking method, I added the fruits later on in the cooking process to have contrast in textures. I believe that this recipe is simple enough to make and results in a light entrée for you to serve, rich in flavors, culture and tradition.

Viva Mexico!!!

Chiles en Nogada-Poblano Peppers stuffed~ Yes, more please!

Chiles en Nogada – Poblano Peppers stuffed with Farro and Walnut Sauce Vegetarian

Serves 4

Roasting the Chiles:

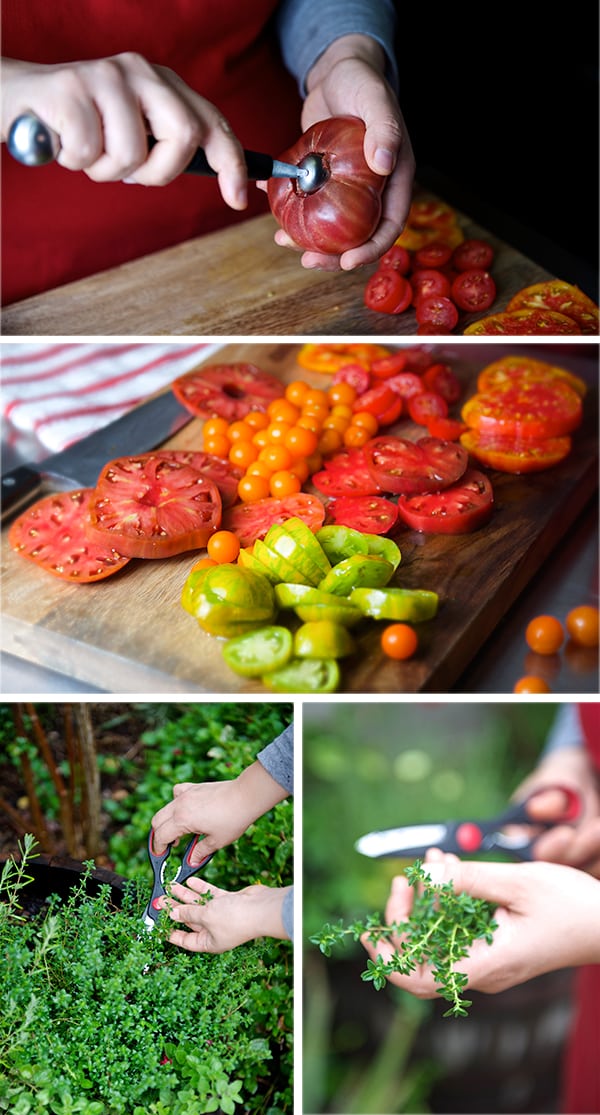
4 Poblano peppers roasted, deveined, and de-seeded* (reference in below photos)
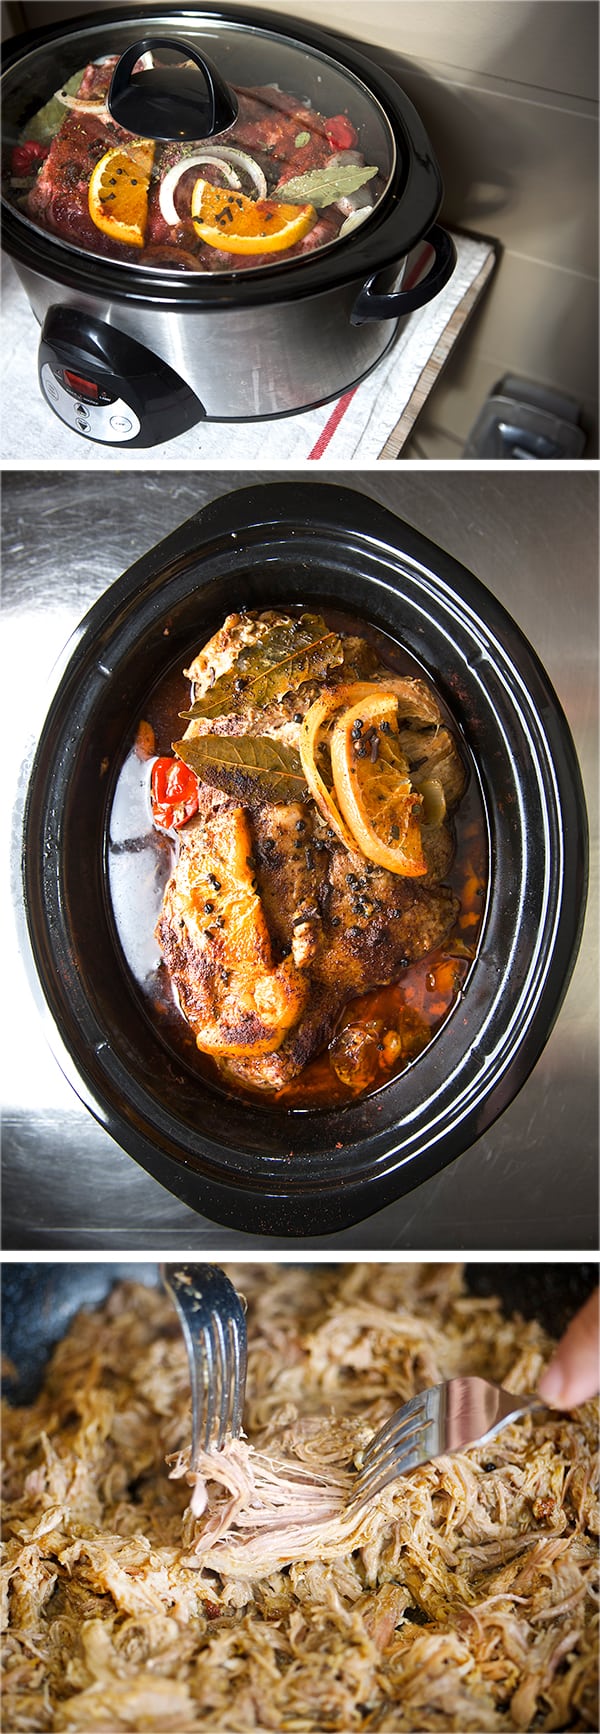
In a baking sheet pan lined with aluminum foil place the poblano peppers and rub them with a little canola oil and sprinkle some sea salt. Roast them for about 3-4 minutes per side at a 450 F pre-heated oven. It is best to char them on the stove over direct flame because it gives them more flavor. In this case I do not own a gas stove or a torch (sad, sad…but the oven method works great to easily remove the skins) I did not grill them. I think the flavor of the smoke charcoal would be too overwhelming for the filling.

Chiles en Nogada-Poblano Peppers stuffed~ Yes, more please!_Chiles skined sequence
Making the Filling:

2 cups of cooked Farro (or brown rice will work too)
1 apple chopped in small cubes
1 Bosc Pear chopped in small cubes
1 Peach chopped in small cubes
1 apricot chopped in small cubes
½ cup golden raisins
½ cup roasted almonds
½ medium size red onion finely diced
1 garlic clove
2-3 tablespoons canola oil
1 teaspoon of sherry vinegar.
Mexican cinnamon ground
a pinch of ground clove.
A pinch of white pepper.

Directions:

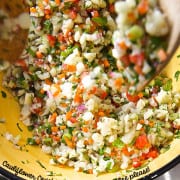
Start by adding your Farro to a small sauce pan with a little canola oil and sauté it until slightly golden brown. Add 2 cups of water and let it come to a boil, then reduce the heat, cover and let it simmer. Add a pinch of salt. Keep an eye on it since you want to leave it a little under done for the best texture and flavor. Once it is cooked, spread the Farro on a platter to stop the cooking process and to release some of the moisture. Let it cool for about 10-15 minutes.

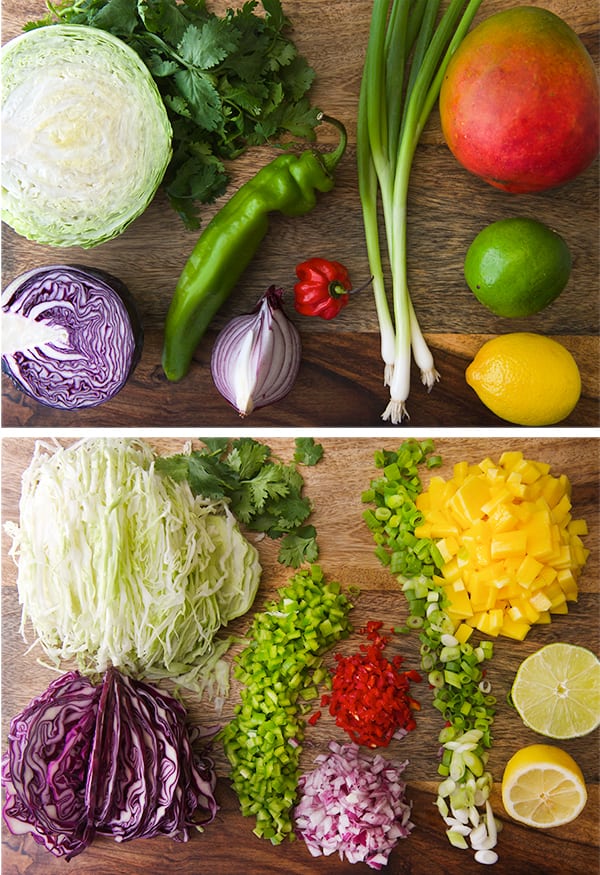
Meantime, chop the rest of the ingredients. Now that you have everything ready, heat a sauté pan with about 2 tablespoons of canola oil, sauté onions and garlic and cook for about 2 minutes. Next, add apples, pears, almonds, raisins, sherry and spices cook for 2 minutes. Add the Farro and sauté for another 2 minutes. Then add the peaches and apricots. Adjust salt and pepper. Remove from stove and let it cool to room temperature before stuffing the roasted poblano pepper.

Chiles en Nogada-Poblano Peppers stuffed with Farro and walnut sauce_ stuffing ingredients
For the Walnut Sauce:

6-8 ounces of Goat cheese
1 ½ cup of Walnut halves soaked and twice rinsed.
1/4-1/2 cup of milk
a dash of sherry vinegar
a pinch of sugar.

Directions:

Blend everything until smooth and refrigerate for about 30 min. before serving
The traditional recipe calls for peeling each walnut by hand…I have not a lot of patience for this process, however I found that if you soak the walnuts in hot water for 20 minutes, and rinse them twice,it removes almost all the bitterness from the skins.(see picture below)

Chiles en Nogada-Poblano Peppers stuffed~ Yes, more please!_Walnut sequenceChiles en Nogada-Poblano Peppers stuffed~ Yes, more please!_Walnut sauce
Garnish with:

Finely chopped Parsley
Pomegranate Kernels (see photos for easy peel and kernels extraction pomegranate)

Chiles en Nogada-Poblano Peppers stuffed~ Yes, more please!_Pomegranate sequence
To serve:

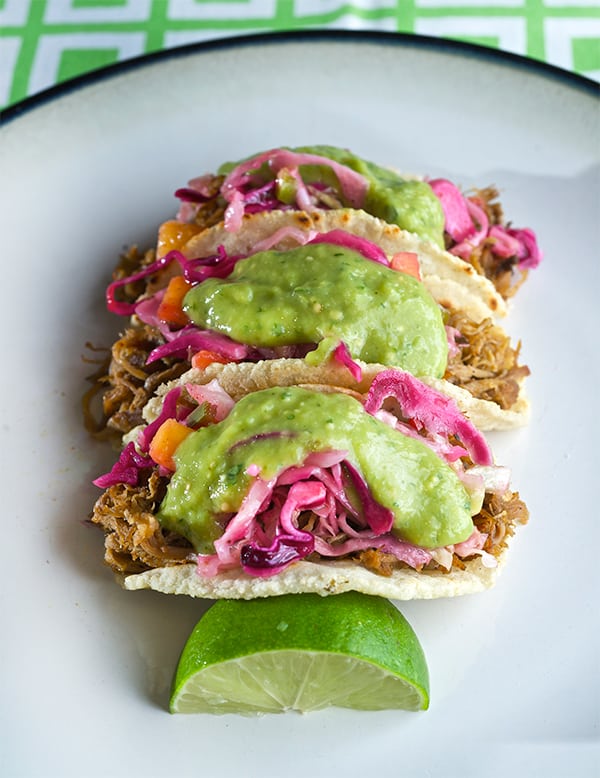
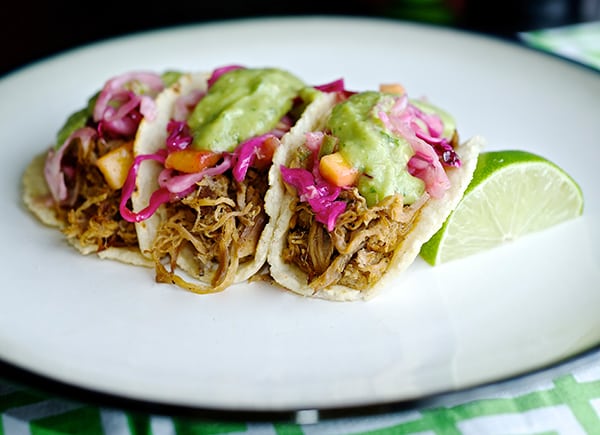
Start by stuffing the poblanos, arrange them on a platter or in individual plates, cover them with the walnut sauce, garnish with pomegranate kernels and finely chopped parsley.
Traditionally they are serve in Talavera plates from the state of Puebla.
I chose this beautiful stoneware plate with an iridescent brown-black glaze made by a Local Artist her name is Barbara Breyfogle she has her own studio and makes one of a kind handmade stoneware pottery. She has been making pottery since 1974. In some of her pieces she uses lace and nature to stamp some designs on her plates and serving platers.You can find her and her beautiful creations at Boggy Creek Farms on Saturdays from 8-1 pm. Or send her an e-mail: [email protected]……Thank you Barbara!!

Chiles en Nogada-Poblano Peppers stuffed with Farro and Walnut Sauce_serving
VIVA MEXICO!!!

* Source of the historical facts:  http://www.elfinanciero.com.mx/secciones/estilo-de-vida/28659-debe-mantenerse-receta-original-del-chile-en-nogada-investigador.html

View Post or View Comments 8

Pulled Pork Tacos & Hatch-banero Mango Slaw

Pulled-Pork-Tacos-&-Hatch-banero-Mango-Slaw-Green-Tomatillo-and-Avocado-Salsa-~Yes,-more-please!

I consider myself a part-time vegetarian but every now and then my carnivorous side knocks at my door. In this case I was craving for a good fresh pork taco. This is an lengthy description right?    Good – fresh – pork – taco? Let me explain myself. “Good”: high quality meat well prepared and well seasoned. “Fresh” : I make it from scratch no short cuts. I want something that is really gonna satisfy my craving. I could go to buy a taco but its better when you make them. Its easy to follow these few steps and….. Done! The formula is ready so you can have the best tacos in town, because you made them!
Being from Mexico, its been hard for me to find good tacos in town (how come something so simple can get so screwed up at the restaurants?). I think the best ones I had here in Austin were prepared in my kitchen. Why? Not because I’m a taco genius, its do to a simple easy equation: handmade tortilla + quality meat cook properly + fresh salsa = the best taco. Want to make fresh corn tortillas?… check our step by step tutorial click here.

In this case, this is more like an adaptation taco recipe, I used the pork shoulder, or pork butt, because its a good substantial cut of meat. It has a balanced percentage of fat and meat and is great for braising. Yes I wish I could have a copper pot with a huge wooden spoon and cook the pork in hot lard (like carnitas style) and also a huge powerful vent in my tiny kitchen for the smell to go away!. Yes, I love tacos but the smelly vapors in my house? Not so much. Therefore I’m using my handy dandy slow cooker. I place a little table outside in my patio and leave it there for about 3-6 hours, depending on how many lbs. of meat I’m cooking. The result is the neighbors want my fork tender juicy meat. (See pictures below). Its such a great method because it allows you to go to work come back with dinner ready! If you are planning a dinner party its also a really easy one pot wonder, everybody happily assembles their tacos.

In this case I wanted to make some sweet and sour cole slaw instead of the traditional cilantro and onions or pickled red onions. I added some mango for sweetness and spicy hatch chilies.For the salsa I used creamy avocado and green tomatillos to balance the acidity from the spicy mango slaw (as I’m writing my mouth is watering). These are good fresh pork tacos to me, for now let the pictures do the talking…
This is three recipes in one all fairly easy considering the pork cooks by itself, a Taco Feast that will satisfy any crowd… Enjoy!

Pulled-Pork-Tacos-&-Hatch-banero-Mango-Slaw-crowd-pleaser-how-to-make-tacos~Yes,-more-please!

Pulled Pork Tacos & Hatch-banero Mango Slaw

Serves 6-8 mexicans, 8-12 americans, 12-16 french.

Ingredients:

3-5 lbs pork shoulder or pork butt roast
1 orange ½ juiced the other half cut in thick slices
4-6 garlic cloves
½ medium size onion cut into thick rings
2 bay leaf
1 teaspoon of whole black pepper corns
6 whole cloves
2 tablespoons of dry chile powder
1 tablespoon dry mexican oregano
2 tablespoons of sea salt
2 red habanero peppers
3/4 cup of apple cider vinegar
2 tablespoons brown sugar
½ cup water

Preparation:

On the bottom of the slow cooker sprinkle some salt , half of the pepper corns, half cloves, 2-3 crushed garlic cloves add vinegar and water. Remove some of the excess fat then place the pork roast in the slow cooker. Sprinkle all the rest of the aromatic ingredients on top, add onion rings, orange slices, chili powder, brown sugar, red habanero peppers, garlic cloves. Cover with a lid and follow the instructions for your slow cooker. I cooked this amount of meat in 4 hours (the 3 first hours in high, the last hour on low). Cook until the center of your meat reaches 145F / 62C measured with a meat thermometer. Once your meat is ready turn off the slow cooker and let it rest for about 30-45 min.
Remove all the topping spices and pieces of orange, onion and bay leaf. Transfer the meat into a bowl, and then proceed to fish out all the peppercorns and cloves once you remove all the aromatics, Remove some of the extra fat, but not too much (Leave some for flavor). Place the meat back into the juices and with the help of 2 forks start shredding the meat. It will be easy since the meat has been cooking for so long. Leave it in the pot to keep it warm.

Pulled-Pork-Tacos-&-Hatch-banero-Mango-Slaw_Pork-cooked_step-by-step~Yes,-more-please!

On the bottom of the slow cooker sprinkle some salt , half of the pepper corns, half cloves, 2-3 crushed garlic cloves add vinegar and water. Remove some of the excess fat then place the pork roast in the slow cooker. Sprinkle all the rest of the aromatic ingredients on top, add onion rings, orange slices, chili powder, brown sugar, red habanero peppers, garlic cloves. Cover with a lid and follow the instructions for your slow cooker. I cooked this amount of meat in 4 hours (the 3 first hours in high, the last hour on low). Cook until the center of your meat reaches 145F / 62C measured with a meat thermometer. Once your meat is ready turn off the slow cooker and let it rest for about 30-45 min.
Remove all the topping spices and pieces of orange, onion and bay leaf. Transfer the meat into a bowl, and then proceed to fish out all the peppercorns and cloves once you remove all the aromatics, Remove some of the extra fat, but not too much (Leave some for flavor). Place the meat back into the juices and with the help of 2 forks start shredding the meat. It will be easy since the meat has been cooking for so long. Leave it in the pot to keep it warm.

Spicy Hatch & Habanero Mango Cole Slaw

Serves 6-8
Hatch-banero-Mango-Slaw-~-Yes,-more-please!

Ingredients:

2 cups or ½ small size red cabbage
4 cups or ½ medium size green cabbage
1.5-2 cups 1 big mango 2 medium size peeled and medium diced
3 green onions finely chopped
½ red onion finely chopped
¼ cup cilantro finely chopped
1 Hatch pepper seeded and finely chopped* ( you can replace the hatch for fresh jalapeños )
1 red habbanero pepper seeded and finely chopped*
*Rub a little canola oil in your hands specially your finger tips before start cutting the peppers, this will help avoid burning your hands.

Vinaigrette:

1/3 cup of canola Oil
½ cup of apple cider vinegar
1 tablespoon brown sugar
2 tablespoons honey
1 teaspoon sea salt
1 teaspoon of dry oregano
½ teaspoon of celery salt
½ lime juice
½ lemon juice

Preparation:

In a large bowl whisk all the vinaigrette ingredients. Add the 2 types of cabbage and the rest of the chopped ingredients. Mix well set a side let it get happy for about 20-30 minutes.

Mango_ColeSlaw_02

Green Tomatillo and Avocado Salsa

Pulled-Pork-Tacos-_Green_avocado_Salsa-how-to-make-~Yes,-more-please!

Ingredients:

6-8 Small fresh green tomatillos
2 hatch peppers roasted skinned and seeded
1 ripe Hass avocado
3-4 cilantro sprigs
juice of ½ lemon
¼ cup of water
salt and pepper to taste

Method:

In a stand blender or using a hand blender, puree all ingredients until smooth and creamy consistency. Adjust for salt and pepper.

Pulled-Pork-Tacos-_Green_avocado_Salsa-~Yes,-more-please!

How does all this work together?…

Place everything on the table like a buffet style, warm up your tortillas, keep the shredded pork warm on the slow cooker, cut some extra limes, some Cholula red sauce, or any of your preference. Layout the coleslaw, the green avocado salsa and let everybody assemble their own tacos. Open a cold bottle of amber beer like Victoria (this beer is from Mexico but now available in Austin!!!) squeeze a lime juice and Salud!…Share with friends!

Pulled-Pork-Tacos-&-Hatch-banero-Mango-Slaw-~Yes,-more-please!

Pulled-Pork-Tacos-&-Hatch-banero-Mango-Slaw_bite!--~-Yes,-more-please!

Enjoy!

View Post or View Comments 6

Summer Soba Noodles

Summer Soba Noodles_healthy and delicious

Lusciously light noodles, that’s my description for this dish. Cold soba noodles are a popular summer dish in Japan. The Japanese people are very wise by eating like this; light, savory, vegetable based; a good way to stay cool. The traditional way to serve them is without toppings; just the delicate flavor of the noodle with some dipping sauce on the side. You dip them as you go.
In my version I decided to give the dish a little kick and add some fresh vegetables and tofu. We usually have this for lunch or a light summery dinner. The combination of fresh crunchy vegetables, sweet-savory sauce and creamy tofu cubes, pairs really well with the tender noodle. The preparation could not be easier, and if we measure preparation time versus rewarding flavors it is a winner.
If you think this dish looks complicated, don’t worry, its easy to make. To save you some prep time I recommend you invest on a little kitchen gadget: get yourself a julienne peeler. It is one of my favorite tools. Its fun, easy to use, and easy to clean. You can use this peeler for any other vegetable or fruit. One of the best kitchen gadgets to have. Let’s cook!

Summer Soba Noodles_ sauce ingredientsSummer Soba Noodles_ ingredientsSummer Soba Noodles_Yes,more please!

Summer Soba Noodles

Serves 2-4

3-6  Soba noodle bundles approximately 1 bundle per person. I recommend you to get the Japanese kind. You can get them at any Asian specialty aisle of a supermarket…
2-4  green onions/scallions, finely sliced
2  carrots, shredded, julienned or grated
1  seedless English cucumber, julienned or thinly sliced
1  avocado
1/4-1/2 cup  unshelled and cooked edamame beans, optional
1 block of extra firm Tofu, remove the excess water patting it with paper towels and cut into small cubes

For the sauce:

3  tablespoons soy sauce.
3  tablespoons seasoned rice vinegar
2  tablespoons sesame oil + one extra tablespoon for finishing
2  tablespoons of honey or agave nectar
1  tablespoon brown sugar
1  tablespoon grated fresh ginger
1  garlic clove grated
the juice and the zest of one small orange

In a bowl Whisk all the ingredients. Reserve 1/3 of the sauce to marinate the tofu squares.

Garnish with:

Thai Basil to garnish
Black or gold sesame seeds
1 red Thai or Serrano chili, thinly sliced

Directions:

1. Start by making your sauce. Place all its ingredients in a bowl and whisk. Set aside 1/3 of the sauce and marinate the tofu. While the tofu is absorbing all the flavors, proceed to cut and prepare your vegetables and garnishes.

2. Bring a large pot of water up to a boil. Unlike regular pasta, you do not need to salt the water. Once the water is boiling place the noodles and monitor constantly, using a pasta spoon to prevent the noodles sticking. Bring the water up to simmering. Do not let it boil. Follow the instructions in the package, taste, it should have some elasticity to it. Usually takes around 4-5 minutes because they cook through quickly . Keep an eye on them to avoid over cooking. When the pasta is ready drain the noodles into a colander. Immediately return them to the pot and fill the pot with cold water. Leave the water running into the pot a bit until the noodles cool down. Gently with your hands rinse the noodles in threads.*( see picture below) until they feel less starchy. Drain them again into a colander and allow them to drain. You can transfer them to a bamboo mat, to remove the excess water.

Summer Soba Noodles_How to prepare soba noodles

3.  In a non-stick pan proceed to saute the marinated tofu until golden brown. A little scorching doesn’t hurt either.
In a large bowl season the noodles with a tablespoon of sesame oil and add sesame seeds.

Summer Soba Noodles_Sautee_marinated_Tofu

4. Divide all noodles evenly into 2 or 4 bowls, garnish with the Juliane carrots, cucumbers, avocado, sautéed tofu, edamame, red chilli.
Serve a small sauce bowl per person for extra dipping the noodles.

Summer Soba Noodles_for two

~Enjoy!~

Music Pairing: Pizzicato Five: Twiggy Twiggy

Summer Soba Noodles

Serves 2-4
Course Brunch, dinner, Lunch
Cuisine Japanese
Prep Time 20 minutes
Cook Time 10 minutes
Total Time 30 minutes
Servings 4

Ingredients

  • 3-6 Soba noodle bundles approximately 1 bundle per person I recommend you to get the Japanese kind. You can get them at any Asian specialty aisle of a supermarket
  • 2-4 green onions/chives – finely sliced
  • 2 carrots shredded, julienne or grated
  • 1 seedless cucumber julienne or thinly sliced
  • ½ avocado
  • 1/4-1/2 cup unshelled and cooked edamame beans optional
  • 1 block of extra firm Tofu remove the excess water patting it with paper towels and cut into small cubes.

For the sauce:

  • 3 tablespoons soy sauce.
  • 3 tablespoons seasoned rice vinegar
  • 2 tablespoons sesame oil + one extra tablespoon for finishing.
  • 2 tablespoons of honey or agave nectar.
  • 1 tablespoon brown sugar
  • 1 tablespoon grated fresh ginger
  • 1 garlic clove grated
  • the juice and the zest of one small orange.

Garnish with:

  • Thai Basil to garnish
  • Black or gold sesame seeds
  • 1 Red chili thinly sliced

Instructions

  1. In a bowl whisk all the sauce ingredients. Reserve 1/3 of the sauce to marinate the tofu squares.
  2. Start by making your sauce. Place all its ingredients in a bowl and whisk. Set aside 1/3 of the sauce and marinate the tofu. While the tofu is absorbing all the flavors, proceed to cut and prepare your vegetables and garnishes.
  3. Bring a large pot of water up to a boil. Unlike regular pasta, you do not need to salt the water. Once the water is boiling place the noodles and monitor constantly, using a pasta spoon to prevent the noodles sticking. Bring the water up to simmering. Do not let it boil. Follow the instructions in the package, taste, it should have some elasticity to it. Usually takes around 4-5 minutes because they cook through quickly. Keep an eye on them to avoid overcooking. When the pasta is ready drain the noodles into a colander. Immediately return them to the pot and fill the pot with cold water. Leave the water running into the pot a bit until the noodles cool down. Gently with your hands rinse the noodles in threads.*( see picture below) until they feel less starchy. Drain them again in a colander and allow them to drain. You can transfer them to a bamboo mat, to remove the excess water.
  4. In a non-stick pan proceed to saute the marinated tofu until golden brown. A little scorching on the edges adds great flavor.

  5. In a large bowl season the noodles with a tablespoon of sesame oil and the sesame seeds.

  6. Divide all noodles evenly into 2 or 4 bowls, garnish with the Juliane carrots, cucumbers, avocado, sautéed tofu, edamame, red chili.
  7. Serve a small sauce bowl per person for extra dipping the noodles. Enjoy!
View Post or View Comments 1

Seared Rainbow Trout + Citrus-fennel-potato salad + Cilantro pesto

Seared Rainbow Trout : Citrus-fennel-potato salad & Cilantro pesto_Yes,more please!

This summer my basil plants have not done really well. I think my mistake was not being able to see that I had 3 plants in the same pot. Oh well! I separated them, but they are a bit annoyed with me at this time. If just they knew I love them. The reason I planted them is because I love pesto and without basil my next favorite herb for pesto is cilantro.
Cilantro is really hard to grow but easy to find fresh at the store or market so I decided to give it a shot and it seems I came up with a pretty exciting recipe. It is like a cross between pesto and the Argentinean chimichurri; not too creamy not too oily, right in the middle. I’m loving it. I used fresh cilantro, peanuts, and chilies. A hint of lemon zest and Extra Virgin Olive Oil. I skipped the Parmigiano cheese and still  It’s creamy and light at the same time.

With this premise, I went to the seafood market and run into this gorgeous Rainbow Trout Fillets. Done deal! the perfect pairing for my pesto. Rainbow trout is a delicate fish but with enough character to old up the herb and zesty flavors. Trouts belong to the family of Salmon, so it has a firm flesh and good fatty acids, Therefore lots of flavors.
Fish intimidates a lot of people, and oh my God, “Fishskin” forget it!. Well, it is time for you to get out of your comfort zone and just do it.  Get resources, talk to your vendor, fisherman, fish aficionado, how to choose fish, where to get it in your city, how to choose a good one. For me, there are two clues to go by smell and texture. I do not buy fish that smell like fish and the flesh to the touch needs to be firm. The next intimidating factor comes from the not knowing how to cook it or which method works better. My friends, if you follow these simple instructions you are on your way to have a feast of kings!

Seared Rainbow Trout : Citrus-fennel-potato salad & Cilantro pesto_Rainbow Trout fillets

Seared Rainbow Trout : Citrus-fennel-potato salad & Cilantro pesto_Fresh Rainbow Trout Fillets

Seared Rainbow Trout + Citrus-fennel-potato salad + Cilantro Pesto

Serves 4

For the Cilantro Pesto:

4 cups  about 2 bunches of Cilantro include stems
1/2 cup roasted peanuts
3-4 chilies  2 serranos, 2 red sweet peppers (you can interchange chilies, like habanero, jalapeño, shishito, just add one at a time so you can control the spice level)
3-4  garlic cloves
1/2 – 3/4 cup of Extra Virgin Olive Oil
The juice and zest of 1 lemon
1 teaspoon of salt
1/2 teaspoon of fresh cracked black pepper

Preparation:
Add everything to the blender or food processor, blending and pulsing to desired consistency. You can live it more chunky or smooth is up to you.*

For the Left Over Pesto:
I’ve been using it in avocado sandwiches, pasta, and cucumber salad is a hit!. This recipe makes about 2-1 1/2 cups and stays good for about a week. Keep it in an airtight container and cover with plastic wrap touching the surface of the pesto. This will prevent air from oxidizing it and turn it dark gray.

Seared-Rainbow-Trout_Cilantro-pesto_-ingredients_Yes,more-please!Seared Rainbow Trout : Citrus-fennel-potato salad & Cilantro pesto_Cilantro pesto

For the Potato Fennel Salad:

4-6 medium-small New red potatoes cook al dente.
1/2 a large bulb of fennel finely sliced
1/2 small red onion finely sliced.
1-2 handfuls of frisse (or arugula)
The juice of one medium orange.
A splash of Rice Vinegar
A splash of Extra Virgin Olive Oil.
Salt & Black pepper to taste

Preparation:
Place all salad ingredients in a bowl. Toss well a few minutes before serving so the potatoes can absorb some of the vinaigrette.

Potato-Fennel-Salad_Yes,-more-please!

Potato-Fennel-Salad_-tossing-the-salad

For the Seared Rainbow Trout:

4  Rainbow trout fillets skin on.
Kosher Salt &  fresh cracked Black Pepper
Extra Virgin Olive Oil.

There are five rules to leave by when you are searing skin on trout fillets:

1- HOT skillet, I mean sizzling hot; water droplets dance in the skillet at this temperature.

2- Room temperature fish. Pull the fish out of the refrigerator at least 20 minutes before you gonna start cooking.

3- Pad dry the fish before seasoning.

4-Proper seasoning salt & pepper both sides of the fillet.

5- Skin side hits the pan first. One flip. That’s it! yes, one flip you read it well. So let’s start cooking…

Preparation:
Heat up a non-stick skillet. Place seasoned trout fillets skin side down into the very hot skillet. Do not crowd the pan, so you can ensure the skin of the trout is seared and crispy. Now, avoid the temptation, do not Look at it, don’t flip it, do not move it around. Don’t please!. Wait 1 and a half to 2 minutes, as soon as you start to see that the edges of the fillet are turning white (like a halo all around the perimeter) then carefully flip it with all your conviction in the knowing that ONE flip is enough.
The skin should be golden brown and crispy edges. Once you flip it is over. Give your fillets an extra 1 to 2 minutes tops.
Remove from heat let it rest a bit 40-60 seconds. And your fillets are Ready to serve.

Serve trout skin side up so stays crispy, top it with a generous spoonful of the pesto, roasted chopped peanuts and drizzle some lemon juice to finish it.
Top the trout with the red new potato and fennel salad. You can also serve this dish family style all arranged on a serving platter, take it to the table and A Comer! Serve immediately accompanied by a good glass of Vinho Verdhe like Casal Garcia from Portugal, or an Albarino 2009 La Cana, from Galicia Spain.
Enjoy!

Seared-Rainbow-Trout-with-Cilantro-pesto_How-to-sear-a-trout_filet_Yes,more-please!Seared-Rainbow-Trout-with-Cilantro-pesto_How-to-sear-a-trout_Yes,more-please!

Seared-Rainbow-Trout-with-Cilantro-pesto-ready-to-serve_Yes,more-please!

Seared-Rainbow-Trout-with-Citrus-fennel-potato-salad-&-Cilantro-pesto_Yes,more-please!

Enjoy!

Music Pairing: Ibrahim Ferrer- Buena Vista Social Club

https://youtu.be/l5gsWhNr_Zw

Seared Rainbow Trout + Citrus-fennel-potato salad + Cilantro pesto

Serves 4 There are five rules to leave by when you are searing skin on trout fillets: 1- HOT skillet, I mean sizzling hot; water droplets dance in the skillet at this temperature. 2- Room temperature fish. Pull the fish out of the refrigerator at least 20 minutes before you gonna start cooking. 3- Pad dry the fish fillets before seasoning. 4-Proper seasoning salt & pepper both sides of the fillet. 5- Skin side hits the pan first. One flip. That’s it! yes one flip you read it well.
Course dinner
Cuisine FUSION
Prep Time 20 minutes
Cook Time 35 minutes
Total Time 55 minutes
Author Mariana McEnroe

Ingredients

For the Cilantro Pesto:

  • 4 cups about 2 bunches of Cilantro
  • 1/2 cup roasted peanuts
  • 3-4 chilies 2 Serrano peppers 2 red sweet peppers (you can interchange chilies, like habanero, jalapeño, shishito, just add one at a time so you can control the spice level.)
  • 3-4 garlic cloves
  • 1/2 – 3/4 cup of Extra Virgin Olive Oil.
  • The juice and zest of 1 lemon.
  • 1 teaspoon of salt
  • 1/2 teaspoon of fresh ground black pepper.

For the Potato Fennel Salad:

  • 4-6 medium-small New red potatoes cook al dente.
  • 1/2 a large bulb of fennel finely sliced
  • 1/2 small red onion finely sliced.
  • 1-2 handfuls of frisse or arugula
  • The juice of one medium orange.
  • A splash of Rice Vinegar
  • A splash of Extra Virgin Olive Oil.
  • Salt & Black pepper to taste

For the Seared Rainbow Trout:

  • 4 Rainbow trout fillets skin on.
  • Kosher Salt & Fresh Cracked Pepper
  • Extra Virgin Olive Oil.

Instructions

  1. Make the pesto: Add every pesto ingredient to the blender or food processor, blending and pulsing until a rough paste. Pulse it more times for a smoother consistency. I like it a bit more chunky, small pieces of peanuts still show and the herbs are roughly chopped, but not completely pureed.

  2. For the Left Over Pesto: I’ve been using it on avocado sandwiches, pasta, and cucumber salad is a hit!. This recipe makes about 2-1 1/2 cups and stays good for about a week. Keep it in an airtight container and cover with plastic wrap touching the surface of the pesto. This will prevent air from oxidizing it and turn it dark gray.

  3. Make the potato salad: place all salad ingredients in a bowl and gently toss well a few minutes before serving so the potatoes can absorb some of the vinaigrette.

  4. Sear the fish: 

    Heat up a non-stick skillet. Place trout fillets into the very hot skillet remember the fish enters the pan skin side down. Do not crowd the pan, so you can ensure the skin of the trout is seared and crispy. Now, avoid the temptation, do not Look at it, don’t flip it, do not move it around. Don’t please!. Wait 1 and a half to 2 minutes,  as soon as you start to see that the edges of the fillet are turning white (like a halo all around the perimeter) then carefully flip it with all your conviction in the knowing that ONE flip is enough. 

    The skin should be golden brown and crispy edges. Once you flip it is over. Give your fillets an extra 1 to 2 minutes tops. 

    Remove from heat let it rest a bit 40-60 seconds. And your fillets are Ready to serve.

  5. Serve trout skin side up so stays crispy, top it with a generous spoonful of the pesto, roasted chopped peanuts and drizzle some lemon juice to finish it.

    Top the trout with the red new potato and fennel salad. You can also serve this dish family style all arranged on a serving platter, take it to the table and A Comer!

  6. Serve immediately accompanied by a good glass of Vinho Verdhe like Casal Garcia from Portugal, or an Albarino 2009 La Cana, from Galicia Spain.

    Enjoy!


View Post or View Comments 0

Cauliflower Ceviche

Cauliflower Ceviche_Tostada ready to eat!

The full summer weather is here! Austin, Texas is burning hot! 101-106 Fahrenheit. With this kind of summer temperatures, I can’t even conceive the idea of “grilling”. Can you imagine being outside with 101 on the thermometer in front of a grill trying to light up the charcoal?…Not my cup of tea I prefer the tundra if you ask me. But well these weather conditions fire up the indoors freshly made meals; light, crisp and lots of veggie action.

Cauliflower-Ceviche_cauliflower-florets

I tried to make this ceviche once in my years of college, not so good; it was really mushy and flavorless… but I loved the concept of using the beloved Cauliflower. Cauliflower is the vegetable everybody loves now because of its versatile flavor. It is evident that Cauliflower has a love affair with butter and cream. Mashed cauliflower can replace a good pile of mashed potatoes, cauliflower gratin, cauliflower chowder, griller, roasted, among my favorites. But what I crave in a Summery hot day is something light easy to digest, fresh and no oven or a long cooking time required.

So with this said, I revamped the cauliflower ceviche recipe from my College years by adding diced crunchy vegetables, steaming the cauliflower and lots of good fresh and dry herbs plus a punch of citrus goodness to add extra flavor. That acid, salty umami note that just makes your mouth water, as soon you start reading the recipe…

Cauliflower Ceviche is a great summery meal, for Vegetarian, Vegans and Carnivorus that won’t even care about the difference once they have the first bite!

Margaritas on the side?…Yes, please!…Enjoy!

Cauliflower-Ceviche_ingredients_Yes,-more-please!

Cauliflower Ceviche

Serves 4

1 Cauliflower head, medium size. Remove the core and small diced florets.

Small diced:

2 carrots
1 tomato
½ medium size red onion
2 green onions including the green part.
1 cucumber seedless
1 long celery stalk
1 habanero, or 1 jalapeno, or 1 serrano. (Remove the seeds for a less spicy version.)
2 Tablespoons of finely chopped fresh cilantro
2 Tablespoons of finely chopped fresh parsley
2-3 pinches of dried oregano

The juice of:

2 Limes
1 Lemon
The juice and zest of ½ Orange
2 tablespoon apple cider vinegar
4 tablespoons Extra Virgin Olive Oil
1 teaspoon celery salt
1 teaspoon of  sea salt
Black crushed pepper to taste.

Garnish with:

Radishes, Avocado Slices, Pumpkin seeds, Ketchup,( weird but delicious, it adds some sweet and tangy note)
Cholula hot Sauce, Limes. Serve with Tostadas or crackers.

Directions:

In a medium size pot steam the small diced Cauliflower florets until al-dente, for about 3-5 minutes. Remove from steamer place them on a tray in one single layer and let them cool off. Mean time chop all the vegetables. Place them on a big salad bowl, add the herbs, extra virgin olive oil, the citrus juices and S&P, toss well.  Once the cauliflower florets have cool down, add them to the mix, toss well and let it marinate for 20-45 minutes. Taste and adjust salt and pepper if necessary. Serve with tostadas or crackers, avocado Slices, radish slices, and toasted pepitas (pumpkin seeds), and a dash of your favorite hot sauce…

Cauliflower-Ceviche-Summer-Vegetarian-Vegan-Bliss_-Yes,-more,-please!

Refreshing, Vegetarian Ceviche, Enjoy!

Music Pairing: Mini Skirt, ESQUIVEL- Metropole Orkest

Cauliflower Ceviche

Serves 4-6
Course Brunch, Lunch, Main Course
Cuisine FUSION, Mexican, wholesome
Prep Time 30 minutes
Cook Time 10 minutes
Total Time 40 minutes
Author Mariana McEnroe

Ingredients

  • 1 Cauliflower head medium size. Remove the core and small diced florets.

Small diced:

  • 2 carrots
  • 1 to mato
  • ½ medium size red onion
  • 2 green onions including the green part.
  • 1 cucumber seedless
  • 1 long celery stalk
  • 1 habanero or 1 jalapeno, or 1 serrano. (Remove the seeds for a less spicy version.)
  • 2 Tablespoons of finely chopped fresh cilantro
  • 2 Tablespoons of finely chopped fresh parsley
  • 2-3 pinches of dried oregano

The juice of:

  • 2 Limes
  • 1 Lemon
  • The juice and zest of ½ Orange
  • 2 tablespoon apple cider vinegar
  • 4 tablespoons Extra Virgin Olive Oil
  • 1 teaspoon celery salt
  • 1 teaspoon of sea salt
  • Black crushed pepper to taste.

Garnish with:

  • Radishes Avocado Slices, Pumpkin seeds, Ketchup,( weird but delicious, it adds some sweet and tangy note)
  • Cholula hot Sauce Limes. Serve with Tostadas or crackers.

Instructions

Directions:

  1. In a medium size pot steam the small diced Cauliflower florets until al-dente, for about 3-5 minutes. Remove from steamer place them on a tray in one single layer and let them cool off. Mean time chop all the vegetables. Place them on a big salad bowl, add the herbs, extra virgin olive oil, the citrus juices and S&P, toss well. Once the cauliflower florets have cool down, add them to the mix, toss well and let it marinate for 20-45 minutes. Taste and adjust salt and pepper if necessary. Serve with tostadas or crackers, avocado Slices, radish slices, and toasted pepitas (pumpkin seeds), and a dash of your favorite hot sauce…
View Post or View Comments 3

Heirloom Tomato Crostata

Heirloom-Tomatoe-Crostata-Yes,-more-please!

This is one of the recipes I being waiting to make with the gorgeous tomatoes from the market, Heirloom tomato Crostata!…Last time I went to Boggy Creek Farm,( my favorite urban farm here in Austin, TX.)  I bought about 5 different kinds I could not resist! (honestly, If you have 3-2 or even just one kinds it will be great too) Looking at all this colors and shapes made me turn my sweet crostata dough into a savory one. I read about this tomato pie with Corn Meal, and honestly I’m not very fond of Pies, I love crostata because of the dough-filling ratio. In a pie usually you have thin crusted and lots of filling versus a crostata in which you have little more crust-less filling (which makes it lighter and balanced to eat. The exposed fruit or vegetables or in this case the tomatoes can get a little roasted and it adds lots of character to it.  I hope you like it. Enjoy!Heirloom-Tomatoes-Variety_Corn-Meal-Crostata_Yes,-more-please!

Tomatoe-Crostata_heirloom-tomatoes,-thyme,-great-fresh-seasonal-ingredients

Heirloom Tomato Crostata

Serves 6-8

For the Dough:

2 Cups of Unbleached All-purpose flour
¾ Cup Corn Meal (I used Larry’s Corn Meal from Boggy Creek Farm, I highly recommend to look for a good quality Organic no GMO coarse ground cornmeal it really makes the difference!)
1 teaspoon of kosher salt
1 teaspoon of sugar
2 sticks (1 cup) unsalted butter, cold and cut into small cubes.
1 tablespoon of Greek yogurt
¼ to ½ cup iced water

How to make the crust:

Measure all your ingredients, and place all the dry ingredients in a bowl and mix. Place bowl in the freezer. Meantime cut your cold butter, and Iced water ready to measure. Remove the bowl of dry ingredients from freezer and add the butter. With a pastry blender incorporate the butter and flour until the mixture resembles to a coarse meal, and the butter pieces are small like the size of a pea. Slowly add the cold water and carefully with your hands form a dough that just holds together. Do not work the dough.
Once that the dough barely holds together cut a piece of plastic wrap and place your dough. Wrap it and shape it into a disk.
Refrigerate for at least 1 hour, 4-6 is best.(see pictures )

Tomatoe-Crostata-how-to-make-the-dough-step-by-step!

How-Dough-Texture-should-look-like-for-a-Crostata,-galette-or-free-form-pie

When the dough is ready Preheat Oven at 400 F/ 205C
On a clean work surface, dusted with flour unwrap the dough let sit for a couple of minutes and roll the dough into a 20-22” round and about 1/8 “ thick. Once is rolled place it into a sheet pan lined with parchment paper.

Tomatoe-Crostata_Rolling-the-dough

For the Filling:

4 medium size heirloom tomatoes cut into ¼ inch tomato slices, from at least 2 kinds of heirloom tomatoes. I used green zebra, yellow Oaxacan, prudence and Cherokee. Use whatever is best fresh available at your farmers market.
1/2 cup cherry gold or cherry tomatoes

I used:
1/3 cup of goat cheese.
3 fresh sprigs of thyme.
Sea Salt, freshly ground pepper.
A small drizzle of Extra virgin Olive Oil.

Directions:

Spread ½ of the Goat cheese into the rolled dough, place the tomato slices, thyme, rest of the cheese, sea salt, black pepper and drizzle Extra Virgin Olive Oil all over the tomatoes. Fold the dough edges into circle creating a 2” border.

Brush the edges with egg wash and sprinkle sea salt all around the edge.

Bake at 400 F/ 200C for 35-45 minutes. Serve warm.

Heirloom-Tomato-Crostata_How-to-make-a-Crostata,-Gallete,-Free-form-savory-pie

Heirloom-Tomatoe-Crostata_Tomato-Season-Cornmealcrust

Heirloom Tomatoe Crostata

Music Pairing: Pink Martini- Hang on Little Tomatoe

Heirloom Tomato Crostata

Serves 6-8
Course bakegoods, Brunch, Lunch, Main Course, vegetarian
Cuisine vegetarian, wholesome
Prep Time 20 minutes
Cook Time 35 minutes
Total Time 55 minutes
Author Mariana McEnroe

Ingredients

For the Dough:

  • 2 Cups of Unbleached All-purpose flour
  • ¾ Cup Corn Meal I used Larry’s Corn Meal from Boggy Creek Farm, I highly recommend to look for a good quality Organic no GMO coarse ground cornmeal it makes a huge difference.
  • 1 teaspoon of kosher salt
  • 1 teaspoon of sugar
  • 2 sticks 1 cup unsalted butter, cold and cut into small cubes.
  • 1 tablespoon of Greek yogurt
  • ¼ to ½ cup iced water

For the Filling:

  • 4 medium size heirloom tomatoes cut into ¼ inch tomato slices from at least 2 kinds of heirloom tomatoes. I used green zebra, yellow Oaxacan, prudence, and Cherokee. Use whatever is best fresh available at your farmers market.
  • 1/2 cup cherry gold or cherry tomatoes
  • I used:
  • 1/3 cup of goat cheese.
  • 3 fresh sprigs of thyme.
  • Sea Salt freshly ground black pepper.
  • A small drizzle of Extra virgin Olive Oil.

Instructions

How to make the crust:

  1. Measure all your ingredients, and place all the dry ingredients in a bowl and mix. Place bowl in the freezer. Meantime cut your cold butter, and Iced water ready to measure. Remove the bowl of dry ingredients from frezzer and add the butter. With a pastry blender incorporate the butter and flour until the mixture resembles a coarse meal, and the butter pieces are small like the size of a pea. Slowly add the cold water and carefully with your hands form a dough that just holds together. Do not work the dough.
  2. Once that the dough barely holds together cut a piece of plastic wrap and place your dough. Wrap it and shape it into a disk.
  3. Refrigerate for at least 1 hour.

When the dough is ready Preheat Oven at 400F / 205C

  1. In clean work surface, dusted with flour unwrap the dough let sit for a couple of minutes and roll the dough into a 20-22” round and about 1/8 “ thick. Once is rolled place it into a sheet pan lined with parchment paper.

Assemble the Crostata:

  1. Spread ½ of the Goat cheese into the round rolled dough leaving a 2-3" outside border. Place the tomato slices and halves, fresh thyme, rest of the goat cheese, sea salt and add a few cranks of fresh ground black pepper. Drizzle Extra Virgin Olive Oil all over the tomatoes. Fold the dough edges into the circle, creating a 2” dough border. Brush the edges with egg wash and sprinkle some sea salt all around the edge. 

  2. Bake at 400 F/ 200C for 35-45 minutes. Serve warm.

View Post or View Comments 0

Privacy Policy Contact Us Yes, more please!