The first days of summer are arriving in Texas, and with them an incredible vegetable abundance.
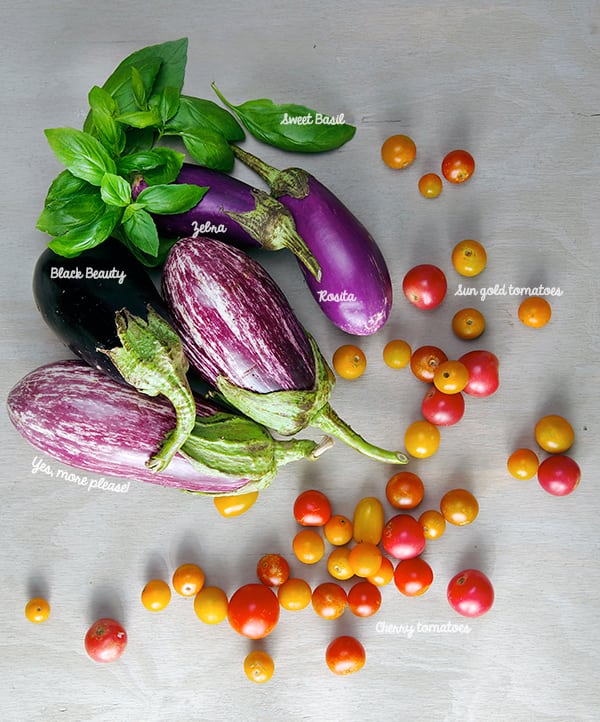
This weekend eggplants at the Farmer’s Market grabbed my attention in such a way that I bought too many!… That’s the the way my crave of cooking works, with my eyes. I’m a very visual person and I believe good, healthy, fresh vegetables have to look good and smell good. Being visually inspired at the farmers market helps me create and translate my cravings into recipes. When I saw these eggplants I immediately thought of eggplant parmigiana. I love eggplant parmigiana, although to be honest sometimes the delicate eggplant flavor gets lost in the breading, frying , melted cheese, and marinara sauce. Don’t get me wrong, I love all these components, but maybe in Autumn or winter…
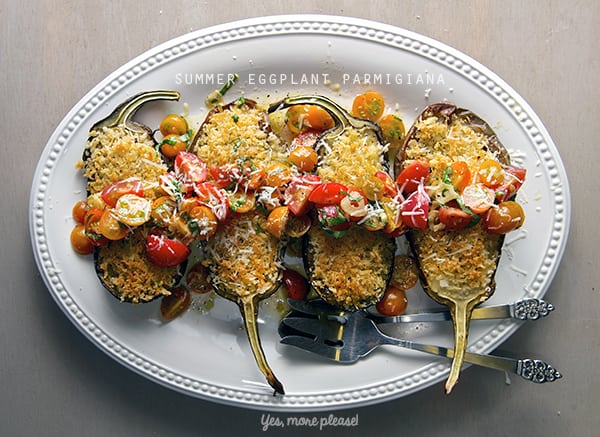
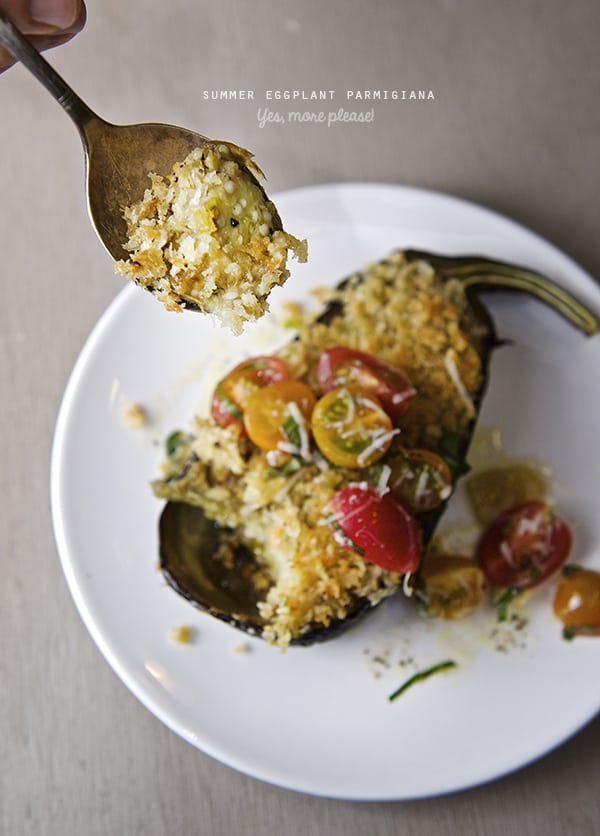
With this memory of flavors in mind, I started to think of how could I transform a classic into a more simple and Summery version. I came up with this Summery eggplant parmigiana recipe. A lighter version in which instead of breading and frying the eggplant I cut them lengthwise and roast them in the oven. Eggplants when roasted this way, develop a buttery flavor almost like a vegetable custard contained in it’s own skin. That’s why Im skipping the melted cheese on these recipe. Believe me you have to try them, you will be enjoying the delicate eggplant flavor. To add texture and contrast to this custard I added a combination of panko bread crumbs and Parmigiano-Reggiano cheese. If you have a gluten allergy these can easily be replaced with ground pecans,or almonds instead of panko breadcrumbs which it will be equally or even more delicious.
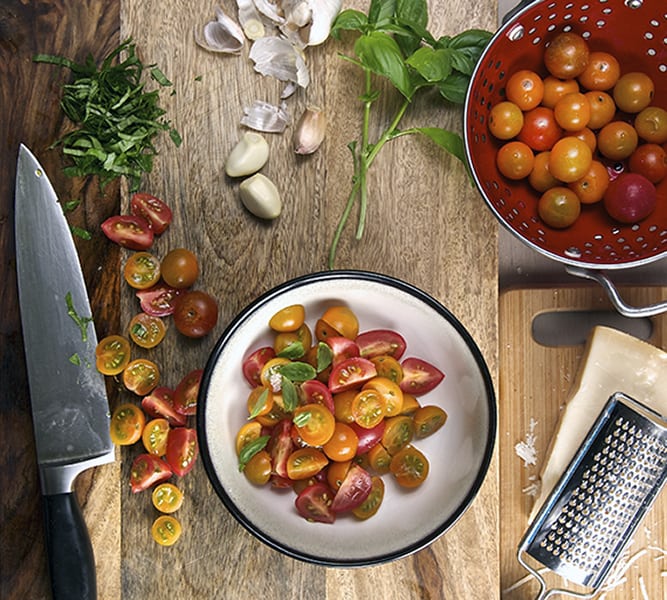
Instead of the warm marinara sauce, I made a warm tomato salad with a garlic oil dressing combining the first sweetest cherry and sun gold tomatoes of the tomato season. These little tomato marbles are incredibly flavorful, I never feel like cook them I almost eat them like grapes, as a snack in the afternoon. That’s one of the reasons this simple warm salad enhance their great qualities.
This summer eggplant parmigiana version will warm your heart. It is easy to make, light, and comforting.
Welcome to the summer, and enjoy!
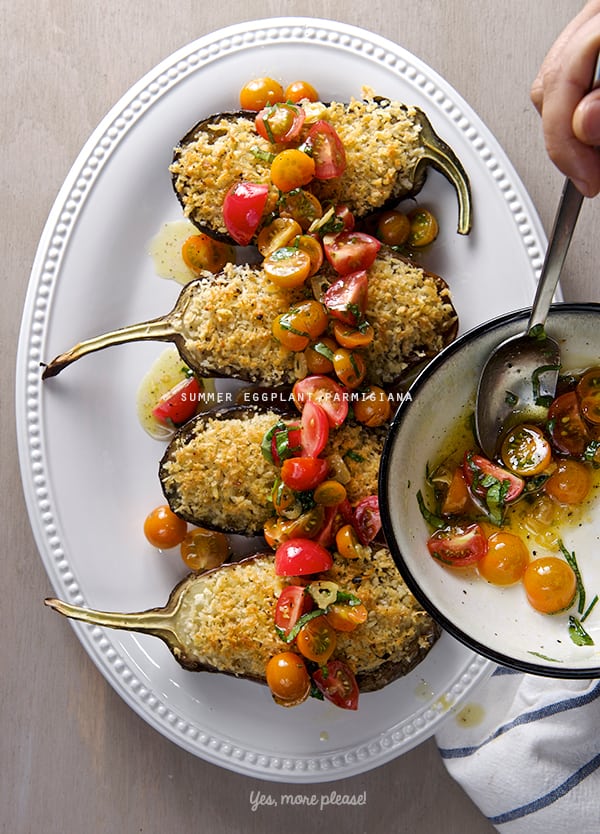
Summer Eggplant Parmigiana
Serves 4
2 large eggplants
1-2 glugs of grape seed oil
sea salt and Black pepper
For the topping:
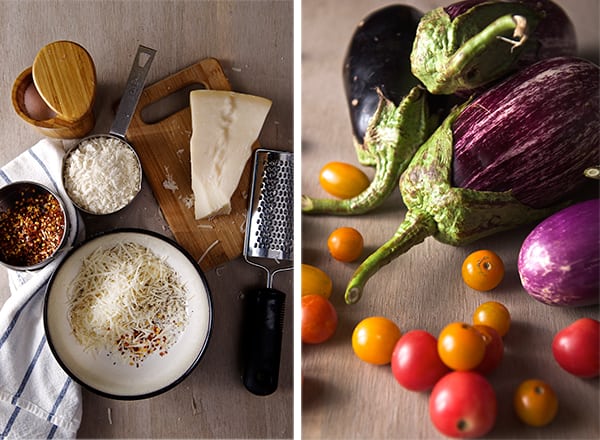
1 cup panko bread crumbs
½ cup Parmigiano-Reggiano cheese grated.
1/4 teaspoon salt
2-3 teaspoons of extra virgin olive oil.
fresh cracked black pepper to taste.
A pinch of red flake peppers (optional)
For the warm tomato salad:
2 cups of a combination of cherry and sun gold tomatoes.
2-3 sprigs of fresh Basil
3 tablespoons Extra Virgin Olive Oil
2 large garlic cloves thinly sliced
3 tablespoons Seasoned Rice Vinegar.
(Rice Vinegar goes so well with the sweetness of the tomatoes. Since this little tomatoes are so sweet, you need to balance the acidity , and the seasoned rice vinegar pairs fantastic , bringing all the notes together, sweet, salty and tangy.)
salt and fresh black pepper to taste.
Preparation method:
1. Preheat the oven 450F/ 230C
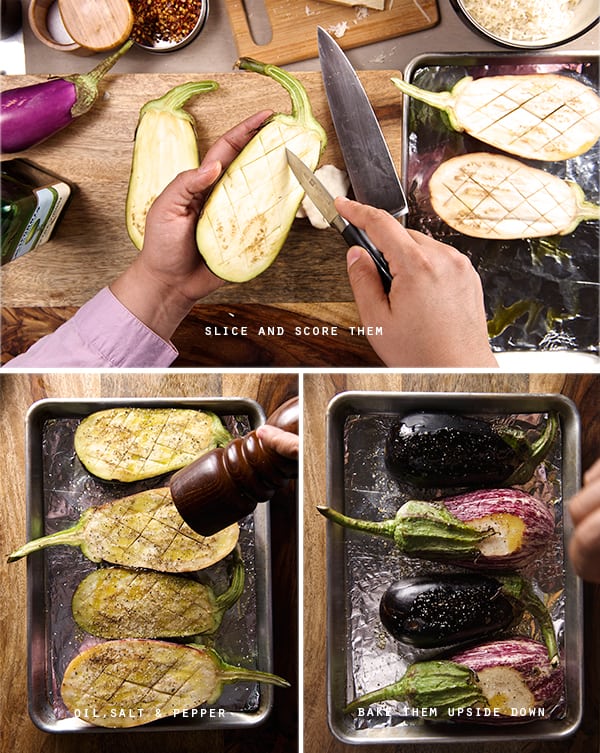
2. Cut the eggplants length wise and score them with a pairing knife.Rub the eggplants with some olive oil or grape seed oil, season them with salt and fresh cracked black pepper.
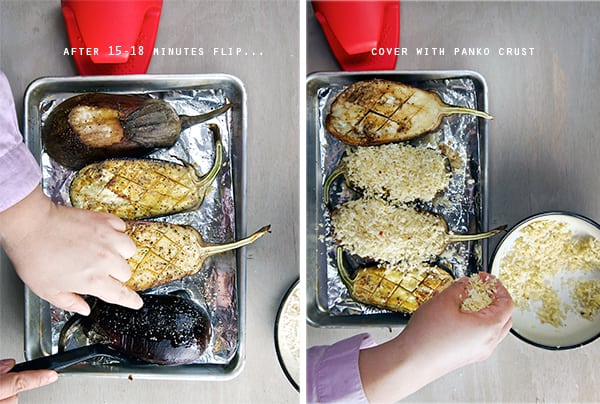
3. Place the eggplants on a baking sheet and roast them for about 15-18 minutes.
4. Mean time, in a bowl combine the Panko bread crumbs, grated Parmigiano-Reggiano cheese, red pepper flakes, olive oil, salt and pepper until well combined and the mixture resembles moist sand. Set a side.
5. Start making the warm tomato salad, by cutting the cherry and sun gold tomatoes into halves or quarters depending on size. Chifonade the basil. Combine them in a bowl, toss them with the rice vinegar, salt and pepper.
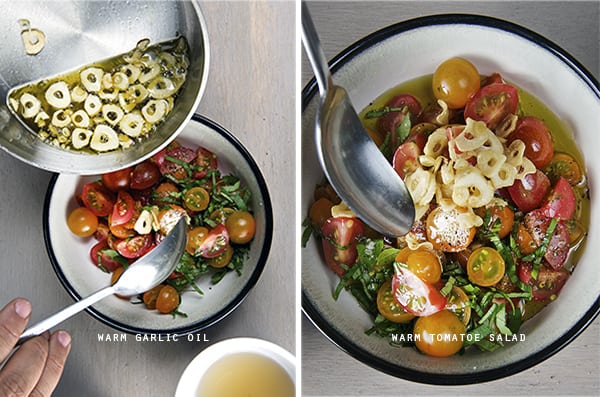
6. In a small pot add the extra virgin olive oil along with the thinly sliced garlic and using the lowest possible heat on the stove, start warming up the oil. This will infuse the oil with the garlic and the thin slices of garlics will start turning golden brown.
7. Check your Eggplant, take out of the oven top each half with a generous amount of the panko mixture. Place them into the oven for another 5 minutes until the topping is golden brown.
8. Mean time check your garlic and olive oil. Once the eggplants come out of the oven, remove the warm oil from the stove and add this to the cherry and sun gold tomato salad toss well.
The warm oil will gently warm up the tomatoes,the garlic chips will add flavor and aroma to the tomato salad it is a fantastic!

9. Once your eggplants are ready out of the oven transfer them onto a platter, and top with the warm tomato salad, grate a little extra Parmigiano-Reggiano and fresh basil. Enjoy!
Welcome the Summer!
Music Pairing: Ella Fitzgerald & Louis Armstrong – Summertime
http://youtu.be/lnXLVTi_m_M


