The state of Yucatán is located in Southeast Mexico right at the tip of a peninsula and is mostly tropical forest. It is the location of important ancient Mayan cities like Chichen Itza, Izamal, Motul, Mayapan, Ek’Balam and Ichcaanzihoo, which now make up the modern city of Mérida. A tropical forest is filled with an abundance of living species including: Toucans, Guacamayas, Papagayos, Garzas, hummingbirds, serpents, crocodiles, wild boar, porcupines, changos iguanas, squirrels, armadillos, reindeer, and jaguars. All kinds of insects inhabit the forest from ants and wild bees to lightning bugs and mosquitos, all living together in a beautiful fertile land.
Nine thousand years ago this was the land that the Mayan choose to develop their civilization. A paradise of abundance of colors, nature, spices, and rainforest; all your senses are awaken in this land.
It is in the Yucatán where an important culinary fusion took place after the Spanish conquest: Spanish and Mayan cuisine. It is a belief that the people of Yucatán were the first Native Americans that tried the pork meat.
This fusion of cuisines gave origin to a New World cuisine, the Mestizo. These dishes which derive part of their origin from prehispanic ingredients, condiments and techniques were fused with the new ingredients from the old continent. Items like pork, spices, citrus, and different cooking techniques came together to create this New World cuisine.
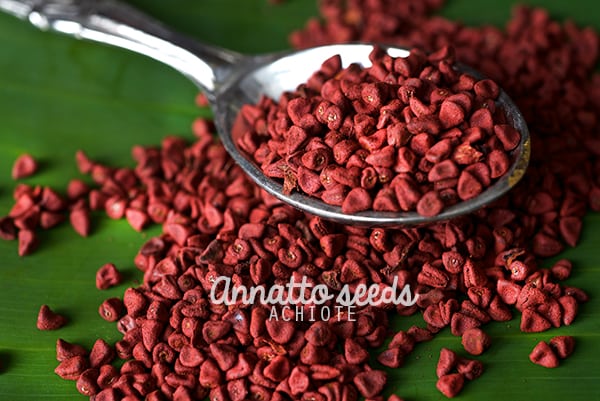
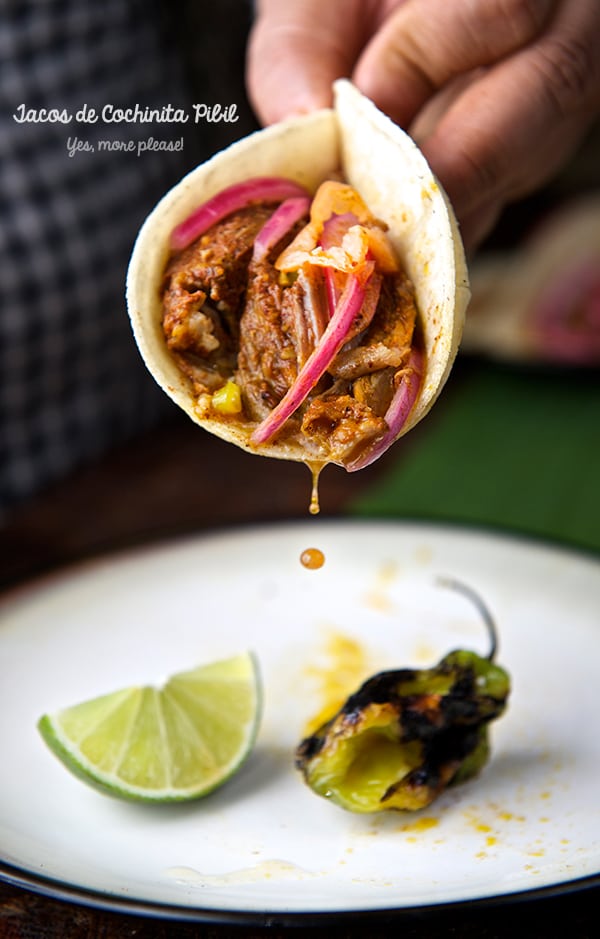
Cochinita Pibil is one of the most renowned dishes in Yucatán. Its name comes from Cochinita = suckling pig or small pig, and Pibil in Mayan means “under the ground” referring to the cooking method that the Mayan developed. It is one of the dishes that I like the most from that region. It is really amusing and fun to prepare. There are two ingredients in this recipe that give character and its particular flavor: Annatto seeds and Bitter oranges. You might have to go on an adventure to find them, although now its easier than ever with all the specialized condiment stores and supermarkets with special sections for ethnic foods. Annatto seeds grow on the tropical forest of a little tree that gives a heart shaped fruit with spiky hairs.When the fruit is fully mature, it splits open revealing the beautiful red seeds. Besides having a culinary purpose, annatto seeds are also used for pigments and food coloring.
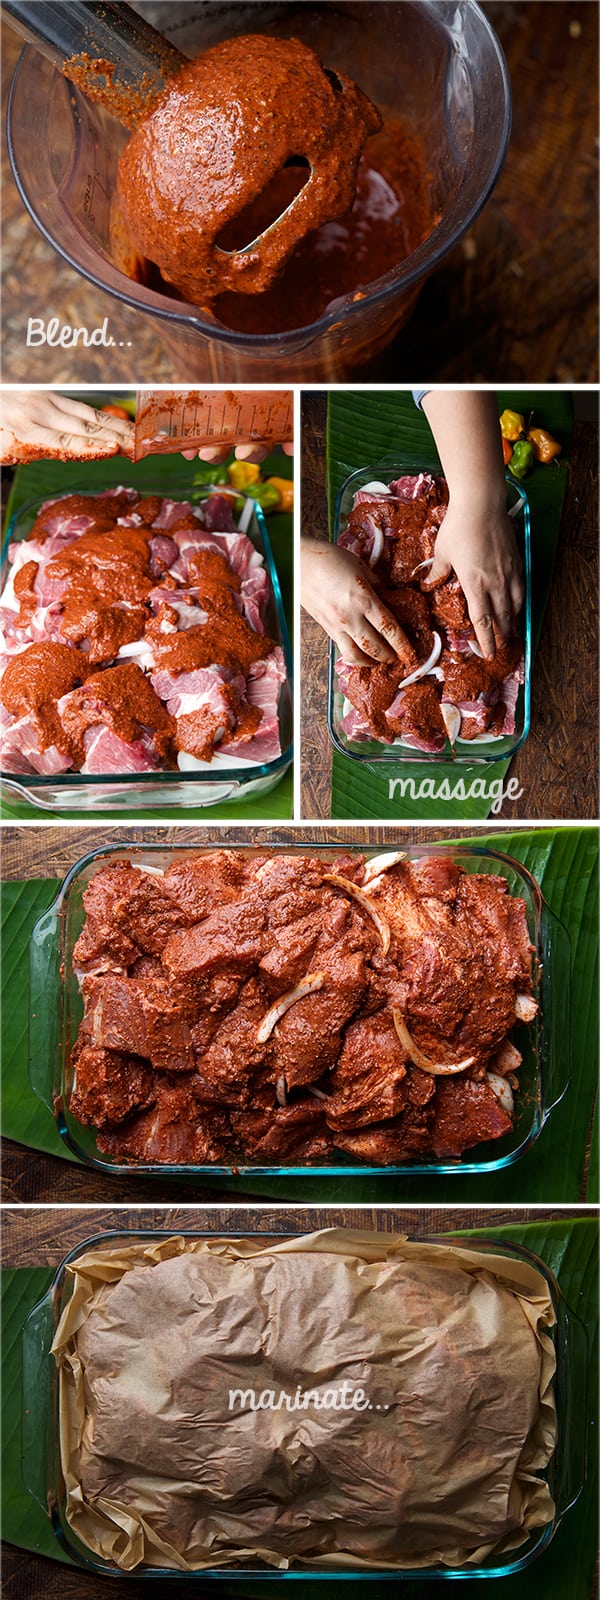
Cochinita Pibil is such a rewarding dish. A little love and effort go a long way. First, you work on a rub-marinade for the pork, marinate it overnight or for as long as twenty-four hours. Then make a pork bundle of banana leaves and bake it in the oven or in an outdoor charcoal pit for 3.5 to 4 hours. If you wish you can go all the way and bury it in the ground which is the traditional method. My recipe is more adapted for house or grill cooking. If you want to go with the traditional method send me an e-mail along with and invitation and I will help you cook it! : )
The best way to describe this Cochinita Pibil is addictive. The tangy oranges, the floral annatto seeds and the two types of pepper corns marry the rich pork flavor transforming the pork into the best succulent pork with an extraordinary flavor and tender texture. The pork remains moist from the Banana leaves pocket that keep the pork bundle warm and juicy. The banana leaves perfume the dish giving it an intangible unique quality.
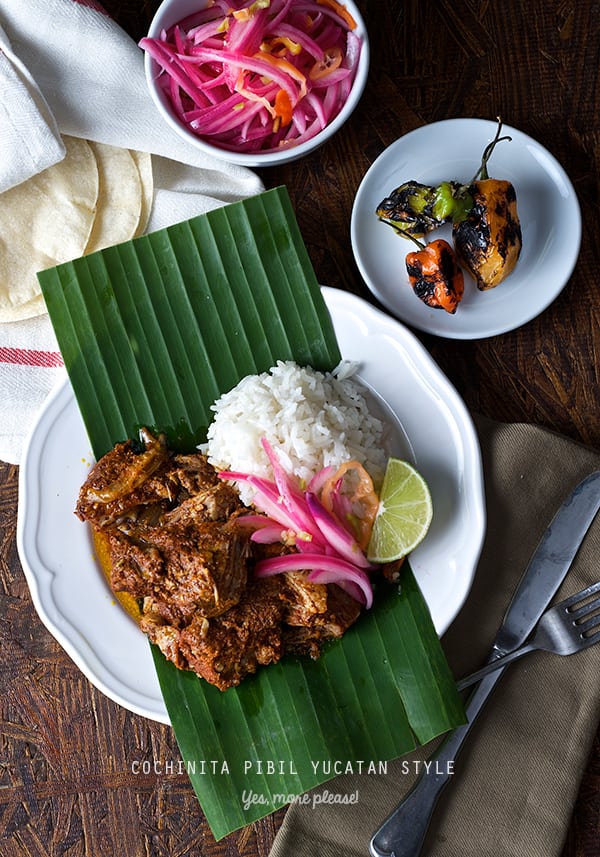
Cochinita Pibil is traditionally served with garlic rice and black beans, in tacos, or tortas.
Other delicious dish preparations could be as a stuffing for enchiladas, poblano chiles or empanadas. For me I think is best on its own, with corn tortillas on the side, hand made if possible.
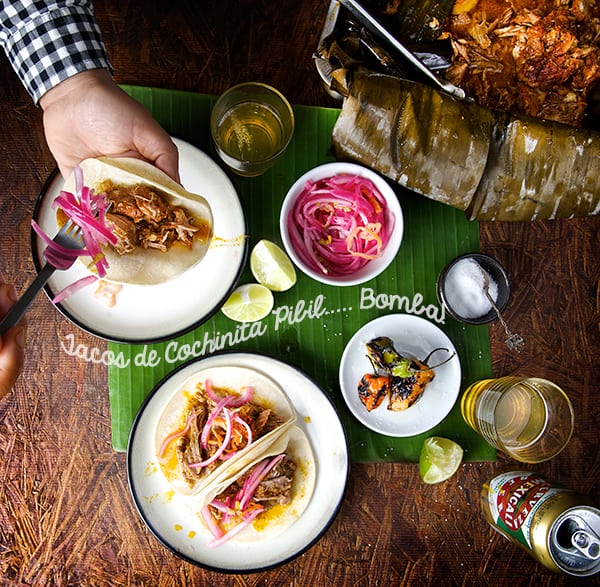
Quick pickled red onions with fresh habanero peppers and a grilled habanero pepper sauce on the side, a cold Mexican pilsner beer are Cochinita Pibil’s best companions… the way its served in Yucatán, the best juicy pork on the planet!
I know you’re gonna love this recipe as much as I do…. ask Ian!…Enjoy!
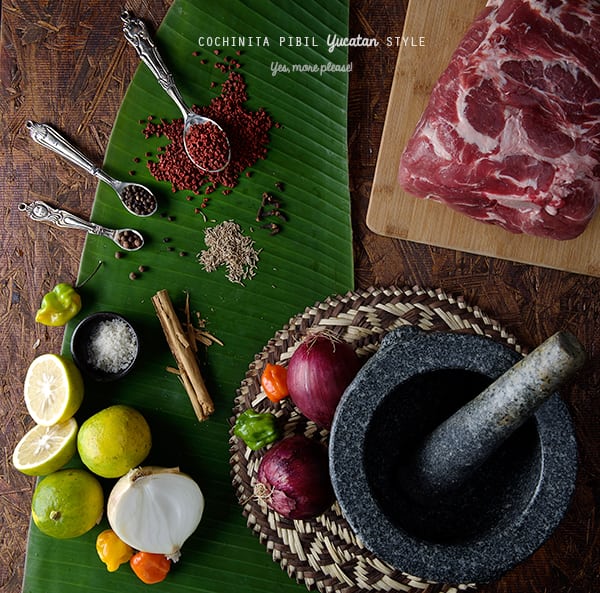
Cochinita Pibil Yucatan Style
Serves 6 Yucatecos, and 6-8 pork taco lovers.
8lbs.Pork butt or pork shoulder cut into large 3”x 4”cubes approx.
Pork butt tends to shrink a lot because of its fat content, always calculate at least 2 or 3 more pounds of what you think you will need. In this recipe 8 pounds, yields about 5-6 net pounds of pork meat.
2 white onions sliced on thin wedges.
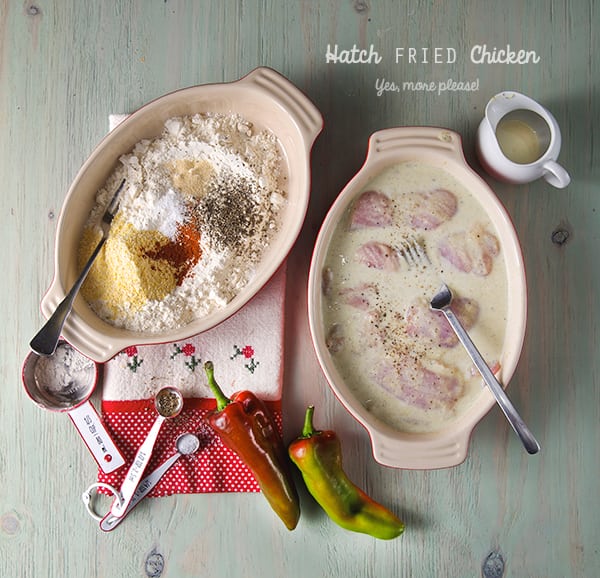
For the marinade:
6 tablespoons annatto seeds*
1 tablespoon whole black pepper
8-10 whole All spice peppercorns (upon size small=10 medium-large=8)
6 whole cloves
2 teaspoons cumin seeds
2″ stick Mexican cinnamon
1/2 teaspoon Mexican oregano
12 garlic cloves
1 Habanero chile de-seeded
1 tablespoon sea salt.
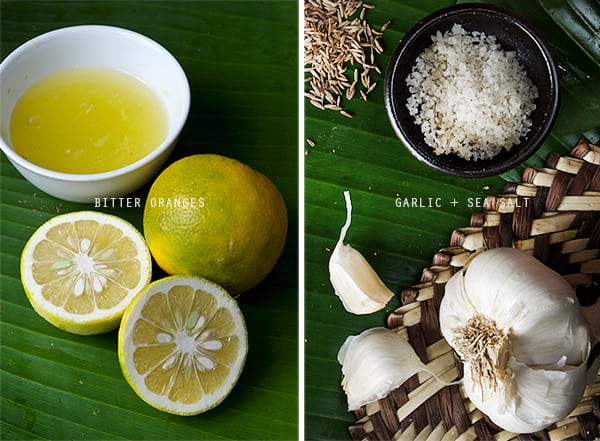
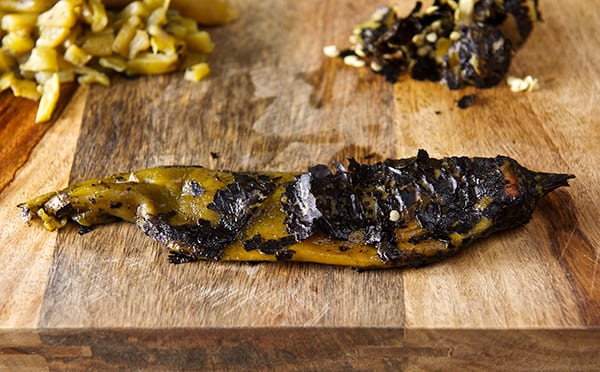
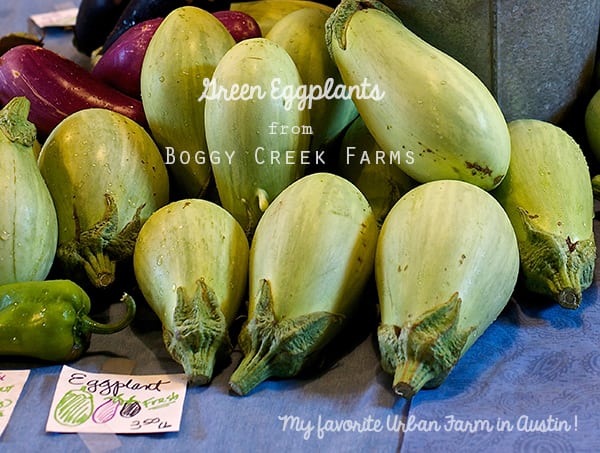
1- 1/2 cup of bitter oranges juice. Bitter oranges have a sour bitter flavor, highly acidic which complement and tenderize the meat.How to recognize them?
They have green and yellow rough skins, picture above.
(If you can’t find this kind of oranges, substitute for 1 cup orange juice and 1/2 cup white vinegar)
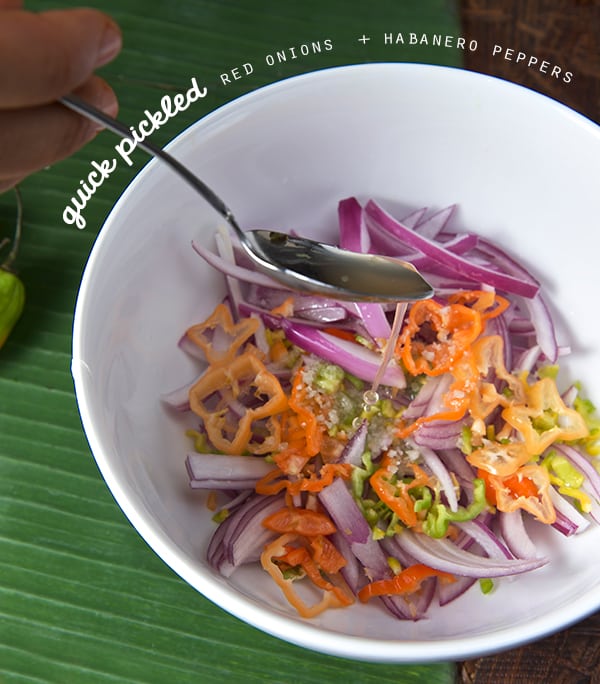
For the quick pickled red Onions:
2 medium red onions, sliced in thin wedges
4-5 Habanero peppers, thinly sliced or diced.
Juice of 1 lime
1/2 cup white or pineapple vinegar
1 teaspoon kosher salt
You will need the following to cook your Cochinita Pibil:
5-6 Banana Leaves
Heavy duty Foil paper
16″x13″ Ennamel, clay or stainless steel roasting pan
Note:
If you cannot get annatto seeds, you can substitute for achiote paste. It is not the same flavor, I really prefer to go with the seeds the flavor and the aroma is so much better. If you use the paste, use 3/4 of the paste bar, and use only 1/2 the amount of salt on the recipe.
The same with the rest of the spices, If you can get them whole the spices taste so much better. Why? Well once the spices are grounded the oils inside the seeds that give the aroma and flavor, start to oxidize,losing their intensity of flavor and aroma.
Preparation Method:
1. Cut the pork into 3”x 4” cubes, set aside.
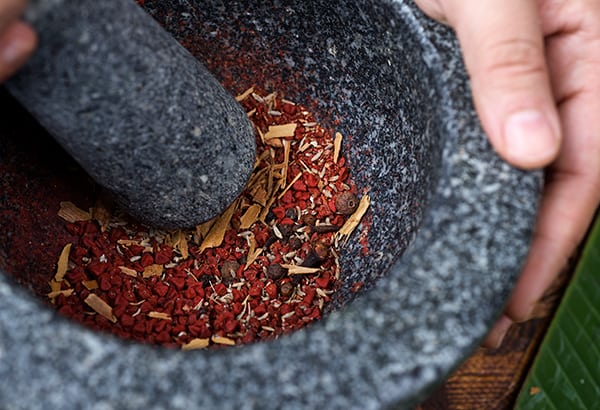
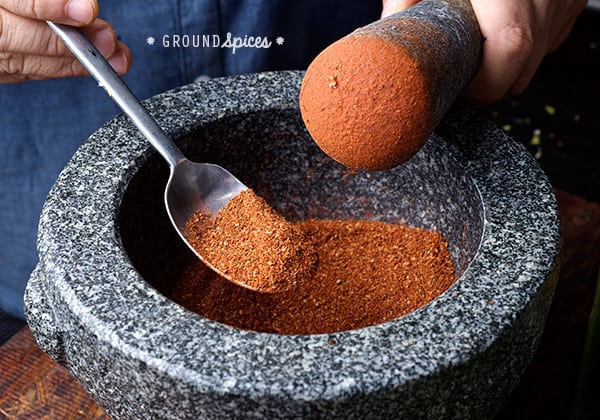
2. Grind the annatto seeds, black pepper, allspice, cinnamon, cloves, cumin seeds, oregano until powdered. You can use a stone mortar to pulverize the seeds or a coffee grinder. I do recommend fresh spices whole rather than powdered because the whole seeds retain much of their oils and are more fragrant. Since we are making all by scratch, it is worth the extra effort!
I do prefer to use a mortar, is more fun and the aroma of the spices while you grind them is amazing… if you are not so romantic like me..hehehe a coffee grinder will work, just remember that once you use it for spices, just use it for that purpose.
3. In a blender combine the garlic cloves, Habanero chiles, sea salt and orange juice. Blend.
4. In a glass container place the pork and all the blended marinade, massage the pork pieces until well covered. Cover with parchment paper and plastic wrap. Refrigerate, let it rest over night.
5. Next day remove your pork out of the fridge while you prepare the pan. You want the marinated pork not to be refrigerator cold when you place it in the oven. This allows the meat to cook more evenly and it will be more tender.
6. Move your oven rack to the lowest position in your oven. Preheat the oven at 325 F/160C Place the banana leaves inside the oven for 5-7 minutes.Afterwards they should be a little warm which will make them more pliable. With scissors cut off the banana leaves hard middle rib edge.
7. In a large roasting pan line the banana leaves in both directions, overlapping half way the leaves and placing them cross ways until you can not longer see the bottom of the pan. Place some banana leaves pieces on each corner to ensure there is no leaks.Leave the over hanging leaves, these will help us to make the bundle.
8. On top of the banana leaves place a layer of thin onion wedges and the marinated pork meat in the roasting pan. Add the marinate juices and cover with the over hanging banana leaf. You want to make a pork bundle. Make sure is all fully wrapped up. Take a look at the following images for visual directions.
9. Cover the entire pan bundle with aluminum foil. Tighten the edges fully to seal and contain the heat and moisture. Place the pot into the oven (or the just warm charcoal embers outside in a pit or carefully monitored grill) for 2.30 to 3.30 hours.
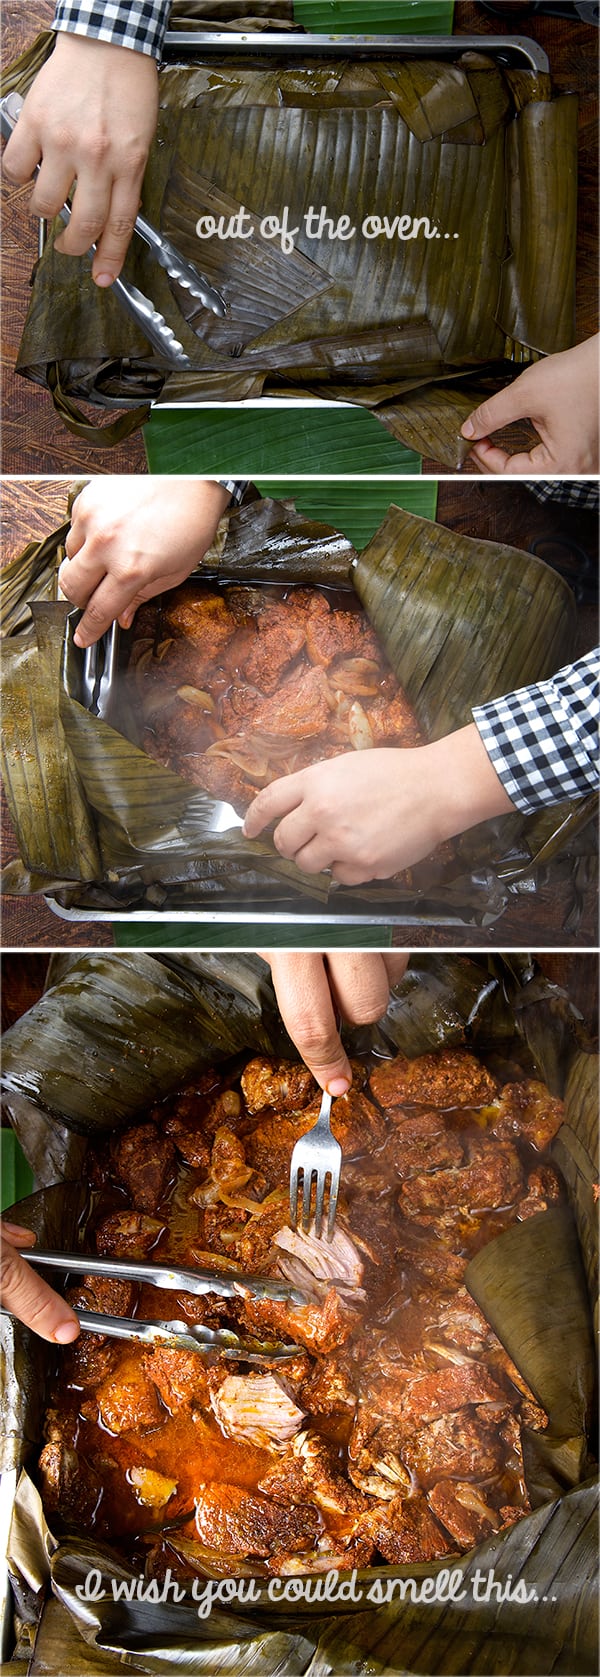
10. Pull the cochinita out of the oven and before uncovering it, let it rest for at least 30 minutes.
11. While your pork is resting, prepare your pickled onions by thinly slicing red onions and habbanero peppers. Slightly warm up the vinegar, and add the salt and lime juice to the onions. cover and leave them at room temperature, until the Cochinita is ready. The onions will became hot pink, and the vinegar will have the flavor of the spicy habaneros. Set up the table, get yourself a nice cold Mexican beer to drink.
12.Unveil the Cochinita Pibil and with the help of two forks shreed the pork into smaller pieces, let the pork absorb those juices from the pan. The pork should be fork tender, juicy, moist…fragrant! the smell will fill your kitchen. You will almost hear the toucan screaming and the Mayan Jaguars slinking around behind you (watch out)… Time to eat!… Enjoy!
This Cochinita Pibil is best served with a side of white fluffy garlic rice, and black beans. Tacos are always a great option. corn or flour, what ever rocks your boat. Enjoy!
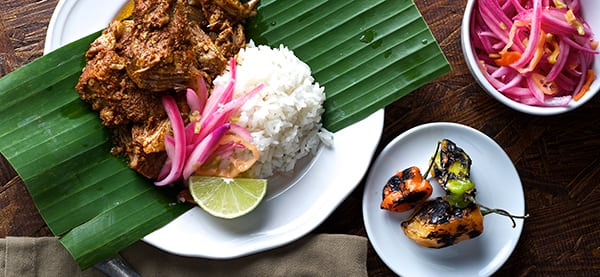
Serve with Rice…or
Make the most amazing Cochinita Pibil Tacos!
Viva Mexico!…Enjoy!
Bomba!
Con esta cara de lec
y
esta figura de pec
te juro preciosa eshpet
que te puedo hacer jesmec!…
Mare, mare!
Music Pairing: La Maldita Vecindad – Mare

Cochinita Pibil | Pulled Pork Yucatan Style
Ingredients
- 8lbs. Pork butt or pork shoulder, cut into large 3”x 4”cubes. Pork butt tends to shrink a lot because of its fat content, always calculate at least 2 or 3 more pounds of what you think you will need. In this recipe 8 pounds, yields about 5-6 net pounds of pork meat.
- 2 medium white onions, sliced on thin wedges
For the marinade:
- 6 tablespoons annatto seeds
- 1 tablespoon whole black pepper
- 8-10 whole all spice peppercons, aka pimienta gorda, upon s small=10 medium-large=8
- 8 whole cloves
- 1 tablespoon cumin seeds
- 2" stick Mexican Cinnamon
- 12 large garlic cloves
- 1 habanero chiles, de-seeded
- 1-1/2 tablespoon sea salt
- 1-1/2 cups bitter oranges juice, Bitter oranges have a sour bitter flavor, highly acidic which complement and tenderize the meat. If you can’t find this kind of oranges, substitute for 1 cup orange juice and 1/2 cup white vinegar.
For the Quick Pickled Onions:
- 2 medium red onions, sliced in thin wedges
- 3-4 Habanero peppers, thinly sliced or diced.
- 1 Lime, the juice
- 1/2 cup white vinegar or pineapple vinegar
- 1 teaspoon kosher salt
You will need the following to cook your Cochinita Pibil in:
- 5-6 large Banana Leaves
- Heavy duty foil paper
- 16"x 13" Ennamel, clay or stainless steel roasting pan
Instructions
-
1. Cut the pork into 3”x 3” cubes, set aside.
2. Grind the annatto seeds, black pepper, allspice, cinnamon, cloves, cumin seeds, oregano until powdered. You can use a stone mortar to pulverize the seeds or a coffee grinder. I do recommend fresh spices whole rather than powdered because the whole seeds retain much of their oils and are more fragrant. Since we are making all by scratch, it is worth the extra effort!
I do prefer to use a mortar, is more fun and the aroma of the spices while you grind them is amazing… if you are not so romantic like me..hehehe a coffee grinder will work, just remember that once you use it for spices, just use it for that purpose.
3. In a blender combine the garlic cloves, Habanero chiles, sea salt and orange juice. Blend.
4. In a glass container place the pork and all the blended marinade, massage the pork pieces until well covered. Cover with parchment paper and plastic wrap. Refrigerate, let it rest over night.
5. Next day remove your pork out of the fridge while you prepare the pan. You want the marinated pork not to be refrigerator cold when you place it in the oven. This allows the meat to cook more evenly and it will be more tender.
6. Move your oven rack to the lowest position in your oven. Preheat the oven at 325 F/160C Place the banana leaves inside the oven for 5-7 minutes.Afterwards they should be a little warm which will make them more pliable. With scissors cut off the banana leaves hard middle rib edge.
7. In a large roasting pan line the banana leaves in both directions, overlapping half way the leaves and placing them cross ways until you can not longer see the bottom of the pan. Place some banana leaves pieces on each corner to ensure there is no leaks.Leave the over hanging leaves, these will help us to make the bundle.
8. On top of the banana leaves place a layer of thin onion wedges and the marinated pork meat in the roasting pan. Add the marinate juices and cover with the over hanging banana leaf. You want to make a pork bundle. Make sure is all fully wrapped up. Take a look at the following images for visual directions.
9. Cover the entire pan bundle with aluminum foil. Tighten the edges fully to seal and contain the heat and moisture. Place the pot into the oven (or the just warm charcoal embers outside in a pit or carefully monitored grill) for 3.5 to 4 hours.
10. Pull the cochinita out of the oven and before uncovering it, let it rest for at least 30 minutes.
11. While your pork is resting, prepare your pickled onions by thinly slicing red onions and habbanero peppers. Slightly warm up the vinegar, and add the salt and lime juice to the onions. cover and leave them at room temperature, until the Cochinita is ready. The onions will became hot pink, and the vinegar will have the flavor of the spicy habaneros. Set up the table, get yourself a nice cold Mexican beer to drink.
12. Unveil the Cochinita Pibil and with the help of two forks shreed the pork into smaller pieces, let the pork absorb those juices from the pan. The pork should be fork tender, juicy, moist…fragrant! the smell will fill your kitchen. You will almost hear the toucan screaming and the Mayan Jaguars slinking around behind you (watch out)… Time to eat!… Enjoy!
This Cochinita Pibil is best served with a side of white fluffy garlic rice, and black beans. Tacos are always a great option. corn or flour, what ever rocks your boat. Enjoy!
Recipe Notes


