Entrée

Grilled Seafood Paella Valenciana

Grilled-Sea-food-Paella-Valenciana_Yes,-more-please!

Valencia is one of the most beautiful cities in Spain. Great architecture, culture, and cuisine gather together in this little gem of a city that faces the Balearic sea.
Throughout history Valencia’s splendid location attracted cultures contributing to this fantastic region character. Moors brought new ingredients to the region like rice, sugar cane, oranges, almonds, and spices. The Romans brought the utensils to cook with. This kind of influences, shaped one of the most iconic Spanish dishes, Paella Valenciana. The original Valencian Paella recipe consists of a combination of chicken, rabbit, rice, green vegetables, artichokes, peppers, bomba rice, white runner beans, saffron, fresh rosemary, sweet paprika, garlic and lemon. It sounds divine, right? And also a little far off from the Paella Mixta we know in America.
I had the opportunity to travel around Spain with my Grandma Ana.  One of the cities we visited was Valencia. We had a blast, and of course every time I tried some remarkable food I wanted to know the origin of the dish. I love to hear about different stories about what people believe and their traditions. For me, this is an enriching way to know a culture; by their stomachs! So I took this info at face value and what I discovered is that Valencianos prefer to make their Paella with one category of meat at a time and not mixing them. Hey, since they are the Paella creators, I will go with their advice!,… And it make sense, seafood ingredients available in the near coast, they use shrimp, langoustines, mussels, clams, and squid. Areas more inland use land creatures, rabbit, chicken. What ever freshest available always taste best.

Throughout Spain, other variations have been adapted for inland areas creating the infamous Paella Mixta which combines a variety of white meats, seafood, sausage and chorizo. But, just remember that Valencians are very proud of their dish and they do not recognize this Paella Mixta as Original Paella Valenciana. So watch out what you call Paella Valenciana unless you want to get in to a heated argument.

Grilled-Sea-food-Paella-Valenciana_summer-grilling_Yes,-more-please!

Every country has their nationalistic pride when it comes to Cuisine, and in this case there is no exception since Paella is Spain National dish.  Every culture has their memories linked around a particular dish, ingredient or preparation that was carried by generations, runs in the family, or evokes a moment in time. And It is admirable when people stand by their beliefs and roots. I do respect that.

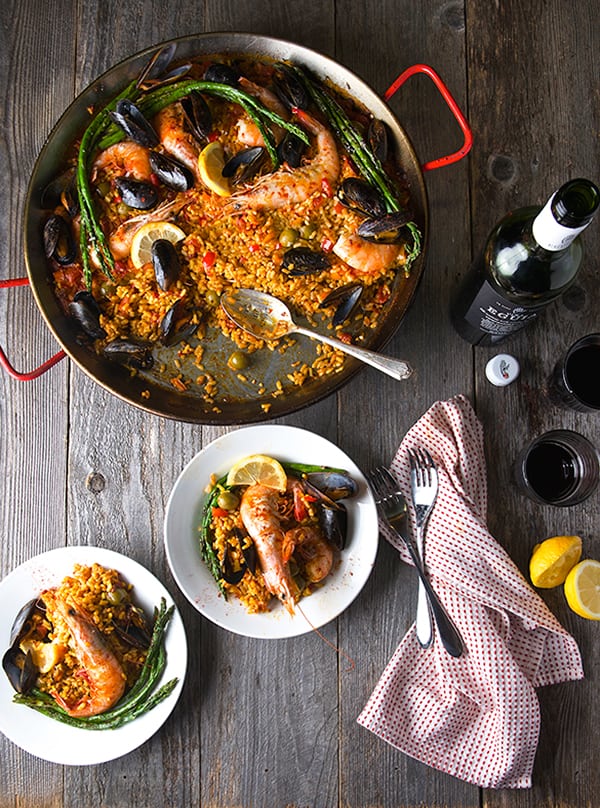
I hope knowing all these facts makes you less intimidated, after all they say knowledge is power. I would say in this case, knowledge is inspiration. I truly believe that everybody has a little of a cook inside. I would love to encourage you to be comfortable  with the idea  of cooking and enjoying the process. Have some red wine, Rioja if possible, and music on the side to let  that cook come out. Whether you are preparing the best butter on a toast or a dish with a lot of history and tradition like this Seafood Paella Valenciana, just have fun and be curious about it.

Grilled-Sea-food-Paella-Valenciana_ready-to-serve_Yes,-more-please!

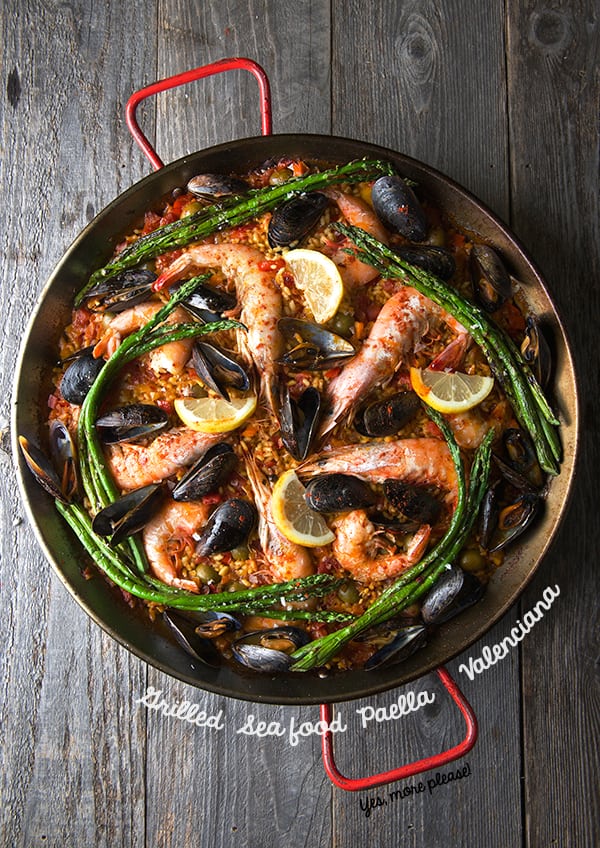
Honoring the authentic Paella Valenciana, I made it strictly with seafood. We live in Texas, and have some access to great shrimp from the gulf, beautiful fresh rosemary in abundance and delicious Spring vegetables, and Texans know all the whereabouts to build a wood fire and that’s one of the key ingredient on the Valencian Paella, since it was created by people on the mountain.

I took the main components of the traditional recipe and added Spring vegetables like asparagus and green peas. I truly wanted to add some artichokes but I could not find good looking ones for some reason; anyway If you find some artichokes it would be a divine addition, if not, no biggy,  it is a delicious recipe any way. This seafood Paella Valenciana can be done in about 2 hours total including the prepping. It is definitely a dish that makes it perfect for small to medium gatherings. It is a fun crowd pleaser. With this fabulous weather, cooking outside and grilling this Spring or Summer its one of the best things to do.

Hey! Get out your inner cook and just cook!

Olé! Guapo…Let’s start!…here comes the recipe…

Continue Reading →

View Post or View Comments 3

Rancho Gordo Corona Beans with Spicy Cilantro Pesto

Rancho-Gordo-Corona-Beans-and-Spicy--Cilantro-Peanut-Pesto_Yes,-more-please!

Beans are the perfect food to cook during this seasonal transition. You know, those days when the weather shows a great deal of indecisiveness . Cold-warm-windy-rain-sunny all in one week. What to cook? Beans. Whether you add them to vegetable soups, tacos or salads they are always there for you as a quick route to make great meals. The trick to it is a little simple plan, a slow cooker, and patience (my little grasshopper).
Beans don’t like to be rushed. They like to soak over night,( preferably) and they like to cook at a steady low, low simmer almost like one bubble per 3 seconds. They like to be cooked in plenty of water lightly seasoned. Usually a piece of onion and one dry or fresh chile is all they need. Salt should always be added at last once the beans are cooked and are soft enough to absorb the salty flavor. They also love clay pots, slow cookers, cast iron pots, Dutch ovens, or any heavy pot that retains even heat and keeps them well snuggled.
As you can see once you have these four factors down it is extremely easy to make a great batch of beans. I always make a big pot of beans and freeze small batches. I can’t tell you enough how much of a life saver this is. Even if you forget to take them out of the freezer, It will take 10-15 minutes to defrost in a microwave or a conventional pot with a lid on. Frozen beans keep for up to four months. I make a batch every month and a half and it works great for the two of us.

Rancho-gordo_Cororna-Beans_Yes,-more-please!

Now let’s talk about what kind of beans to cook. For those who have not yet read our “about” page, Beans are my favorite grain and my ultimate last supper. Being from Mexico, beans are a huge part of our everyday diet. So, I am always looking for the ultimate bean, fresh and of good quality, that cooks evenly and has great flavor. I finally found it a few years ago when In the search for a bean that tasted like the ones home, I ran into Rancho Gordo. The first time I saw this brand was at wholefoods. Unfortunately they do not carry them any longer, but the good news is that you can buy them online. Rancho Gordo is not only a brand, Steve Sando owner, and grower is dedicated to find and save heirloom bean grains. He is part of Seed Saver Exchange where he rescues and grows beans and grains of the Americas.
He is recuperating our American diet roots. From North America, Mexico, Central and South America. Me being Mexican, knowing any one with this kind of mission goes straight to my heart.
My favorite beans Ayocote negro, Mayocoba, Midnightblack, Rosa de Castilla, Royal Corona uff etc…
If you are a bean fan like me, you can enroll into the Rancho Gordo Bean Club. Yes, you read that correctly, they will send you an amazing bean allowance 4 times a year. Also, you can enjoy some of the rare bean varieties. For more details click here: Rancho Gordo website

Rancho-Gordo-Corona-Beans-and-Cilantro-Pesto_Beans

As you can read I’m a 100% bean lover.
I hope you enjoy this recipe these Corona beans are a special type of bean, they are huge almost the size of a prune. In flavor they are buttery, potatoey and very starchy. These beans are easy to pair with any meal or a satisfying main dish for a meatless Monday. This bean does require the pre soaking overnight, it’s a must so plan ahead. Once they have been soaked, they cook more evenly and plump up.
I hope you like the recipe, which I feel is more like a pairing since it is so effortless.
Get into the bean club soon! Enjoy!

Rancho-Gordo-Corona-Beans-with-Spicy-Cilantro-Pesto_ingredients

For the recipe you will need…

Continue Reading →

View Post or View Comments 6

Chipotle Albondigas-Meatball Soup

Chipotle-Albondigas-Meatball-Soup_Yes,-more-pelase!

Praise the Lord for Albondigas and this 34F weather! I think this combination is a match made in heaven. Imagine a piping hot tomato smokey spicy broth with turkey-rice meatballs swimming among little pieces of carrot, sweet potatoes, potatoes, zucchini, kale and chayotes. Serve it with Sour Cream or Mexican crema, corn tortillas, and a squeeze of fresh lime juice.

This is the type of Mexican comfort soup dear to my heart. The classic albondigas are made with ground beef /ground chuck, which give the broth a richer flavor. I was craving a lighter comfort soup and I made them with ground turkey and chicken broth. The result is a soup which is light as a feather. Rice is added to the meatballs giving them a soft tender crumb along with egg and some finely chopped onions and spices. I used some of my favorite vegetable soup veggies and added some kale to win extra green points…

Feel free to use any vegetables of your affection. Not fan of kale? Spinach will work. The white rice can be interchanged with quinoa, farro, or brown rice to add extra nutrition and flavor. But beside the fantastic meatball action, I believe everything is about the broth in this soup. A combination of crushed tomatoes with chipotle and smokey paprika is the ticket to this fantastic soup recipe. It comes out mildly spicy; just enough to make your throat ticklish. Mmmm!

This one pot dinner soup would make you fall in love with wintery nights. If you like meatballs, vegetables and spicy broth you gonna love this Chipotle Albondigas-Meatball Soup.

Keep warm!

Chipotle-Albondigas-Soup_-main-ingredients

Chipotle-Albondigas-Meatball-Soup_ingredients_Yes,-more-please!

For the recipe you will need…

Continue Reading →

View Post or View Comments 3

Creamy Bagna Cauda & Seasonal Vegetables

Creamy-Bagna-Cauda-

Bagna Cauda, is a traditional dish from the North region of Italy, Piedmont. Bagna Cauda, literally means “Hot bath”. It is served in a similar way as fondue. It is a warm dip made with Olive Oil or Walnut Oil that it’s heated with generous amounts of garlic and… please do not panic when you read this, I promise you, that when you try this recipe you will fall in love with the abominable ingredient “anchovies”. Me, I’m not afraid at all, I’m an anchovy lover, but I know that there is a lot of people who is even scared by the word. Not even to mention the profound and terrified feeling if they know they are an ingredient in their food  preparation, and some people might off gone into strike if they have to touch them.

Well,what can I say?… give anchovies a chance. Anchovy flavor when is paired with different food and use as condiment to enhance deep of flavors in sauces or stews, acts as a salty umami background flavor. It gives a salty and nutty note that can bring any sauce, salad dressing, marinade or stew to a whole different level. No fishiness or crazy smells. And particularly in this warm sauce, it brings the punch of flavor to the tub party!….
Now, who is taking the bath?…Vegetables, any vegetable raw, steamed, roasted, “ a n y “ vegetable you like. The best way to serve it is keeping the dip warm, I usually use a ceramic Fondue set with a tea light underneath, and serve the warm vegetables in separated plates or arranged in a big platter. Cutting the vegetables in bite size is a must so they can easily be reheated when drenched into the dip. Slices of crusty artisanal bread are ideal to complement the creamy sauce.

There are two ways to prepare Bagna Cauda, the oil route or the creamy route, I like the creamy version for fall-winter cold weather, because is richer and it goes great with the wintery seasonal greens and root vegetables.

The Extra Virgin Olive Oil or Walnut Oil version works great for the summer months when you want to eat something lighter, and in my opinion, the summer seasonal vegetables pair magically with the olive oil.Bagna-Cauda_ingredients

This recipe is great for parties, or for an easy light dinner, Ian and I we usually try to have a vegetable night during the week and this Bagna Cauda it’s fun, easy to prepare and really fulfilling.

How would I describe the flavor of the Bagna Cauda? Creamy-umami, salty-nutty , velvety sauce that makes any vegetable taste like a million bucks with a poor mans budget!…

Give it a try, I will advice you that If you are experimenting for the first time with anchovies, start shy, it is a bit of an acquired taste. But if you already love them kick it up! you gonna love them even more!. About the vegetables, honestly you are the one who is in charge, go to your farmers market see whats in season, try something different one vegetable at a time, chose some veggies you are comfortable with, so you don’t end up giving up. Trying many new flavors at once can be overwhelming.

When choosing your vegetable assortment apply the colors of the rainbow, sounds silly but this will ensure you to have a great variety of flavor, texture, vegetables that taste better raw versus cooked and it will bring a great visual interest to your table… because in the end if it looks good you are more likely to eat it. So have fun!

Ah!… I almost forgot, this is the last recipe of the 2013, thank you so much for all your support!
Happy New year!

May this year bring the best in you.

Ian & Mariana

Bagna-Cauda-and-seasonal-vegetables-~Yes,-more-please!

For the recipe you will need…

Continue Reading →

View Post or View Comments 4

Braised Lamb Shanks with Fennel, Cipollini Onions and Cauliflower Parsnip Mash

Braised-Lamb-Shanks-with-Fennel_-and-cauliflower-parsnip-mash-ready-to-serve!_Yes,-more-please!

To braise or not to braise, there’s is no question…. To Braise!

Braising is one of my favorite cooking techniques. I’m always amazed by the results of applying minimal efforts, a little pampering and low and slow heat with a “no rush” time frame. The results are beyond expectations: big warm fully developed flavors, aromas all ingredients in deep harmony. A true feast for kings.

If you follow the 3 golden rules for Braising, you are on the boat of a dinner feast.

1. First, seal, brown, caramelize your well seasoned piece of meat with salt & pepper. Brown all sides over medium heat.
2. Build your saucy broth base, adding the trilogy of all times: celery, carrots and onions, Herbs, good quality chicken or beef stock. Red or white wine that you will drink, a bit of balsamic or sherry vinegar and/or tomatoes. These are acidic ingredients that this braising method needs to break up the collagen in the meat. The combination of all this orchestrated herbs, wine, vegetables, stock with the low moist and dry heat along with time, creates the most tender meat and an amazing rich and flavorful effortless sauce, and tender meat.
3. Cover your meat at 2/3 of the way with stock and wine, cook in the oven at a low temperature for at least 2 and 1/2 hrs…. Low and slow.
The Magic of braising is that it combines a dry and a wet cooking method, creating this juicy and saucy tender meat which also has a crust and slightly roasted top. What could be better?…Now can you imagine the possibilities? different acid components, variety of herbs, vegetables, root vegetables and a cut of meat that is suited for the job.Usually tougher cuts of meat, lamb, pork, rabbit the choice is yours.

Winter is just around the corner. Perhaps there is no better way to warm up your house than with this one pot of Braised Lamb Shanks with Fennel, Cipollini Onions and Cauliflower Parsnip Mash. Oh! did I mentioned the Cauliflower Mashed? I think this is a recipe on its own… extremely easy and surprisingly good, steamed cauliflower and parsnip whipped with a bit of butter and Extra Virgin Olive Oil, salt and pepper, its a mashed with an attitude.

This recipe is for two and easily adapted for 4 to 6. I usually make this over the weekend if we are gonna spend the afternoon around the house or on a Lazy Sunday afternoon. Leftovers like this just get better the next day. Effortless love in a pot. Warm up!

Braised-Lamb-Shanks-with-Fennel_ingredients

Braised-Lamb-Shanks-with-Fennel_Lamb-Shanks

Braised Lamb Shanks with Fennel, Cipollini Onions and Cauliflower Parsnip Mash

Serves 2

2 Lamb shanks cut for ossobucco (preferable the front Lamb shanks, since they are the meatiest)
1 glug grapeseed oil for browning the shanks.
1 medium fennel bulb cut in fourths
12 cipolinni onions peeled
2-3 carrots cut in medium pieces
6-8 fingerling potatoes or red new potatoes
2 grated Roma tomatoes
2 cups chicken stock or more if needed.
1 cup Dry white wine
1 – 1/2 teaspoons Herbs de Provence
1 bay leaf
4 garlic cloves unpeeled
1-1/2 teaspoon sea salt
1/4 teaspoon fresh crushed black pepper
2 tablespoons of butter

1 Dutch oven or any enamelware medium size pot with a tight lid.

For the Cauliflower-Parsnip Mash:

1 small cauliflower head
1-2 medium-small Parsnips
2 tablespoons butter
1 little glug extra virgin olive oil
1-2 gluts milk, unsweetened almond milk or soy milk upon your preference.
salt and pepper to taste

Preparation method:

1. Preheat your oven to 425F and prepare all your vegetables, and grate your tomatoes.

Braised-Lamb-Shanks-with-Fennel_vegetables
2. Pat dry the lamb shanks and season all sides with sea salt and fresh ground pepper. Heat up the Dutch oven over medium heat, add the grapeseed oil and wait until rippling hot, add the shanks and brown evenly all sides. Remove from pan set aside.

Braised-Lamb-with-Fennel_-how-to-prepare-the-braising-pot
3. To the same pan add the cipolinni onions and re-season with salt and pepper until they have a bit golden brown color both sides. Remove from pot and set aside.

Braised-Lamb-Shanks-with-Fennel_how-to-caramelize-the-cipollini-onions

4. In the same pot add the fennel quarters and the carrots until the fennel shows some color, at this point make a well in the center of the pan and add the grated tomato, sauté for 3-4 minutes, then add the wine and cook for another 3 more minutes.
5. Once that the tomato and wine are bubbling, make room in the pot and add back the lamb shanks, add the chicken stock making sure the shanks are at least 2/3 covered in liquid. Add the Herbes de Provence, bay leaf, garlic cloves and cover with a lid on the stove. Bring to a rapid simmer. Remove the fennel from the pot, cover the pot with a lid and place the pot into the oven at 325F Set your timer for 1 and a half hours.

Braised-Lamb-Shanks-with-Fennel_braising-liquids
6.After one and a half hours, carefully turn your lamb over, and add the potatoes, fennel and sautéed cipollini onions,make sure the potatoes are summered into the liquid cover with lid and keep braising for another 45 minutes.

Braised-Lamb-Shanks-with-Fennel_braising-the-vegetables
7. Meantime, cut your cauliflower into mini florets, peel and cube the parsnip, steam them on the same pot until soft and tender. Remove from steamer, place in a pot, add butter, salt pepper, extra virgin olive oil and a dash of milk, almond milk or soy milk what ever you prefer. With an inmersion blender whip until creamy and fluffy. A food processor will work well to. Set aside and keep on a warm place.Cauliflower-and-Parsnip-Mashed


8. Remove your Lamb from the oven, remove the lid, add the butter to the sauce and let it rest for 15 minutes before serving. this will allow all the juices to re-distributed and it will bring it to the perfect temperature to serve. I love the consistency of the juices when it comes out of the oven, the consistency of the saucy broth tends to be a little more lose, which for me it is perfect to soak some crusty french country bread.*sigh*… But sometimes, If there is to much liquid, I remove the lid and place the pot back into the oven under the oven broiler for 5-7 minutes,  just to get some extra roasted edges on the meat and veggies and it also helps to evaporate some of the extra juices a bit.
But, If you want your sauce to be  thicker or  to make it in to a glossy gravy, Once you get the pot out of the oven, remove the lamb shanks and vegetables into a platter poor some of the liquid over to avoid drying them out and cover them with some foil paper to keep them warm and moist.  Remove herbs and skim fat if necessary. Place the pot over the stove, and bring the liquids to a boil. Reduce to desired consistency, adjust salt and pepper to taste.

Braised-Lamb-Shanks-with-Fennel_Yes,-more-please!

9. To serve, In any of the cases, place your lamb shank over the cauliflower-parsnip mashed, add vegetables on the side and a ladle of the  delicious juicy broth or gravy… do not forget the crusty bread!…Enjoy.

Braised-Lamb-Shanks-with-Fennel_sprinkle-some-fennel-topsBraised-Lamb-Shanks-with-Fennel_and-Cauliflower-parsnip-mash_Yes,-more-please!Braised-Lamb-Shanks-with-Fennel_delicious-dinner!...Yes,-more-please!

Braised Lamb Shanks with Fennel, Cipollini Onions and Cauliflower Parsnip Mash…

where is the crusty bread?

Music Pairing: Nouvelle Vague – Dance with Me

View Post or View Comments 0

Butternut squash Cannelloni with Walnut-Sage Béchamel Sauce

Butternut-Squash-Cannelloni-with-Walnut-Sage-Sauce_Yes,-more-please!
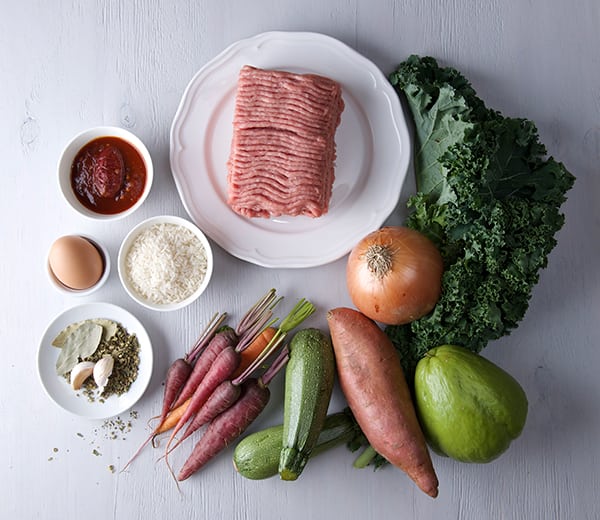
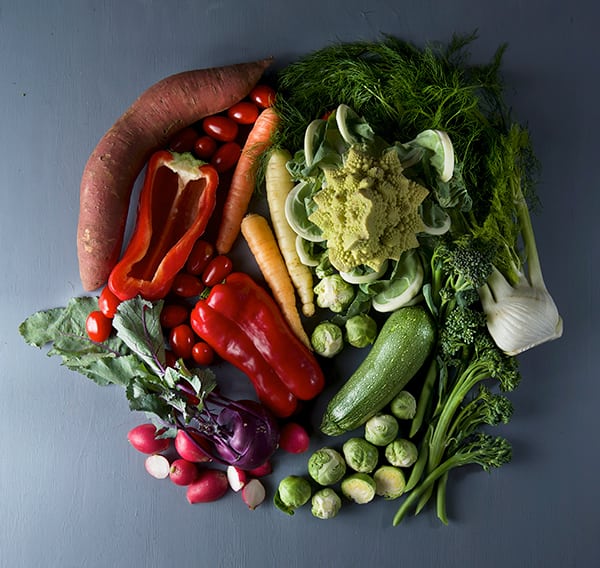
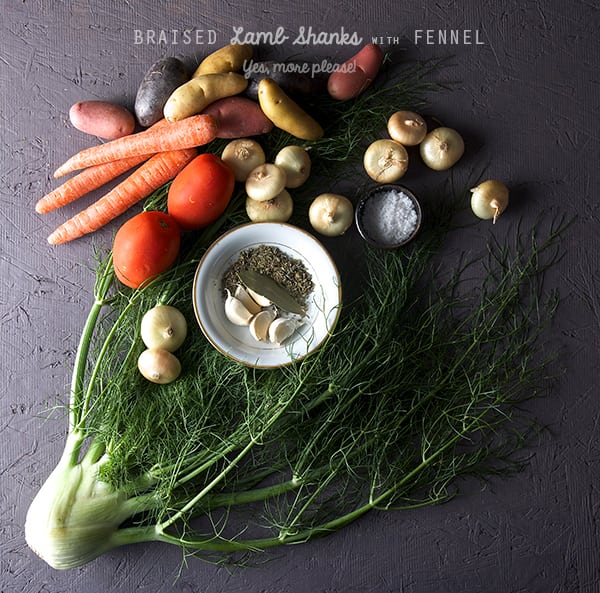
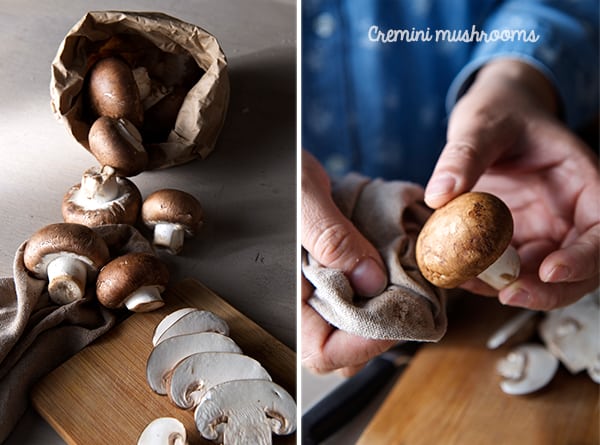
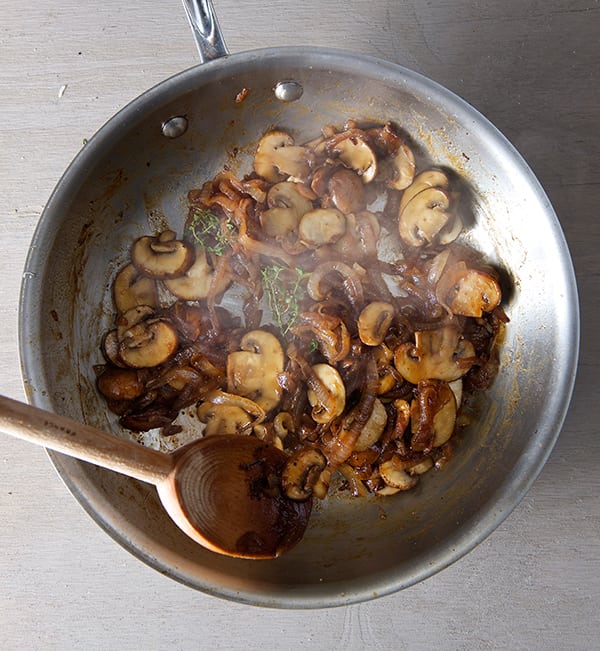
Its warm in the Lone Star State. We’re still waiting in Texas for some cool Autumn weather. We are still in the 80’s around here if you know what I mean. The only indication of Fall, besides the calendar, are the beautiful pumpkins, squashes, sweet potatoes, root vegetables and leafy greens at the markets.

This last Sunday, I found small butternut squash, acorn squash, and some white mini pumpkins. While some people are turning them into candle holders, I think they are the perfect individual size for dinner. They cook fast and leave no left-overs.

Buternut-squash-Cannelloni_the-vegetables

With this in mind, and the romantic idea of having a Fall season, I turned my oven on and thought about the most autumn dish I could bake, and this is what I came up with: Butternut Squash Cannelloni with a Walnut-Sage Bechamel sauce. Dreamy. This recipe has a long name and a short preparation. It is not hard to Imagine pasta sheets filled with delicate butternut squash, baby spinach, onions and goat cheese; rolled and smothered with a light creamy, nutty walnut-sage béchamel sauce, some mozzarella on top and.. Kazam! You have Fall on a plate. Nutty, creamy, warm, cheesy, the kind of dinner you want to snuggle with…In Texas we snuggle in shorts and t-shirts. Or you can fake it and watch a movie with maple trees, and turn your A/C to 64F grab a little blanket and for a few hours pretend is Fall….Not that we have done this…ehem, ehem.

Mean time we will patiently wait in shorts and T-shirts for the winter… maybe I should make Margaritas instead!… Enjoy the recipe.

Buternut-squash-Cannelloni_pasta-and-sauce-ingredients

Butternut squash Cannelloni with Walnut-Sage Bechamel Sauce.

Serves 4

12 cannelloni pasta tubes or 12 lasagna sheets.

For the filling:

1 small butternut squash peeled and cut into small cubes
2 cups baby spinach or baby kale
1/2 medium onion small diced.
1 glug extra virgin olive oil
2 pinches of nutmeg
Salt and pepper to taste
4 oz. Chèvre Goat cheese

For the sauce:

1/2 cup blanched and toasted walnuts
2 cups milk
2 tablespoons flour
4 tablespoons butter
Zest 1/2 lemon
1-2 pinches nutmeg (freshly grated preferred )
2-3 Sage leaves whole*
1/2 teaspoon salt
4-6 cranks of fresh ground black pepper

Fresh mozzarella ( liberal amounts upon your preference)

3-4 Sage leaves to garnish

*Note: Sage its a powerful herb, I levee it whole to just perfume the sauce and leave it whole as garnish also enhances the dish and brings out delicious aromas. I prefer not to chop the sage on dishes like this, because it becomes a bit bitter, and is not very pleasant to bite into them, they will overwhelm the delicate flavor of the butternut squash. However, If you love sage and its a flavor you enjoy, feel free to adjust to your taste.

Preparation:

1. Using a little glug of olive oil Sauté the onions and butternut squash until tender. Finally add spinach salt, pepper and nutmeg; toss well then remove from stove and let it cool down. Add the goat cheese in crumbles once the filling is cool, toss gently.
2. Pre-cook your pasta sheets according the directions on your package. Remember to salt your water to flavor the pasta. Remove the sheets from boiling water 3-4 minutes before, according to directions. Shock them in iced water to stop cooking, and avoid to stick together.

Buternut-squash-Cannelloni_pasta-and-sauce-preparation
3. Make the sauce.  Start by blanching the walnuts in warm water for 5 minutes, this will eliminate any bitterness from the walnut skins. Drain the walnuts and toast them on a large skillet for a few minutes. Blend the walnuts with 1/2 cup of the milk until smooth. Then incorporate with the rest of the milk.

Walnuts
4. In the same large skillet, over medium heat, place the butter until melted and bubbly. Add the flour and whisk well to combine until no lumps and the buttered flour looks light golden-yellow in color. Start adding the walnut-milk in smaller additions and whisk at all times to avoid lumps, until the 2 cups of milk are incorporated. You might need to reduce the heat to medium low while whisking. After all the milk is incorporated season with salt, pepper, and nutmeg and sage leaves. Bring too a slow simmer and remove from heat. The consistency should be of a light creamy thickness, if to thick, add more milk, to lose, place it back to the heat and whisk until desired consistency.
It should cover the back of a spoon see picture below.

Butternut-Squash-Cannelloni_how-to-make-bechamel-walnut-sage-sauce
3. Prepare a baking dish with butter, or a little olive oil, add a bit  of the sauce on the bottom.
4. Start by filling the cannelloni’s pasta tubes or by placing the filling on one end of the precooked pasta sheets and roll them up tightly. Proceed to do the same with each pasta sheet. Place the cannelloni rolls into your baking dish as you go.
5. Cover all the pasta rolls with the walnut-sage sauce, reserve some of the sauce.
6. Cover with mozzarella slices, then pour the remainder of the sauce, top with some sage leaves.

Butternut-Squash-Cannelloniwith-sage-and-walnut-sauce_assambling-the-rolls
7. Bake at 375F for 20-30 minutes until cheese is melted and top is blistered.
8. Let it rest for 10 minutes before serving. Enjoy!

Note: Not too fond of rolling? make it into lasagna layers, you also can add some cooked ground turkey or sausage to the butternut -spinash filling and it will be equally delicious. I just love the way the Cannellonis portions out. Enjoy!

Butternut-squash-Cannelloni-with-Walnut-Sage-Sauce_out-of-the-oven-

Butternut-squash-Cannelloni-with-Walnut-Sage-Sauce_Yes,-more-please!-

 Music Pairing: Autum Leaves – Miles Davis

View Post or View Comments 2

Seared Under Blade Steak Greens and Beets

Underblade-steak-&-beets

I got these fabulous under blade steaks similar to the infamous Denver steak. The Under Blade Steak comes from the same muscle as the Denver steak, however the under blade steak is cut against the grain for better texture. Where did I get these beauties? At one of my favorite butcher shops here in Austin, Salt &Time. These steaks are full of flavor with great texture, and very fairly priced for their amazing punch of flavor they are good for you and your wallet. My friend Kristen (who I met at volunteering at Boggy Creek Farm) currently manages Salt & Time. She has always recommended awesome cuts to try. Besides the under blade we have sampled the Flat iron steak, Hanger steak, and next on my list the Babette…I hope it is as good as the last supper scene in “Babette’s Feast”. By the way if you are a foodie or food movie aficionado this is a good film to watch, just to enjoy seeing the woman cooking the feast of a lifetime.. keep in mind… Also ask for Kristen if you happen to visit the amazing Butcher shop & Salumeria known as Salt & Time, in Austin, Texas.

Any how, with this fabulous under blade steaks in my possession, one quote came to my mind,
“To eat steak rare… represents both a nature and a morality.”
―Roland Barthes

I believe this man knows his semiotics well. I believe that under cooking a steak is an easy repair and forgivable, but over cooking a steak it’s a sin. By the nature laws and morality, I would like to reply to Roland Barthes quote, “ To the cook: when you are cooking a steak, please don’t kill twice” Cooking a steak it’s a serious matter to me. Few foods are so misunderstood like the steak. Forget the marinades, glazes, grilling seasonings and all those powders, and lets concentrate on the matter “maximus meat flavor” that’s how I want to eat my steak.

Under blade steaks taste best if cooked, medium to medium rare, especially if you are pan searing them. I would say that if you like your steak more on the done side, this cut may not be for you since it can get a little tough.( But to tell you the truth I have not meet a well done steak that is not tough, heheh…)

After I cooked the steaks, I could not resist to leave all the good delicious bits of meaty flavor plus butter garlic and rosemary left in the bottom of the pan; so I decided to throw some vegetables I had in hand, yellow onions, beets, beet greens, added a pinch of cinnamon quick sautéed all and add a squeeze of lemon at the end for a punch of acidity. I put back my steaks and served straight out of the pan to the table…. one pan easy dinner, your protein and vegetables all happy together. Seared Under Blade Steak Greens and Beets It was epic!

Music Pairing: Sin, Sing, sing, Benny Goodman

Let’s cook!

Underblade-steak-&-beets_season-under-blade-steak

Seared Under Blade Steak Greens and Beets

Serves 4

4 under blade steaks (also known as Denver steak) room temperature
1 glug extra virgin olive oil
2-4 tablespoons of butter
2 garlic cloves crushed
4-5 sprigs of rosemary
Sea salt
Freshly ground black pepper

For the Onions, Greens and Beets:

5-6 organic baby beets per person combine yellow, chioggia, red, or any kind you have available, Save the leafy greens if your beets are organic, we will sauté them along,

they are delicious and a great source of beta carotene, vitamin C, vitamin K, Calcium, Iron and Magnesium.

2 cups beet greens (spinach, kale, any green of your affection will work too)
1 medium yellow onion sliced in wedges.
2 sprigs of fresh rosemary
2-4 good pinches of cinnamon
4-5 cranks of fresh ground black pepper
1 good pinch of sea salt
The zest and juice of ½ lemon

Preparation:

1. Remove your steak from refrigerator and leave it on a fresh area of your counter. Allow them to come to room temperature for 20-30 minutes before cooking.
2. Mean time wash and remove the rough parts of the tops, leave the skin. Steam your beets until al-dente. 20-25 minutes depending on the size. Once cooked, under the water remove the skin very easily with your thumbs or using a paring knife. Cut into quarters.
3. Save and wash the leafy greens of your beets, make a leafy bundle and slice into a wide chiffonade.
4. Slice the onion into wedges.

underblade-steak-and-beets_cinnamon-lemon,-beet-greens,-babybeets
5. Once you have all the prep done on your vegetables start by heating your skillet. Use a heavy bottom stainless steel or a cast iron pan will work best.
6. Pat dry your steaks if needed, Season with a good pinch of sea salt and fresh black pepper on both sides. Be generous, do not be afraid of seasoning well.
7. Once your skillet is screaming hot, add a glug of olive oil. The oil should be rippling hot, then proceed to place the steaks. Remember not to overcrowd your pan. (I used a 12” skillet for 3 small steaks)

Underblade-steak-&-Beets_how-to-cook-a-steak_Yes,-more-please!
8. Give 4-5 minutes on each side, then once you turn on the second side, add the butter, the rosemary, and crushed garlic to the pan. Tip the pan and start basting the steaks with the melted butter. Using some tongs stand up the steaks to cook and caramelized and crustify the edges of the steak.

Underblade-steak-&-beets_basting-a-steak

Underblade-steak-&-beets_sear-the-sides


Underblade-steak-&-beets_basting-a-steak_sear-the-sides
9. Check for doneness, medium rare about 4-5 minutes on each side, medium 6-7 turn 4 times for the extra 2 minutes to cook evenly, add the butter and herbs during the last 2 minutes, baste. Use your thermometer to check the temperature. Usually I will remove them a bit early than the maximum read on the desired doneness, the residual heat can keep cooking your steaks about 3-4 more degrees once the meat is resting.
10. Once your steak is cook to your desired doneness, transfer to a platter and let it rest.

Underblade-steak-&-beets_reasting-the-steak

11. Meantime in the same pan, add the onions and sauté for 2-3 minutes, add beets and toss for a quick sauté, season with a pinch of salt, fresh black pepper, and 3-4 good pinches of ground cinnamon, keep tossing until the onions are tender . Then add the greens and toss and shake for 2 more minutes. Place the steak back into the pan over the beets and onions, squeeze some lemon juice all over and grate some lemon zest. Serve immediately. Enjoy! 

Note: Get creative, you can trow any vegetable combinations, sweet potatoes, little new potatoes,spinach, kale, chard,  zucchini, okra, mushrooms, cipollini onions, peppers, shishito peppers, serranos, jalapeños,… just rock it out!)

Under-blade-Steak_sauteing-green-beets,-beets,-onions

Under-blade-steak,-final-touches

Underblade-steak--with-greens-and-beets-Yes,-more-please!

Seared-Under-Blade-Steak-greens-and-beets_Yes,-more-please!

 Sing, sing, sing, this  is the new steak of the goddess…

Seared Under Blade Steak Greens and Beets one pan epic dinner!!

View Post or View Comments 0

Wednesday Grilled Cheese Sandwich

Wednesday-Grilled-cheese-sandwichWednesday-Grilled-cheese-sandwich_cremini-mushrooms

A grilled cheese sandwich with a side of green salad, this is my love letter to the grilled cheese sandwich.
Sautéed Mushrooms, caramelized onions, and rich fragrant cheese in between two slices of toasted buttery bread; this is my kind of togetherness and solidarity. This is the one that hump day screams for. Let’s stick the whole week together with melted cheese plus mushrooms and onions and make our Wednesday memorable. After all it is certain that the small things in life give happiness and comfort. Wednesday Grilled Cheese Sandwiches like this have one mission , to turn any humpy or lumpy day into a little happy memory. Enjoy.

Wednesday-Grilled-cheese-sandwich--Caramelized-onions-+-cremini-mushrooms

Wednesday Grilled Cheese Sandwich.

Makes 2 sandwiches

4 slices of artisanal, rustic bread
1/4 pound of Challerhocker Swiss cheese. (Gouda, Swiss, Emmental will work fantastic as well)
8-10 Cremini Mushrooms wiped with a damp clean towel and sliced. 
1 small medium yellow onion 1/4 “thick sliced
1 sprig of fresh thyme
1 teaspoon olive oil
2 tablespoons of butter for sauté
1/4 cup or 2 glugs of any leftover white wine. no white wine…chicken stock will work…
2-4 dashes of Sherry Vinegar.
Salt and Black Pepper to taste.

Wednesday-Grilled-cheese-sandwich_Manchego-butter


Manchego Butter Spread:

2 tablespoons of 1 year aged Manchego cheese, grated.
4 tablespoons butter softened

1. In a little bowl combine this two ingredients until you have a spreadable consistency.

What I love the most a bout this sandwich? the Manchego Butter Spread, once the sandwich hit the pan, this spread makes the most utterly croquant and buttery grilled cheese, you ever had… I suggest you can make any substitutions on the inside of the sandwich, but this spread is irreplaceable.

Wednesday-Grilled-cheese-sandwich_Butter-and-manchego-spread-for-bread

Preparation:

1. Over medium heat on a sautee pan add olive oil, 2 tablespoons of butter, sliced onions, salt pepper and a pinch of turbinado sugar. sweet the onions until translucent and they start to get some golden edges and color. At this point add the sliced mushrooms and sautee for about 3-4 minutes, until the mushrooms start to get some color too. about 6-7 minutes.
2. By now the bottom of your pan is starting to show some crusty brown bits. The onions and mushrooms are soft and golden brown caramelized color, Away fro the stove add two good splashes of white wine, and 2-4 dashes of the sherry vinegar, and a fresh sprig of thyme. Bring back the pan to the stove and wait until the liquids reduce. Set aside.

Wednesday-Grilled-cheese-sandwich-caramelized-onions-and-cremini-mushrooms 
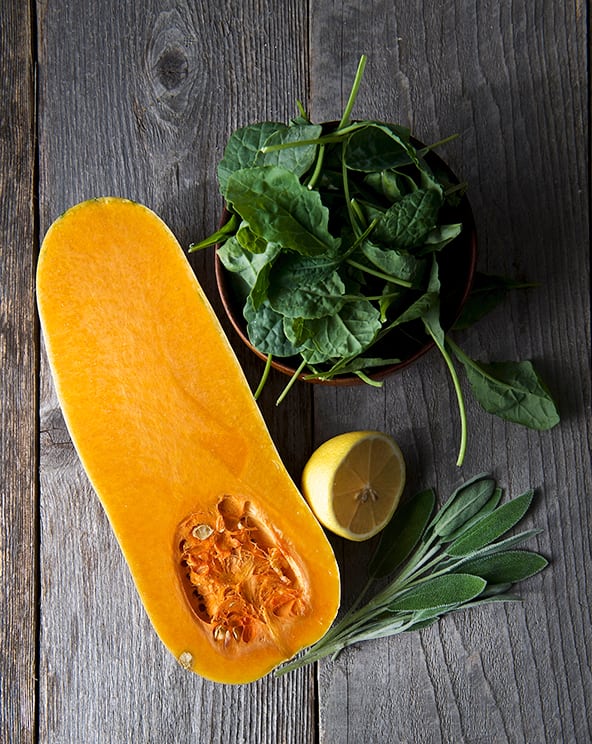
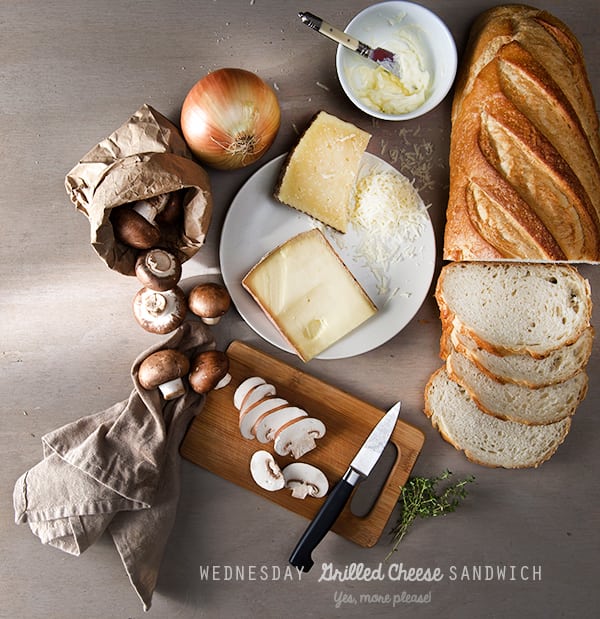
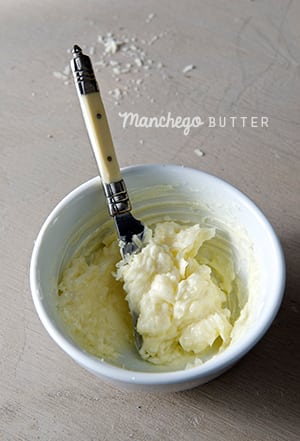
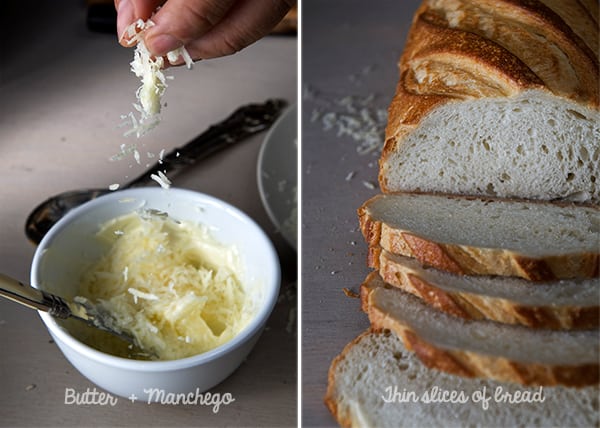
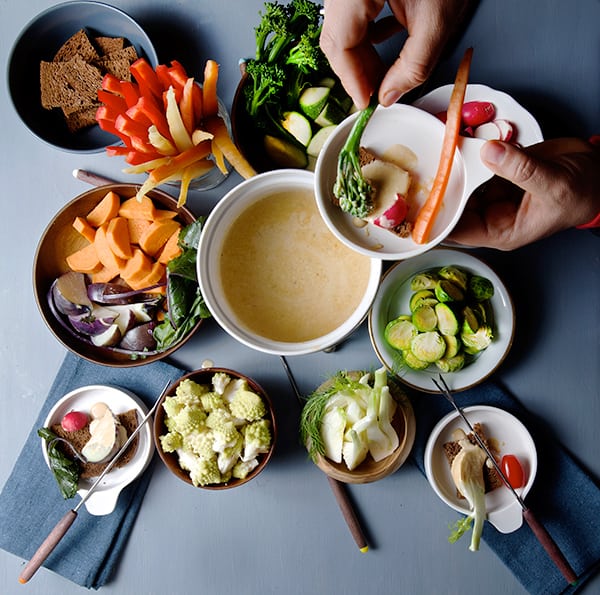
3. Evenly spread one side of each of the bread slices with the Manchego-butter spread.
4. On the no spread side, place a layer of thinly sliced or grated Challerhocker cheese, then a layer of the caramelized onions and mushrooms, and top with more cheese. Cover with the other bread lid, butter spread side up.

Wednesday-Grilled-Cheese-Sandwich_Yes,-more-please! 
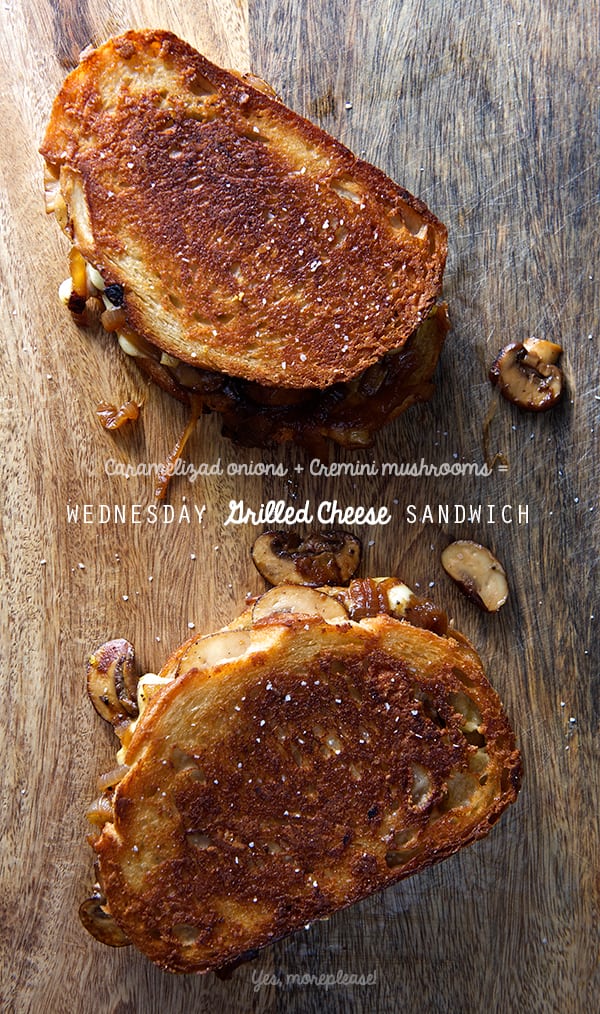
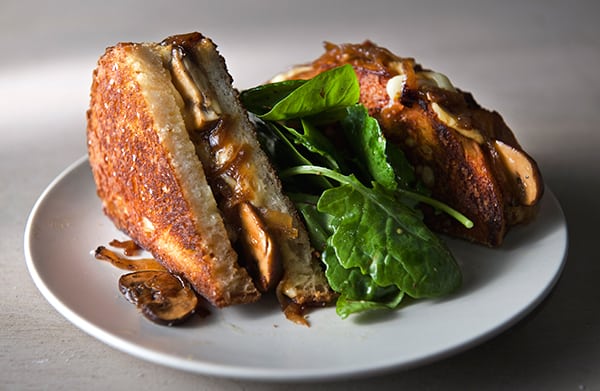
5. On a medium heat warm up a non-stick pan, cast iron pan or plancha. Once is hot, place both of your sandwiches and grill for about 4 minutes each side, until mahogany golden brown, and the cheese is melted.

Wednesday-Grilled-cheese-sandwich_-on-the-pan 
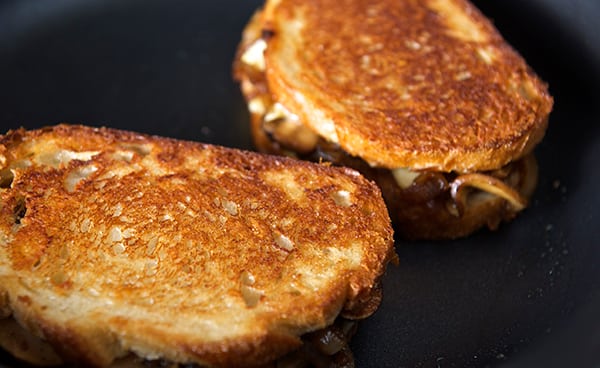
6. Remove from pan into a cutting board and slice in half.
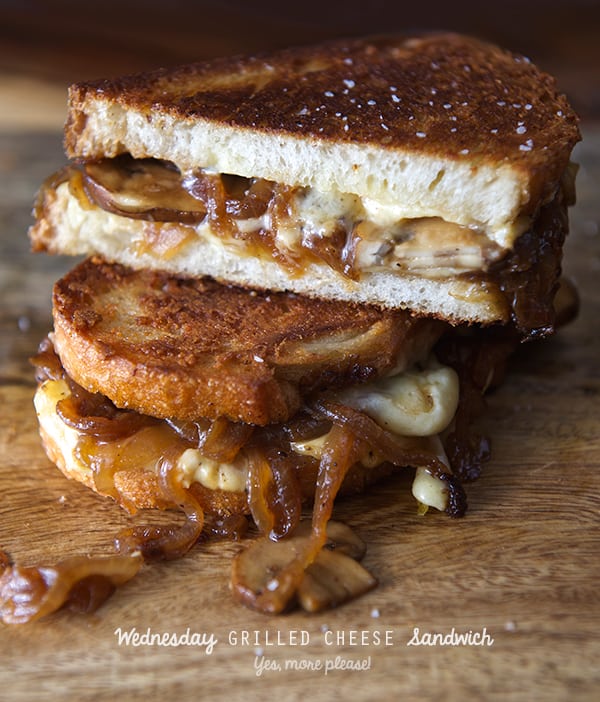
7. Toss some baby spinach and salad greens with a bit of lemon juice, extra virgin olive oil, salt and pepper, serve your sandwich on the side.
Enjoy!Wednesday-Grilled-cheese-sandwich_sliced


Wednesday-Grilled-cheese-sandwich_don't-forget-your-greens!

Always remember to eat your greens!

View Post or View Comments 2

Privacy Policy Contact Us Yes, more please!