
To braise or not to braise, there’s is no question…. To Braise!
Braising is one of my favorite cooking techniques. I’m always amazed by the results of applying minimal efforts, a little pampering and low and slow heat with a “no rush” time frame. The results are beyond expectations: big warm fully developed flavors, aromas all ingredients in deep harmony. A true feast for kings.
If you follow the 3 golden rules for Braising, you are on the boat of a dinner feast.
1. First, seal, brown, caramelize your well seasoned piece of meat with salt & pepper. Brown all sides over medium heat.
2. Build your saucy broth base, adding the trilogy of all times: celery, carrots and onions, Herbs, good quality chicken or beef stock. Red or white wine that you will drink, a bit of balsamic or sherry vinegar and/or tomatoes. These are acidic ingredients that this braising method needs to break up the collagen in the meat. The combination of all this orchestrated herbs, wine, vegetables, stock with the low moist and dry heat along with time, creates the most tender meat and an amazing rich and flavorful effortless sauce, and tender meat.
3. Cover your meat at 2/3 of the way with stock and wine, cook in the oven at a low temperature for at least 2 and 1/2 hrs…. Low and slow.
The Magic of braising is that it combines a dry and a wet cooking method, creating this juicy and saucy tender meat which also has a crust and slightly roasted top. What could be better?…Now can you imagine the possibilities? different acid components, variety of herbs, vegetables, root vegetables and a cut of meat that is suited for the job.Usually tougher cuts of meat, lamb, pork, rabbit the choice is yours.
Winter is just around the corner. Perhaps there is no better way to warm up your house than with this one pot of Braised Lamb Shanks with Fennel, Cipollini Onions and Cauliflower Parsnip Mash. Oh! did I mentioned the Cauliflower Mashed? I think this is a recipe on its own… extremely easy and surprisingly good, steamed cauliflower and parsnip whipped with a bit of butter and Extra Virgin Olive Oil, salt and pepper, its a mashed with an attitude.
This recipe is for two and easily adapted for 4 to 6. I usually make this over the weekend if we are gonna spend the afternoon around the house or on a Lazy Sunday afternoon. Leftovers like this just get better the next day. Effortless love in a pot. Warm up!
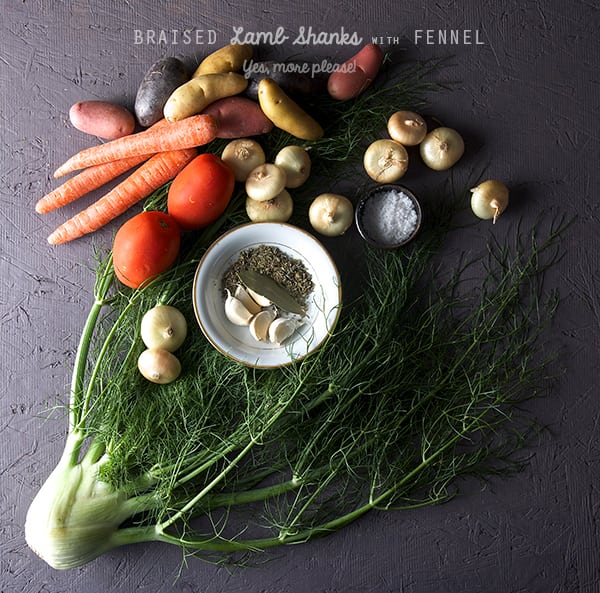
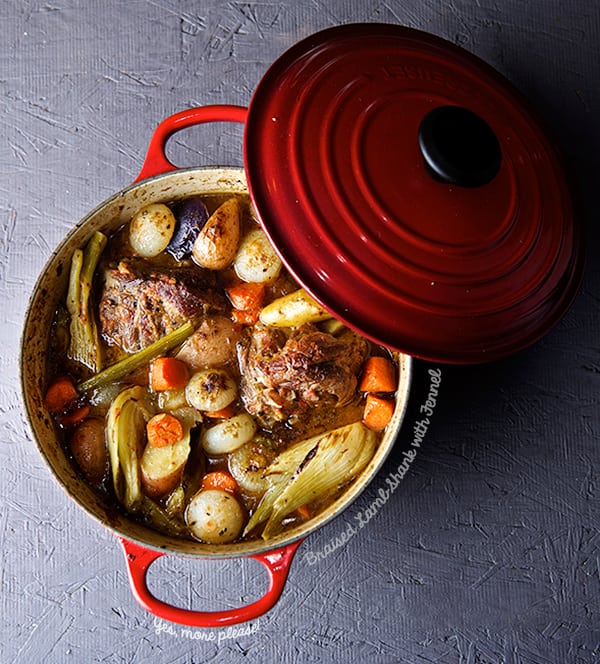
Braised Lamb Shanks with Fennel, Cipollini Onions and Cauliflower Parsnip Mash
Serves 2
2 Lamb shanks cut for ossobucco (preferable the front Lamb shanks, since they are the meatiest)
1 glug grapeseed oil for browning the shanks.
1 medium fennel bulb cut in fourths
12 cipolinni onions peeled
2-3 carrots cut in medium pieces
6-8 fingerling potatoes or red new potatoes
2 grated Roma tomatoes
2 cups chicken stock or more if needed.
1 cup Dry white wine
1 – 1/2 teaspoons Herbs de Provence
1 bay leaf
4 garlic cloves unpeeled
1-1/2 teaspoon sea salt
1/4 teaspoon fresh crushed black pepper
2 tablespoons of butter
1 Dutch oven or any enamelware medium size pot with a tight lid.
For the Cauliflower-Parsnip Mash:
1 small cauliflower head
1-2 medium-small Parsnips
2 tablespoons butter
1 little glug extra virgin olive oil
1-2 gluts milk, unsweetened almond milk or soy milk upon your preference.
salt and pepper to taste
Preparation method:
1. Preheat your oven to 425F and prepare all your vegetables, and grate your tomatoes.
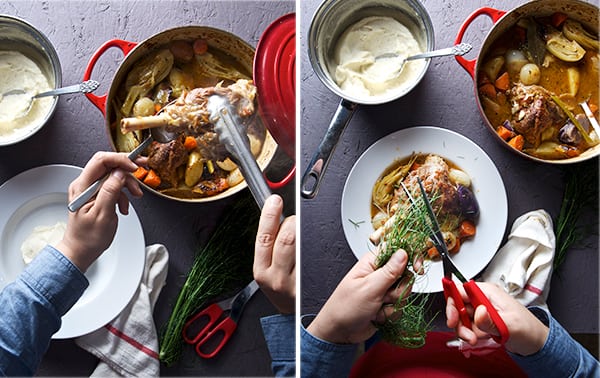
2. Pat dry the lamb shanks and season all sides with sea salt and fresh ground pepper. Heat up the Dutch oven over medium heat, add the grapeseed oil and wait until rippling hot, add the shanks and brown evenly all sides. Remove from pan set aside.
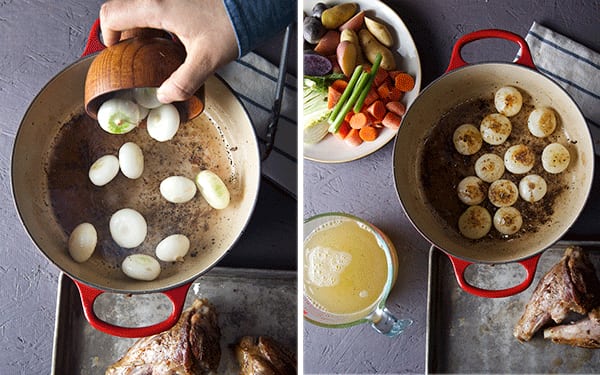
3. To the same pan add the cipolinni onions and re-season with salt and pepper until they have a bit golden brown color both sides. Remove from pot and set aside.
4. In the same pot add the fennel quarters and the carrots until the fennel shows some color, at this point make a well in the center of the pan and add the grated tomato, sauté for 3-4 minutes, then add the wine and cook for another 3 more minutes.
5. Once that the tomato and wine are bubbling, make room in the pot and add back the lamb shanks, add the chicken stock making sure the shanks are at least 2/3 covered in liquid. Add the Herbes de Provence, bay leaf, garlic cloves and cover with a lid on the stove. Bring to a rapid simmer. Remove the fennel from the pot, cover the pot with a lid and place the pot into the oven at 325F Set your timer for 1 and a half hours.
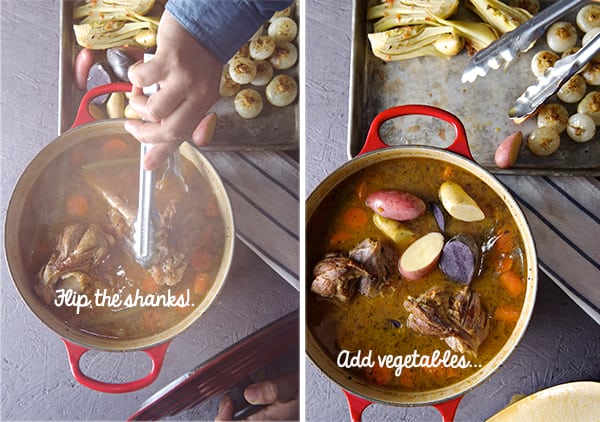
6.After one and a half hours, carefully turn your lamb over, and add the potatoes, fennel and sautéed cipollini onions,make sure the potatoes are summered into the liquid cover with lid and keep braising for another 45 minutes.
7. Meantime, cut your cauliflower into mini florets, peel and cube the parsnip, steam them on the same pot until soft and tender. Remove from steamer, place in a pot, add butter, salt pepper, extra virgin olive oil and a dash of milk, almond milk or soy milk what ever you prefer. With an inmersion blender whip until creamy and fluffy. A food processor will work well to. Set aside and keep on a warm place.
8. Remove your Lamb from the oven, remove the lid, add the butter to the sauce and let it rest for 15 minutes before serving. this will allow all the juices to re-distributed and it will bring it to the perfect temperature to serve. I love the consistency of the juices when it comes out of the oven, the consistency of the saucy broth tends to be a little more lose, which for me it is perfect to soak some crusty french country bread.*sigh*… But sometimes, If there is to much liquid, I remove the lid and place the pot back into the oven under the oven broiler for 5-7 minutes, just to get some extra roasted edges on the meat and veggies and it also helps to evaporate some of the extra juices a bit.
But, If you want your sauce to be thicker or to make it in to a glossy gravy, Once you get the pot out of the oven, remove the lamb shanks and vegetables into a platter poor some of the liquid over to avoid drying them out and cover them with some foil paper to keep them warm and moist. Remove herbs and skim fat if necessary. Place the pot over the stove, and bring the liquids to a boil. Reduce to desired consistency, adjust salt and pepper to taste.
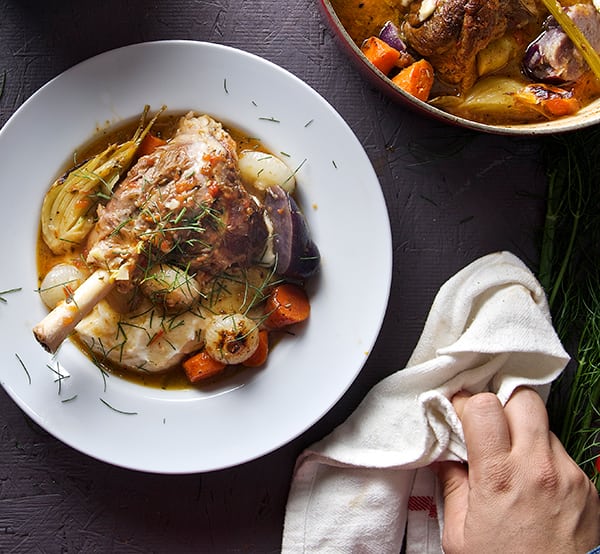
9. To serve, In any of the cases, place your lamb shank over the cauliflower-parsnip mashed, add vegetables on the side and a ladle of the delicious juicy broth or gravy… do not forget the crusty bread!…Enjoy.
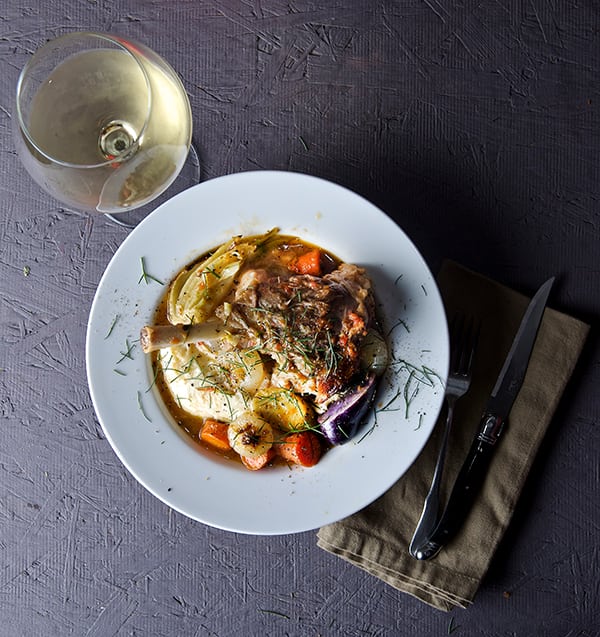
Braised Lamb Shanks with Fennel, Cipollini Onions and Cauliflower Parsnip Mash…
where is the crusty bread?
Music Pairing: Nouvelle Vague – Dance with Me
http://youtu.be/1boeQ9zoF-s


