Corn Flour Cookies

Gluten-free-Corn-Flour-Cookies_Yes,-more-please!_2

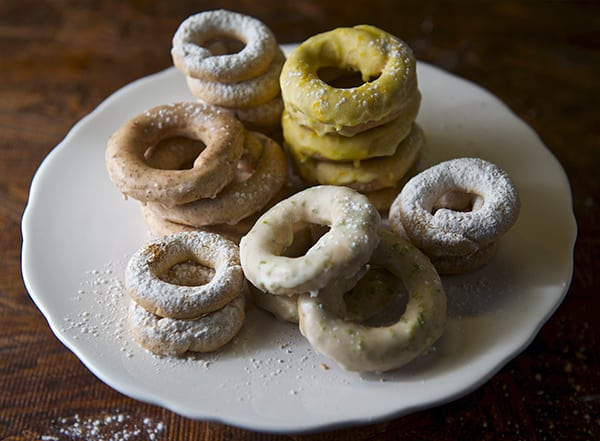
These cookies are originally from Sinaloa, Mexico and traditionally made in Sonora and Chihuahua. They are called “Coricos” or “Pinturitas” and they are made with corn flour ( a.k.a. MASECA), dry corn flour, lard or vegetable shortening, sugar or turbinado sugar, cinnamon, and vanilla. They are traditionally baked in brick-wood ovens that is the traditional recipe.

I got inspired and changed the recipe a bit. I used butter or coconut oil, a conventional oven and some aromatics and citrus to enhance the flavor of the cookie.

I suspect that by now you will be asking yourself what is MASECA? And why MASECA?
Maseca is a brand that uses a play of words: Masa(dough) and Seca (dry) .After all it is a dry corn flour commonly used to make corn tortillas. Now, before I answer the why,
I do have a request from you: please, do not judge these cookies by the fact they are made with the same flour you make corn tortillas. I know it sounds a bit odd but believe me you have to try this recipe. They are the most simple and utterly delicious cookies. In fact, I could say Coricos are one of my favorites cookies.
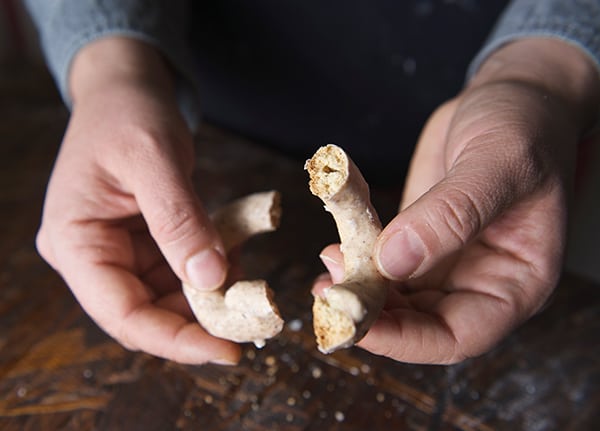
They are crumbly with a nutty flavor from the toasted dry corn flour and not overly sweet. It’s this simplicity of flavor that allows you to add any aromatic spice like cinnamon, vanilla, orange blossom water, orange zest, lemon, zest, or cardamom.

The dough is so simple and playable, it is great to make with kids, plus you do not have to wait for a resting time or chilling the dough. You can have these delicious gluten-free cookies in less than 30 minutes!!!.
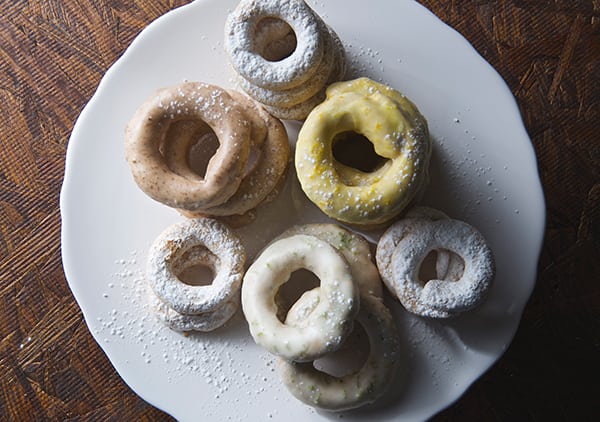
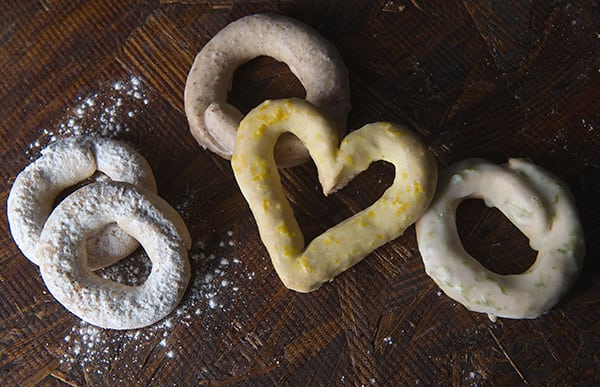
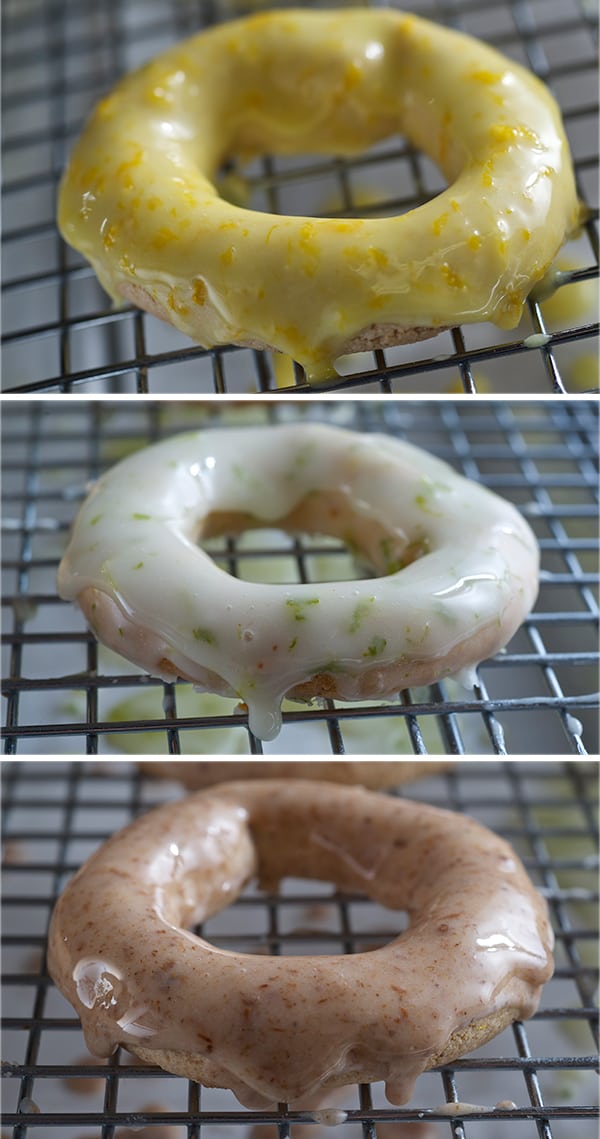
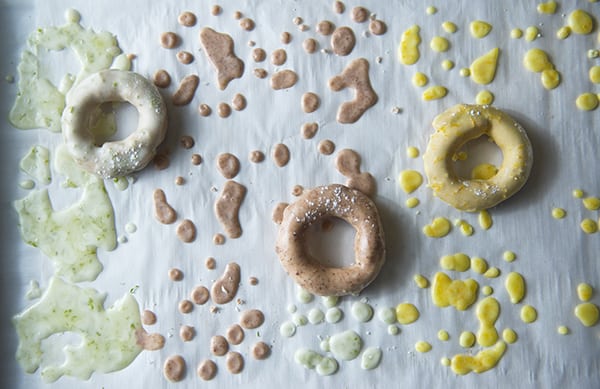
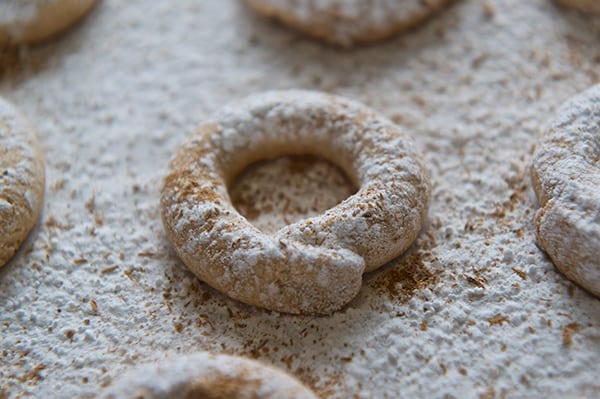
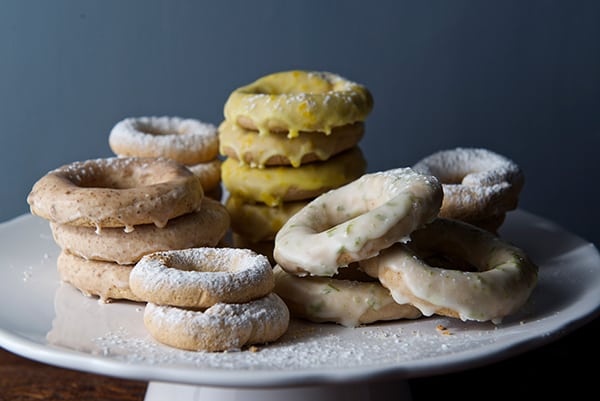
This dough also works well if you roll it out it and make cut outs for decorated cookies. Although their more traditional shape looks like a ring you can make them any size and shape you like. These Corico cookies are usually eaten plain, but I like to dust them with a little powdered sugar and cinnamon for a simple tea or coffee treat, although recently I experimented with some glazes and I have to say I’m in trouble now. The glaze makes them ridiculously good and you’ll see what I mean…

Making cookies makes me happy. So many recipes…so little time! I’m especially fond to this recipe because it’s simplicity and with glaze or no glaze they taste so good to me either way…

I hope you like them and I would love to hear your feed back, and new discoveries. Enjoy!

Corn-Flour-cookies_AvobeCorn-Flour-Cookies_texture-insideCorn-flour-cookies_Beautiful-and-delish!

Corn Flour Cookies

Makes 2 dozen – 2.5” rings cookies

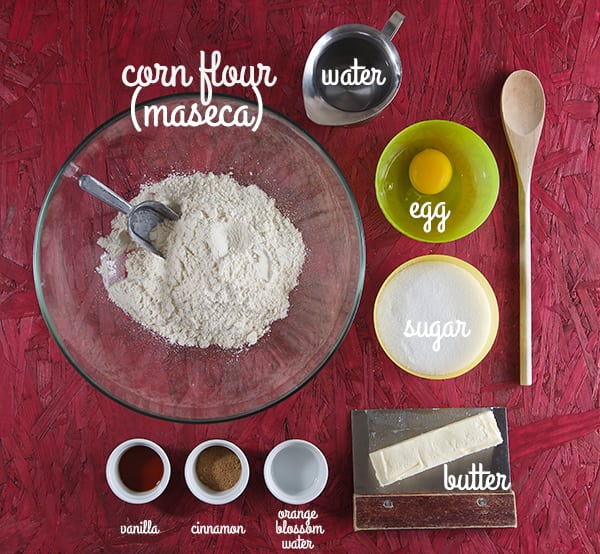
2 cups masa harina MASECA
½ cup butter (1 stick, 4oz, 125 gr) softened-room temperature
1 cup sugar
1 egg
1 teaspoon vanilla
1 teaspoon cinnamon
1 tablespoon orange blossom water (optional, but highly recommended)
¼ cup up to ½ cup of water, milk or orange juice.

Preparation:

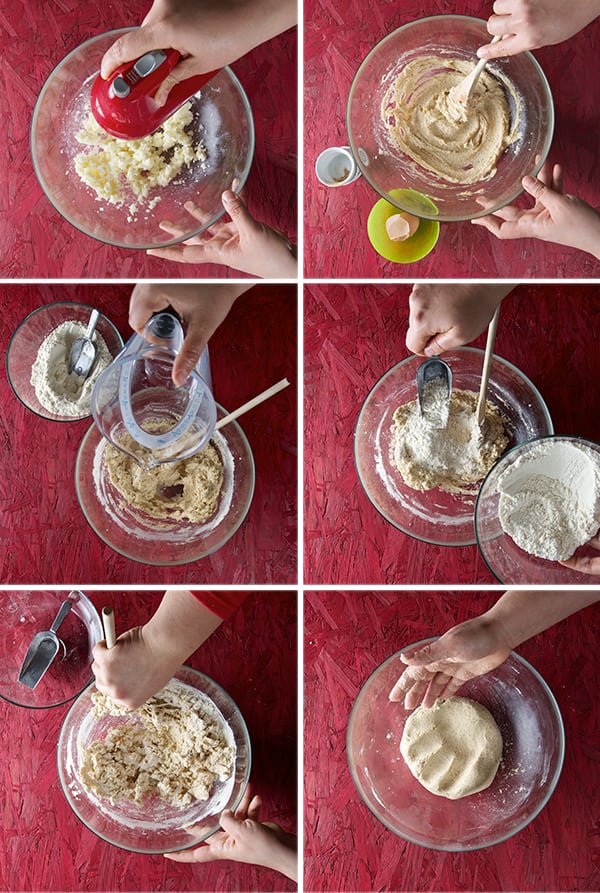
1. In a bowl, cream the butter with a wooden spoon or using a hand mixer at low speed.
2. Add sugar and mix until a bit fluffy. Add egg, vanilla, cinnamon and orange blossom water. Mix until a bit fluffy and well combined.
3. Add ½ of the corn flour, mix until combined, add the water little at the time and the rest of the corn flour until a soft dough, that resembles like play-dough.
4. Form a small ball If it does not holds together or cracks on the edges when press, add a teaspoon of water a the time until the dough holds together, is not sticky and do not crack on the edges.
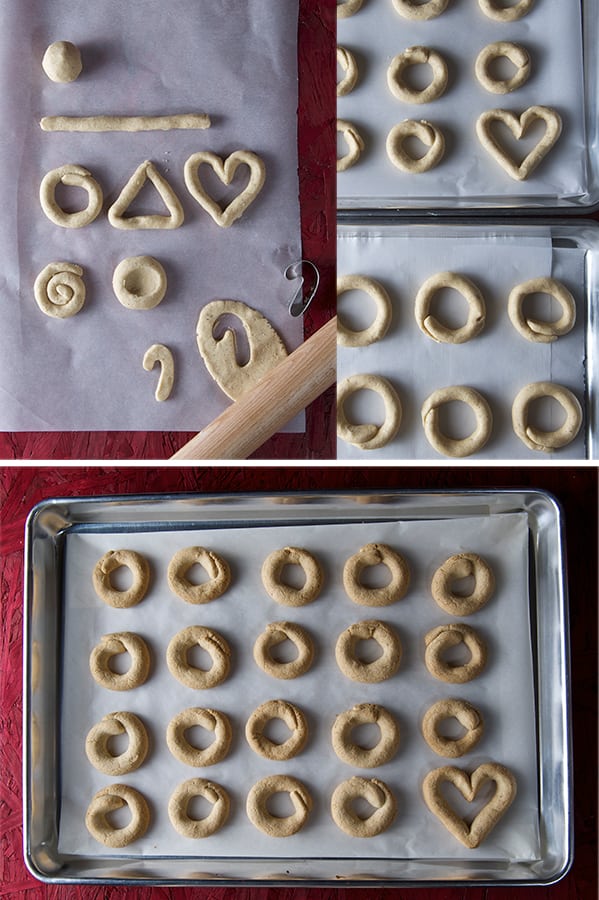
5. Now the fun begins! Take a little round ball and roll it into a cylinder then shape into a ring. Press the two ends slightly to close the circle. (no need egg wash or water to seal)
6. You can make any shape or size, coins, balls, thumbprints, or roll the dough and make cookie cut outs. You name it. Have fun!
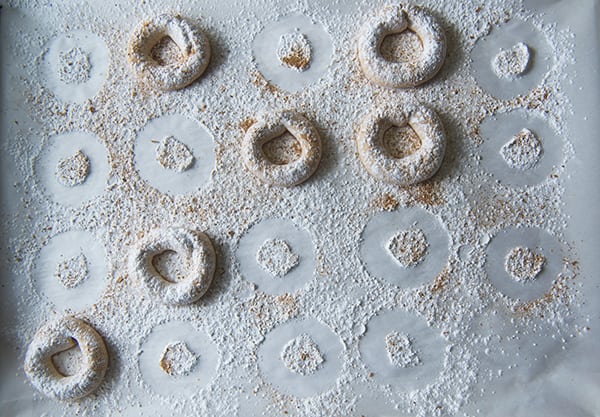
7. As you go, place the rings on a cookie sheet lined with parchment paper.
8. Preheat the oven at 350 bake for 18-20 minutes until slightly brown. Remove from oven wait for 3 minutes and then transfer them to cool on a rack.
9. Glaze or sprinke with powdered sugar when they are cool.

Corn-flour-Cookies_ingredientsCorn-Flour-Cookies_mixing-the-dough

Corn-flour-cookies_ready-to-bake!22

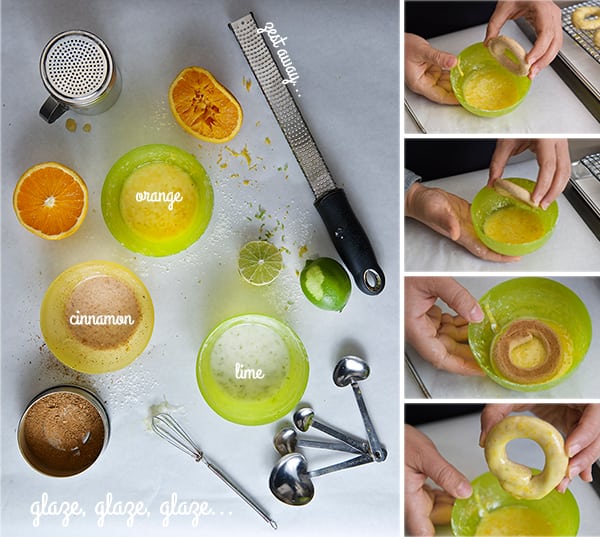
Glaze:

½ cup powder sugar
1-1/2 teaspoons lemon juice or orange juice or milk.
The zest 1 lime, orange or lemon. Or 1 teaspoon of cinnamon.

Whisk all this ingredients until glossy with no lumps. Proceed to glaze. Dry them on a rack.

Enjoy!

Corn-Flour-cookies_glaze-away!!

Corn-flour-Cookies_glazezd-up!Corn-Flour-cookies_glaze-drizzle

~Powdered sugar ~

Corn-flour-cookies_powder-sugarCorn-flour-Cookies_powder-sugar-tray

G o t    m i l k ?

Corn-flour-cookies_got-milk-2

View Post or View Comments 15

Warm Acorn Squash Salad

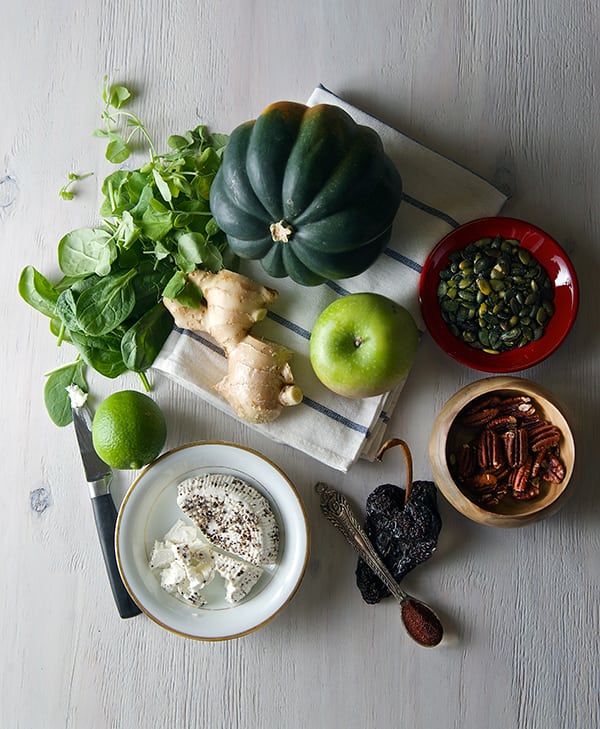
Acorn-Squash-Warm-Salad_ingredients

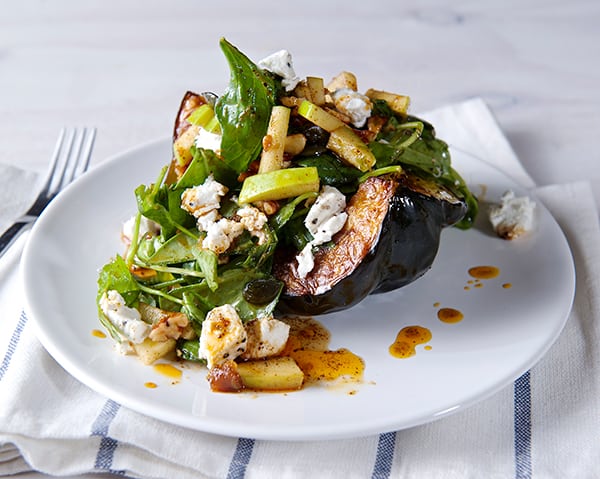
Full winter here in Austin! Yeah!!! I love cold weather and with it the delicious and comforting warm salads.
This scrumptious Warm Acorn Squash Salad is a great dish to keep up with the winter calories. If you know what I mean… I’m saving calories to spend them at Christmas… hehehe

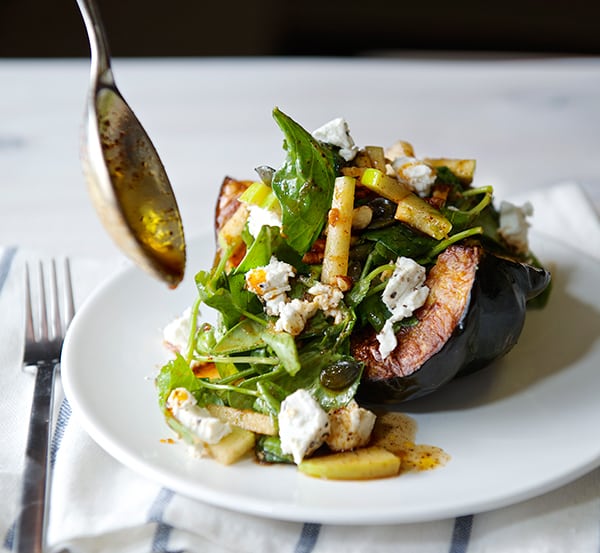
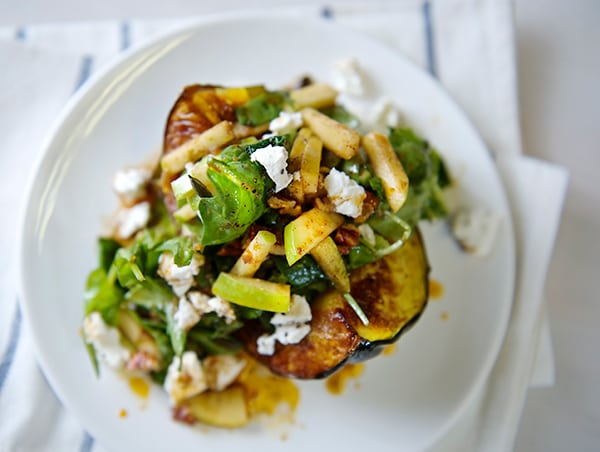
Imagine a roasted wedge of acorn squash, topped with baby spinach watercress, green apples, toasted nuts, creamy goat cheese drizzled with a slightly warm lime-ginger-ancho chilli vinaigrette… super easy, and comforting. This recipe will make you crave salad in the winter.

So, keep warm and I hope you fall in love with this easy and healthy dinner. Enjoy

Acorn-Squash-warm-salad~Yes,-more-please!

Warm Acorn Squash Salad

Serves 4

1 acorn squash cut in 4 pieces
4 cups spinach
2 cups watercress
1 granny smith apple cut in long match sticks or similar.
¼ cup toasted chopped pecans
¼ cup salted toasted pumpkin seeds (pepitas)
4-6 oz goat cheese

For the warm vinaigrette:

2 Tablespoons Extra Virgin Olive Oil
2 Tablespoons Agave nectar
1 teaspoon ancho chilli powder
2 teaspoons freshly grated ginger
The zest and juice of one lime
½ teaspoon salt

Preparation:

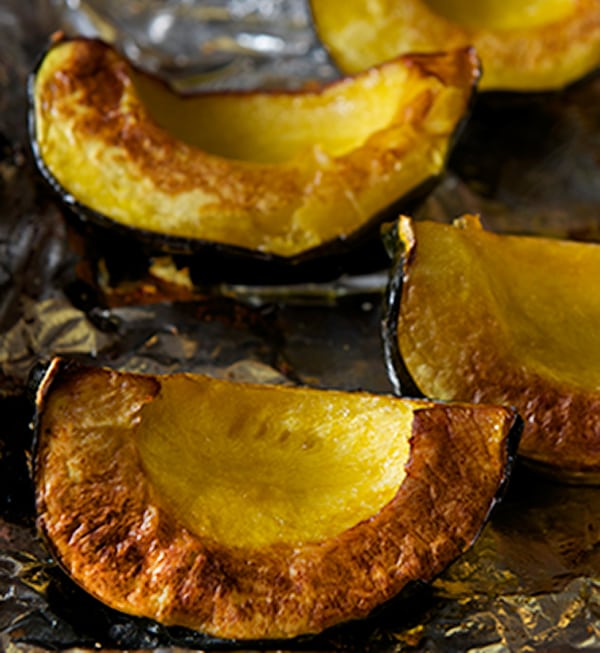
1. Place the 4 acorn squash segments in a baking sheet lined with parchment or aluminum foil, salt and pepper, Roast at 450F for about 25-30 minutes, checking half way thru, rotate the pan. And bake until fork tender.

Acorn-squash-warm-salad_roasted-acorn 2. In a salad bowl combine, the spinach, watercress, cut apples, toasted pecans, toasted pumpkin seeds.
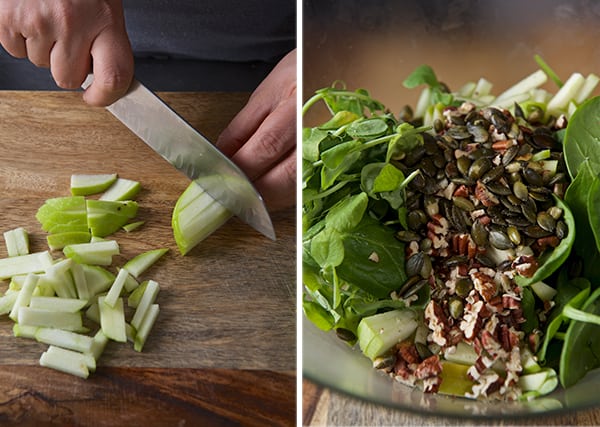
Acor-Squash-warm-salad_match-sticks-apples

3.To make the vinaigrette:
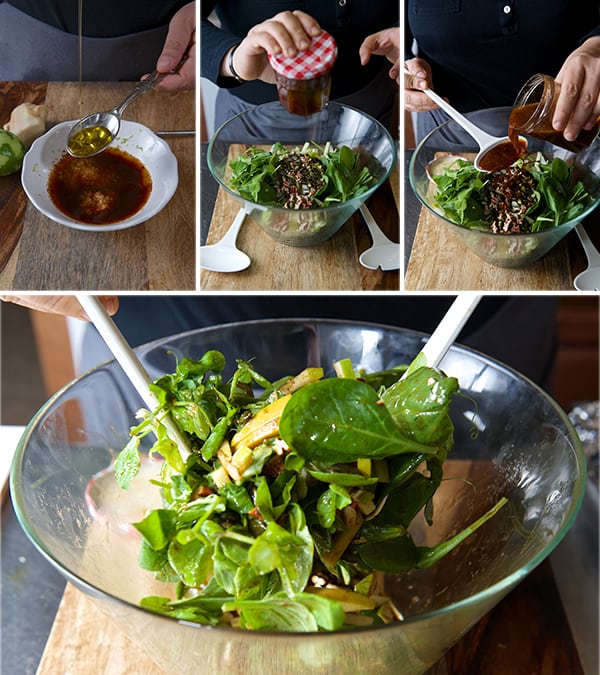
Slightly warm the Extra Virgin Olive Oil (warm to the touch). Add agave nectar, ancho chili, ginger, lemon zest, lemon juice and ½ teaspoon of kosher salt, whisk until well combined. Or place all this ingredients into a small clean glass jar and shake. The warm oil will marry the flavors and develop the aromas, as well to cozy up your greens.

Acorn-squash-warm-salad_making-the-dressing

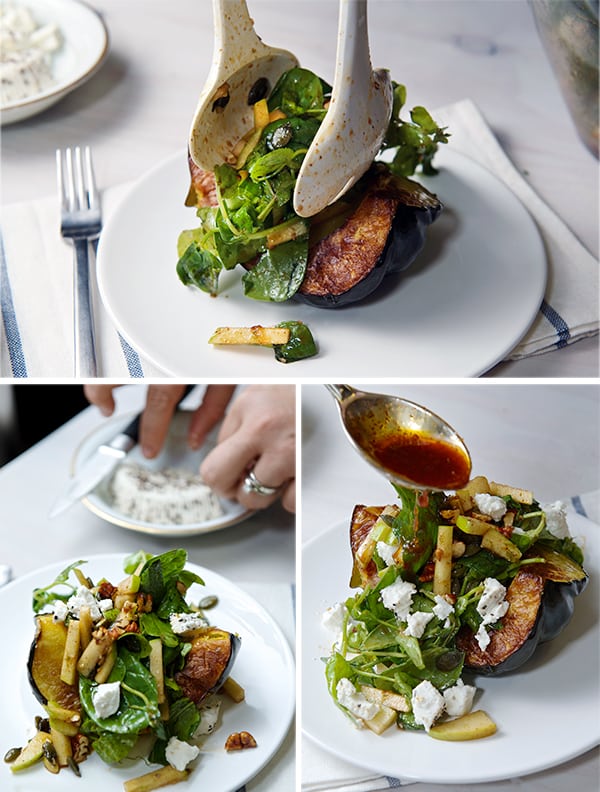
4. Once the Acorn squash is roasted, toss the salad with some of the dressing, and top each acorn squash wedge with the salad.
5. Crumble some goat cheese and drizzle a little more of the vinaigrette.Enjoy!

Acorn-Squash-Warm-Salad_dressing-up-the-salad!

Acorn-Squash-Warm-Salad~Yes,-more-please!-delish

Acorn-Squash-Warm-Salad_above-your-expectations!

Warm Acorn Squash Salad…warm up!~

View Post or View Comments 5

Chicken Tortilla Soup “Mariana Style”

Chicken-Tortilla-Soup-'mariana-style'`Yes,-more-please!

In this global world we are living, what is authentic anyway?…

I think as I get to know more people from different backgrounds, cities, expatriates, cultures, beliefs, culinary eccentrics, purist, creators; the more I conclude that authenticity is not a place, a language, a heritage, a culture, or a belief.
I think authenticity comes from within. Who you are at this right moment, in this place and at this time; and the one that you want to become…. that’s authenticity for me.

It reminds me of a monolog phrase in the movie “All about my mother” from Almodovar’s
and one of the characters in the movie quotes the following:
“… because you are more authentic the more you resemble what you’ve dreamed of being” – “La Agrado’s” monologue (All About My Mother) Almodovar.

And you are wondering what does this has to do with tortilla soup?,
In the culinary world, I’ve always questioned myself about  what is considered an authentic dish? Perhaps it is the dish that resembles more to the people who created it?
For example, If you are from Mexico; is the soup that your grandma prepares more authentic, than my grandma’s soup?.. No, I really don’t think so.
I believe you embrace the flavors that make you happy and satisfy, that make you re- create a memory a flavor, an aroma and you create the soup you want to eat and share with your loved ones… It will be hard to imagine Mexican grandmas cooking for the authenticity sake! I believe you can cook along the way with tradition and make it your own with a few touches.

In this Chicken Tortilla Soup, I wanted to evoke the aromas, textures, flavors, freshness, from the cooking style in Guadalajara, Jalisco the city I’m originally from. This soup re-creates a little memory of my home city, easy on the condiments and full of flavor…
I hope you like the soup as much as I do. So let’s cook!. Enjoy.

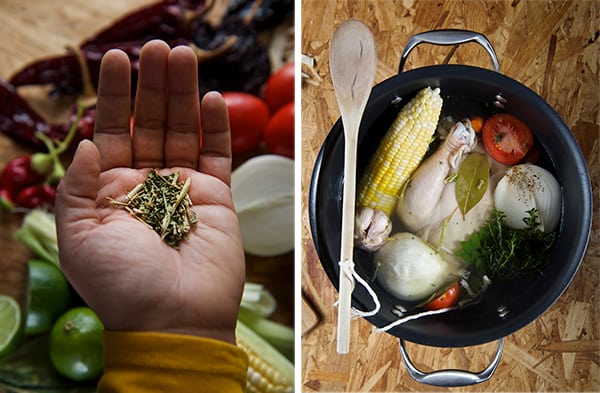
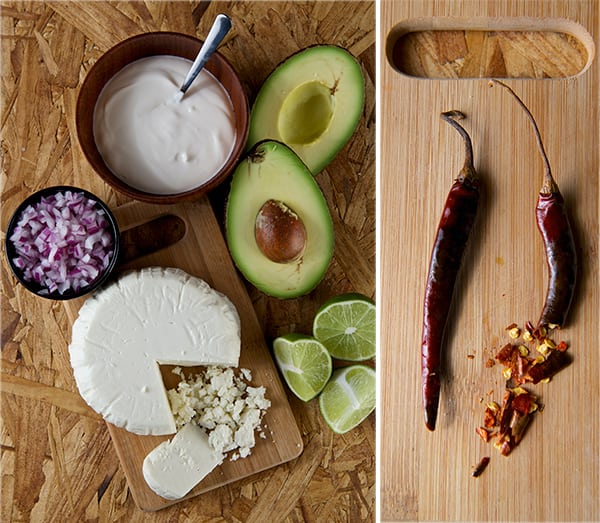
Chicken-Tortilla-Soup-'mariana-style'ingredients

Chicken Tortilla Soup “Mariana Style”

Serves 4-6

For the chicken stock:

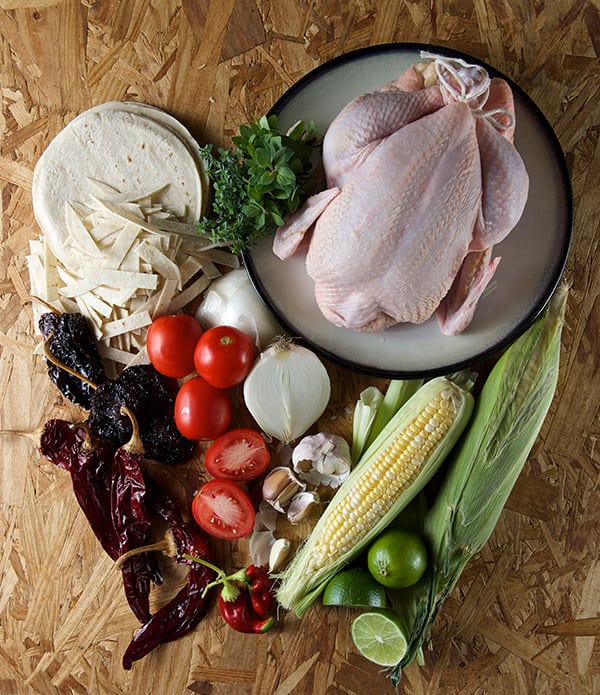
1 whole chicken 3.5-4 lbs. I’m in love with the chickens from Smith & Smith Farms
1 medium size with onion
2 carrots
2 celery stalks
1 roma tomato
1 head of garlic
3-4 sprigs of thyme
2-3 sprigs of fresh oregano
1 teaspoon dry epazote or mint
1 tablespoon of salt
1/4 teaspoon black pepper

2 ears of corn- cut the corn of the cob
(my preference is white corn if I can find it, but yellow is ok too)

For the sauce:

2-3 dry Pasilla chiles slightly toasted
4-6 dry Guajillo chiles slightly toasted
1-2 dry Arbol Chiles slightly toasted
4 Roma tomatoes
¼ piece of onion
1 garlic clove
4 tablespoons of corn or sunflower Oil
Salt and pepper.

4-5 cups Chicken stock previously made… or the best option you have available.

Garnish with

8-10 Corn Tortillas cut into 1/2-1/4” wide strips.
½ to ¾ cup Canola Oil

1 ripe avocado, cut in slices or cubes
1 cup queso fresco crumbled
½ cup Mexican style crema or Creme fraiche
½ cup diced onion
2-3 Limes
2-4 dry Arbol Chiles toasted with a little bit of oil, until they look dark. (see photo below)


Preparation:

1. Start by preparing your chicken stock on a 7-8 qt pot. Place the whole chicken and add all the stock ingredients, add water enough to cover the chicken. Bring to boil and then lower down the heat to a slow simmer cover with a lid and cook for about 45 minutes.

Chicken-Tortilla-Soup-'mariana-style'

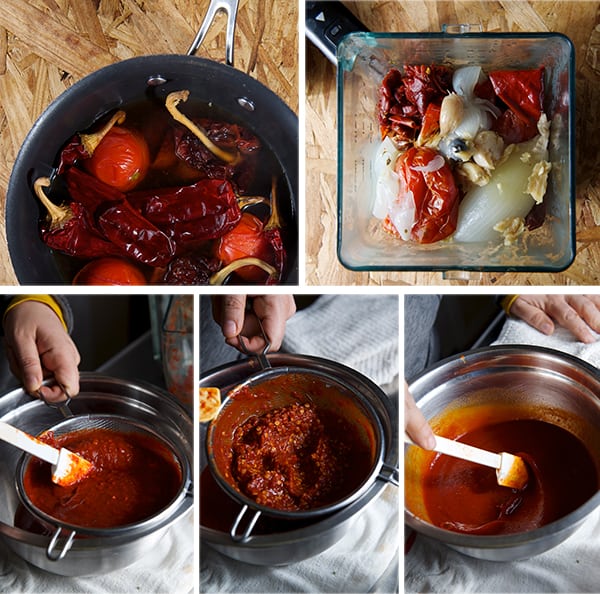
2. Mean time slightly toast your chillies on a pan, small comal or cast iron pan.
3. In a small pot boil the toasted chillies and the tomatoes.
4. Once they are soft, place the chillies, tomatoes, onion & garlic into a blender or food processor and puree.
5. Using a strainer, strain the chilli puree to eliminate the seeds and pieces of skin. (see picture below)

Chicken-Tortilla-Soup-'mariana-style'how-to-make-the-broth

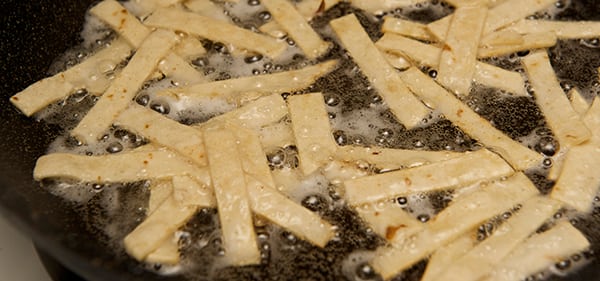
6. Cut and Fry the tortilla strips. Once fried place them on a plate with a paper towel to remove the oil excess. Sprinkle with salt while they’re warm.

Chicken-Tortilla-Soup'Mariana-Style'-frying-tortilla-strips
7. Check on your chicken stock, the broth should look translucent, no foam on the top, vegetables soft and onion translucent, chicken fork tender. If it is done remove at least 4 cups of chicken stock and strain. Take out the chicken, place it on a bowl and cover with some aluminum foil wait a bit until ready to handle, remove the skin and shred the chicken.
I usually use about ½ a chicken to serve 4. you can save the rest for tomorrow’s enchiladas…hehehe
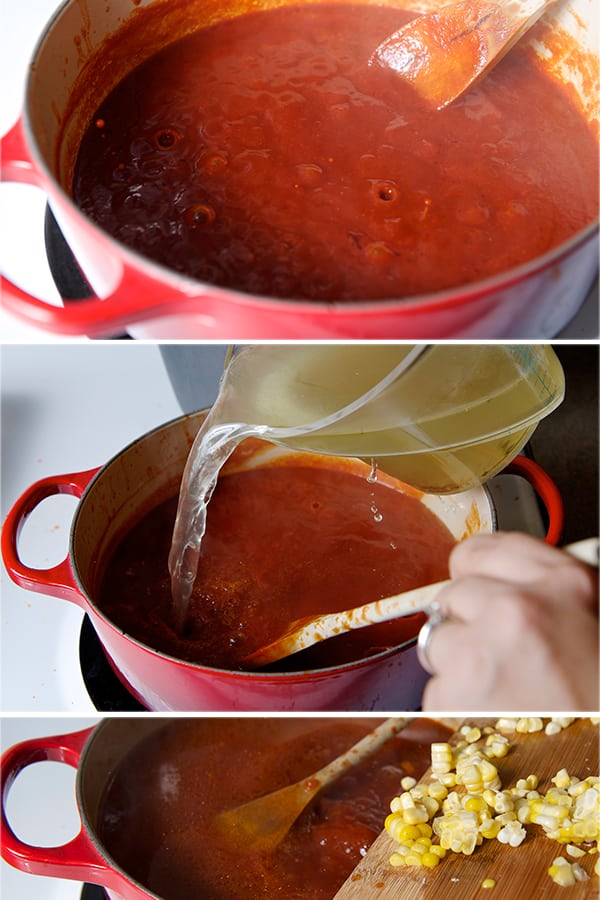
8. In a medium size pot add 4 tablespoon of canola, or sunflower oil, once is rippling hot add your chilli-tomato puree, and cook the sauce in medium low for about 4-5 minutes.
9. Add chicken stock, and corn kernels season with salt and simmer for about 10-15 minutes.
10. Taste the soup for salt and paper.

Chicken-Tortilla-Soup-'mariana-style'_making-the-soup

11. Chop and prepare your garnishes

Chicken-Tortilla-Soup-'mariana-style'-Garnishes
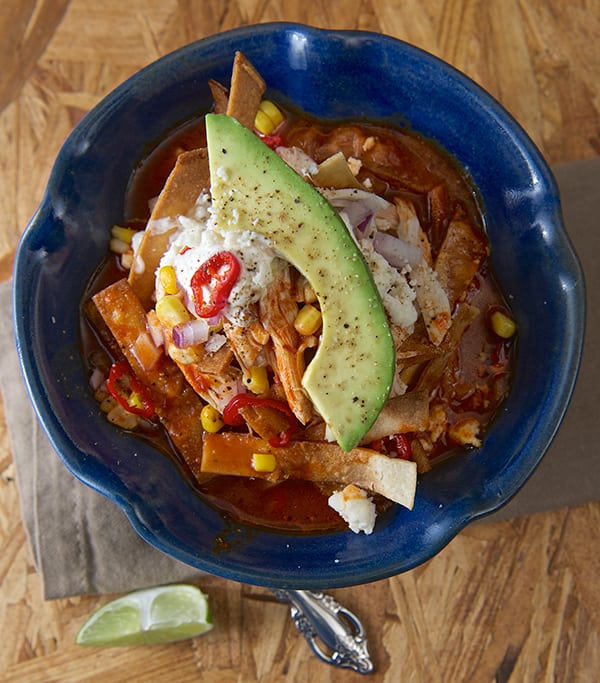
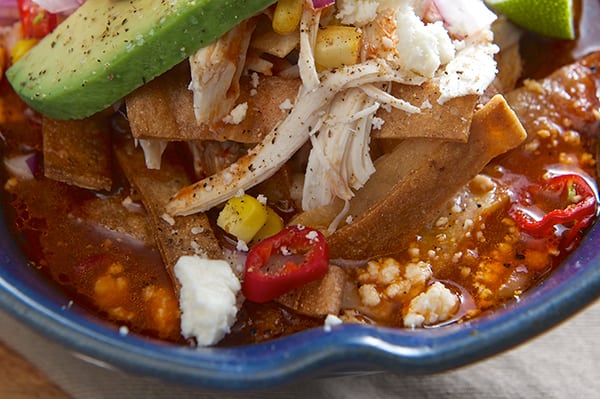
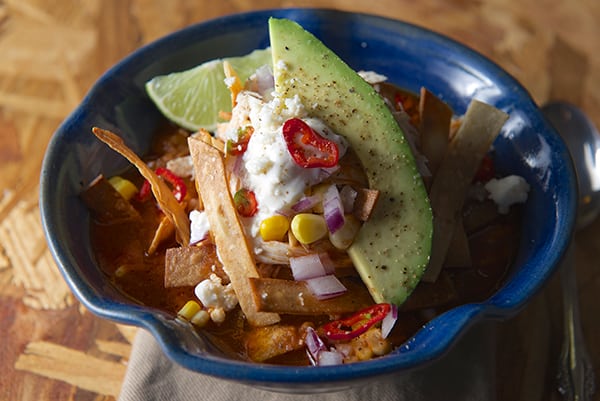
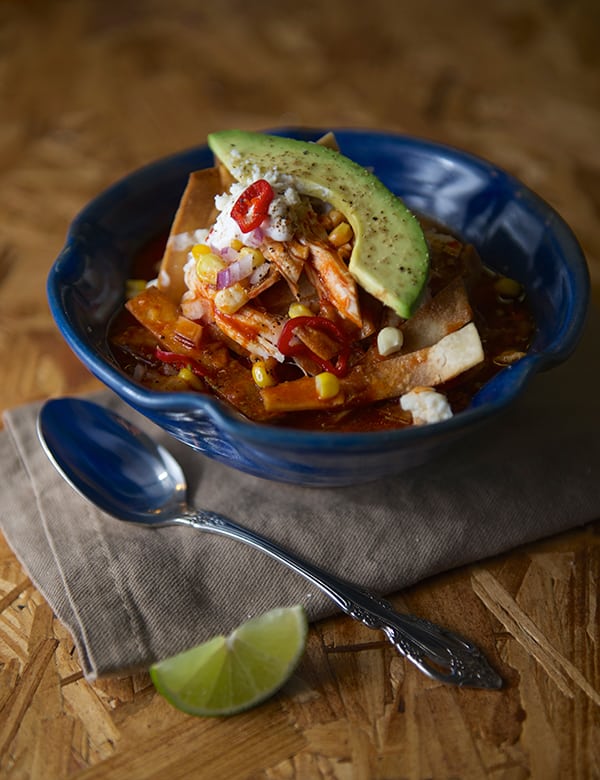
12. Serve on a deep bowl place the shredded chicken 2 to 3 ladles of the chilli broth place a good handful of the fried tortilla strips, and garnish with the cream, crumble cheese, avocados, and some of the chile de arbol fresh or toasted with a little oil for more heat.


Chicken-Tortilla-Soup'Mariana-Style'-close-up

Chicken-Tortilla-Soup'Mariana-Style'-bowl~yes,-more-please!

Chicken-Tortilla-Soup'Mariana-Style'-ready-to-eat~yes,-more-please!

ENJOY!!!

Smith&smith-chicken I’m in love with the chickens from Smith & Smith Farms, it is a small family operated farm, they specialize in  pasture raised meats that are hormone and antibiotic free. They  raise Dorper Lambs, all different breeds of laying hens, Cornish Rock meat chickens, Red wattle hogs, and Broad Breasted White Turkeys. All of the animals on their farm are free range and roam around every where! They are all as happy as can be, and you can taste the happines when you cook them. Delicious!

If you live in Austin, check their website for hours and farmers markets locations at: http://smithandsmithfarms.webs.com

View Post or View Comments 5

Thanksgiving with Friends!!!

Ian-&-Mariana

Hello!, I hope you had a great Holiday, we would like to share our Thanksgiving with friends day with you.

This year Ian and I were very grateful to have had spent it with two great friends, Andrea and Arin, who they share the love for cooking, we had a blast!.

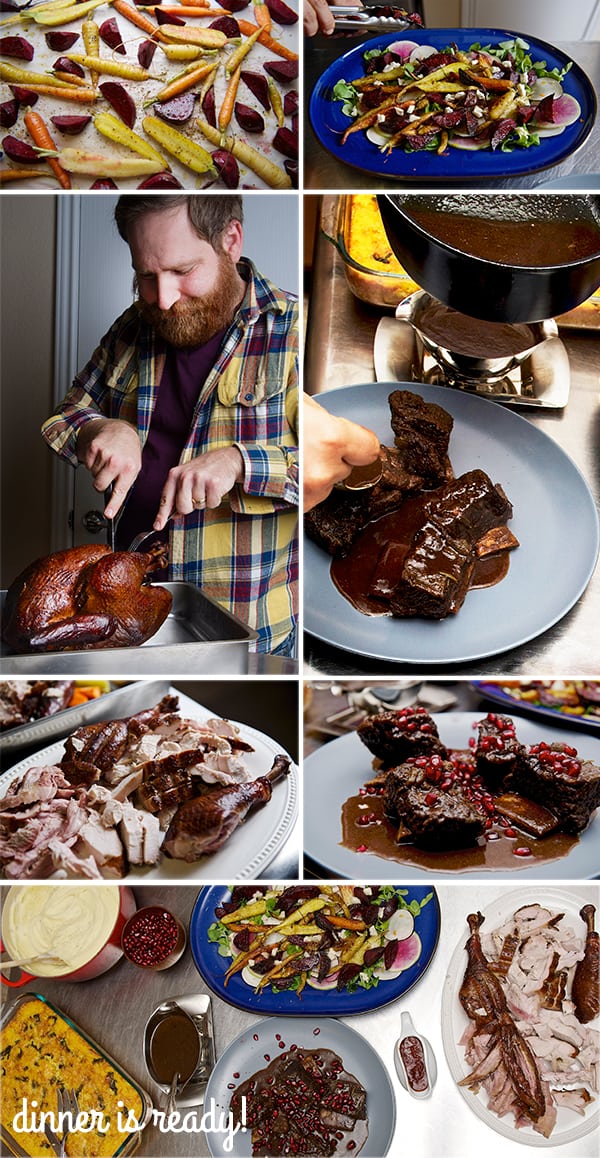
We decided to go with a not so traditional menu, with room for the turkey to be invited.

Thanksgiving_2013

“Friends are the Family we choose for Ourselves” -Edna Buchanan

 Our Thanksgiving Menu

November 2013

~ Breakfast Brunch ~

Spanakopita/prasopita

Leeks, spinach, feta, eggs, butter all wrapped in a layered fillo crust.

Recipe from Arin’s Yaya

~ Tea time & games ~

Corn Cookies

Recipe from Momofuko’s pastry chef

Crabapples, ginger and Rum warm Cider

Andrea’s and Mariana’s concoktion

~ Dinner ~

Applewood Smoked Turkey

Recipe by Arin & Andrea

Braised Beef short ribs in red wine sauce

Recipe by Mariana & Ian

Robuchon style mashed potatoes

~
Corn bread with smoked gouda and poblano peppers

by Mariana’s grandma Ana recipe

~
Watercress, watermelon radishes, spanish radishes,

roasted beets & carrot salad

blue goat cheese crumbs with orange vinagrete

by Mariana.

~ Dessert ~

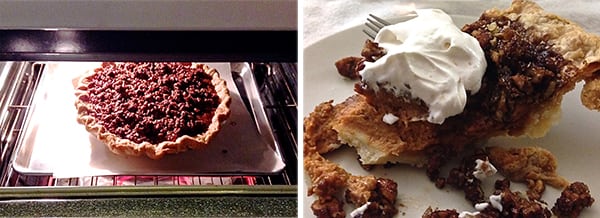
Pumpkin pie with pecan praline topping and whipped cream

by Mariana

. ——————————————– .

We started our day early, Ian prepared for us his fabulous Cappuccinos he can make killer chinos;  once we were awake, Arin and Ian started the fire for the smoker and place the turkey in the smoker, Meantime Andrea and I prepared some breakfast tacos (a small bite) before Arin started to make his fantastic Spanikopita torte, a recipe from his Greek-grandmother.

Later for brunch, we had a slice of spanikopita and Cider to warm up, played board games and had a cup of tea and freshly baked cookies, It was a chilly day in Austin, 34F/54F…

Around 4:30 we started making the side dishes, short ribs were done, gravy, and mashed potatoes. Andrea and I baked the cornbread.

Everything went smooth and fun. Ian had fun taking photos, all the  ingredients, excitement and cooking action.

Finally around 5:30 we were ready eat…What a great experience, cook, share, laugh, eat and drink!

Even though we miss our family and we where thinking about them, we are very grateful to have had the joy to spend this holiday with friends…

Thank you Arin and Andrea… Now,  whats for X-mas LOL!

Thanksgiving-_02

The smells were driving Sophia a little crazy!

(Sophie is our little dog it is an Italian greyhound)

Thanks-giving-dinner_2013~-Yes,-more-please!


There is always room for dessert….

Thanksgiving-Pumpkin-Pecan-Praline-Pie-Dessert

So…what’s for X-mas???


View Post or View Comments 0

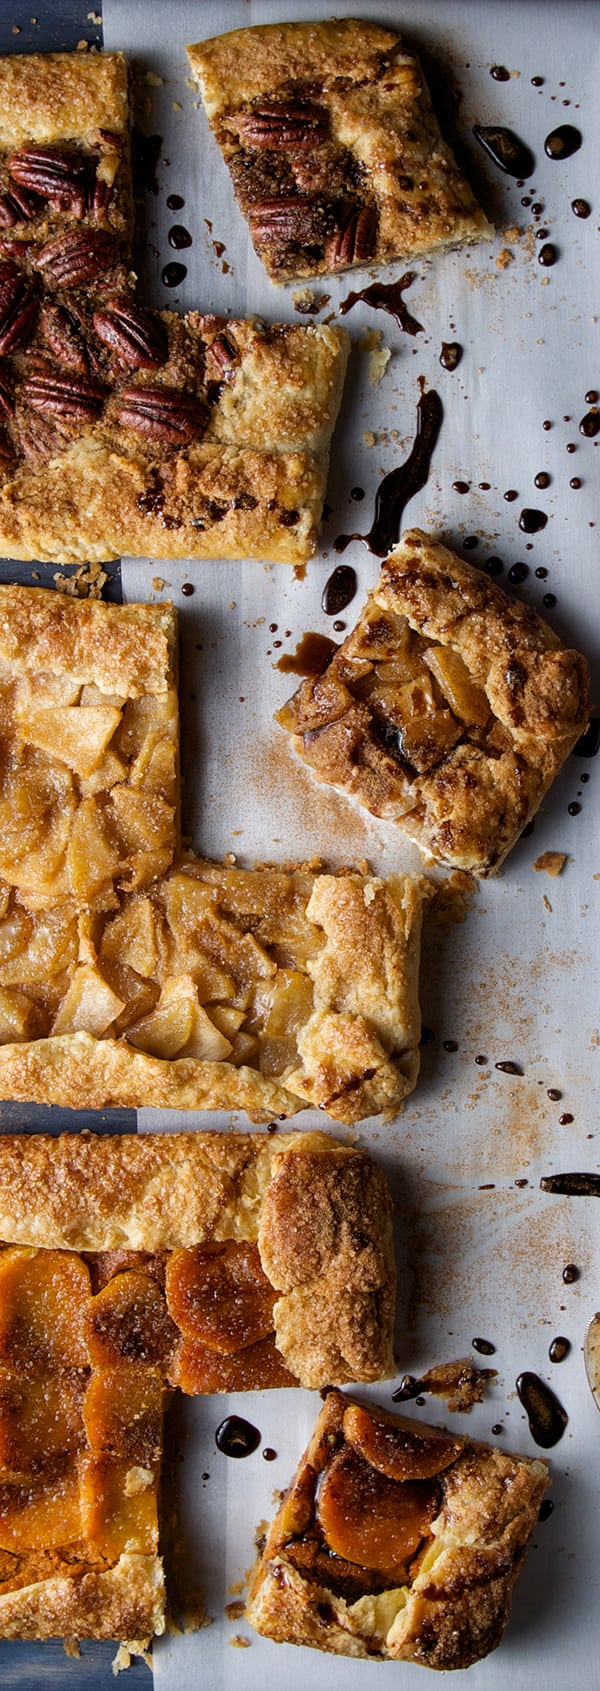
Thanksgiving Crostatas Pecan Apple & Pumpkin-Yam

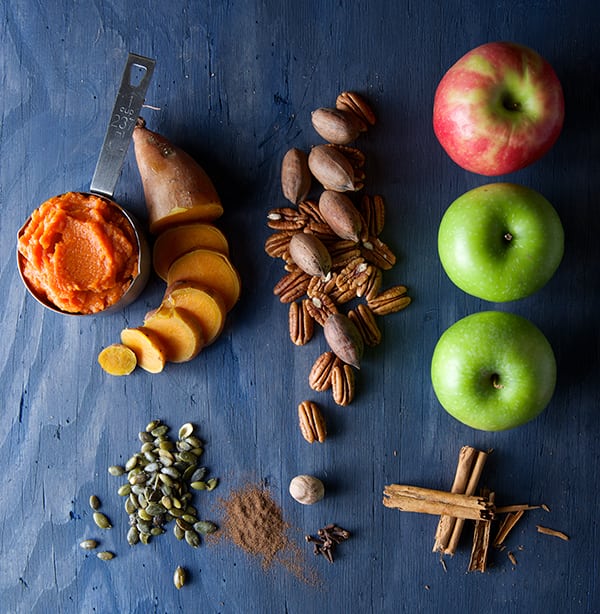
Thanksgiving-Crostata_ingredients

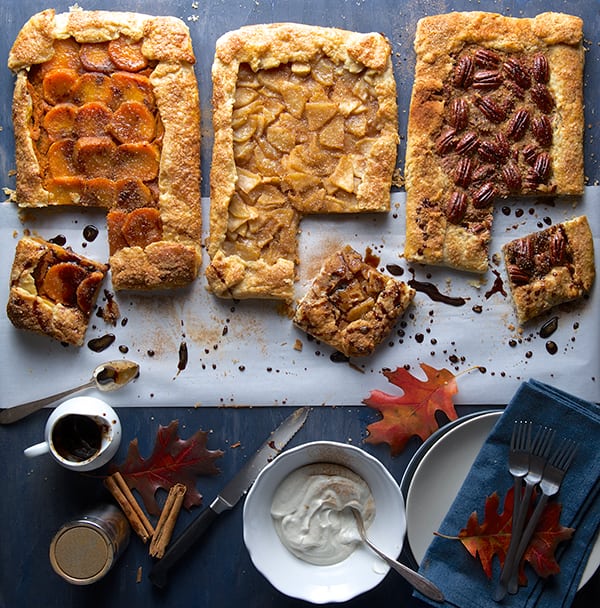
I wish you could have smelled my kitchen the day I baked these crostatas, it was intoxicating!…
A cloud of buttery pecan, apple, cinnamon and allspice in the air.
Crostata, my absolutely favorite pastry. Let me tell you why…

During my sweet tooth life I’ve tried many pies: the open pies, the double crust, the lattice, you name it. I always felt there was too much sugary filling compared to the amount of crust. The pie ratio in most of the cases does not work for me.

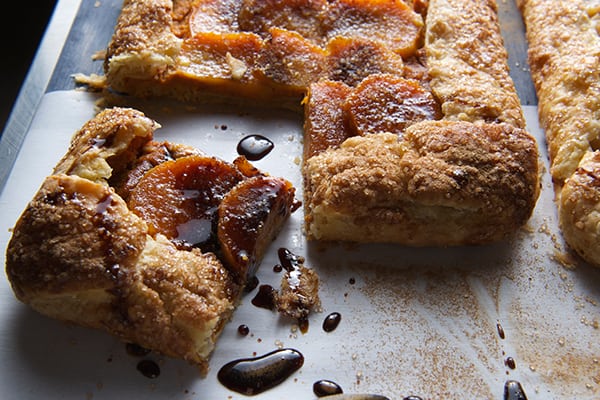
The day I tried my first crostata I was madly in love. It was an apple crostata, in the town of apples Julian in California. It had the perfect ratio between crust and filling and the crust was golden brown , flaky and crumbly, tender, and buttery. The sensible single layer filling had a bubbly, slightly crusty caramelized top. Inside it was juicy and fruity, and I was lost. Yet, I felt illuminated, just like the Greeks when they discovered “the golden ratio”. I prefer to call it Crostata like the Italians, over Gallette like the French, and of course the less romantic name free form pie….any way you name it, it’s always so simply and utterly delicious.

What I call“The Crostata Golden Ratio” is that perfect amount of crust and filling, allowing you to savor the buttery flaky crust and the sensible layer of fruit topped with some sugar allowing the crust to stay crispy and flaky in every bite. The fruit acts like the butter; slightly sweet and a bit tart. Suddenly, all your tastebuds are  awake; sweet, tart, creamy, crusty , buttery flaky…even days after its made, you can warm it in a toaster oven and it feels like you just baked it.

Now, if we talk about appearance, I love crostata with its rustic and honest look. It’s not decorated and definitely you can apply some decor, however I think the beauty comes from its baked right ingredients, the simple look is what makes it so attractive to eat and to prepare, no fuss, it is what it is.

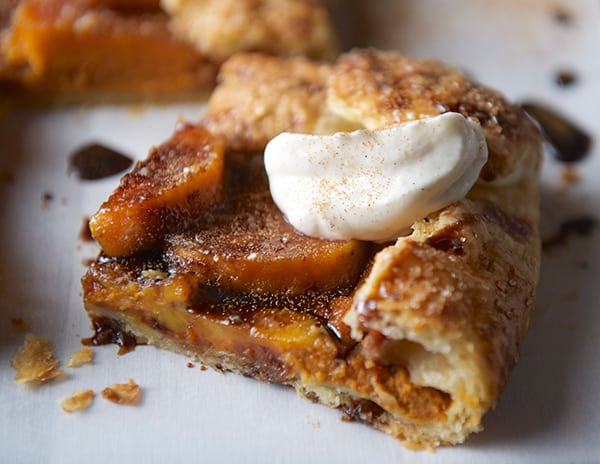
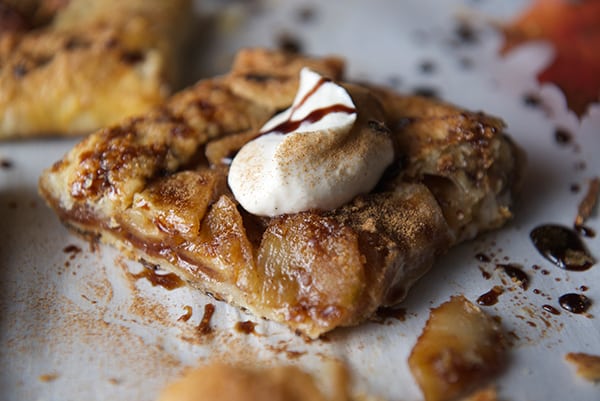
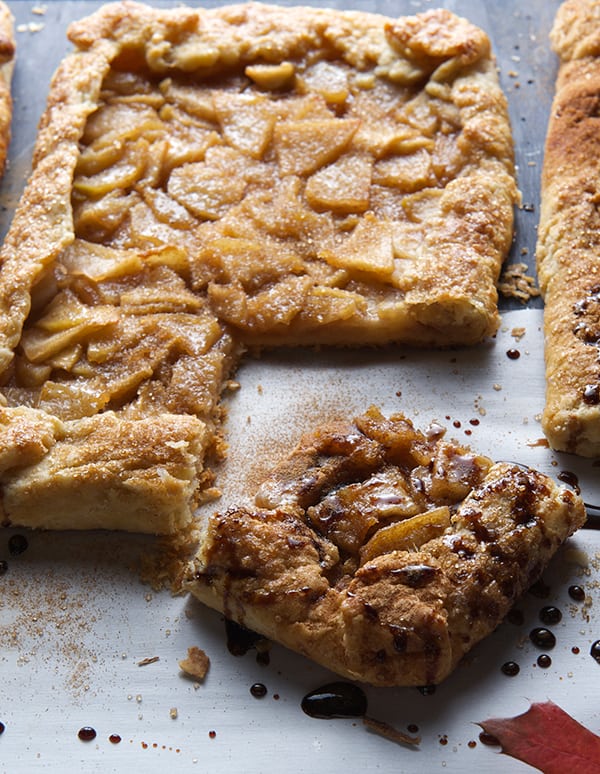
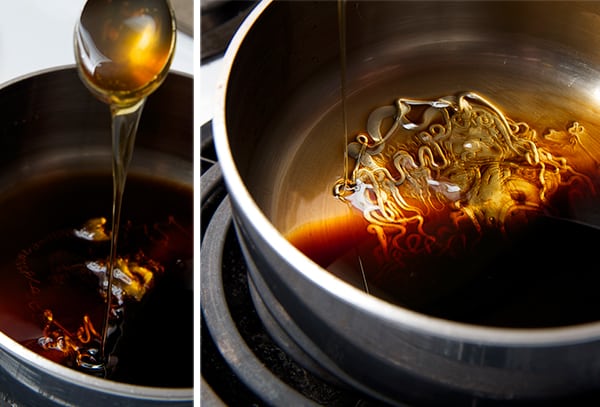
I serve these crostatas with a cinnamon whipped cream and a honey-balsamic vinegar reduction, I love the tangy-sweet note that the reduction brings to the crostata, a caramel sauce will go great too….

Thanksgiving Crostatas will make a fabulous and sweet end to your dinner.
~ Happy Thanksgiving ~ from Ian and Mariana.

Thanksgiving-Crostatas_Pecan,-apple-and-Pumpkin-Yam

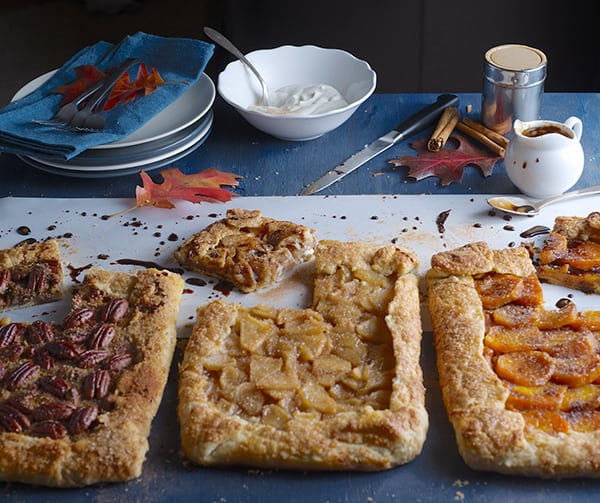
Thanksgiving Crostatas: Pecan, Apple & Pumpkin-Yam

Makes 3 – 7 ” x 11″rectangular Crostatas. Serves 24 to 18 slices.

For the Crust:

3-3/4 cups of unbleached-all purpose flour
3 sticks of butter
1 tablespoon of sugar
1 pinch salt
3/4-1 cup Ice cold water

1 egg + 1 tablespoon water for egg wash
1 cup of turbinado sugar to top the edges of the crust.

Directions:

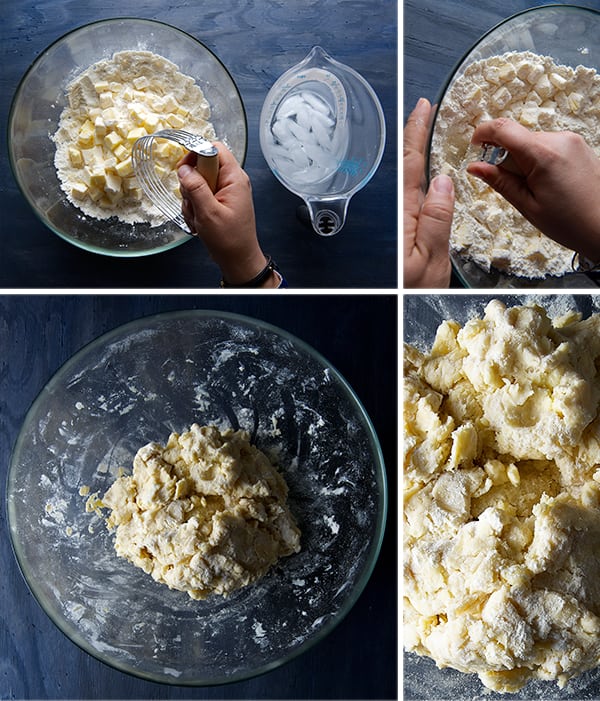
Measure all your ingredients. Place all the dry ingredients in a bowl and mix. Place the bowl in the freezer. Meantime cut your cold butter, and iced water ready to measure. Remove the bowl of dry ingredients from freezer and add the butter. With a pastry blender incorporate the butter and flour until the mixture resembles a coarse meal, and the butter pieces are small like the size of a pea. Slowly add the cold water and carefully, with your hands, form a dough that just holds together. Be careful not to over work the dough. 
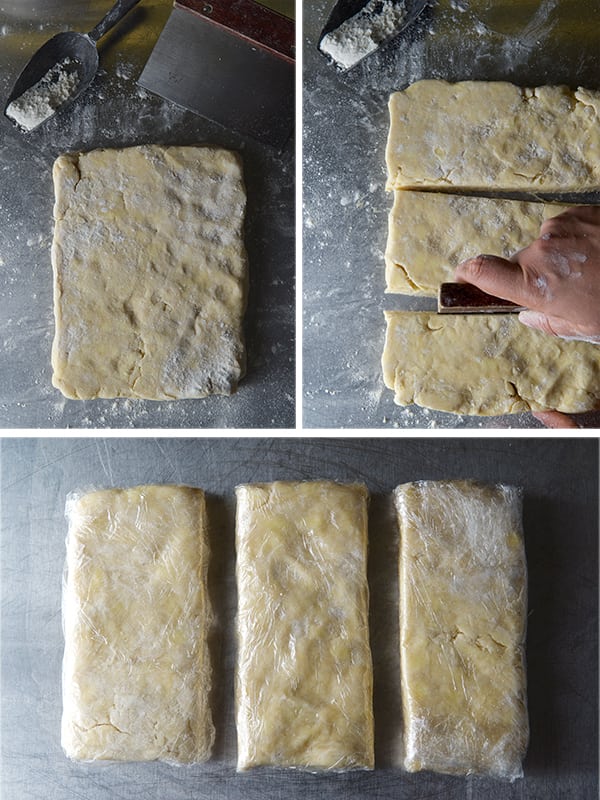
Once that the dough holds together. Shape it into a rectangle about 9”x6” and then divide that rectangle into 3 pieces (see picture below) Wrap each rectangle with plastic wrap and refrigerate for at least 1 hour; you can rush it by placing into freezer for 20-25 minutes.

Thanksgiving-Crostatas_The-crustThanksgiving-Crostatas_dividing-the-crust

~ R o l l i n g ~

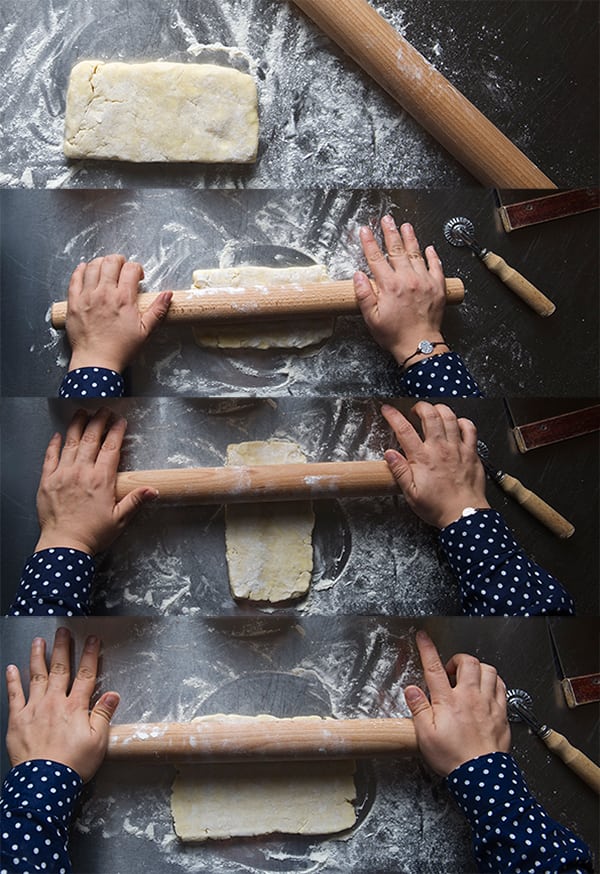
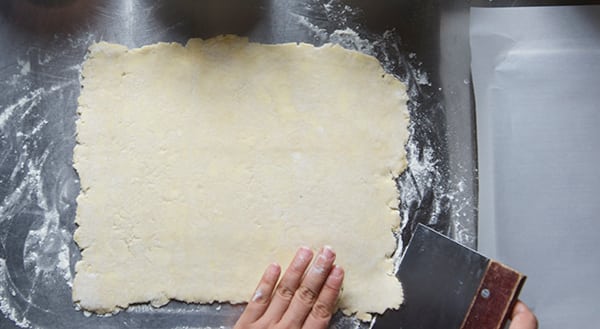
On a clean work surface, dusted with flour, unwrap the dough let sit for a couple of minutes and then roll the dough into a 13”x 9” rectangle and about 1/8″and 1/4″thin.
Rolling little by little, rotating the rectangular, for even thickness (see picture below).

Thanksgiving-Crostata_rolling-the-crust.. roll it!Thanksgiving-Crostata_rolling-the-crust_one-sheet

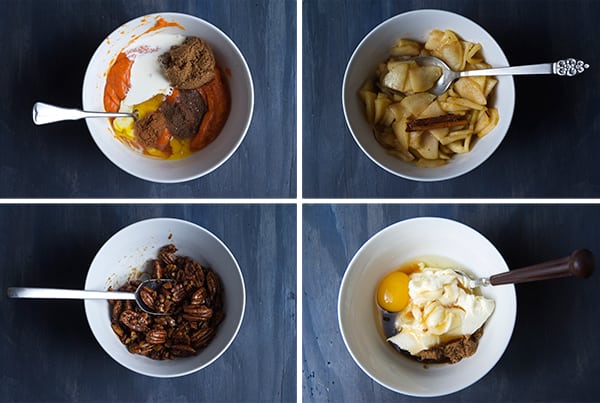
~  F i l l i n g s  ~

Thanksgiving-Crostatas_fillings


Pumpkin- Yam Crostata

Thanksgiving-Crostata_Pumpkin-yam-slice

Filling:

1 cup hefty pumpkin purée.
1 egg
1 tablespoon of heavy cream
¼ cup brown sugar
¼ teaspoon allspice
¼ teaspoon cinnamon
1 tablespoon of heavy cream
pinch of salt
2-3 small Yams or sweet potatoes.
3 Tablespoon butter cut into little squares to top the yams.
½ cup turbinado sugar
extra cinnamon for dusting

Directions:

In a bowl, mix the pumpkin pure, egg, heavy cream, sugar and spices and salt until well combined.
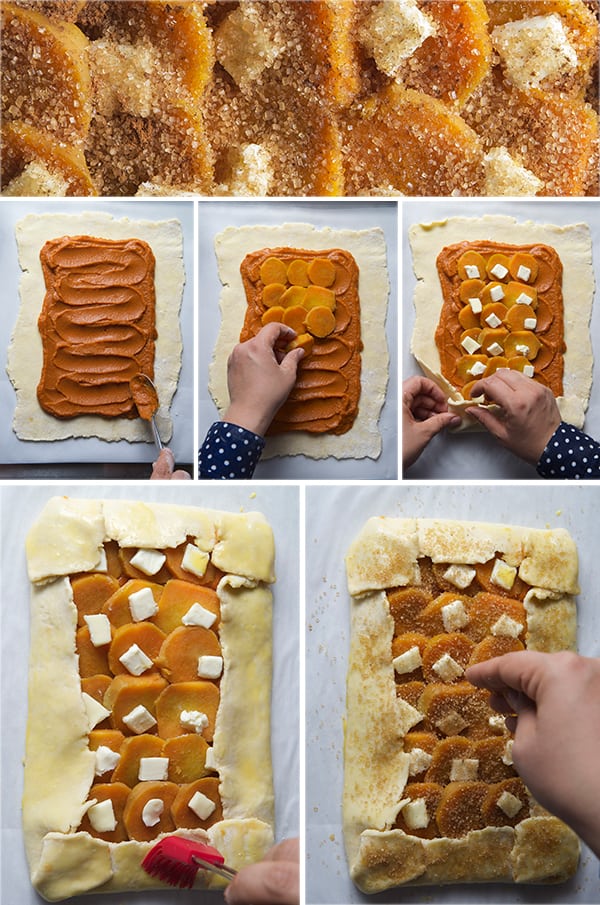
Yams: steamed, peel and slice into ½ “ slices. Set aside room temperature. Preheat Oven at 400. In a 1/4 sheet pan lined with parchment paper, place the 9″x13″ crust spread the layer of pumpkin mixture leaving a 1.5” inch margin around the rectangle to be folded. arrange the slices of yam and sprinkle with the little squares of butter, turbinado sugar, and dust with some cinnamon. Fold the sides and fold the corners into a triangle, (see picture below) Egg wash and sprinkle the turbinado sugar all around the crust and a little over the filling. Bake for 25-30 minutes. Until golden brown.

Thanksgiving-Crostatas_Pumpkin-YamThanksgiving-Crostatas-Pumpkin-Yam


Apple Crostata

Thanksgiving-Crostata_apple-slice

Filling:

2 granny smith apples peeled and sliced.
1 Honey suckle or pink lady peeled and sliced.
2 tablespoons butter
1/4 cup turbinado sugar (taste your apples! if they are two sweet you might need less sugar, if they are to sour, you need to add a bit more!)
1 teaspoon cinnamon
½ teaspoon nutmeg freshly grated.
the zest of half a lemon about ½ teaspoon.
1 teaspoon lemon juice
Smidge of salt

Directions:

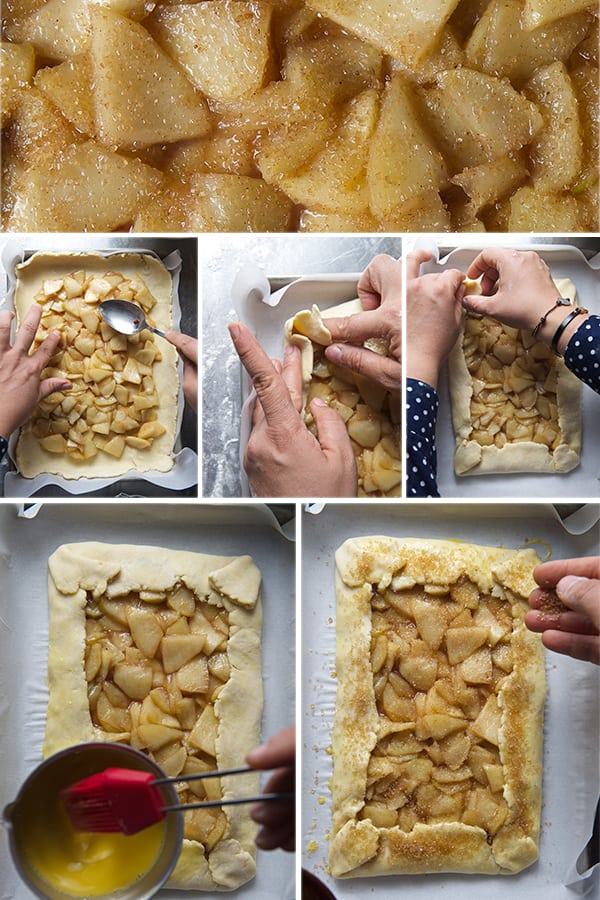
In a sauté pan melt the butter, add the sliced apples, brown sugar, cinnamon, nutmeg, lemon zest and juice, salt. Saute until the apples are slightly tender and the liquids reduce. Remove from stove and cool down filling before use. Preheat Oven at 400. In a 1/4 sheet pan lined with parchment paper, place the 9″x13″ crust spread the saute apples in an evenly layer  leaving a 1.5” inch margin around the rectangle to be folded. Fold the sides and fold the corners into a triangle, (see picture below) Egg wash and sprinkle the turbinado sugar all around the crust and a little over the filling. Bake for 25-30 minutes. Until golden brown.

Thanksgiving-Crostatas_apple-assambling-crostataThanksgiving-Crostatas-Apple


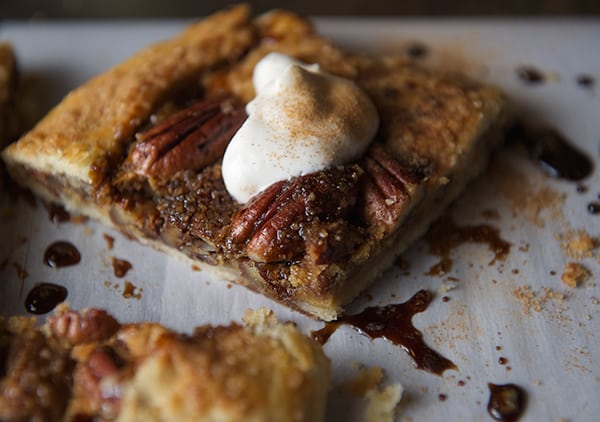
Pecan Crostata

Thanksgiving-Crostata_Pecan-slice

Filling:

1 cup pecans halves roasted
½ cup fine chopped pecans
8 oz cream cheese softened
1 egg
1 teaspoon vanilla
1 pinch of salt
1 tablespoon sugar
2 tablespoons brown sugar

Directions:

In a mixing bowl combine cream cheese, chopped pecans, egg, vanilla and one tablespoon of sugar.
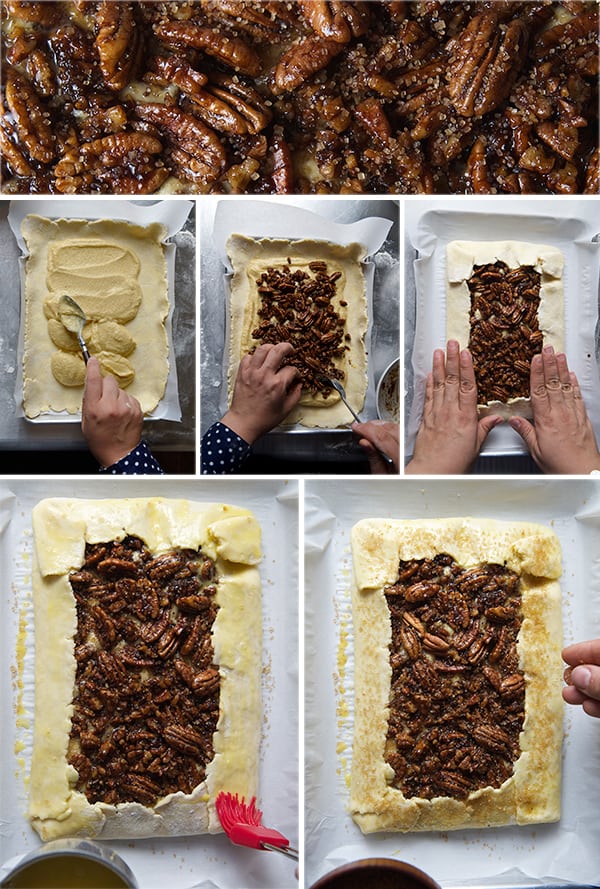
Toast the pecans and quick sauté them using a little butter and 2 tablespoons of brown sugar, set aside and let them cool before using. Preheat Oven at 400. In a 1/4 sheet pan lined with parchment paper, place the 9″x13″ crust and spread the cream cheese filling leaving a 1.5” inch margin around the rectangle to be folded. Top with the sautéed pecans. Fold the sides and fold the corners into a triangle, (see picture below) Egg wash and sprinkle the turbinado sugar all around the crust and a little over the filling. Bake for 25-30 minutes. Until golden brown.

Thanksgiving-Crostatas_pecan-assambling-the-crostataThanksgiving-Crostata-Pecan

~ T o p p i n g s ~

Thanksgiving_Crostatas_Toppings

Cinnamon Whipped cream:

½ cup heavy whipping cream
dash of vanilla extract
1 tablespoon powder sugar
1/2 teaspoon cinnamon

In a clean chilled metal bowl, whisk all ingredients until it forms soft peaks.
Keep refrigerated until serving.

Honey-Balsamic reduction:

½ cup balsamic vinegar
2 tablespoons honey

In a small sauce pan combine honey and balsamic bring it to a slow simmer, check for desired consistency by running your finger on the back of the spoon. Serve warm.

Thanksgiving-Crostata_Balsamic-Honey

~ D r i z z l e ~

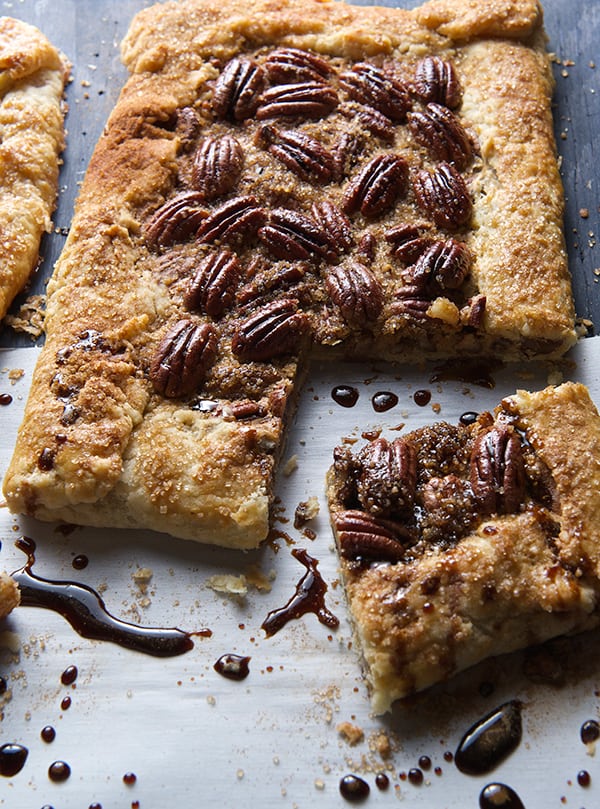
Thanksgiving-Crostata_beauty-close-up_vertical_01

Happy Thanksgiving…ENJOY!!!

View Post or View Comments 6

Fennel-Shallot-Bacon & Edam Quiche

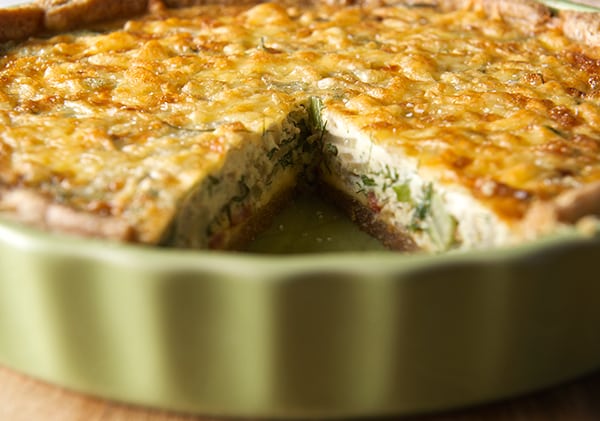
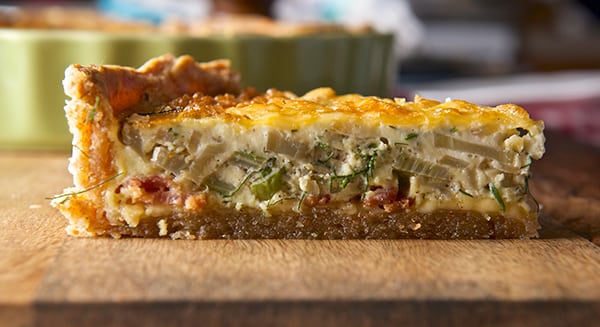
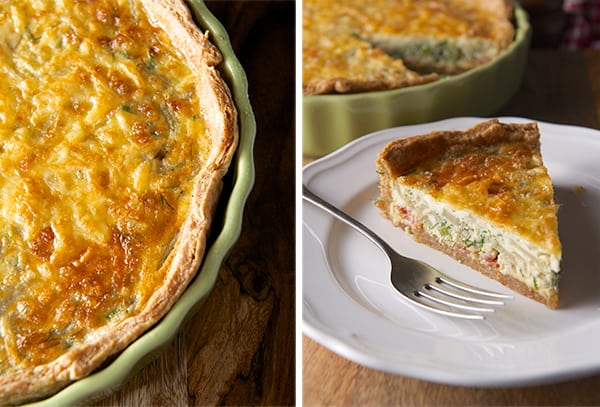
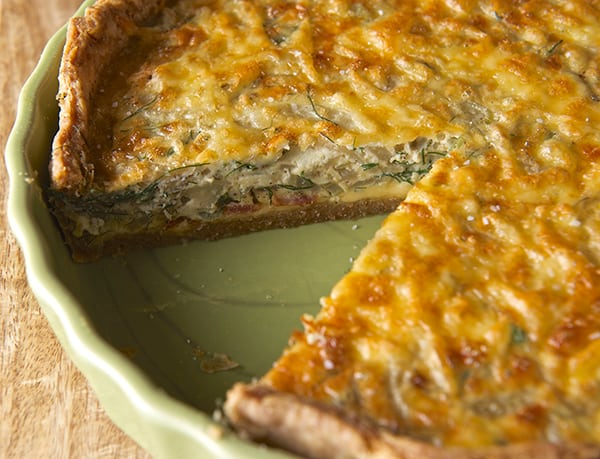
Fennel-Shallot-Bacon-&-Edam-Quiche~Yes,-more-please!Fennel-Shallot-Bacon-&-Edam-Quiche_slice-elevation

The open tart, filled with a mixture of beaten eggs, cream, cheese and pieces of bacon or any vegetable combination you can imagine, has been around since the 16th century. Despite the fact that it is a classic French dish, the word and the origins of this delicious open tart comes from Germany; from the region of West Central German dialects spoken in the French Lorraine region. The French word Quiche comes from the borrowed word “Küeche” which means cake in German.

Originally Quiche was made from bread dough but nowadays short crust or puff pastry is the best option. And that is what I’m interested in, the crust.
Short-crust is so easy to make and so much better than your frozen options that it’s almost not fair to consider the purchase of that rolled refrigerated crust from the store. For a fraction of cost and a little time you can have an amazing buttery, flaky, and grateful crust. Little handling the dough and 4 ingredients, this crust once is baked you just can feel grateful and crust proud.

The ratios given in this recipe, come from the most basic short crust principles. Four ingredients:  flour, butter, iced water and salt. You can play with almost any type of flour, in this case I used ½ whole wheat, ½ all-purpose flour. The whole wheat flour brings a very pleasant nutty flavor to the crust and of course fiber…not that it’s of major concern but lets say its better for you than the pure white flour and that’s a plus. You can substitute the butter coconut oil.

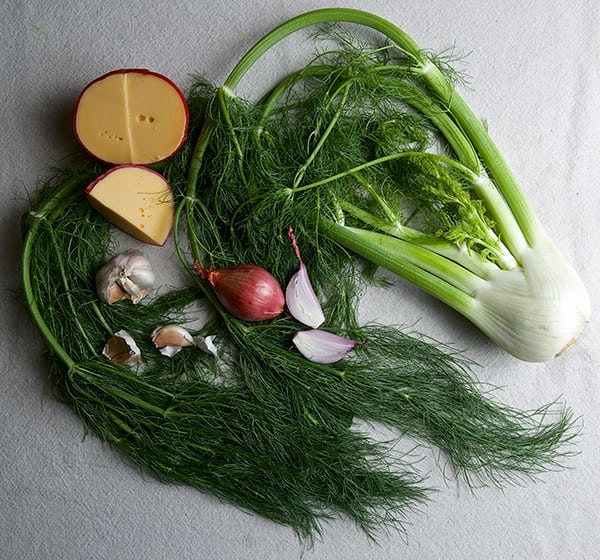
For this Quiche, I combined fennel, shallots and bacon. The fennel gives a slightly liquorice and pleasant back taste, shallots accentuate the bacon and, well, what can I say about the bacon? Everybody knows it is a cosmic ingredient. And honestly you don’t need much. A little bacon goes along way.

For me, Fennel-Shallot-Bacon & Edam Quiche works for breakfast, lunch, and dinner, Why not? It fits every meal of the day. Serve warm with a salad, or tomato soup. It taste great at room temperature and out from the refrigerator it still tastes good. Quiche will cure any gray skies, stormy weather blues, or a crummy day. Enjoy!

Fennel-Shallot-Bacon-&-Edam-Quiche_fresh-ingredients

Fennel-Shallot-Bacon & Edam Quiche

Makes 1 round 10″ by 2″ deep Quiche

Toppings:

1 medium size fennel bulb and some of the tops and steams.
1 large shallot
2 garlic cloves finely chopped
3 thick slices of smoked bacon

Egg mixture:

1 cup Edam cheese shredded
5 Large eggs room temperature
½ cup heavy cream
¼ cup milk
salt pepper

For the Crust:

1 cup all-purpose flour + a little more for rolling.
1 cup whole wheat flour
1-2 pinches of sea salt
2 sticks of butter= 1 cup, cold and cut into small squares. (Coconut oil can be used instead of butter, make sure you make little dollops and freeze them before making the crust)
1/4-2/3 cup Iced cold water.

1- 10″ ceramic-oven safe dish or a pay pan

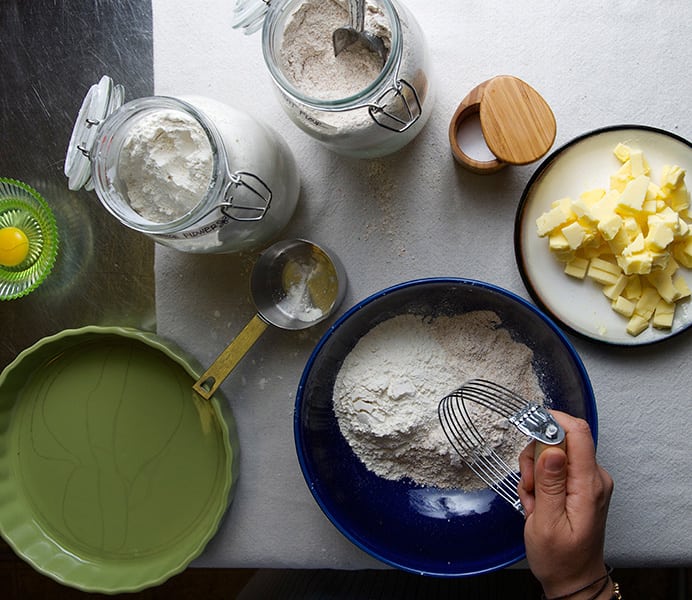
Fennel-Shallot-Bacon-&-Edam-Quiche_crust-ingredients

Directions:

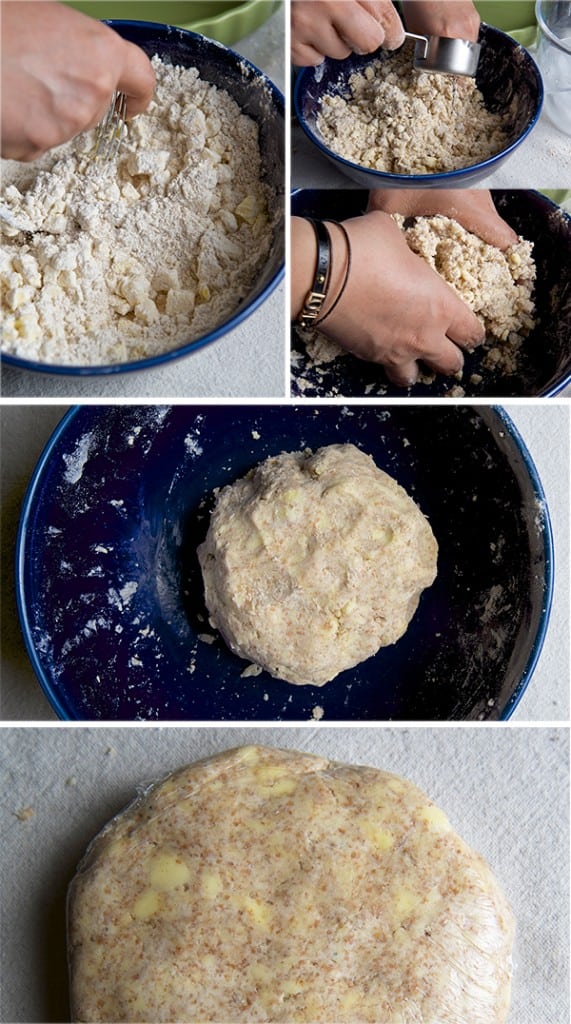
Measure all your ingredients. Place all the dry ingredients in a bowl and mix. Place the bowl in the freezer. Meantime cut your cold butter, and iced water ready to measure. Remove the bowl of dry ingredients from freezer and add the butter. With a pastry blender incorporate the butter and flour until the mixture resembles to a coarse meal, and the butter pieces are small like the size of a pea. Slowly add the cold water and carefully, with your hands, form a dough that just holds together. Be careful not to over work the dough this will give you a flakier crust. 
Once that the dough coarsely holds together, wrap your dough in plastic wrap and shape it into a disk. 
Refrigerate for at least 1 hour; you can rush it by placing into freezer for 20-25 minutes.

Fennel-Shallot-Bacon-&-Edam-Quiche_making-the-crust

Preheat Oven at 400.
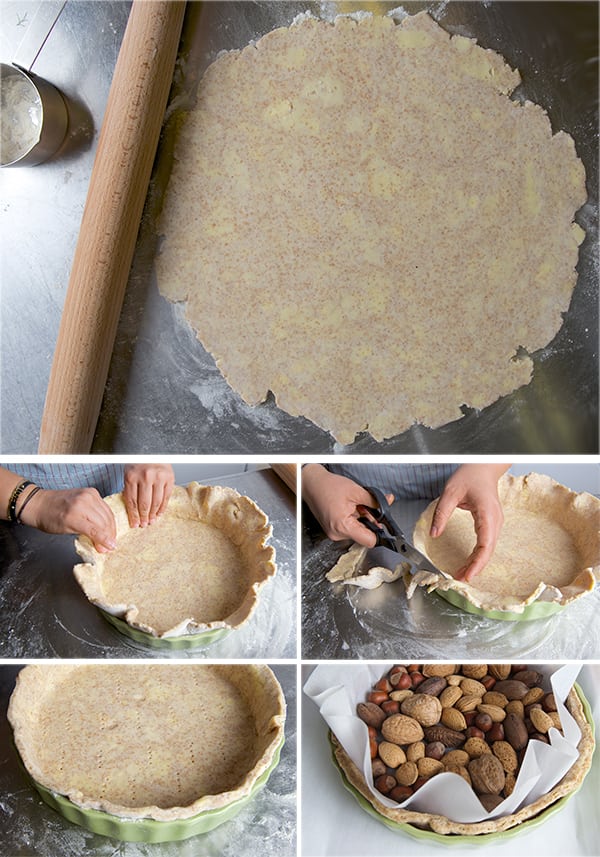
In clean work surface, dusted with flour unwrap the dough let sit for a couple of minutes and roll it into a 18-20” round and about 1/4” thick. Once is rolled place it into a Quiche pan and start pushing down the inside edges to make sure the pastry dough takes the shape of the dish.
Let the edges of the pastry up to extend beyond the dish edge. Prick the crust a few times all around and blind bake in the oven for about 16-20 minutes at 400 F/  200 C.

Remove from the oven and let it cool for at least 20 minutes.

Fennel-Shallot-Bacon-&-Edam-Quiche_rolling-the-crust

Prepare your toppings:

Render the bacon pieces until crunchy, save 2 tablespoons of the bacon fat.

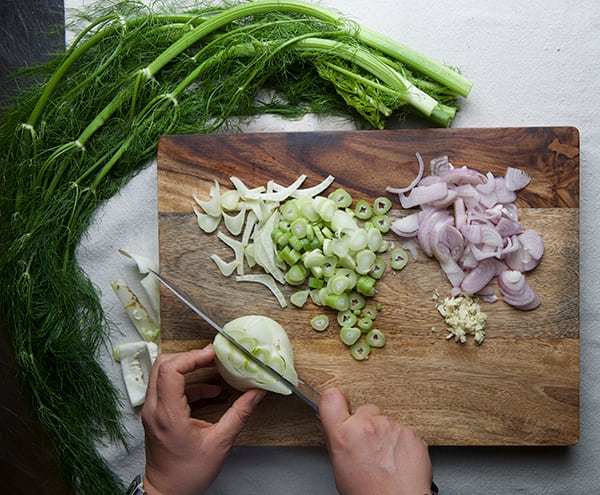
Finely cut your fennel I include some of the green tops and stems, shallots, garlic and shred your cheese.

In a Saute pan add the 2 tablespoons of bacon fat and a glug of olive oil, sauté the fennel, shallots,and garlic. Let it come to room temperature.

Mix, the eggs, heavy cream and milk, some salt and pepper.

Fennel-Shallot-Bacon-&-Edam-Quiche_chop-fennel

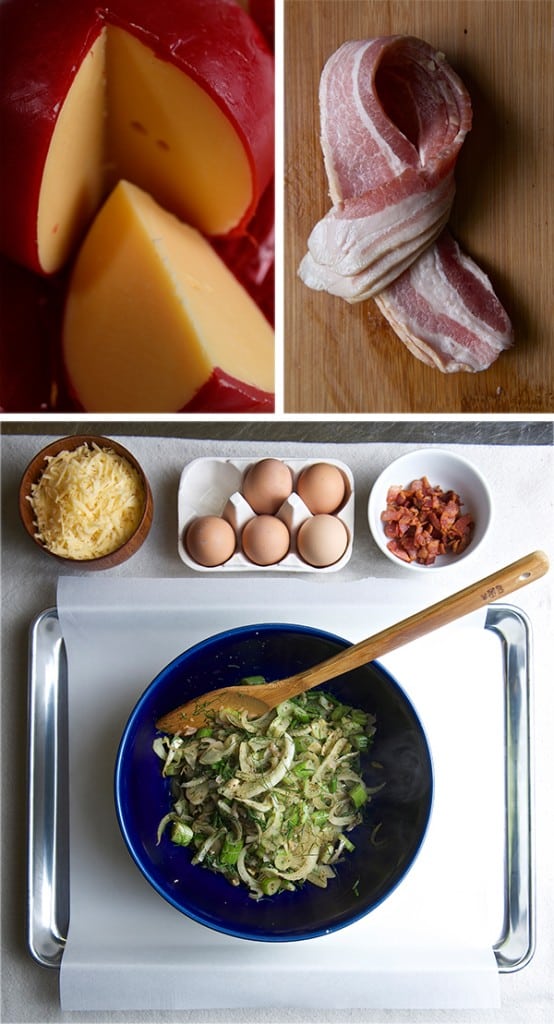
Fennel-Shallot-Bacon-&-Edam-Quiche_mise-en-place


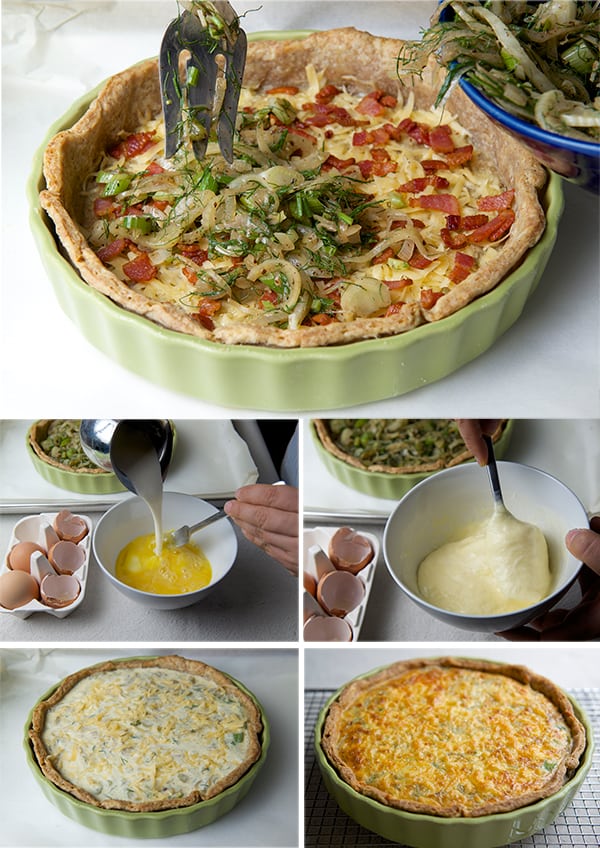
Start assembling your Quiche:

Spread half of the cheese on the bottom of the crust, add bacon crisps,
spread the sautéed fennel and shallots. Then add the egg mixture, top with the rest of the shredded Edam cheese, top with some freshly cracked pepper.

Place into the 350F/ 180C oven and bake for 20-25 minutes until the top looks golden brown and slightly giggles in the center.

Let it cool on a rack for about 15 minutes until totally set.
Serve warm with a green salad, or tomato soup. Enjoy!

Fennel-Shallot-Bacon-&-Edam-Quiche_assamblingFennel-Shallot-Bacon-&-Edam-Quiche~yes_more_-please-slice!Fennel-Shallot-Bacon-&-Edam-Quiche_slice

View Post or View Comments 8

Hibiscus-Orange Glazed Cornish Hens

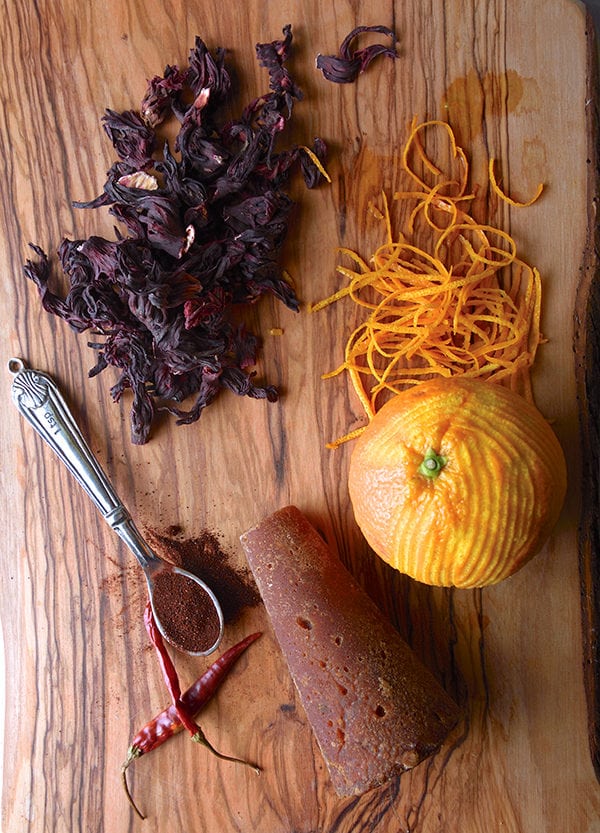
Hibiscus-Orange-Glazed-Cornish-Hens_aromatics-for-the-recipe_01

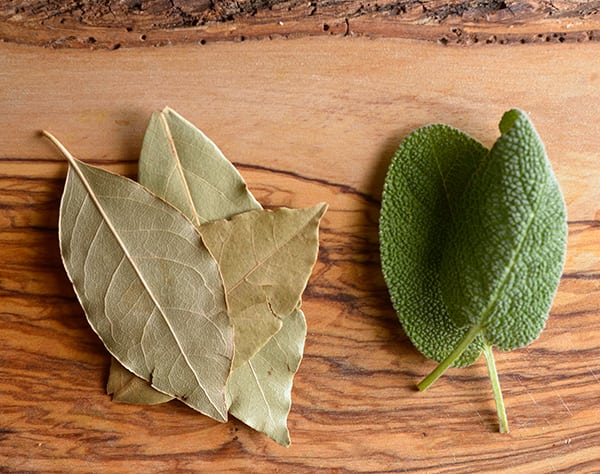
Hibiscus-Orange-Glazed-Cornish-Hens_Bay-and-Sage

Have you ever tried hibiscus?… hibiscus is a flower from a tall plant that when dried makes the most fabulous aromatic and vitamin C loaded tea or cold beverage. It is one of my favorite ingredients.
I’m from Mexico and Hibiscus is called “Jamaica” and it is pronounced Ha-my-cah, not to get it confused with the Island. Hibiscus is used in many different preparations, the most common is to prepare “agua fresca”flavored water. Jamaica it is very floral and refreshing, its our natural instant beverage.
It is also used in candy making in Mexico on the Chapala Lake Riviera, in Jalisco. There they make delicious sweet and tart hard candy pieces. If I was to describe the hibiscus flavor, it resembles a little to cranberry. The difference: Hibiscus has this floral notes that makes it so remarkable.

I was thinking of a little spin on Thanksgiving for people who find cranberry too tart so I thought of Jamaica. Then, what to do besides agua fresca and candy? Chutney?.. no… Glaze!

Oh yes I experimented last week glazing some Cornish Hens and it tastes  delicious. My original thought was to glaze some quail, but I look for a good source of quail here in Austin and I was with out luck… so I cooked Cornish Hens…and what a treat!
The results?… Well  you have to try it. It’s floral, tart, sweet and I added a hint of orange zest, and ancho powder to give a little spicy kick….Ian loved it!.. and yes I liked it too.. I definitely want to share the recipe with you, let me know what you think!
Try it with Quail if you or some soul around reading this can find some. I think it will be wonderful and if not it’s great on Cornish Hen! And if you are already a Hibiscus Lover, try our recipe  Martini dos Flores… you will fall in love with it! https://yes-moreplease.com/2013/08/martini-dos-flores/

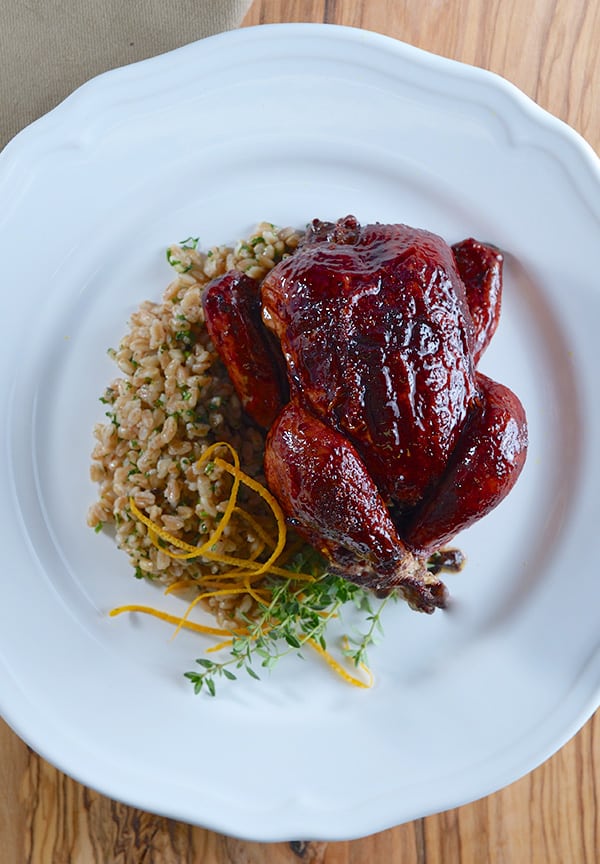
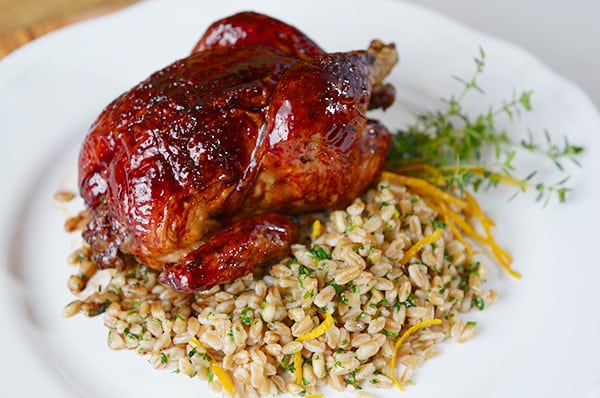
Hibiscus-Orange-Glazed-Cornish-Hens_with-herb-orange-Farro

Hibiscus-Orange Glazed Cornish Hens

Serves 2-4

2 cornish Hens, about 18 to 22 oz each
4 sage leaves
4 bay leaf
Sea salt and black pepper

Directions:

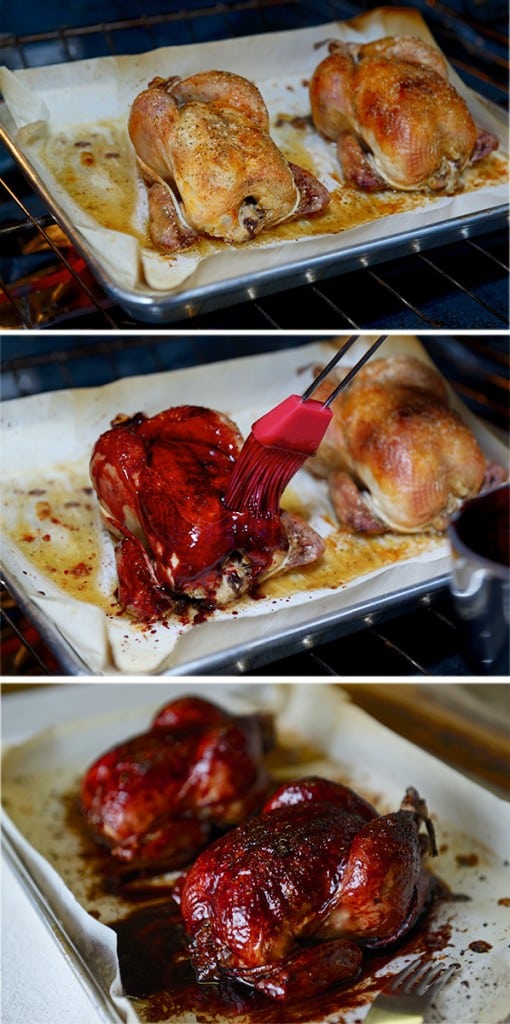
To roast the perfect cornish hens, I always follow the following steps:

1. Bring the Cornish Hens to room temperature. Take them out of the refrigerator at least 30 minutes before start cooking.
2. Preheat the Oven at 450 F/ 232 C – cook at 425 F/ 218 C
3. Using paper towels pat dry the hens. Salt, pepper and add 2 bay leaves and 2 sage leaves to each bird cavity.
4. Truss the birds, ensuring legs are tight and the tips of wings are behind the body just like if the bird is taking a nap in the sun. Trussing the Cornish Hens make a more even mass, so they cook more evenly.
5. Place them on a baking sheet or a heavy bottom roasting pan and roast for 30-25 minutes until a meat thermometer, inserted in between the breast and thigh reads 165 F/ 70 C anf juices run clear. 0While the hens are in the oven, make the glaze.

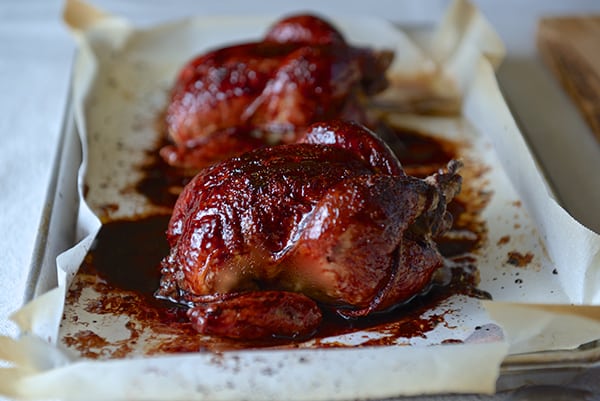
Hibiscus-Orange-Glazed-Cornish-Hens_out-of-the-oven

Hibiscus-Orange Glaze

The first time I made this dish I tried to make the glaze using the Cornish Hens drippings from the pan and de-glaze de pan like when you are making a gravy. I did not like this, the delicate floral flavors from the hibiscus were masked by the chicken fat so I made the glaze separate to keep the floral notes alive.

1 cup dry Hibiscus flowers
the zest of ½ medium size valencia orange
½ cone piloncillo, grated
1 aromatic clove
1 chile de arbol
1 teaspoon ancho powder
4-6 sprigs of thyme
1 tablespoon of butter
pinch of sea salt

Directions:

  1. Steep 1 cup dry hibiscus flowers in about 1 ½ cups of simmering water for about 8-10 minutes.
    In a small sauce pan add the concentrated hibiscus tea, piloncillo, clove, chile de arbol, ancho chili powder, orange zest, and thyme. Bring to a slow simmer, simmer for 4-6 minutes.
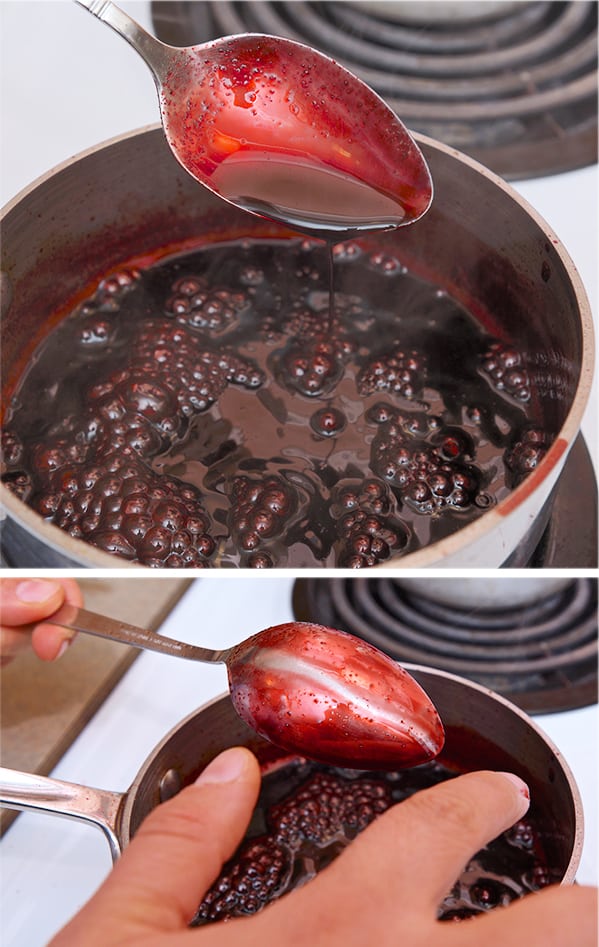
  2. Remove the sprigs of thyme clove and chilies. Bring the glaze to a rapid simmer stir constantly, until the glaze is reduced by half. Check the consistency by dipping a spoon into the glaze and running your finger tip across. If the line stays put, your glaze is ready (see picture below). At this point add 1 tablespoon of butter until melted and well incorporated, set aside.
  3. Check cornish Hens at 35 minutes. If the thermometer reads 160F/70C start glazing.
    Use a pastry brush or a rubber brush to varnish them. Apply 1 coat and keep baking for about 2 minutes, apply 2 or 3 glaze coats in total. If necessary turn on the broil on the oven and broil for 1 minute for a shiny glaze finish.7. Check temperature until reads 165F/74C and juices run clear.
    Remove from the oven and let them rest for 10-12 minutes before serving.
  4. Serve over a bed of herbed farro or buttery rice, recipe follows…

    Quick herb-orange farro

    Serves 2

    ½ cup farro perlato
    2 cups water or chicken stock
    ¼ cup finely chopped parsley
    1 teaspoon orange zest
    1 tablespoon butter (or you can use some of the chicken fat from the roasting pan)
    salt & pepper to taste.

    In a small sauce pan, bring water to boil and add farro. Reduce heat to a low simmer.
    Cook for about 20-25 minutes. Check for doneness. It usually takes 30-35 to be al dente,
    at this point add butter, chopped parsley, orange zest, salt and pepper. Toss well, remove from heat and cover with a lid for 5 minutes. Serve warm.
    Note: I love farro done this way, I like it a little al dente, not too mushy, and I like to add the herbs, at the end to keep the flavors fresh and colors vibrant.

Hibiscus-Orange-Glazed-Cornish-Hens_hibiscus-glaze-consistency

Hibiscus-Orange-Glazed-Cornish-Hens_roasted-cornish-hens_glazing-the-roasted-cornish-hens

Hibiscus-Orange-Glazed-Cornish-Hens_Yes,-more-please!

Enjoy!

Music pairing: Sabor a mi, by Lila Down

View Post or View Comments 0

Sweet Potato Kale and Quinoa Fritters

Kale-Sweet potatoe-and-Quinoa-FrittersKale-Sweet-potatoe-and-Quinoa-Fritters-cooked-quinoa

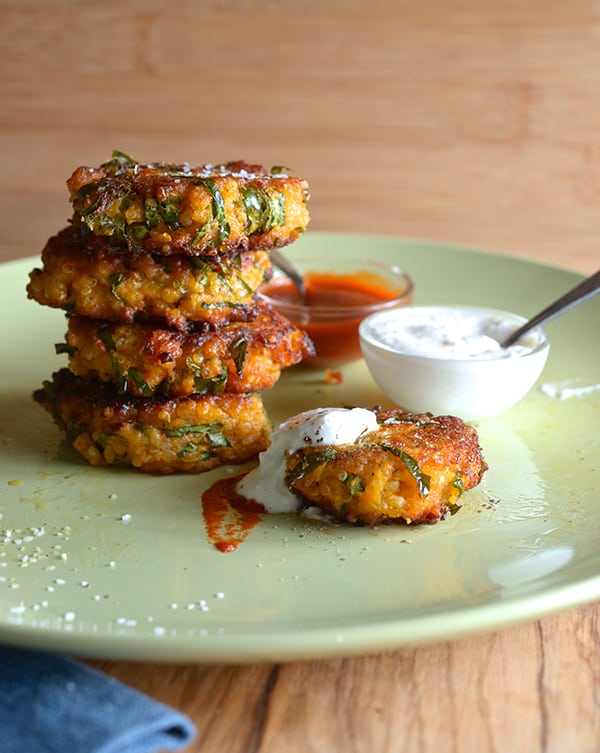
So many Kale… so little time… root vegetables, pumpkins, sweet potatoes, all kinds of potatoes, carrots; an Autumn cornucopia is here and with it Thanksgiving. So gear up! I will be posting side dish appetizers, entrees, and everything with the potential of being on your Thanksgiving table… I think it’s great to add new dishes to the traditional menu, or revamp old recipes. And even if you are not a Thanksgiving celebration type, this seasonal produce is what you will enjoy preparing, whether it’s lunch, or dinner or a simple snak-petizer like this Sweet Potato Kale and Quinoa Fritters.

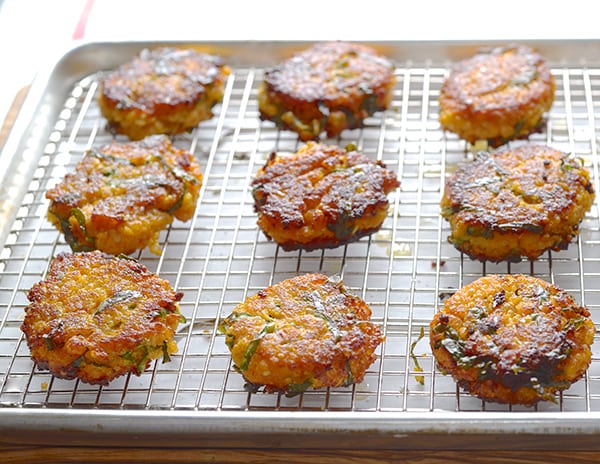
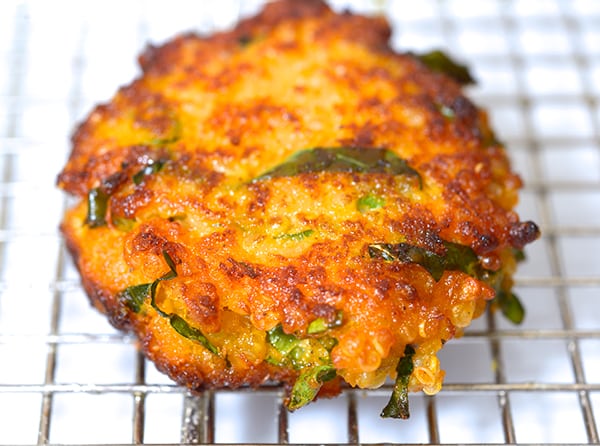
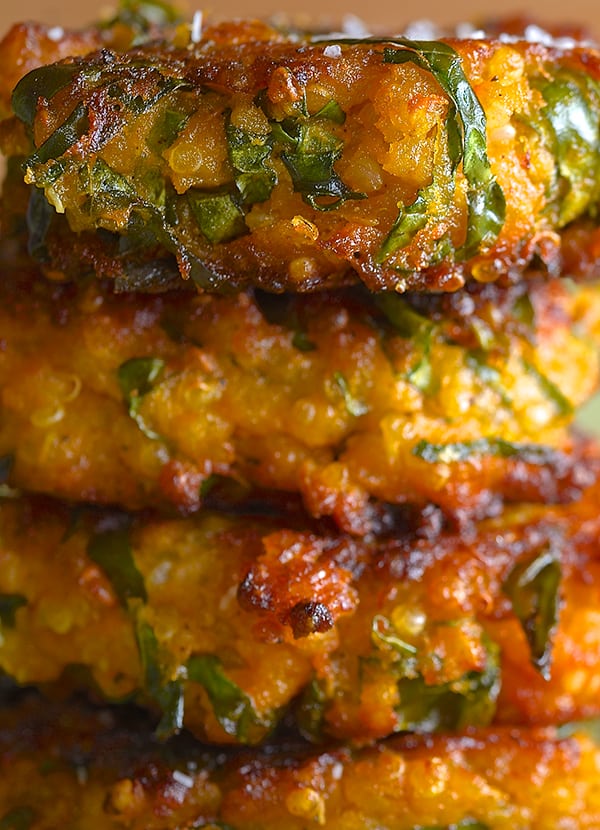
These little fritters are scrumptiously good. Loaded with vitamins and flavor, this little patties that have a crispy exterior and a soft creamy interior. The quinoa adds texture and a little crunch. Call them patties, fritters, creatures; you’re gonna love them. They taste equally good when they are warm or room temperature.
They make for a fabulous appetizer, side dish, or if you make them bigger. Two of these patties can be your lunch or sensible dinner with a salad on the side.

Kale-Sweetpotatoe-and-Quinoa-Fritters_platter-ready-to-eat!

Sweet Potato Kale and Quinoa Fritters

Makes 18-20 / 2”mini patties or 6 / 3.5” side patties

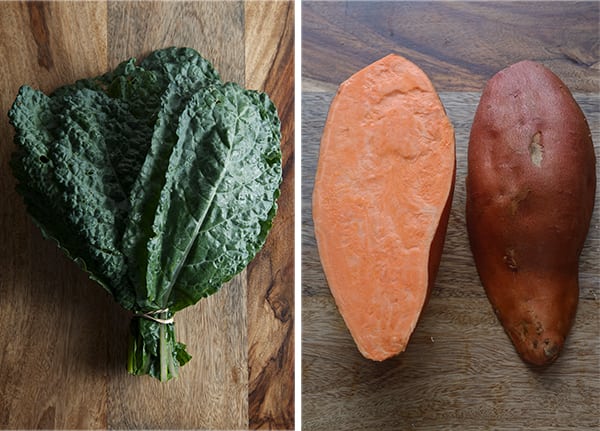
1 large or 2 medium sweet potatoes steamed and pureed. Makes about 3 cups
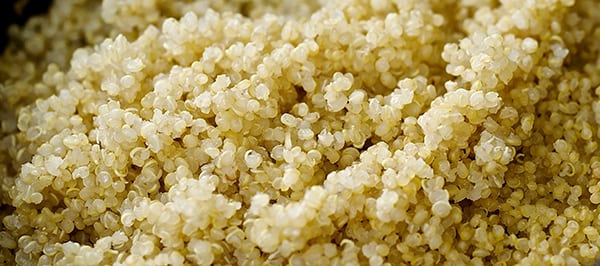
2 cups cooked Quinoa, you can use red quinoa if you prefer. Approximately 1 cup of uncooked quinoa yields 2.25 cups when cooked.
2 cups kale finely chopped.  I used Lacinto kale, a.k.a. Dinosaur Kale but, any flat kind kale will work.
2 eggs (vegan: substitute 2 tablespoons ground flaxseed + 3 tablespoons of water)
½ cup panko or any kind of plain breadcrumbs. If you have gluten allergies, ground old fashion oats or almond meal will work.
3 teaspoons cornstarch. If using the almond meal add one extra teaspoon.
1 teaspoon grated ginger
1 good pinch paprika or smoked paprika
1 teaspoon freshly ground black pepper
1 teaspoon kosher salt

4-6 tablespoons grapeseed oil, peanut oil, or coconut oil to pan fry them.

*See note for an alternative cooking method on the bottom of the post…

For the dipping sauce:

¼ cup Greek yogurt
1 teaspoon freshly grated ginger
pinch of kosher salt
pinch of black pepper

In a small cup mix all ingredients and chill.

Hot sauce of your preference. I highly recommend Sriracha Sauce.

Directions:

1.-

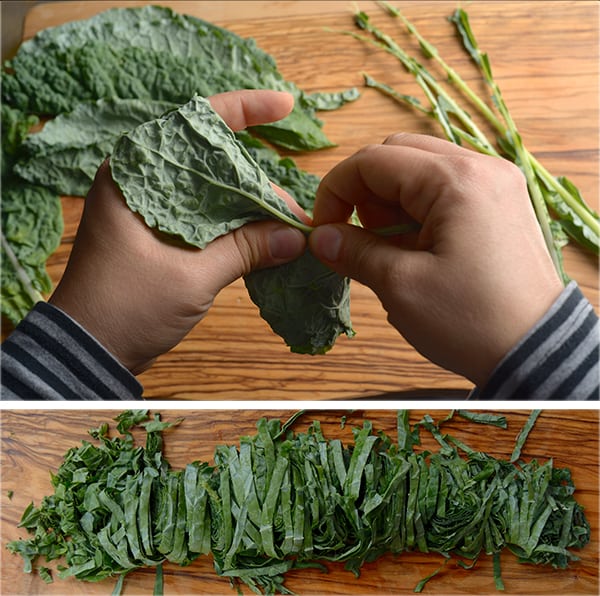
Devein the Kale, make it into a tight roll and chop chiffonade style.

Kale-Sweetpotatoe-and-Quinoa-Fritters_Deveining-and-chiffonade-Kale-

2.-

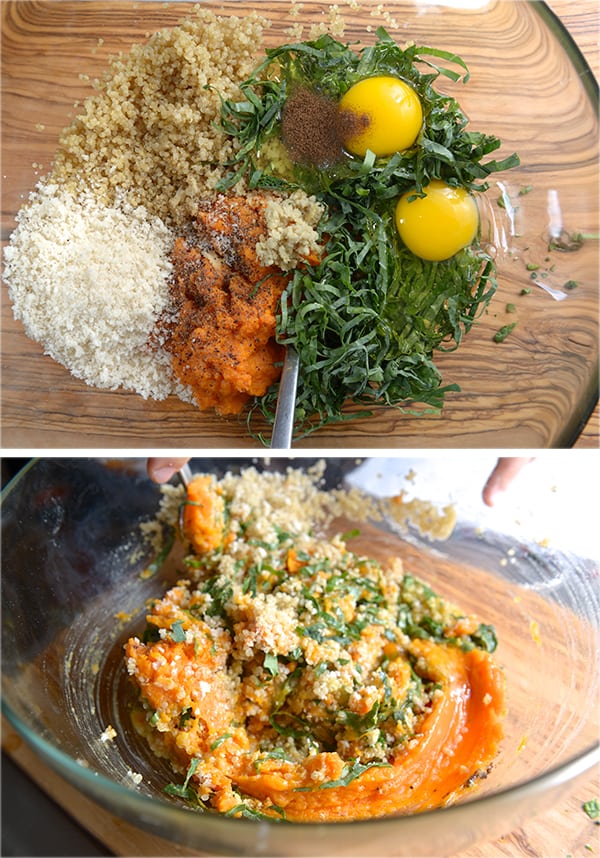
In a medium size bowl, place all ingredients and mix well.

Kale-Sweetpotatoe-and-Quinoa-Fritters_Mixing-ingredients

3.-

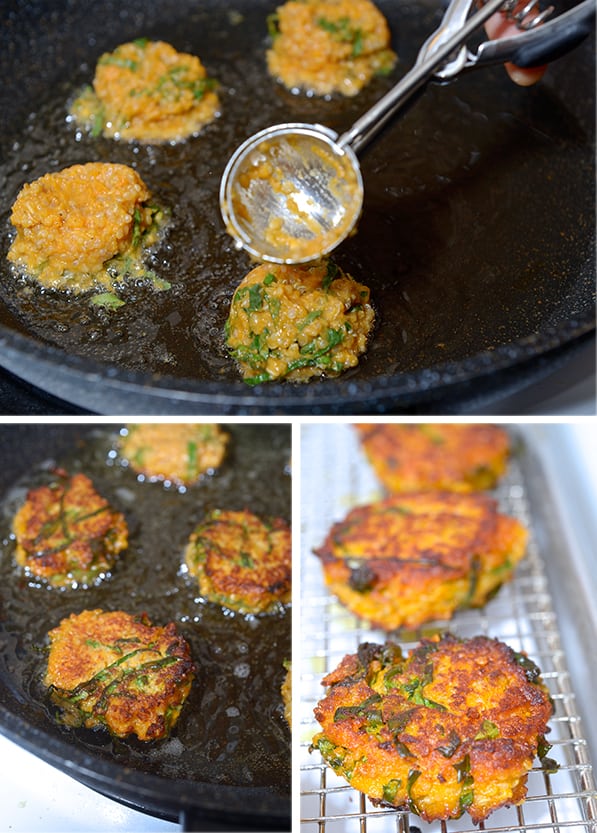
In a medium size pan heat up about 4-6 tablespoons of grape seed oil, peanut oil or coconut oil.
With a small Ice cream scooper scoop about 6 patties into the pan and slightly flatten the tops.
Cook for about 3-4 minutes on each side or until golden brown.

 Kale-Sweet potatoe-and-Quinoa-Fritters_pan frying

4.-

Cool them on a rack.
Serve warm or at room temperature, with the ginger sauce on the side and some hot sauce of your preference. I highly recommend Sriracha…I love it….Enjoy!

Kale-Sweetpotatoe-and-Quinoa-Fritters_-fritters-resting-on-cooling-rack

Kale-Sweet potatoe-and-Quinoa-Fritters-delicious!
Kale-Sweet potatoe-and-Quinoa-Fritters_delicious-texture

Enjoy!!!
 *Note:  Many people have asked me about baking these fritters. It never occurred to me to bake a fritter… So I made a batch and baked half and fried half to see the differences in flavor and texture. Here is the veredict:

Baked Version:

I Baked them at 375F on a sheet pan lined with parchment. I brushed each patty with some grape seed oil and baked for 15-20 minutes flipping them half way.

The results:  Texture is more firm and they hold up more like a patty, where the inside is a little more dense. They do not remind me a fritter at all since they have no crispy outside texture.

Pan Fried: 

Well you see the results, they really do not absorb a lot of oil, I love love the contrast in textures, crispy caramelized outside, and creamy less thight inside. For me this is fritter.

I like them both in their own category… but a fritter its a fritter!

5 from 1 vote
Print

Sweet Potato Kale and Quinoa Fritters

www.yes-moreplease.com

They make for a fabulous appetizer, side dish, or if you make them bigger. Two of these patties can be your lunch or sensible dinner with a salad on the side.

Course Appetizer, Breakfast, Brunch, Lunch, Main Course, Side Dish
Cuisine Healthy, wholesome
Prep Time 20 minutes
Cook Time 30 minutes
Total Time 50 minutes

Ingredients

  • 3 cups Sweet potato, about 1 large-2 medium potatoes, stemmed and pureed.
  • 2 cups Quinoa, cooked
  • 2 cups Lacinato-Dino Kale, chopped chiffonade
  • 2 Eggs
  • 3 teaspoons Cornstarch
  • 1/2 cup Panko Japanese style breadcrumbs, or any kind of plain bread crumbs. If you have gluten allergies, ground old fashion oats or almond meal will work.
  • 1 teaspoon fresh ginger, grated
  • 1 pinch smoked paprika
  • 1 teaspoon fresh ground black pepper
  • 1 teaspoon kosher salt
  • 4-6 tablespoons grape seed oil, or coconut oil, to pan fry them

Dipping Sauce:

  • 1/4 cup Greek yogurt
  • 1 teaspoon freshly grated ginger
  • 1 pinch salt
  • 1 pinch black pepper
  • Sriracha Sauce, to taste.

Instructions

  1. 1. Devein the Kale, make it into a tight roll and chop chiffonade style.

    2. In a medium size bowl, place all ingredients and mix well.

    3. In a medium size pan heat up about 4-6 tablespoons of grape seed oil, peanut oil or coconut oil. With a small Ice cream scooper scoop about 6 patties into the pan and slightly flatten the tops. Cook for about 3-4 minutes on each side or until golden brown.

    4.Cool them on a rack.

    5. Mix all ingredients of the dipping sauce on a small bowl.

    Serve fritters while warm or at room temperature, with the ginger sauce on the side and some hot sauce of your preference. I highly recommend Sriracha…I love it….Enjoy!

    Happy cooking!


Recipe Notes


Music Pairing: Perhaps Perhaps Perhaps by Cake


View Post or View Comments 106

Privacy Policy Contact Us Yes, more please!