Recipes, Cooking & Art Direction: Mariana Nuño Ruiz McEnroe | Photography: Ian McEnroe |
Published: December 16, 2014
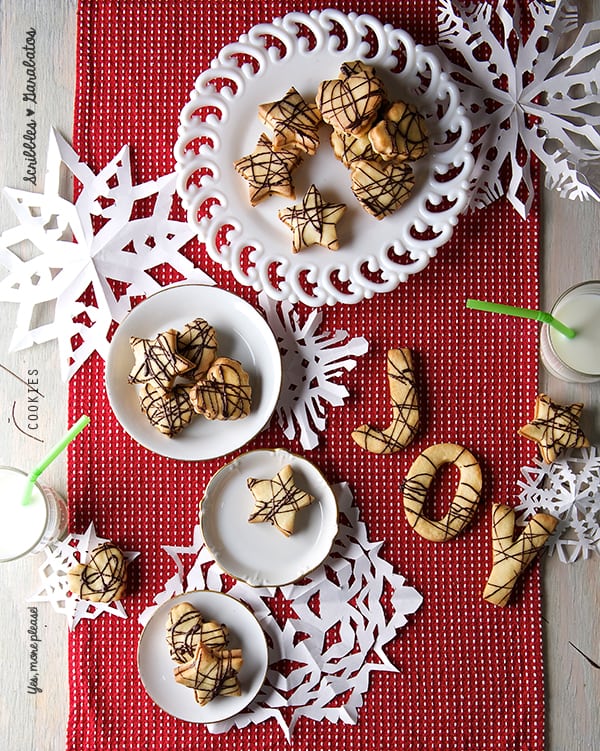
At less than 10 days until Christmas there are too many cookies and so little time! This year I decided to go with just ONE cookie, yes believe it or not just one… Ahem.. let me re phrase that…because there is no way I can eat just one of these buttery and nutty lil cookie sandwiches. I mean one type of cookie, and I chose my favorite ones Garabatos, which translates to: scribbles. The name of these Scribbles Garabatos Cookies comes from the freedom and delightful abandon in which the chocolate is drizzled all over these buttery cookies. This cookies are very popular and loved in Mexico.
These crisp cookies with a soft crumb like a shortbread are filled with raspberry jam, chocolate ganache or hazelnut spread. A fine scribbling drizzle of dark chocolate, makes these little cookies not only delicious, and appealing, but equally easy to make. Dough is made in a flash in the food processor, chilled for 30 minutes, then rolled, cut, and baked 8-10 minutes. When you bake these cookies a butter cloud hugs you with love and Christmas feelings.
If you want to enjoy and make a simple and delicious effortless buttery cookie, start scribbling, this is the perfect last-minute letter to Santa! Ho, ho, ho!
Recipes, Cooking & Art Direction: Mariana Nuño Ruiz McEnroe | Photography: Ian McEnroe |
Published: November 20, 2014
This is the time of the year when quick breads like this fill up the house with warmth and delicious comforting aromas. MAKE THEM, It’s a must.
I have had this recipe for about 25 years …from one of my grandma’s best friends. It is one of the first encounters I had with baking. My modern grandma Ana Fernanda used to make this cornbread; she used some canned goods and different chiles from the north part of Mexico including chile California a bright green chile mild in spice. Also she used Chihuahua style cheese and baked it in a big rectangular dish. By the time this corn bread hit the table it was pretty much gone, absolutely delicious.
I decided to adjust the recipe and replace the canned goods by using fresh ingredients. For me it makes such a big difference in flavor and in texture. I used corn meal instead of corn mix, and interchanged the flour for gluten-free flour mix, which gives them a lighter and fluffier texture. The recipe works great with both types of flour, whether if you are using all-purpose flour, or a gluten-free all-purpose mix.
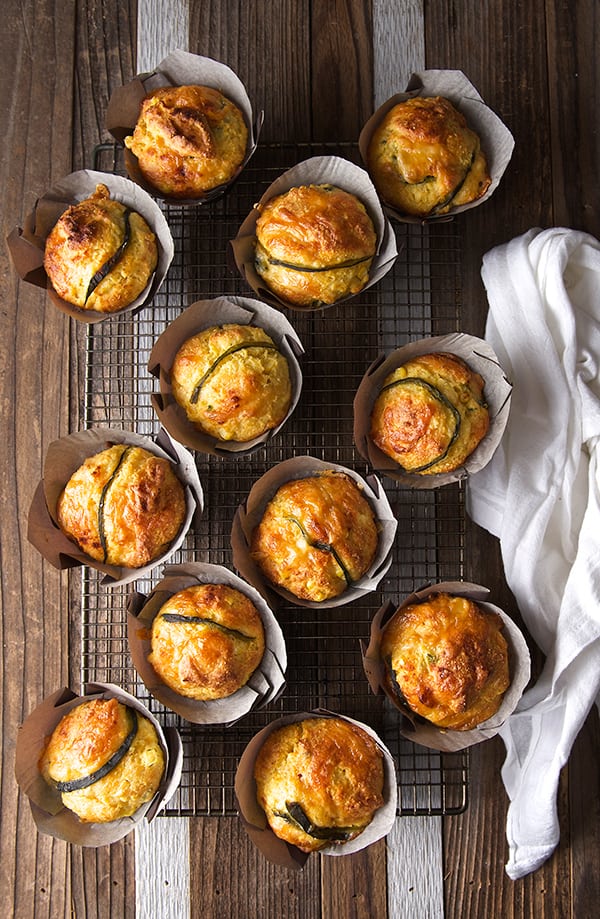
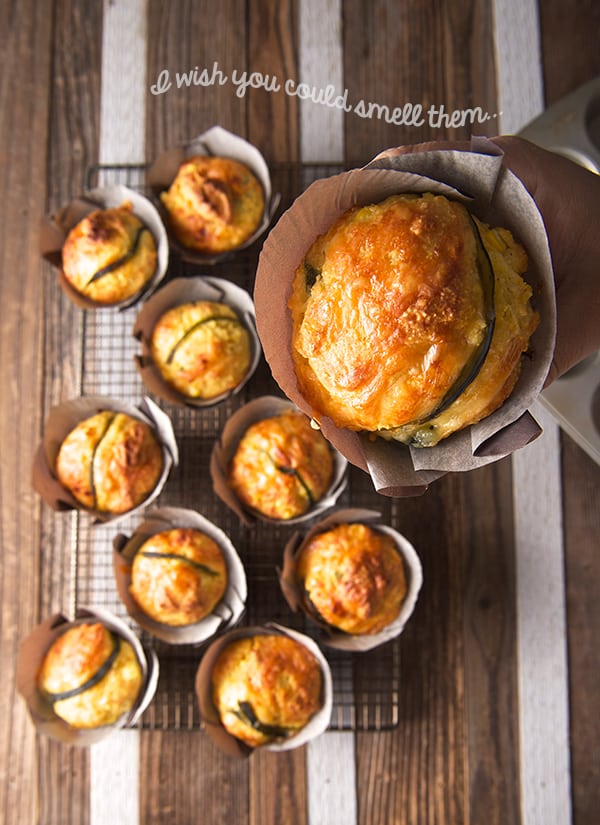
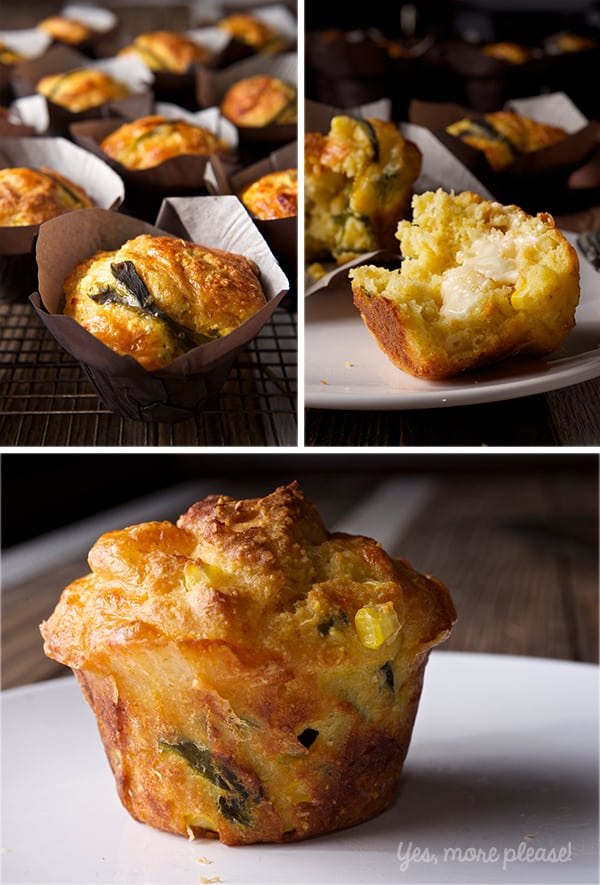
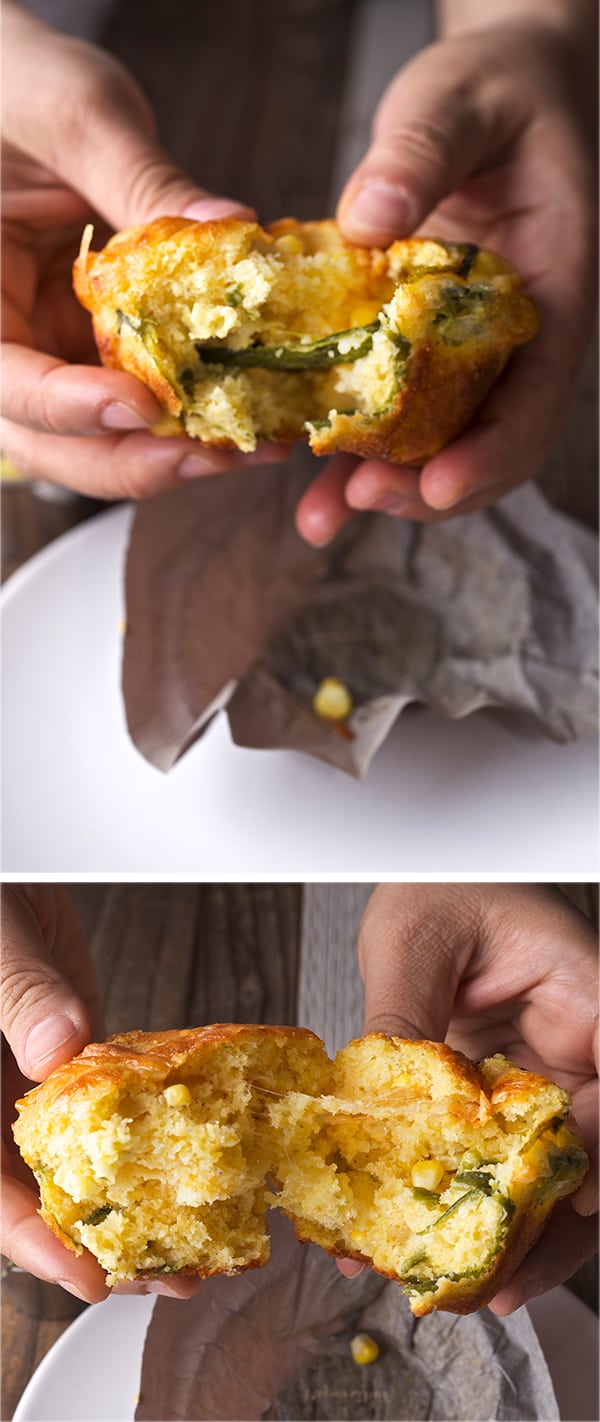
Now, instead of a big rectangular bread, I think to portion them out it’s the ticket! It cuts down the cooking time and each muffin gets an irresistible crusty top. I used Poblano peppers instead of California, Hatch chiles would be also great if you happen to have some frozen ones from this last season. Now, do not worry about the Poblanos, they are mild with just a hint of heat that play really well with the sweet corn. Instead of Chihuahua cheese, since I could not find one of a good quality and flavor, I used Smoked Gouda. Use what you like, perhaps something local, mild with good melting qualities.
These Cornbread Muffins with Poblano peppers and Smoked Gouda will make everybody happy at the table, including your gluten-free guests, they are moist , fluffy and flavorful, I assure you this babies can be the hit at your Thanksgiving table or any given baking night!…Or Breakfast…Ian and I split them in half, warmed them on the pan with a dash of butter and topped them with a sunny side up egg…you’ve got to love the leftovers, if there are any…
Enjoy and Happy Thanksgiving!
Gluten free Cornbread Muffins with Poblano Peppers and Smoked Gouda
Makes 12 muffins or one 9×13 rectangular baking dish.
1-1/2 cups organic corn meal flour *
1 cup gluten-free all-purpose flour ** Not gluten-free fan? you can use regular all-purpose flour.
2 teaspoons baking powder***
1 teaspoon plus one pinch kosher salt
4 eggs
½ cup greek yogurt
1-1/2 tablespoons honey
¾ cup corn oil. Grape seed oil, sunflower will work too.
4 tablespoons melted butter
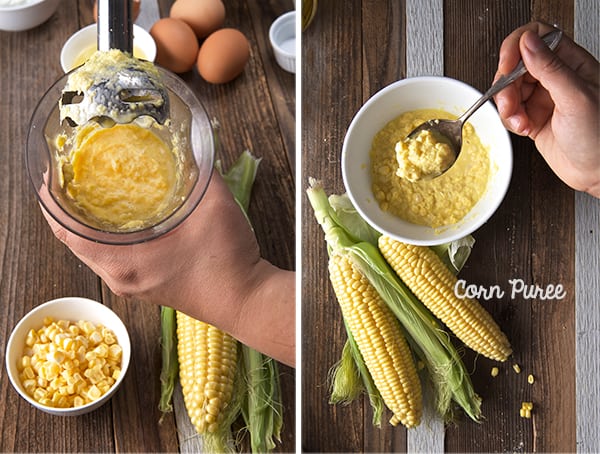
4 small medium fresh ears of sweet corn
1 cup shredded smoked gouda cheese
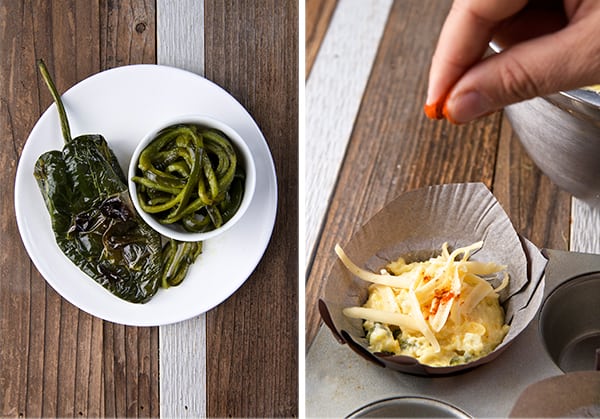
2 Poblano peppers roasted, skinned, de seeded and sliced into strips. Remember to save some strips to top the muffins!
1 pinch smoked paprika
Topping with:
½ cup shredded cheese
12 thin Poblano strips
smoked paprika to sprinkle on top
12 baking liners
*If you are in Austin, Boggy Creek Farm has the best one, Lamb’s stone ground meal, or Bob’s Red Mill for a national brand. **The brands I prefer for gluten-free all-purpose flour: Cup4Cup, King Arthur all-purpose gluten-free mix.Not a gluten-free fan, you can use regular unbleached all-purpose flour.
*** I always use aluminum free Baking Powder.
Preparation Method:
1. De-kernel 3 ears of corn and blend on the food processor or immersion hand blender, until a coarse purée. De-kernel the 4th ear of corn and add the kernels to the purée.
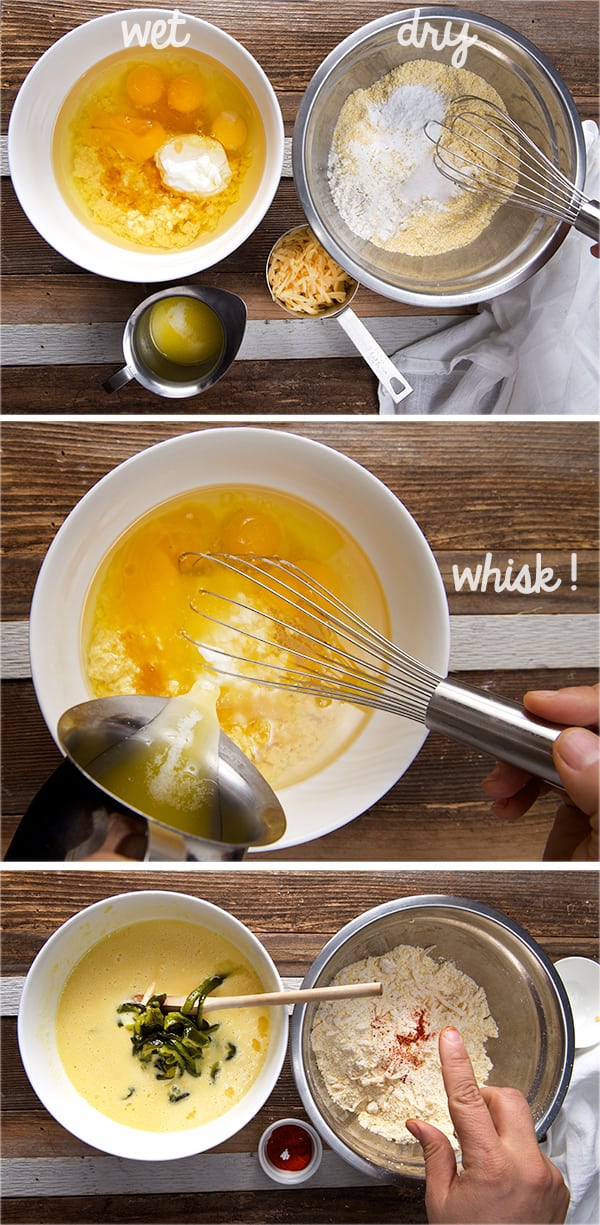
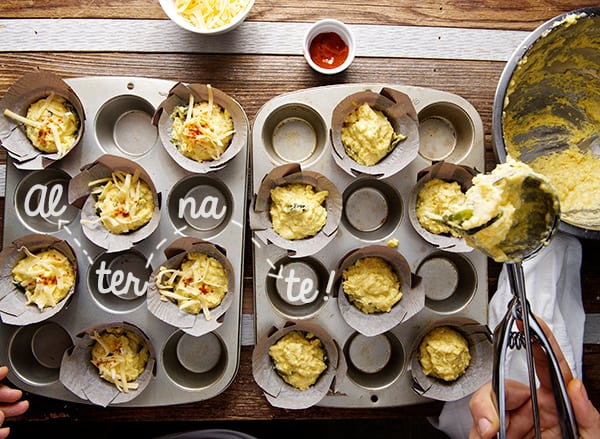
2. Preheat your oven at 375F. Line two muffin baking pans with the large muffin liners 6 on each pan alternating spots. (Please: Read bottom note about baking liners and baking times.) 3. In a medium size bowl mix all DRY ingredients, whisk well to incorporate. Add cheese and toss. 4. In another medium size bowl, mix all your WET ingredients, including the corn kernel purée and the poblano strips. Remember to save some poblano strips to top the muffins.
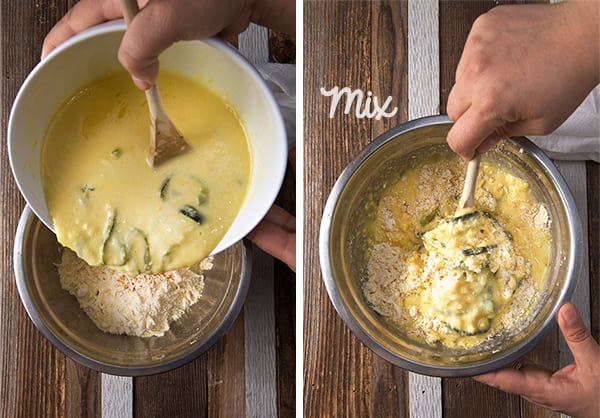
5. Combine wet ingredients into Dry with a wood spatula, until well incorporated, do not over mix.
6. Apply a little oil to a standard size Ice cream scooper, and fill each cup with a well-rounded heaping scoop of the batter. If you are using smaller cups use a leveled scoop.
7. Sprinkle a little cheese, a poblano strip and a dash of paprika on each muffin.
8. Place them into the oven on the lower third rack and LOWER the temperature to 350F. 9. Bake at 350F for 17-20 minutes until golden brown tops and a toothpick comes out almost clean with a few crumbs. Remove from oven and wait for 1-2 minutes, remove from pan into a baking rack or a basket and take them to the table. Enjoy.
Note: Baking liners: I used a large paper cups that overlap if you bake them to close. That’s why I alternate them, and I used two trays. I love the medium size muffins and the raised muffin tops. They take about 17-20 minutes to bake. If you are using regular cupcake liners I would say you might have more than a dozen, since they are smaller, and they will bake faster, perhaps 12-15 minutes. So, watch out and keep an eye on them. If you are using dark muffin pans you might have to lower down your oven temperature at 325F since the darker pans retain more heat.
Enjoy!
Music Pairing: Billie Holiday – The very thought of you
Recipes, Cooking & Art Direction: Mariana Nuño Ruiz McEnroe | Photography: Ian McEnroe |
Published: October 28, 2014
“With an apple I will astonish Paris.”
~ Paul Cezanne ~
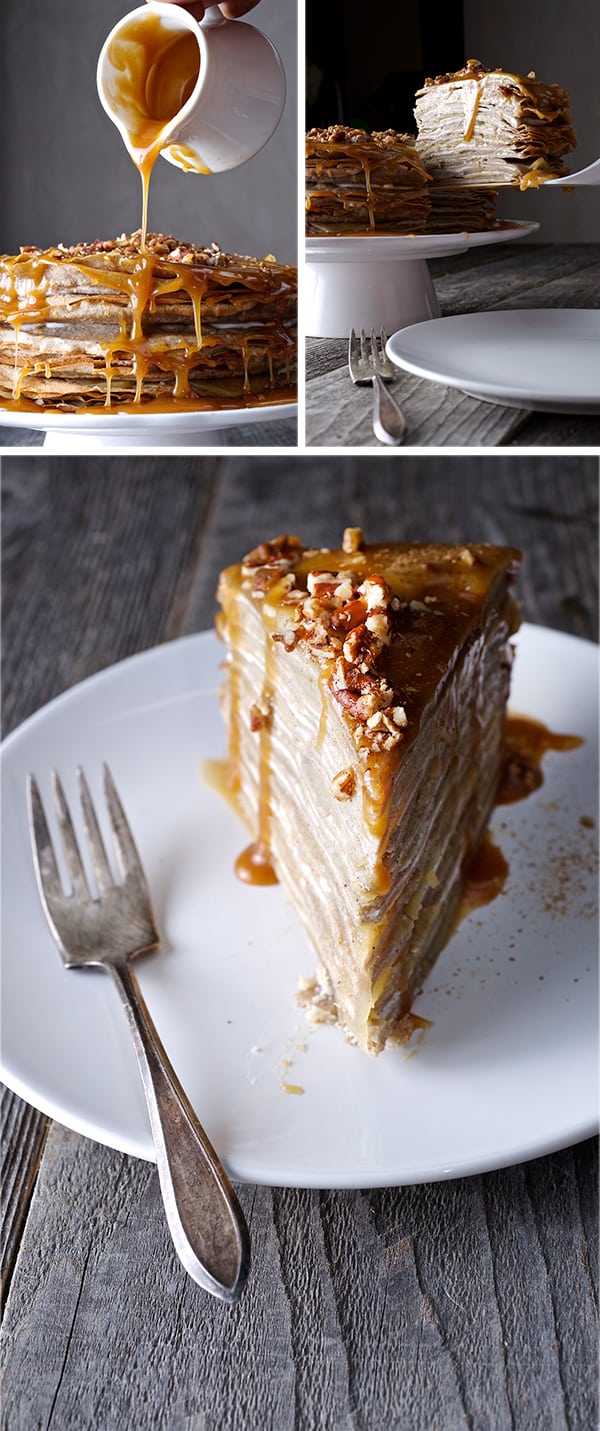
This cake is for the person who loves to cook and who enjoys the process of creating, and building something from scratch; layering flavors, textures, and aromas. This cake taught me patience. From the conception, to the making I learned all the way. I learned that fast and easy are not always worth it. I was reminded of the “virtuous” character of patience. We can use it when we desire the outcome we imagine. To enjoy making this cake, reserve time, and relax. There is something about craftsmanship in this recipe that I love, especially the gratification of assembling the components. The results of such efforts are worth every step.
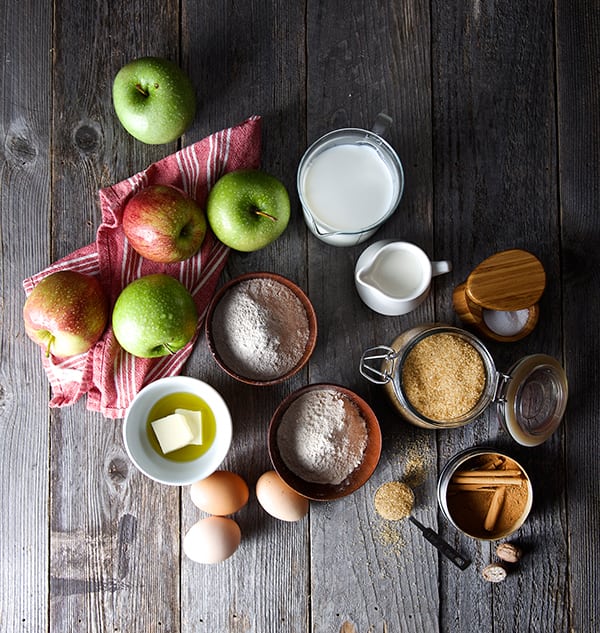
Time, and patience are the main ingredients. Apples, buckwheat flour ,butter and apple cider are the witnesses to the madness. The smells are insane once you start to cook; peeling the green apples, that crisp sweetness from breaking the skins, to the nutty and buttery aromas that fill the kitchen with a warm cloud when making the buckwheat crepes.
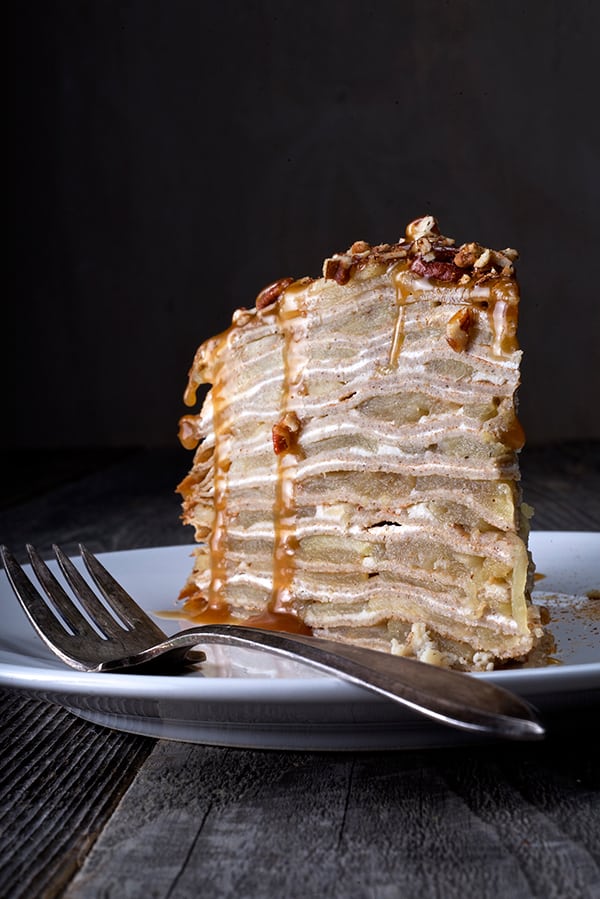
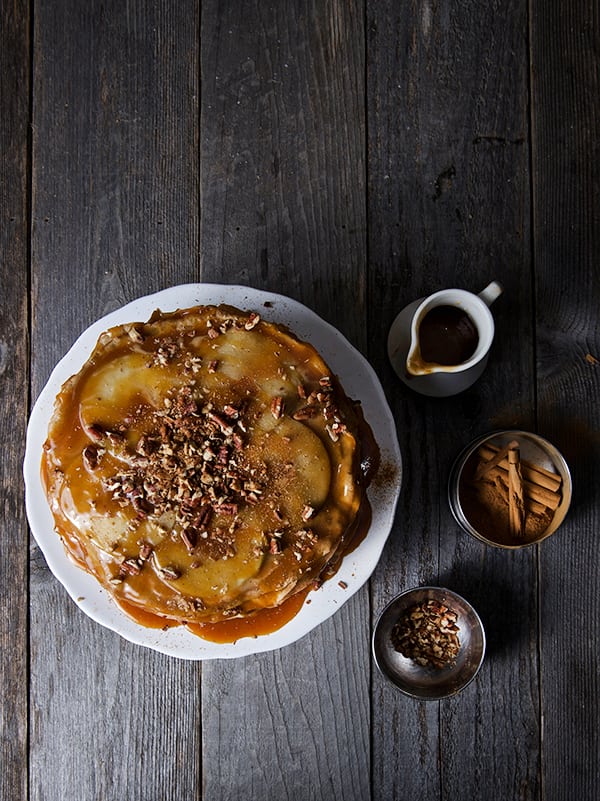
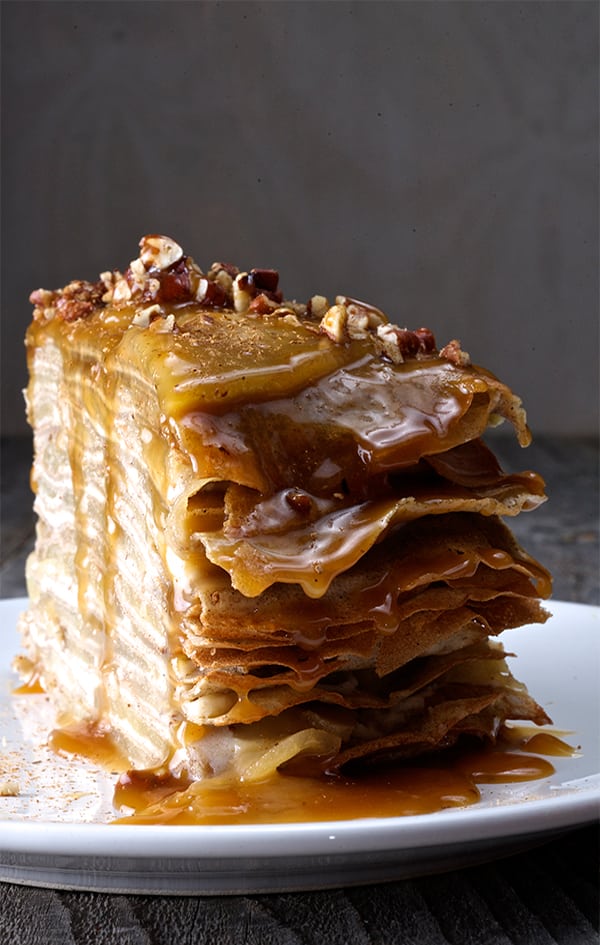
Imagine 26 soft silky layers of light, thin, buttery and nutty buckwheat crepes carefully layered with thinly sliced tart green apples sautéed with cinnamon and honey, mascarpone cinnamon cheese spread between layers. Add toasted pecans and a tipsy cider caramel sauce that sinuously hangs from the crispy feathery crêpe edges…This is the ultimate tribute to the apple and buckwheat love affair.
When you cut the first slice of this cake, your work shows, it makes you feel like a better person and all that patience and love invested in the creation it is absolutely worth it for a slice of this cake.
Fifty percent apples plus cheese and a bit of flour make it almost guiltless and mildly sweet, do not get the appearance trick you.
If you want to enjoy an apple cake this season, something memorable, and not so overly sweet, Apple Buckwheat Crepe Cake with Cider Caramel Sauce is the dessert you been waiting for.
Make time for this love affair and prepare to astonish.
Apple Buckwheat Crepe Cake with Cider Caramel Sauce
Serves 8-10
For the Crepes:
11/2 cups buckwheat flour
½ cup unbleached all-purpose flour
1 ½ tablespoons turbinado sugar or agave nectar.
¾ teaspoon fine salt
1 pinch of cinnamon
3 cups of milk
4 Large eggs
3 tablespoons of melted butter
2 tablespoons mild extra virgin olive oil
Plus about 3 more tablespoons of butter to cook the crepes.
1 – 8” non-stick pan
1 Ice cream scooper
1 baking sheet or cookie sheet tray
For the Apples:
7 medium size green tart Granny smith apples*
3 medium size Braeburn apples*
½ cup honey
1/2 cup turbinado sugar
½ teaspoon salt
1 tablespoon cinnamon
¼ teaspoon nutmeg
1 teaspoon lemon juice
¼ teaspoon lemon zest
2 tablespoons butter
2 teaspoons cornstarch
¼ cup apple cider
Note: I’m combining two different types of apples, green tart wich are super crisp and hold their texture when sautéed, and the Braeburn wich are sweet and fragrant and wich also hold their texture when they are cooked. Once balance the others, I did not wanted to use a lot of sugar, since the cake will be drizzled with a cider caramel sauce. My advice is please, taste your apples: If they are to sweet or two tart you might need to add more sugar or honey is up to your preference and your sweet tooth.
For the Mascarpone filling:
2 cups mascarpone cheese
¼ cup honey
½ teaspoon cinnamon
For the Apple Cider Caramel Sauce:
2 cups apple cider
½ cup turbinado sugar
¼ cup honey
4 tablespoons butter
1 cup heavy cream
1/4 cup calvados.
1/2 cup roughly chopped toasted pecans.
Directions:
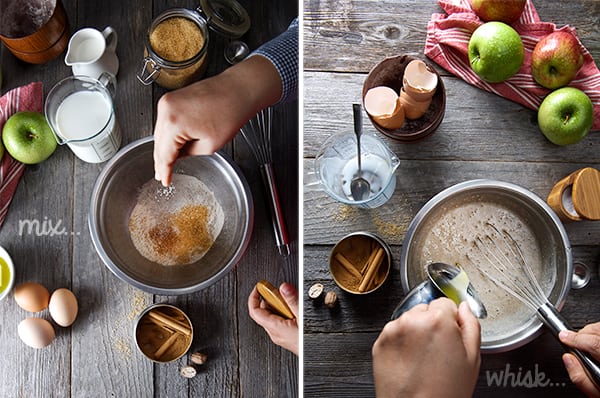
1. Start by preparing your Crepe batter. Combine all dry ingredients, Combine all wet ingredients and add them little by little to the dy ingredients whisking throughly until well combined and no lumps. Cover your batter with plastic wrap, making sure the plastic is touching the mixture, to avoid a skin to form. Refrigerate for at least 1 hour. You can make it the night before or in the morning and make the crepes at night. The batter will keep for about 48 hours.
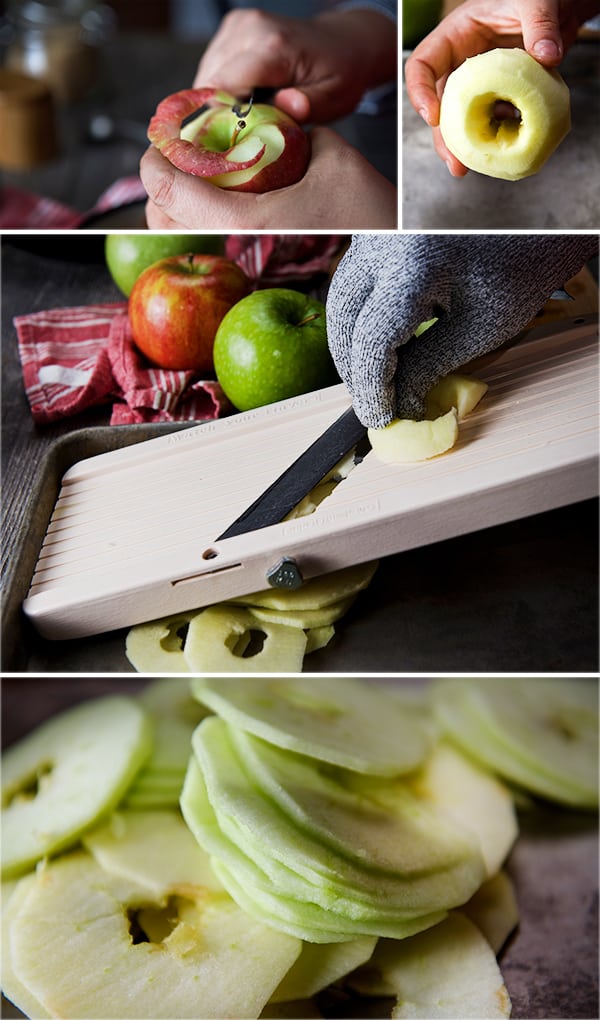
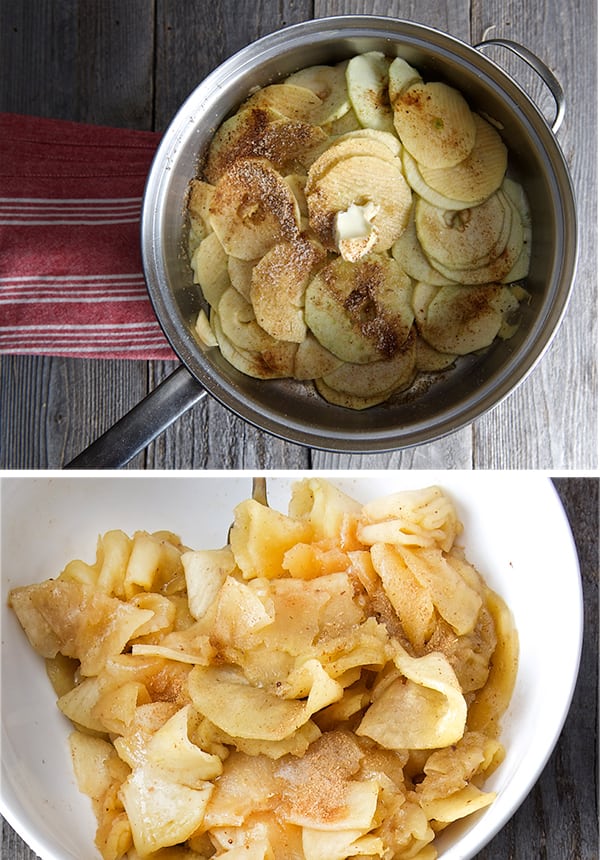
2. Mean time your crêpe batter is resting, prepare your apples. Peel them, core them as you peel and core them place the apples on a bowl with water and lemon juice to prevent the apples turning brown. Slice the apples about an 1/8 inch thin using a mandolin or the food processor. When using a mandolin, I always use a metal mesh glove, it is safe and comfortable when slicing, than the plastic apparatus that come with the mandolin set.
3. Place them on a bowl and toss them with the honey, sugar, salt cinnamon, nutmeg, lemon juice lemon zest. On a large pot over medium high heat melt the butter and add the tossed apples. Mix the cold apple cider with the cornstarch to avoid lumps, and add to the apples. Saute the apples tossing gently for about 6-7 minutes until they are tender, but not mushy, they have a glistening light brown color the juices are reduced. Taste for sweetness, add more sugar if needed. Set aside, to allow to cool. Reserve some of the best looking round slices to decorate the top layer.
3. Once your batter has rested, pull it out f the refrigerator and allow to come to room temperature, whisk a little and start preparing to make the crepes. Pre-heat your 8” nonstick pan over medium heat. Add a little dab of butter until melted and remove excess with a folded paper towel. Poor about 1.5 to 2 ounces of batter into the center of the pan immediately swirl the pan all around to spread the batter on an evenly coat that covers all the bottom of the pan. Cook for about 30 seconds until the edges start releasing when you pull them with the help of a spatula. At this point flip. And cook for another 10 to 15 seconds, transfer to the baking sheet, lay them out flat and allow them to cool. Continue with the same procedure, using the buttered paper towel in between crepes works great, you do not have to add butter every time to the pan, a small coat from the napkin will do it. Continue until your batter is gone.
Tips and Notes to the crêpe maker: – I use an Ice cream scooper to portion the batter, this allow me to have equal thickness every time. a small ladle will work too. -The first crêpe is not always the prettiest, usually is the test drive; it allows you to adjust the temperature in your pan and rectify the heat. – If this is your first time making crepes please do not get discouraged, it gets better as you go. Once you get the groove on it is fun and the smell on your kitchen is heavenly!
4. Once you finish making all the crepes, allow them to cool, and make your mascarpone filling. Combine all the ingredients in a small bowl and whip them for 2-3 minutes with a hand blender until smooth and well combined. 5. Now that you have all the components start assembling, on a flat platter or a cake stand, place a dollop of the cheese and place your first crêpe, arrange a single even layer of the sautéed apples unfolding the slices if tangled, then add a crêpe, then a thin layer of mascarpone cheese, apples. Between, crêpe and crêpe, gently press to ensure you have even layers. Continue until you are done with the crepes and filling, ending with a crêpe. Cover the cake with some plastic wrap and place it in the refrigerator for 30 minutes so the layers can set. Mean time make the caramel sauce.
6. On a small heavy bottom pot, add the apple cider, sugar, honey and butter. Bring to a rapid simmer, you want o evaporate as much water on the sauce. This will take around 15-20 minutes until reduced by half. You will see the formation of big bubbles, and the consistency of the sauce is thicker it resembles more like a syrup.
At this point add the heavy cream whisking at all times, until all is incorporated. Add the Calvados and let it simmer for another 10-15 minutes until the consistency of a caramel sauce. Remove sauce from heat. And transfer into a small poring jar. Allow to cool before drizzling on the cake.
7. Pull the cake out of the refrigerator, place the reserved pretty slices of sautéed apples and decorate the top, once the caramel has cool down a little, pour some of the caramel sauce all over the cake drizzle all edges and sprinkle with the toasted pecans. 8. Make sure you reserve at least half of the sauce to drizzle some extra when the cake is served. Enjoy.
Apple Buckwheat Crepe Cake
with Cider Caramel Sauce
Music Pairing: Erik Satie – The Essential Collection
Recipes, Cooking & Art Direction: Mariana Nuño Ruiz McEnroe | Photography: Ian McEnroe |
Published: October 3, 2014
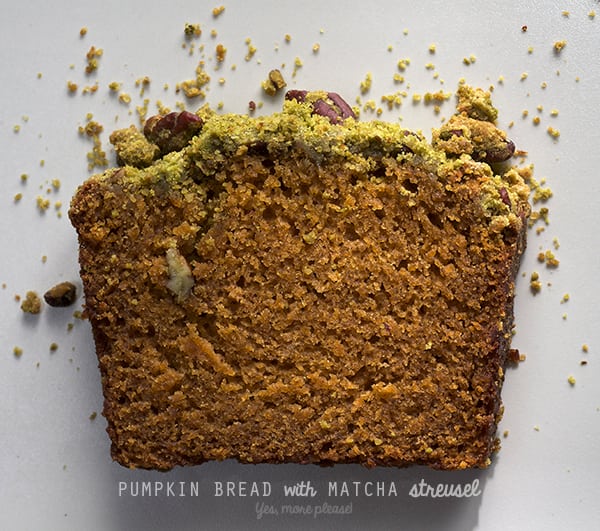
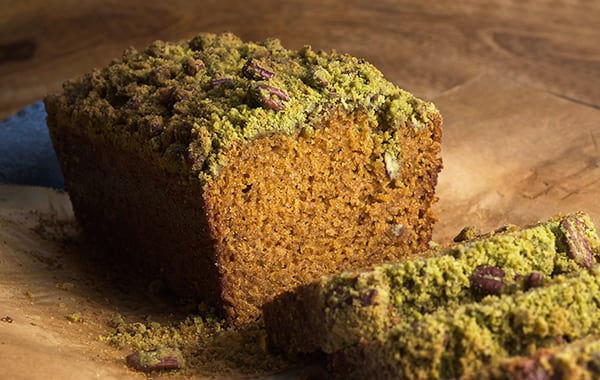
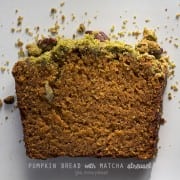
October is here and I can’t wait for pumpkinized everything. My primary pumpkin craving is pumpkin bread (delicious moist and spiced). So, here is my spin for this season. Its delicious and a new flavor combination for you to try.
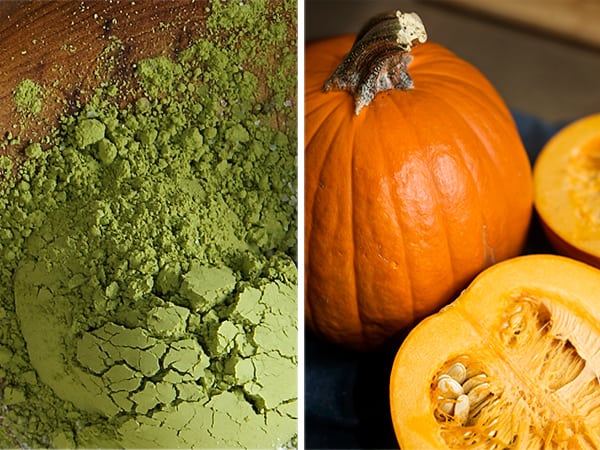
The pumpkin flavor with Matcha is like having tea within your slice. The Matcha green tea powder, tames the sweet sweet notes and enhances the pumpkin, and the spices. These are the ingredients that ordinarily don’t meet in a recipe and come from opposite sides of the planet. Sometimes thats the kind of combo that we need. Matcha Streusel Pumpkin Bread will pumpkinize your tea time. Enjoy!
Happy Fall and stay tuned for Octoberfest! Pretzels, sausage, and beer recipes coming up soon!
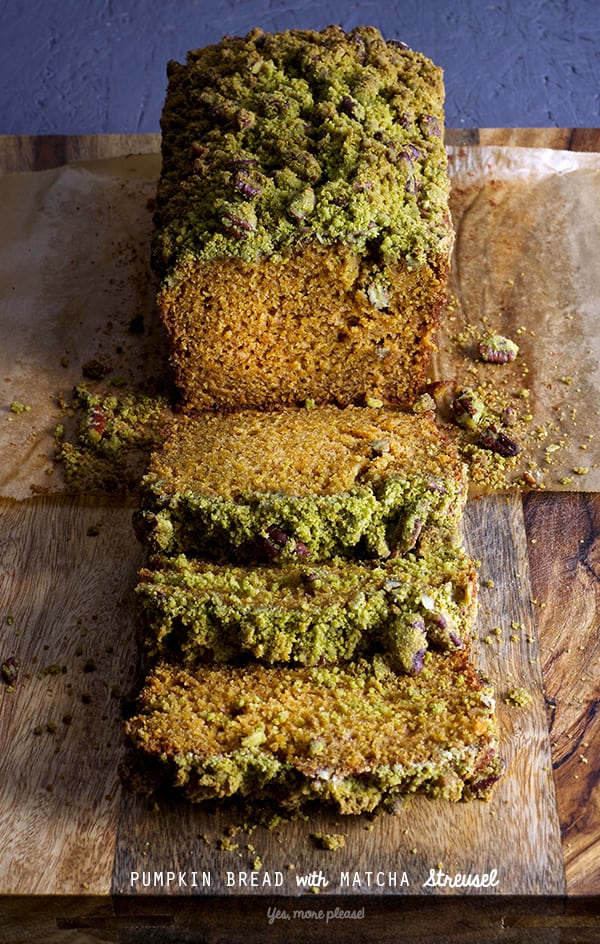
Matcha Streusel Pumpkin Bread
Makes 1 loaf 9″x5″ or 10″x5″ or about 24 muffins
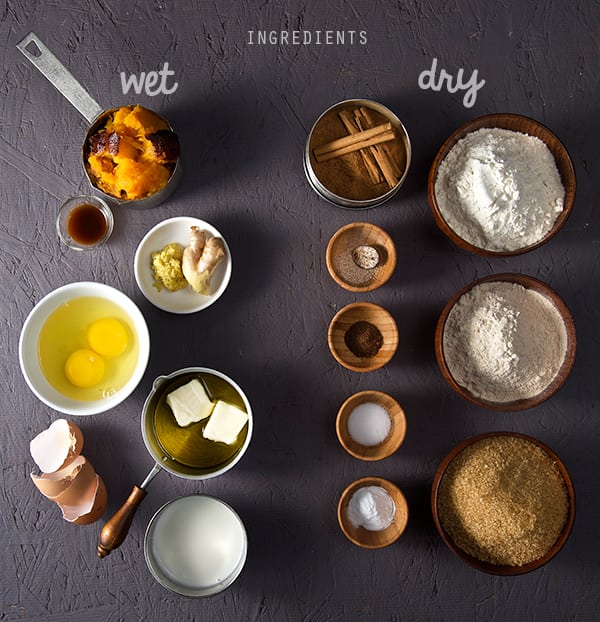
Dry ingredients:
1 Unbleached all-purpose flour
3/4 whole wheat flour
1 cup of turbinado sugar
1 teaspoon salt
1 -1/2 teaspoon baking soda
1 teaspoon ground cinnamon
1/2 teaspoon ground all spice
1/2 teaspoon nutmeg
Wet ingredients:
1-1/2 cups roasted pumpkin
2 eggs room temperature
1/4 cup olive oil
1/4 cup melted butter
1/3 cup natural Bulgarian yogurt
1 teaspoon fresh grated ginger
1 teaspoon vanilla extract
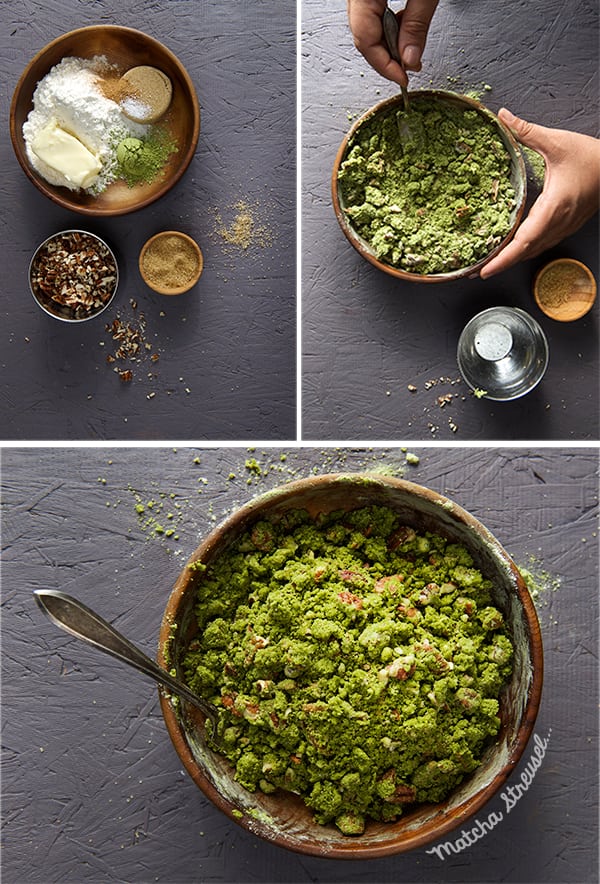
For the streusel:
1/2 cup Unbleached all purpose flour
1/8 cup packed light brown sugar
2 tablespoons turbinado sugar
1/4 teaspoon kosher salt
2 teaspoons organic Matcha powder
1/4 cup roughly chopped pecans
6 tablespoons butter room temperature.
Directions:
Preheat oven at 375F
1. Prepare the matcha streusel, with a fork, combine all the ingredients with the softened butter until the mixture resembles a coarse lumpy dough. refrigerate while you prepare the rest…
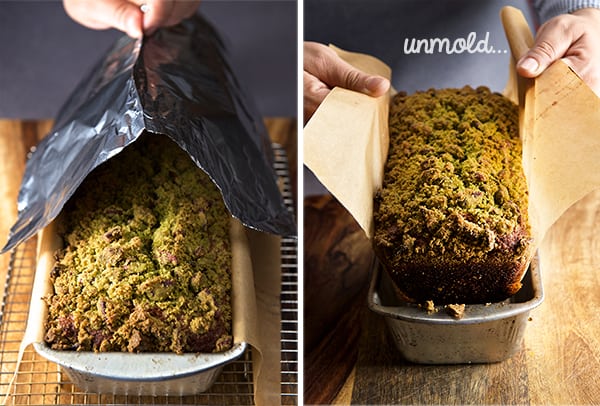
2. In a large mixing bowl combine all dry ingredients. Whisk. 3. On a medium size bowl combine all wet ingredients, mix well until well combined. 4. Combine wet into dry and fold until well incorporated being carefull of not over mixiing the batter. 5. Butter up a 10″x 5″ loaf pan, lined up with a piece of parchment paper long enough to hang about 4-5 inches on each side. (See picture below) 6. Pour batter into the mold and cover completely with the matcha streusel mixture. Lightly press so the crumbs stay attached to the top.
7. Bake at 350F for the first 30 min.- Check your bread at 30 minutes mark and tent it with a piece of aluminum foil shiny side up, to prevent he streusel to over-brown . Lower the temperature to 325F and bake for another 25-30 minutes. 8. Passed the 50 minutes mark, check near the center with a toothpick to check for doneness. Toothpick should come out clean with a few moist crumbs attached.
Remove from oven and cool it on a rack for 20 minutes, before slicing.
Once cool, slice it and enjoy!!!
Notes:
Store the bread in a piece of parchment paper and plastic wrap. It tastes better the next day!!!.. keep it safe and away from temptation… It will last for about a week, no need to refrigerate. This recipe will work for muffins. Divide the batter into cupcake molds lined with cupcake liners, fill up a bit over 1/2 way and add 1 heaping tablespoon of matcha streusel, you will need to make a double batch of the streusel. Bake at 325F for about 20-25 minutes.
Music Pairing: The Smashing Pumpkins – Tonight, tonight
This Pumpkin Bread is extra moist, has a fine crumb, great spice flavor with our masking the natural pumpkin flavors. The crumbly matcha streusel is a top-notch addition.
Makes 1 loaf 9″x5″ or 10″x5″ or about 24 muffins
Course
Breakfast
Cuisine
wholesome
Ingredients
Dry ingredients:
1Unbleached all-purpose flour
3/4whole wheat flour
1cupof turbinado sugar
1teaspoonsalt
1 -1/2teaspoonbaking soda
1teaspoonground cinnamon
1/2teaspoonground all-spice
1/2teaspoonnutmeg
Wet ingredients:
1-1/2cupsroasted pumpkin
2eggs room temperature
1/4cupolive oil
1/4cupmelted butter
1/3cupnatural Bulgarian yogurt
1teaspoonfresh grated ginger
1teaspoonvanilla extract
For the streusel:
1/2cupUnbleached all purpose flour
1/8cuppacked light brown sugar
2tablespoonsturbinado sugar
1/4teaspoonkosher salt
2teaspoonsorganic Matcha powder
1/4cuproughly chopped pecans
6tablespoonsbutter room temperature.
Instructions
Directions:
Preheat oven at 375F
Prepare the matcha streusel, with a fork, combine all the ingredients with the softened butter until the mixture resembles a coarse lumpy dough. refrigerate while you prepare the rest…
In a large mixing bowl combine all dry ingredients. Whisk.
In a medium-size bowl combine all wet ingredients, mix well until well combined.
Combine wet into dry and fold until well incorporated being careful of not over mixing the batter.
Butter up a 10″x 5″ loaf pan lined up with a piece of parchment paper long enough to hang about 4-5 inches on each side. (See picture below)
Pour batter into the mold and cover completely with the matcha streusel mixture. Lightly press so the crumbs stay attached to the top.
Bake at 350F for the first 30 min.- Check your bread at 30 minutes mark and tent it with a piece of aluminum foil shiny side up, to prevent the streusel to over-brown. Lower the temperature to 325F and bake for another 25-30 minutes.
Passed the 50 minutes mark, check near the center with a toothpick to check for doneness. Toothpick should come out clean with a few moist crumbs attached.
Remove from oven and cool it on a rack for 20 minutes, before slicing.
Once cool, slice it and enjoy!!!
Substitutuions:
Any combination of oils like: melted coconut oil, canola oil, will work.
For the sugar: use a combination of coconut sugar and turnbinado, or brown sugar and turbinado, always use half and half to obtain a better crumb.
For Eggs you can make a vegan egg using 1 tablespoon of ground flaxseeds and 3 tablespoons of water. Mix this well until frothy, this amount will make the equivalent of 1 egg.
Recipe Notes
Notes: Store the bread on a piece of parchment paper and plastic wrap. It tastes better the next day!!!.. Keep it safe and away from temptation… It will last for about a week, no need to refrigerate. This recipe will work for muffins. Divide the batter into cupcake molds lined with cupcake liners, fill up a bit over 1/2 way and add 1 heaping tablespoon of matcha streusel, you will need to make a double batch of the streusel. Bake at 325-350F for about 20-25 minutes.
Recipes, Cooking & Art Direction: Mariana Nuño Ruiz McEnroe | Photography: Ian McEnroe |
Published: August 20, 2014
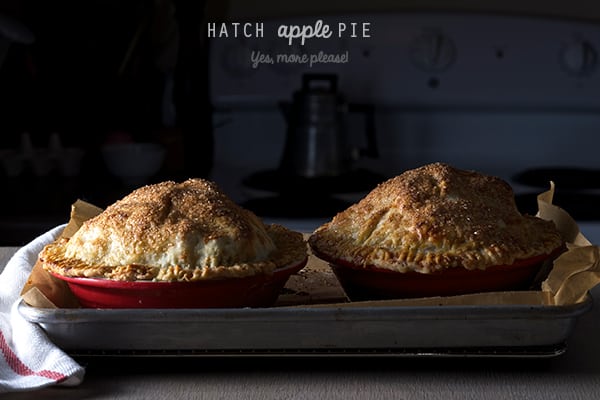
Last week I went prickly pear hunting with my good friends Andrea and Arin. This involved intense heat, lots of driving, and careful handling of ingredients, and lots of tiny needles. After picking these thorny fruits, we juiced them and they produced a bright pink fragrant juice which tastes like a sweet tart lemonade. Afterwards, we were having a food conversation over our drinks and Hatch chilli’s which are in season became the topic,no matter what we always end up talking about food is inevitable…I love it!. As ingredients go Hatch peppers its one of the gems of the chili world, having a mild heat and great flavor. Andrea’s Hatch mode was contagious. After tossing around some favorite Hatch combinations, I began considering Apple Pie with Hatch peppers. Apple pie is normally reserved for the fall but I am married to a man who can eat it regardless of season. I thought this would be the right time to bake a test batch (which ran on Instagram, which you knew because all of you MUST follow YMP on Instagram) and they turned out splendidly, or at least the eaters of the samples left not a crumb,apple, or chili behind.
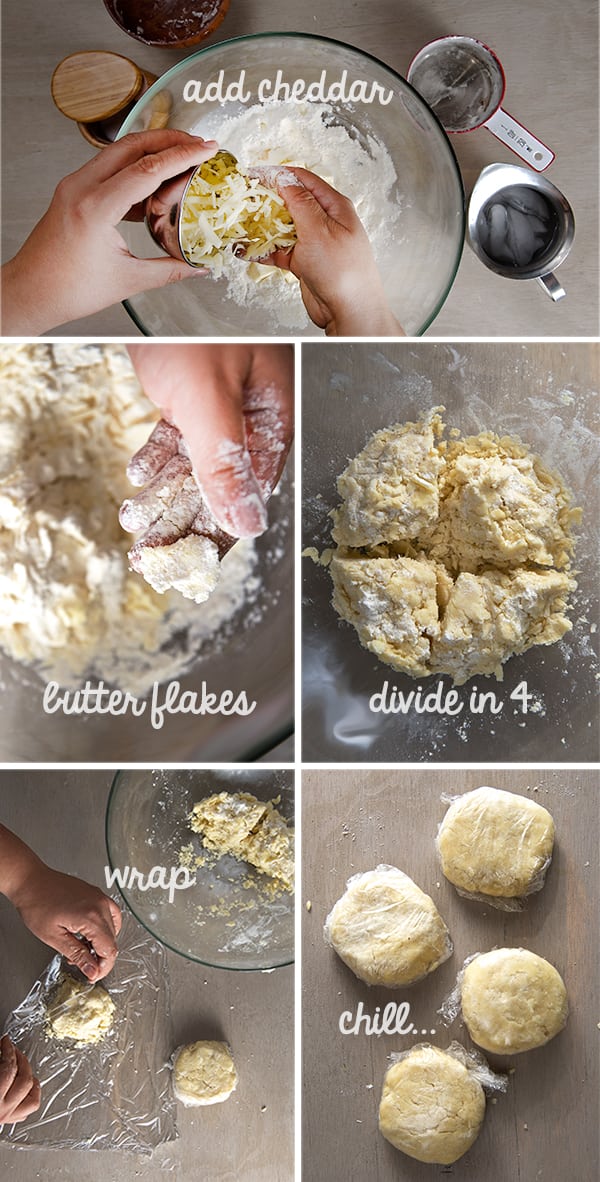
I twisted my classic crostata crust recipe which you can find the step by step in this post (Ian this phrase is just for me!..need to plug the link!) and I added cheddar cheese! Yes you heard well, sharp cheddar cheese. It came to me like a dream. The cheddar adds the savory a bit salty note to the crust, and it makes it airy and flaky. I also tried a new technique when kneading the pie crust, I learned by watching one of the episodes “ The Mind of a Chef ” with Sean Brock and southern baker Lisa Donovan who were making her amazing buttermilk pies. What I learned about her Pate brise type of dough, (which is my favorite kind for pie), is the following: she “flaked the butter” when she was making her dough, instead of leaving those famous “pea size butter chunks”. She squeezes them between her thumb and index finger to create what she called “butter flakes” Genius!!!! So I tried her technique and I added grated cheddar to create more flaking. The result is this utterly buttery and flaky crust, you can see the pictures which do not lie! Omg what a great technique and awesome combination between the fat of the butter and the cheese if I do say so myself.
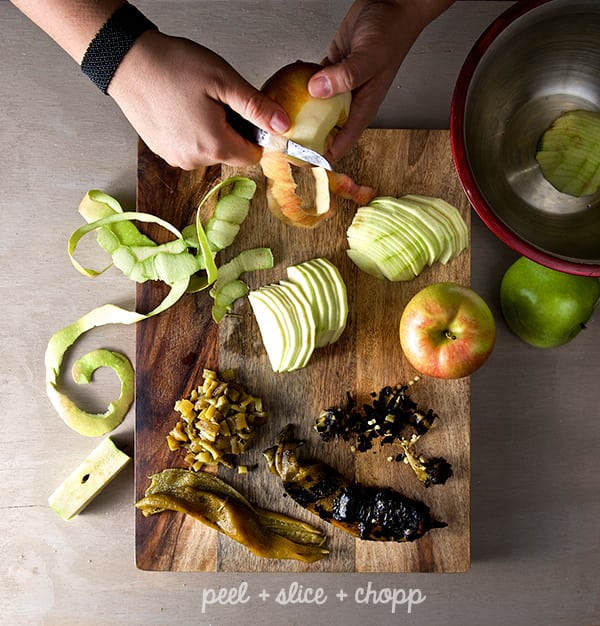
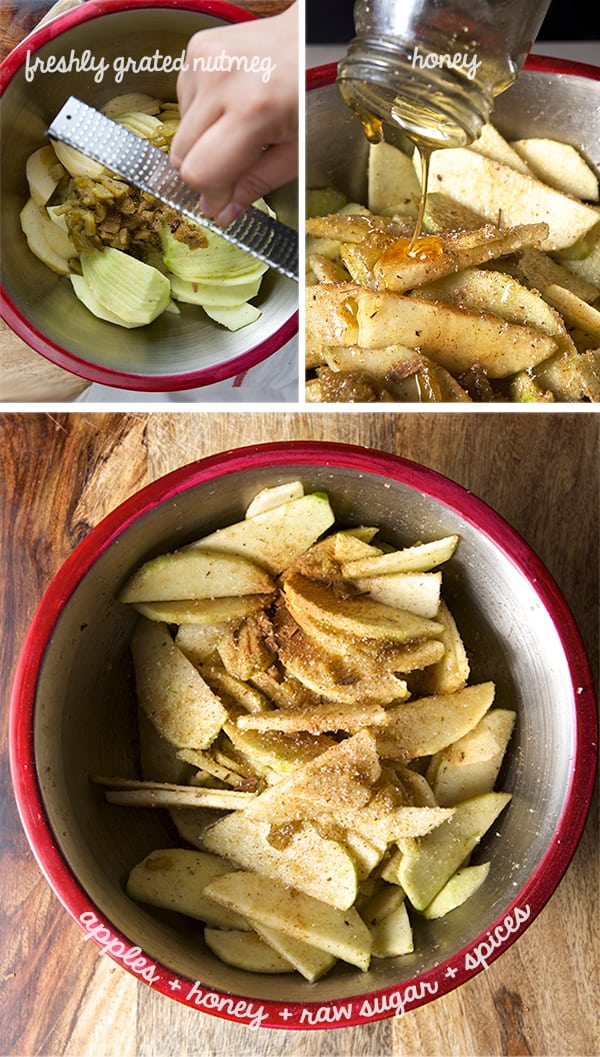
But where is the hatch? After I chard them, they were hanging out with the apples in a combination of raw sugar, Gause Jaupon honey, Mexican cinnamon, and nutmeg. That’s what the crust had to stand up to! You can only imagine the amazing outcome after all these ingredients colliding in the same universe. Amazing pie. Go for it. Don’t be shy. If you want to comment on your experience with it please e-mail me. If you love the recipe shout it on the streets! …Enjoy!
Hatch Apple Pie
A tongue twister by name and by taste!
Makes 2- 5” baby pies
For the pie filling:
2 green apples
2 red Apples
2-3 hatch chiles charred, skinned , de-seeded and chopped. (I used hot!)
¼ cup honey
½ cup turbinado sugar
1 teaspoon mexican cinnamon grated
¼ teaspoon nutmeg
2 tablespoons of butter
1 teaspoon corn starch
½ teaspoon apple cider vinegar
1 good pinch of salt
For the cheddar cheese crust:
1+1/4 cup unbleached all-purpose flour
1 stick = 4 oz. of european style butter cut into small cubes.
4 oz. sharp cheddar cheese grated
1 pinch of kosher salt
3-4 tablespoons of iced water.
Extra flour for dusting and rolling the dough. 1 egg for egg-wash the pie tops a little extra turbinado sugar to sprinkle on crust.
Preparation method:
1. Start by making the crust. In a large bowl combine flour and salt. Then add the chilled butter cubes, and the grated cheddar cheese. With you hands start rubbing the flour and butter between your fingers and creating “the flakes” see picture bellow) you want to be gentle and as fast as possible. 2. Once your dough looks flaky and coarse, add the iced water and quickly combine by incorporating the flour with the least kneading possible. (see picture below) 3. The dough will look almost like is not together. Gently press into a flat ball and divide into fours. (you will need two tops, and two bottoms) 4. Wrap each portion in plastic wrap and quickly shape into 4 small disks. Chill them for at least 15-20 minutes in the freezer.
5. Meantime, prepare the apple filling. Peel and thinly slice the apples. In a medium bowl toss the sliced apples, diced roasted hatch peppers, honey, sugar, cinnamon, nutmeg, cornstarch, salt apple cider vinegar. Mix well. Use your hands to well combine every ingredient. Set aside.
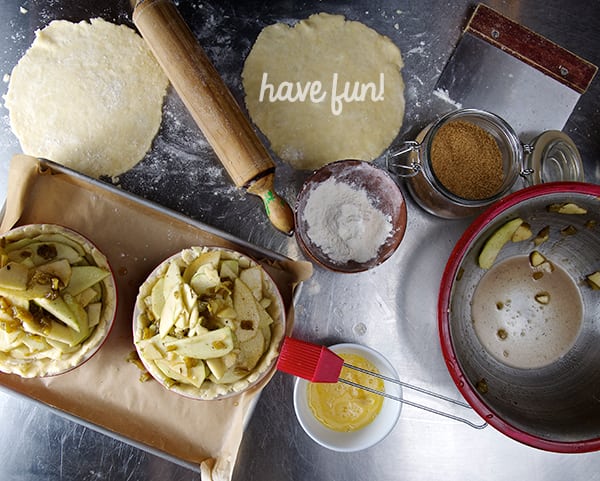
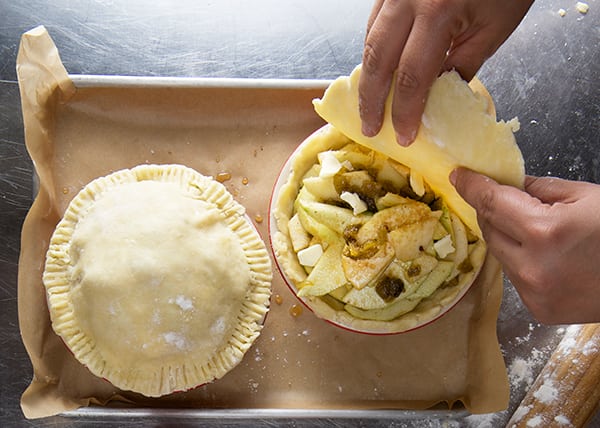
6. Time to roll up your dough!.. this is fun! Using 2 small 5” baking pie dishes. Roll each dough piece into a 7- 8” rounds. Rub some butter into the dishes, and then place the bottom disc shaping the dough into the dish with your hands. 7. Fill each pie with half of the apple filling. Arrange the apple pieces in flat layers. You don’t want to be to fussy about it, just pay attention at not leaving apple gaps specially on the bottom layer ; )
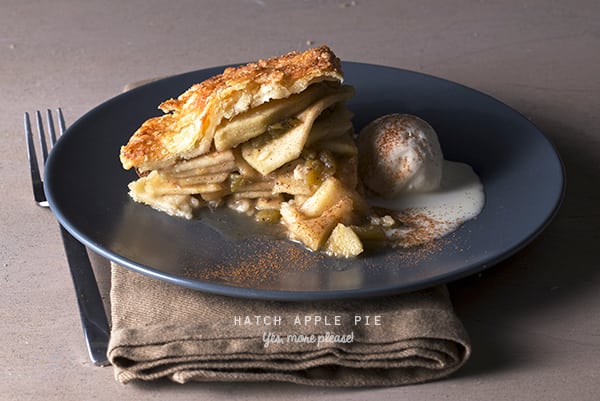
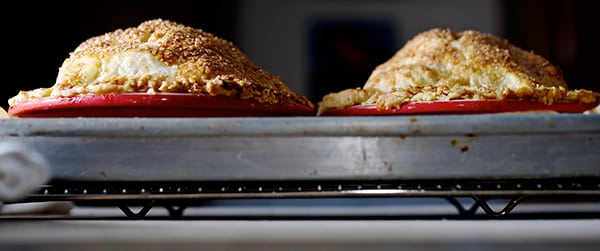
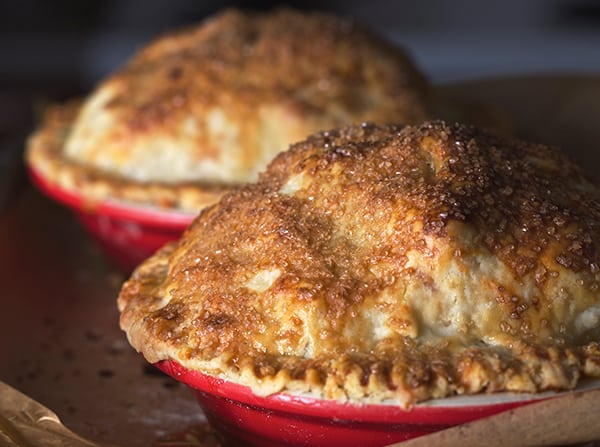
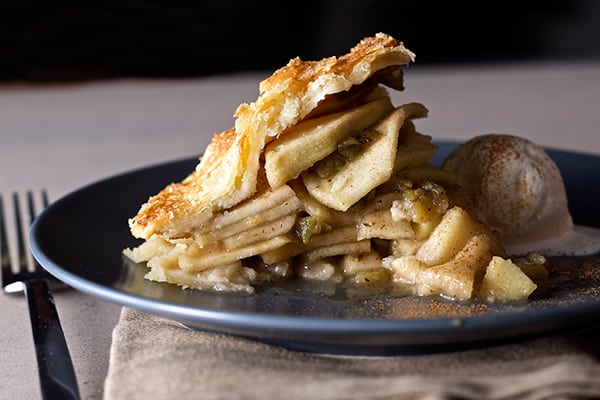
8. Now your pies look like mountains of apples, that’s great! Roll the other two pastry disks into 7”-8” and cover your pies. 9. Crimp the edges of the pie with the help of a fork, make four 1” slits on top of the pie. Beat one egg and 1 teaspoon of water and with a pastry brush, brush the tops of the pies with this egg wash mixture. Sprinkle turbinado sugar on top, and edges of the pie. 10. Line up a baking sheet with a lip with aluminum foil. Place the two pies in the tray. Place the tray in the freezer for about 20 minutes. 11. Place the rack oven into the bottom third of the oven. Preheat your oven at 400F. 12. After 20 minutes, remove the pies from freezer and place them directly into the oven. 13. Bake at 400F for the first 20 minutes. Rotate the pies and lower the temperature to 350F. Bake for another 20-25 minutes. 14. By now your house smell like heaven! Place the pies into a cooling rack let them cool for about 30 minutes. Serve with a scoop of your favorite vanilla ice cream and a dash of ground cinnamon. Enjoy!
Life is too short. Make pie. Eat pie. Repeat!
Music Pairing: Nouvelle Vague – Dancing with Myself
Recipes, Cooking & Art Direction: Mariana Nuño Ruiz McEnroe | Photography: Ian McEnroe |
Published: June 12, 2014
Not too long ago, roaming around whole foods supermarket aisles, I discovered on the shelves the magical Sir Kensington’s ketchup. Looking at me rom the wide mouth glass jar I noticed Sir Kensington’s top hat personality and I fell in love with his aristocratic moustache. That was my very first impression. But the man behind the monocle had way more to offer than just an attractive moustache. As I grabbed the jar and started to read the label my jaw just dropped, Non- GMO, 50% less sugar, 33%less sodium, and a short list of ingredients in which whole tomatoes take the first place ingredient. I was totally in love.
You all know my love affair with tomatoes, so you must know what this discovery meant to me. In my opinion this is the best ketchup I’ve had. Shortly after I discovered the whole condiment collection, mayo, chipotle mayo, spicy ketchup and their recent addition “The” Sir Kensington’s Spicy Brown Mustard. I’ve tried them all. You should, too. Period.
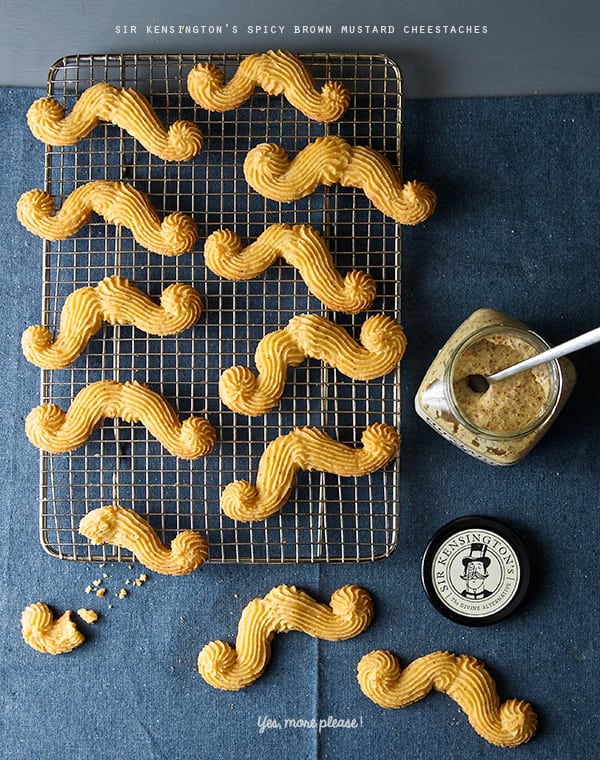
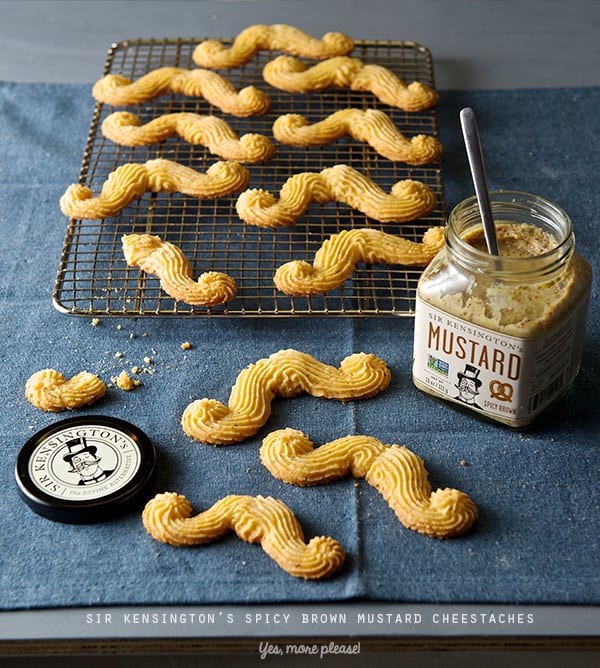
A condiment revolution is here! With all natural ingredients, this spicy brown mustard already has a place in the Mustard Museum with a silver medal on the 2014 world-wide competition. The distinctive spicy mustard flavor has a hint of maple syrup. I have smothered it on everything. I decided to come up with a recipe that enhanced the mustard flavor, and a tribute to Sir Kensington’s Moustache.
This is how this recipe was born. These cheese straws are the ‘piped’ kind you can squeeze from a piping bag or a cookie gun. Not to be confused with the twisted puff-pastry kind. These buttery, cheesy, crumbly, savory cheestaches have a spicy brown mustard kick!
Mild cheddar pairs fantastically with this spicy brown mustard. This easy and fun to make recipe has five ingredients and the result are this cheesy and spicy, utterly delicious moustaches. Most anyone with a love for creamy cheddar cheese and spicy brown mustard will appreciate a treat like this. This fun snack is a great treat to pamper your Dad on Father’s Day. Even if your Dad does not have a mustache!
Apple juice, a cold glass of beer or a cold iced tea will be the perfect match for this Cheestaches on a summer afternoon. Top notch!
Enjoy!
Sir Kensington’s Spicy Brown Mustard Cheestaches
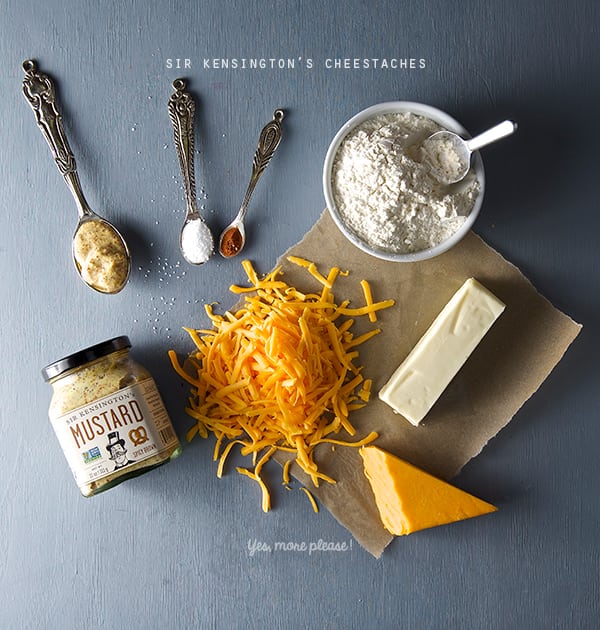
Makes 24 cheestaches
4 oz mild cheddar shredded and at room temperature
4 oz (1stick) unsalted butter room temperature
1 heaping Tablespoon of Sir Kensington’s Brown Spicy Mustard
1/8 teaspoon Cayenne pepper
1/2 teaspoon kosher salt
1+1/2 cups unbleached all purpose flour.
1 medium 12” piping bag
Metal decorating tip # 32 available at any craft store.
1 cookie sheet, parchment paper.
Preparation Method
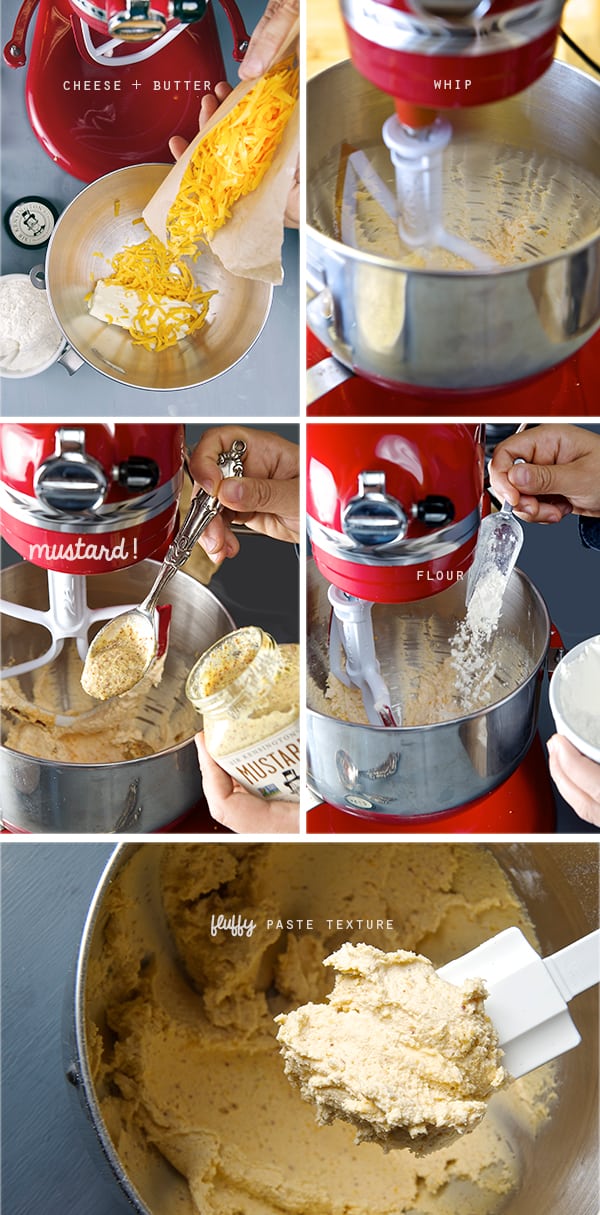
1. In the bowl of a mixer fitted with a paddle attachment, whip the butter for about 4-5 minutes until the butter looks lighter color.
2. Add the shredded cheddar cheese mix for another 3-4 minutes. until you just see small speckles of cheese and the butter is fluffy and looks whipped.
3. Stop mixer, add the spicy brown mustard, cayenne and salt. Mix until combined. 1-2 minutes.
4. Stop the mixer and add the flour in two stages, mixing on medium low until well incorporated.
5. Mix on medium high for 2 minutes. the batter should look like a paste. (if the dough is to stiff, add a bit more mustard and bout a tablespoon more of butter. whip.)
6. Prepare the piping bag, follow instructions below.
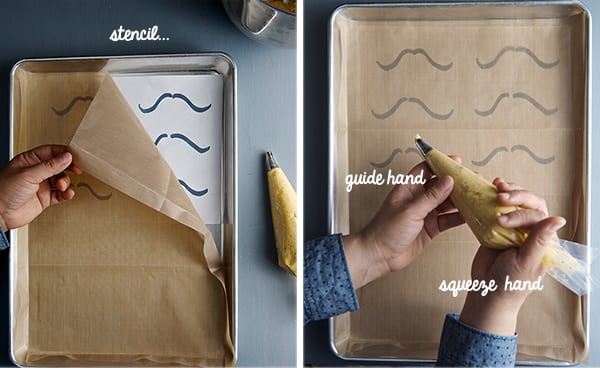
7.Line a Baking sheet with parchment paper, a silpad or reusable-parchment, mi favorite!; place the mustache stencil under the parchment.
I made a mustache stencil you can print for easy piping, you can look it up, down load it our Yes, more please! Facebook page click here to get it! Not in the mood of mustaches?.. pipe 3”- 4” stripes and bake for about 12 minutes.
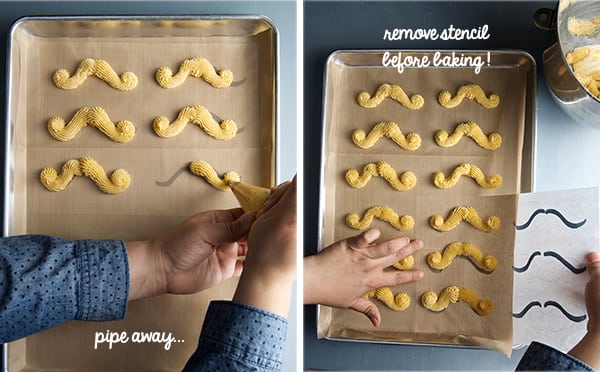
8. Now the fun begins!…Pipe the cheese- mustaches follow the instructions on the picture below, but first take a quick look on my easy way to handle a piping bag.
9. Once you pipe the mustaches place the baking sheet in the refrigerator for at least 15- 25 minutes.
10. Preheat your oven at 350 F.
11. Bake cheese straws for 12-14 minutes, until the tips and base of the mustaches start looking golden brown on the edges.
12. Remove from oven, let them cool on the cooking tray for 4-5 minutes on the tray. Then with the help of a flat spatula transfer them to a cooling rack.
13. This cheese mustaches can be dipped on a bit extra of spicy brown mustard if desired for more kick. But to tell you the truth they are great as they are!..and they taste fantastic the day after.
Serve with a nice cold glass of beer or Iced Tea. Enjoy!
This recipe post was sponsored by Sir Kensington’s brand condiments and the mustard used was furnished by the good folks at Sir Kensington’s.
Recipes, Cooking & Art Direction: Mariana Nuño Ruiz McEnroe | Photography: Ian McEnroe |
Published: May 16, 2014
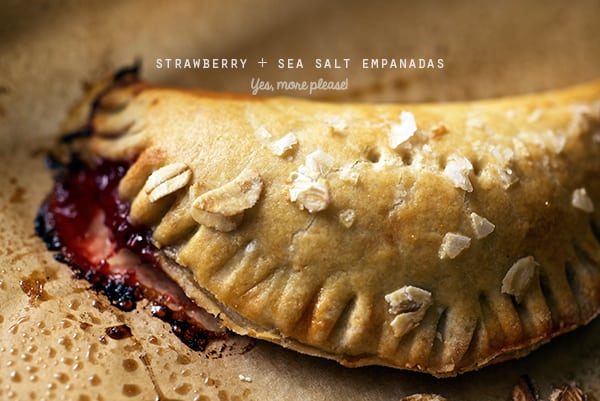
The Empanada is a classic pastry in Mexico. We inherited these pastry pockets of goodness from the Galician people of Spain. If we backtrack to the empanada’s middle eastern cousins ,the samosas, we can trace their origins all the way to Persia. They have been around for a quite while. The common denominator of these pastries is a piece of dough that wraps in a half-moon pocket with any kind of filling; sweet to savory, meats, vegetables, fish, cheese, nuts, fruits, you name it! Your craving and the sky are your limit on this one.
What makes a good empanada? Is it the filling or the dough? Its like asking what was first the egg? or the chicken?…For me its all about the dough. If you have a great dough recipe even the humblest filling will shine.
This recipe is all about the dough and a very humble strawberry compote filling.
I woke up dreaming about these strawberry empanadas. Yes, I had the empanada voice in my head but my conscious belly did not want to have to deal with the caloric remorse. So I re-vamped my old recipe to make it a bit more nutritious. Its a recipe I’ve used for a long time. I adapted it, made it my own and it never fails, it always turns out great and it’s easy to make. What makes it different from other recipes is that I replaced the water and leavening with white wine. Yes, you heard it well or shall I say read it clearly. WINE in my dough! any wine left overs?… Why wine? Well the wine acts as the leavening and gives the dough a smooth and pleasant flavor, tender crumb and bit of sweetness. No worries about alcohol content please. Once you bake these babies the alcohol is gone leaving the great flavor on the dough. *sight*
The original recipe calls for lard, which with the years I’ve changed to butter. For this recipe in an effort to not use lard or any other heavy-duty fat I decided to replace the butter with coconut oil, a plant-based fat. This might seem like a fad, but I’m on a mission to demystify this trend. I’ve used it in a couple of recipes, with great success and flavor. So if the healthy bonus come along that’s even greater! Also I’ve substituted half of the white un-bleached flour for oatmeal flour.
The results are delicious. The empanadas are light and flavorful, easy to digest, with no caloric remorse, and best of all an oatmeal empanada can technically be a breakfast of champions! Hehehe.
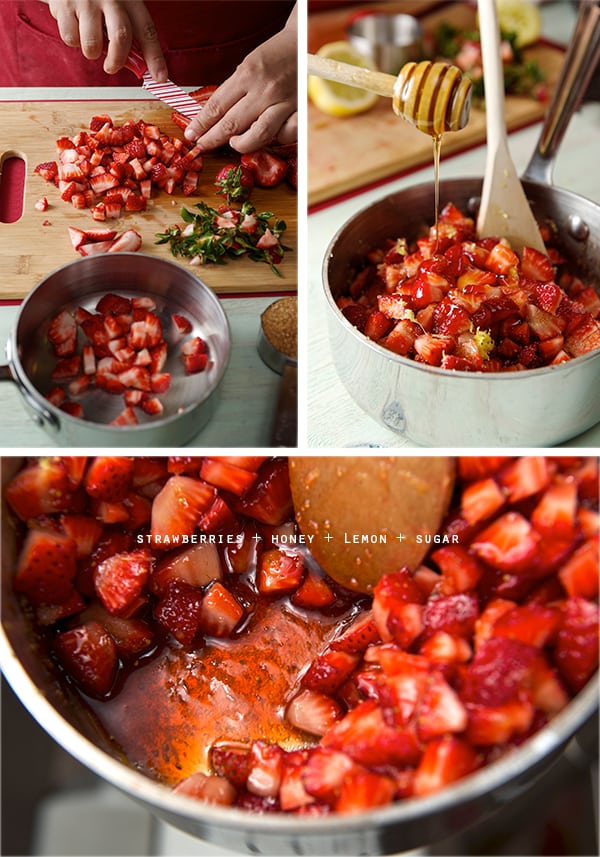
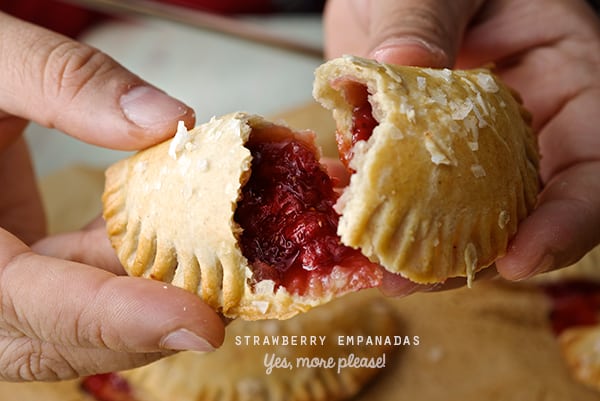
For the filling I used strawberries, honey and lemon to make a simple strawberry compote. Three perfect natural flavors in harmony.
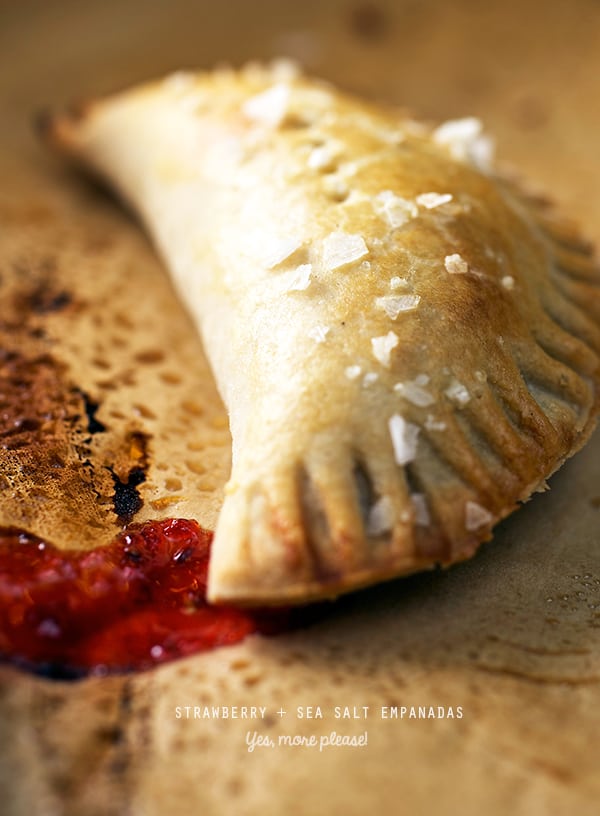
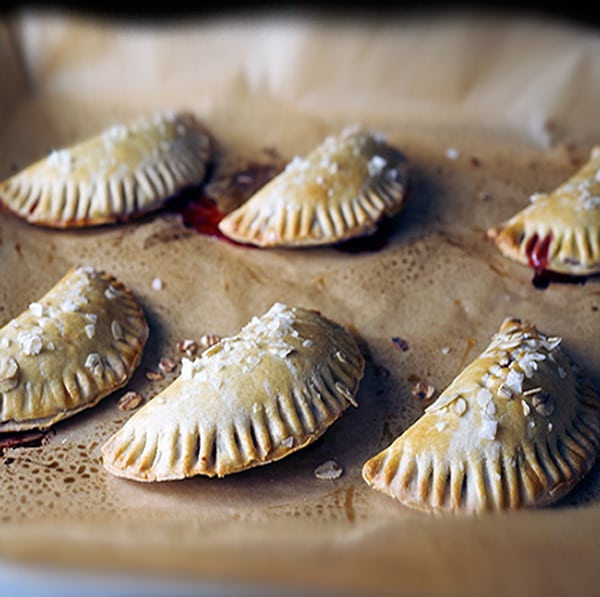
And for the final touch some sea salt flakes on the crust. Oh my when you take a bite of these babies its heaven. They have a light crust, not too sweet, and the sea salt flakes add tons of attitude, they brighten up the strawberry filling and balance the sweet flavor. This recipe is a winner and I truly believe You are gonna love them. I would love to hear back from you if you make them, shoot us some comments do not forget to share…Enjoy!
Other empanada fillings: peach & ginger, apples, strawberry and peanut butter, raspberry, mangos, pineapple! Or any savory flavor will work too…strawberry & peanut butter wha?!
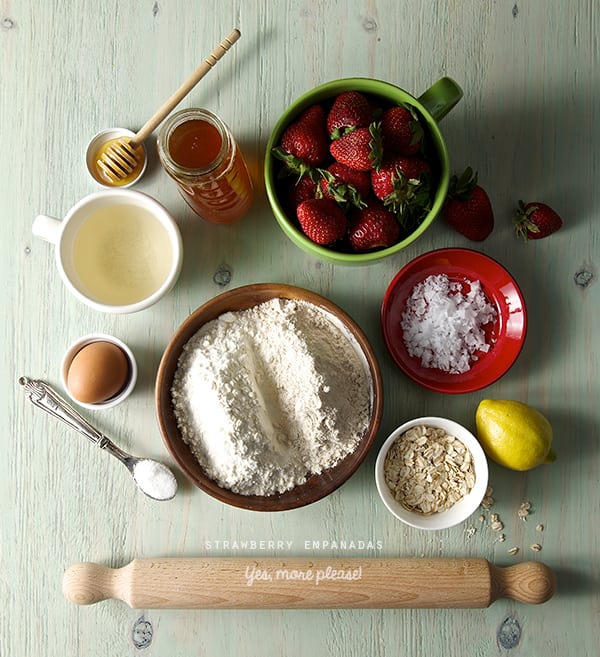
Strawberry Empanadas
Makes 12 empanadas, recipe can easily be doubled for a bigger yield.
1 cup unbleached all-purpose flour
1 cup oatmeal flour
1 teaspoon sugar
1 good dash of kosher salt
1 large egg yolk
1/3 cup coconut oil Organic Coconut Oil Pure Extra Virgin
½ cup white wine ...almost any kind will work, left over wine? Great!.. with the exception of a very dry and mineral-rich wine (Those flavor notes will be a bit harsh on the dough flavor.)
For the strawberry compote:
2 cups diced strawberries
the zest of one lemon
the juice of half a lemon
a pinch of salt.
¼ cup honey
¼ -1/3 cup turbinado sugar, upon how sweet or tart your strawberries are, start with ¼, taste, and add more if needed.
Top with:
Sea salt flakes
Oat flakes
1 egg + 1 teaspoon water for egg wash.
Preparation method:
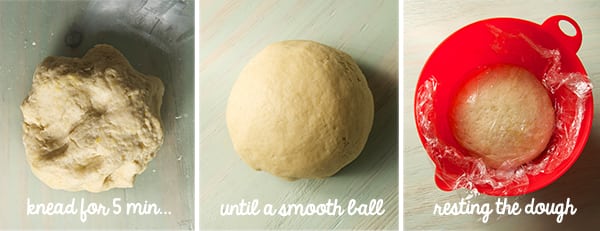
Making the dough:
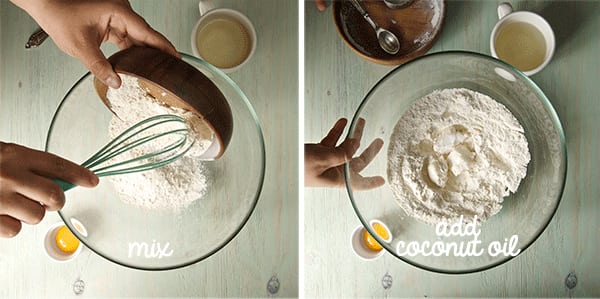
1. Combine dry ingredients, whisk.
2. Add coconut oil in solid form mix using your fingers until the flour resembles coarse sand.
3. Add egg yolk and mix.
4. Add white wine little by little and mix with your hands until well incorporated and you form a ball.
5. Knead the dough for about 3-4 minutes until smooth.
6. Cover with plastic wrap and refrigerate for about 1 hour.
While the dough is resting, make the strawberry compote:
In a small non reactive pot (stainless steel preferable) combine diced strawberries, turbinado sugar, honey, lemon zest lemon juice. Mix well until sugar is dissolved by the strawberry juices.
Over medium heat, bring to a boil and simmer for 4-5 minutes. Attend at all times, you don’t want a sugary foam all over your stove!. Remove from burner set a side and cool.
Making the empanadas:
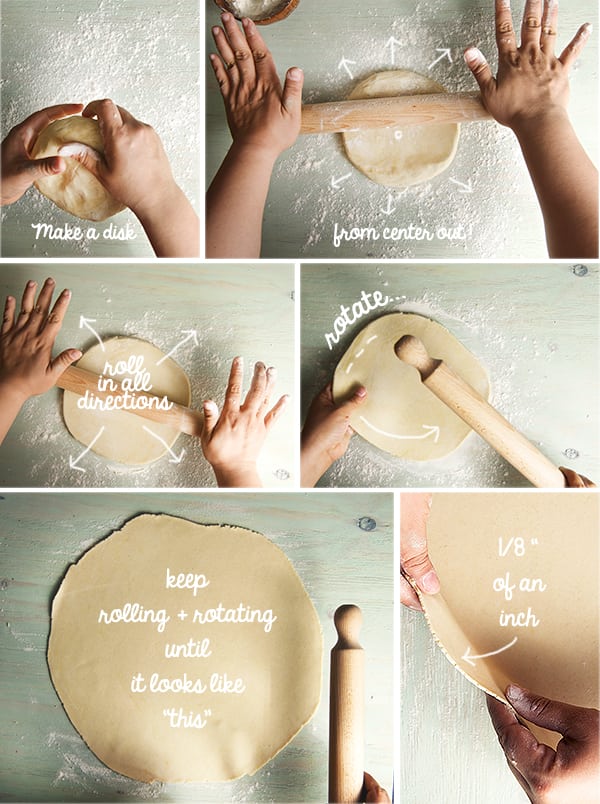
1. Roll the dough into a large circle, start by shaping the dough into a disk, flour the surface and with your rolling pin start rolling from the center out. rotate your dough 90 degrees every time you roll to keep the dough into a circle . /this rolling and rotating allow you to keep the dough from sticking to the surface, and to keep it at an even thickness. You want to stop rolling until your dough is about 1/8 of an inch thick. (see picture below)
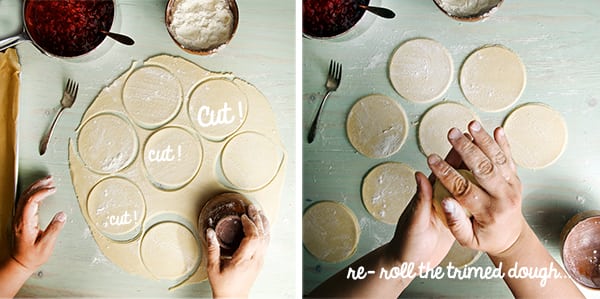
2. Cut 4” circles (I used a bowl with a thin edge for better results use a pastry or cookie cutter)
3.Egg wash the perimeter, place a little less than a tablespoon of strawberry compote on the center of the dough and fold the circle in half making a half-moon.
4. Slightly press the edges to seal the empanada, place on a floured surface and with the help of a fork press all the edge to seal it.
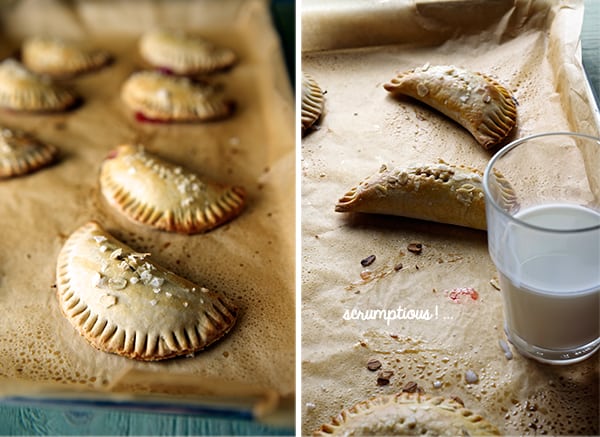
5. Place them as you go on a baking sheet lined with parchment paper or a silpad for best results.Proceed with the rest of the dough until you have about 12 empanadas.
6. With the same fork prick all the empanadas in the center so steam can get off as they bake and avoid leaks. ~Sometimes leaks happen ands thats ok; keep calm and carry on because they still taste delicious!~
8. With a pastry brush apply egg wash and sprinkle some sea salt and oat flakes. Bake at 375F for 10-12 minutes.
9.Remove out of the oven and let them sit for a minute or two, transfer to a cooling rack, before you eat them all!!!
Recipes, Cooking & Art Direction: Mariana Nuño Ruiz McEnroe | Photography: Ian McEnroe |
Published: April 26, 2014
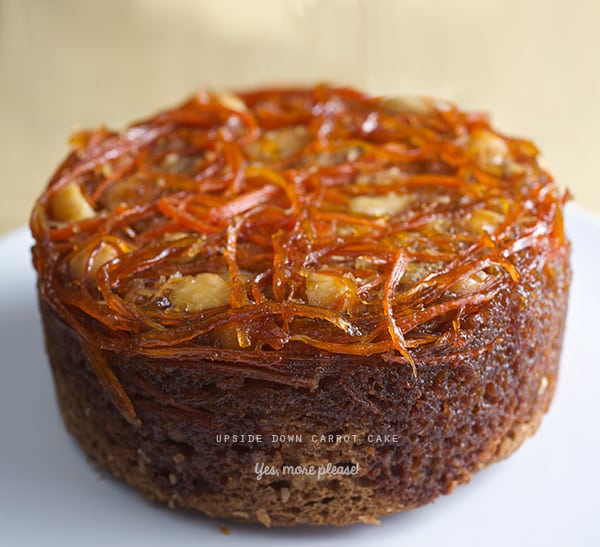
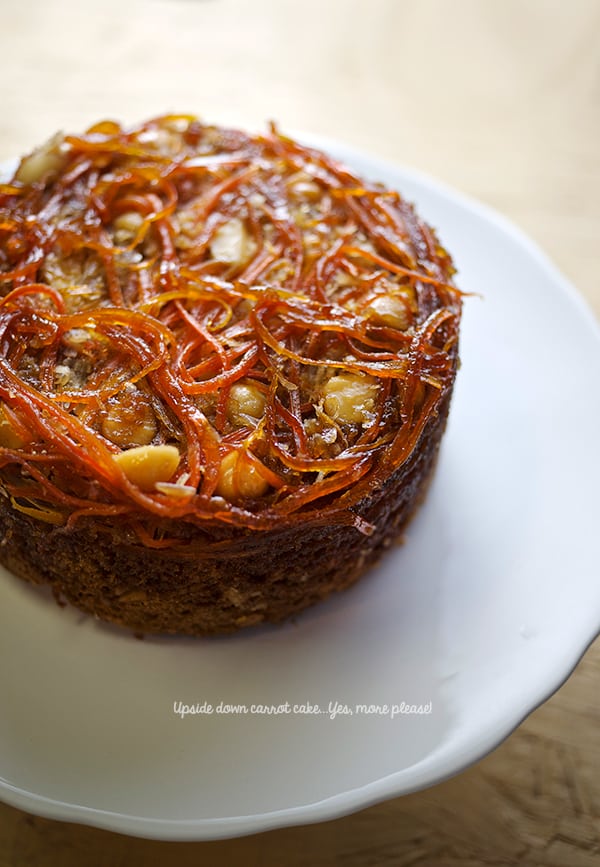
Lately everything in my world seems upside-down, but the little wacky moments in everyday life can be fun. Being playful in the kitchen is my kind of fun. And boy, if this cake screams upside-down, I’m seeing life straight up now!~
After making the Leek and Potato Tarte tatin, a light bulb turned on in my head and crisscrossed with the idea of a carrot cake. What if I apply almost the same concept of a pineapple cake to the carrot cake? Without hesitation I made ½ of a recipe, and it turned into a delicious unexpected result. I placed the carrots on the bottom of the pan and used coconut butter instead of regular butter to create a coating. I added some honey and turbinado sugar which caramelized beautifully on the bottom. Adding some freshly ground ginger was the final touch; fragrant with a spicy lemony note.
I think Ian looked at me funny when I told him I was baking an upside-down carrot cake. He probably though I was crazy…and then when he saw the cake, he just smiled and understood, and when he tried it he asked: “When are we shooting this?”… So I guess he liked it!
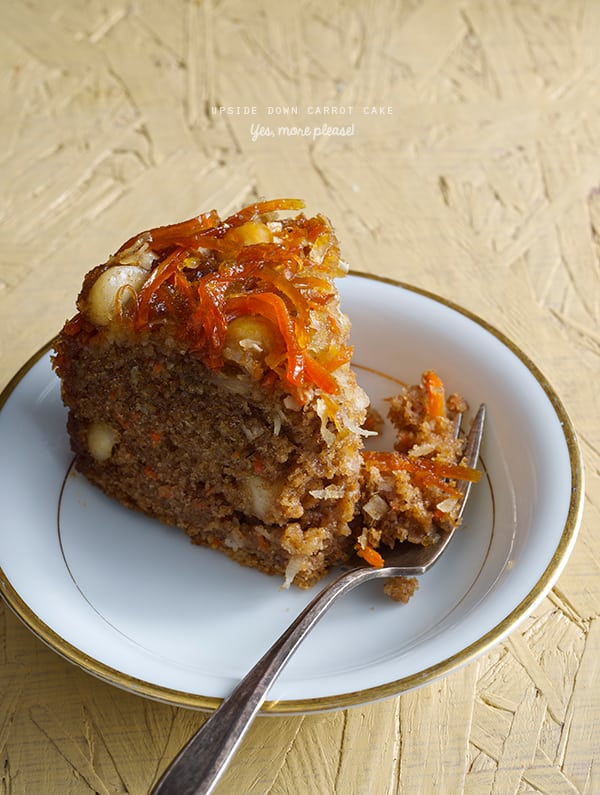
The cake is mildly sweet. The caramelized carrots add the sweetness and texture to this scrumptious cake, without being overly sweet. It is more of a coffee cake than the classic carrot cake with cream cheese icing, (which I adore) but, in this case, the no frosting makes the idea of baking and eating cake for breakfast more…manageable…*hehehe*
This recipe I wrote is for a small 6” cake, since is just Ian and I it is more than plenty. You can easily double it and bake a 9”-10”. for bigger crowds. This upside down carrot+coconut+ginger cake will make a fantastic bake good for brunch or a simple delicious birthday. I’m really hopping you enjoy this recipe, shoot us a comment, we’d love to hear from you!
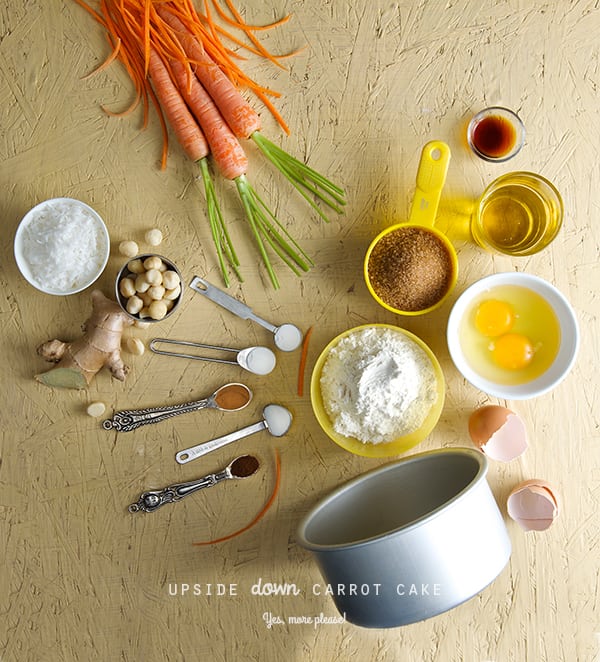
Upside down Carrot Cake
Makes 1- 6” cake, serves 4-6
Dry:
1 cup all-purpose flour
½ teaspoon baking soda
½ teaspoon baking powder
1 teaspoon cinnamon
½ teaspoon nutmeg
¼ teaspoon ground clove
½ cup shredded carrots
¼ cup shredded coconut
¼ cup roasted Macadamia nuts, roughly chopped
Wet:
1 tablespoon freshly ground ginger
¾ cup turbinado sugar
½ cup safflower oil
2 eggs
For the bottom of the cake pan:
4 tablespoons solid extra virgin coconut oil I used this kind or butter if you prefer
3 tablespoons turbinado sugar
4 tablespoons honey
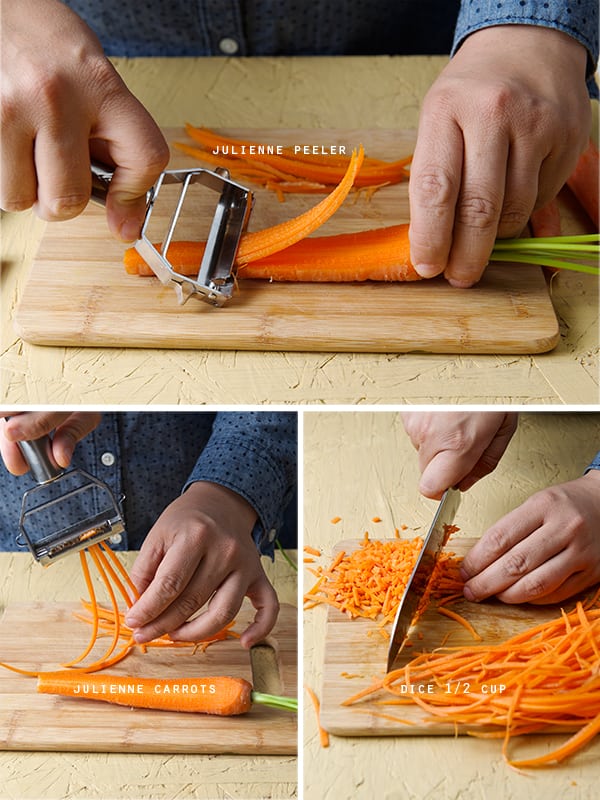
1-1 1/2 cups of long shredded carrots
¼ cup shredded coconut
½ tablespoon freshly ground ginger
¼ cup roasted macadamia nuts halves or whole.
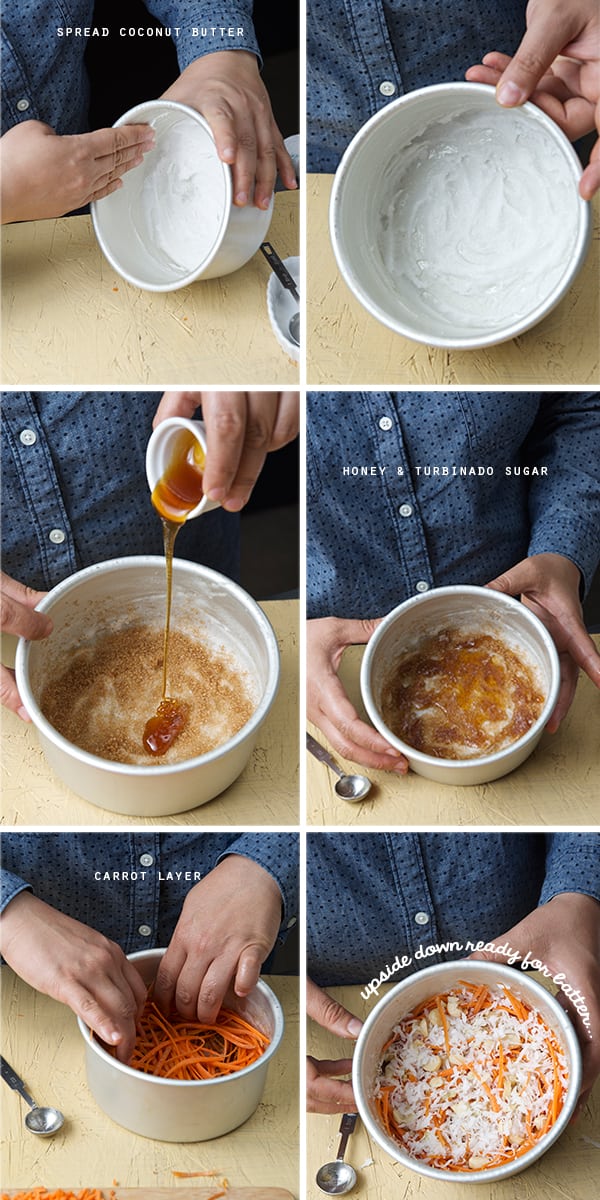
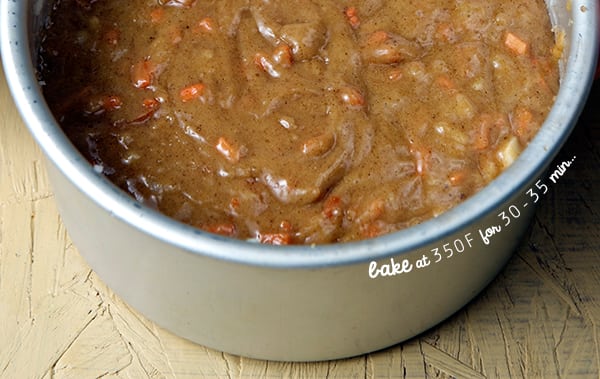
1. In a 6”x 4”tall pan, spread an even thick coat of the solid coconut oil.
Thinly grease the sides of the pan as well.
2. Scatter evenly the sugar and honey
3. Layer the shredded carrots evenly
4. Sprinkle the roasted macadamia nuts halves
5. Sprinkle the shredded coconut in an even layer.
6. Set aside in a cool place
7. In a medium size bowl whisk together all the dry ingredients.
8. Add the ½ cup shredded carrots, shredded coconut, and roasted macadamia nuts.
9. In a small size bowl whisk first oil, sugar and ginger, then add the eggs one at a time and whisk until well combined.
10. With a spatula, mix wet ingredients into dry ingredients until well combined.
11. Poor the batter on top of the carrot layer, and bake for about 30-35 minutes. Until a toothpick in the center comes up clean.
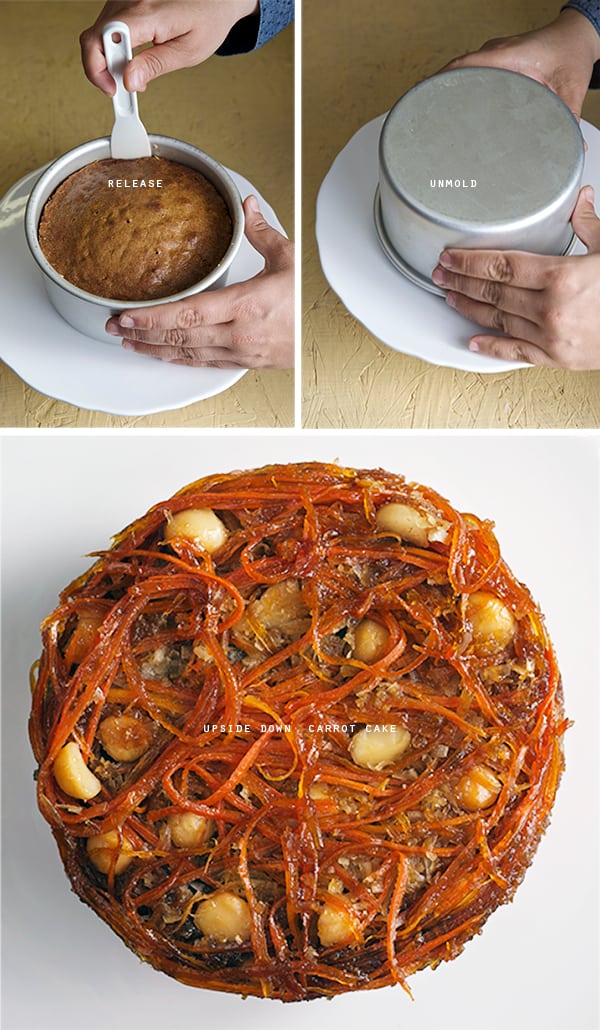
12. Cool on a rack for 20 minutes and un-mold the cake before its completely cool.
Knife… Ready, set go!… first slice is mine!…Enjoy!


