Salads & Vegetables

Sweet Potato Kale and Quinoa Fritters

Kale-Sweet potatoe-and-Quinoa-FrittersKale-Sweet-potatoe-and-Quinoa-Fritters-cooked-quinoa

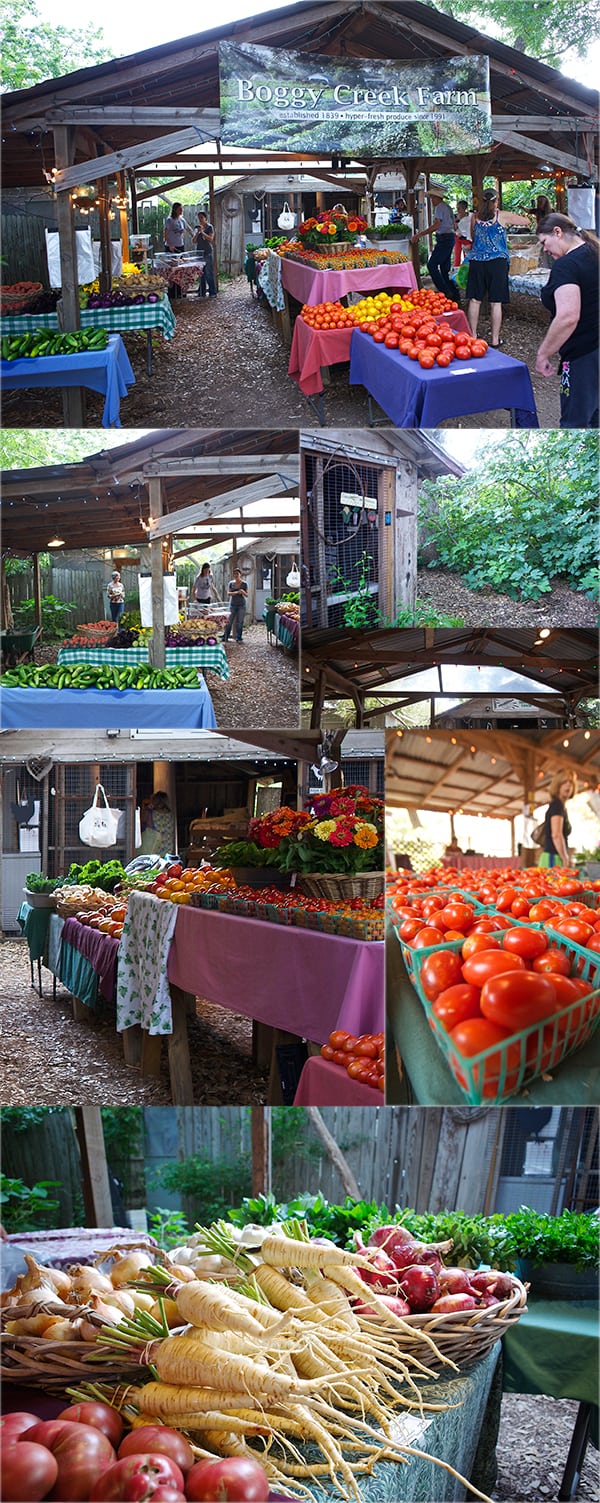
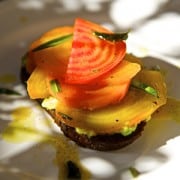
So many Kale… so little time… root vegetables, pumpkins, sweet potatoes, all kinds of potatoes, carrots; an Autumn cornucopia is here and with it Thanksgiving. So gear up! I will be posting side dish appetizers, entrees, and everything with the potential of being on your Thanksgiving table… I think it’s great to add new dishes to the traditional menu, or revamp old recipes. And even if you are not a Thanksgiving celebration type, this seasonal produce is what you will enjoy preparing, whether it’s lunch, or dinner or a simple snak-petizer like this Sweet Potato Kale and Quinoa Fritters.

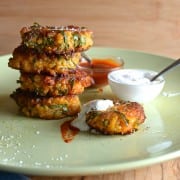
These little fritters are scrumptiously good. Loaded with vitamins and flavor, this little patties that have a crispy exterior and a soft creamy interior. The quinoa adds texture and a little crunch. Call them patties, fritters, creatures; you’re gonna love them. They taste equally good when they are warm or room temperature.
They make for a fabulous appetizer, side dish, or if you make them bigger. Two of these patties can be your lunch or sensible dinner with a salad on the side.

Kale-Sweetpotatoe-and-Quinoa-Fritters_platter-ready-to-eat!

Sweet Potato Kale and Quinoa Fritters

Makes 18-20 / 2”mini patties or 6 / 3.5” side patties

1 large or 2 medium sweet potatoes steamed and pureed. Makes about 3 cups
2 cups cooked Quinoa, you can use red quinoa if you prefer. Approximately 1 cup of uncooked quinoa yields 2.25 cups when cooked.
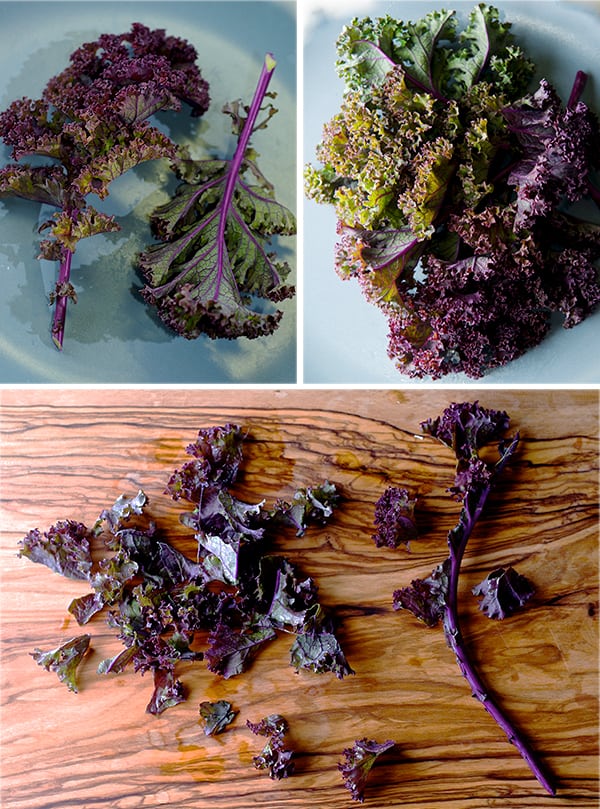
2 cups kale finely chopped.  I used Lacinto kale, a.k.a. Dinosaur Kale but, any flat kind kale will work.
2 eggs (vegan: substitute 2 tablespoons ground flaxseed + 3 tablespoons of water)
½ cup panko or any kind of plain breadcrumbs. If you have gluten allergies, ground old fashion oats or almond meal will work.
3 teaspoons cornstarch. If using the almond meal add one extra teaspoon.
1 teaspoon grated ginger
1 good pinch paprika or smoked paprika
1 teaspoon freshly ground black pepper
1 teaspoon kosher salt

4-6 tablespoons grapeseed oil, peanut oil, or coconut oil to pan fry them.

*See note for an alternative cooking method on the bottom of the post…

For the dipping sauce:

¼ cup Greek yogurt
1 teaspoon freshly grated ginger
pinch of kosher salt
pinch of black pepper

In a small cup mix all ingredients and chill.

Hot sauce of your preference. I highly recommend Sriracha Sauce.

Directions:

1.-

Devein the Kale, make it into a tight roll and chop chiffonade style.

Kale-Sweetpotatoe-and-Quinoa-Fritters_Deveining-and-chiffonade-Kale-

2.-

In a medium size bowl, place all ingredients and mix well.

Kale-Sweetpotatoe-and-Quinoa-Fritters_Mixing-ingredients

3.-

In a medium size pan heat up about 4-6 tablespoons of grape seed oil, peanut oil or coconut oil.
With a small Ice cream scooper scoop about 6 patties into the pan and slightly flatten the tops.
Cook for about 3-4 minutes on each side or until golden brown.

 Kale-Sweet potatoe-and-Quinoa-Fritters_pan frying

4.-

Cool them on a rack.
Serve warm or at room temperature, with the ginger sauce on the side and some hot sauce of your preference. I highly recommend Sriracha…I love it….Enjoy!

Kale-Sweetpotatoe-and-Quinoa-Fritters_-fritters-resting-on-cooling-rack

Kale-Sweet potatoe-and-Quinoa-Fritters-delicious!

Kale-Sweet potatoe-and-Quinoa-Fritters_delicious-texture

Enjoy!!!

 *Note:  Many people have asked me about baking these fritters. It never occurred to me to bake a fritter… So I made a batch and baked half and fried half to see the differences in flavor and texture. Here is the veredict:

Baked Version:

I Baked them at 375F on a sheet pan lined with parchment. I brushed each patty with some grape seed oil and baked for 15-20 minutes flipping them half way.

The results:  Texture is more firm and they hold up more like a patty, where the inside is a little more dense. They do not remind me a fritter at all since they have no crispy outside texture.

Pan Fried: 

Well you see the results, they really do not absorb a lot of oil, I love love the contrast in textures, crispy caramelized outside, and creamy less thight inside. For me this is fritter.

I like them both in their own category… but a fritter its a fritter!

5 from 1 vote
Print

Sweet Potato Kale and Quinoa Fritters

www.yes-moreplease.com

They make for a fabulous appetizer, side dish, or if you make them bigger. Two of these patties can be your lunch or sensible dinner with a salad on the side.

Course Appetizer, Breakfast, Brunch, Lunch, Main Course, Side Dish
Cuisine Healthy, wholesome
Prep Time 20 minutes
Cook Time 30 minutes
Total Time 50 minutes

Ingredients

  • 3 cups Sweet potato, about 1 large-2 medium potatoes, stemmed and pureed.
  • 2 cups Quinoa, cooked
  • 2 cups Lacinato-Dino Kale, chopped chiffonade
  • 2 Eggs
  • 3 teaspoons Cornstarch
  • 1/2 cup Panko Japanese style breadcrumbs, or any kind of plain bread crumbs. If you have gluten allergies, ground old fashion oats or almond meal will work.
  • 1 teaspoon fresh ginger, grated
  • 1 pinch smoked paprika
  • 1 teaspoon fresh ground black pepper
  • 1 teaspoon kosher salt
  • 4-6 tablespoons grape seed oil, or coconut oil, to pan fry them

Dipping Sauce:

  • 1/4 cup Greek yogurt
  • 1 teaspoon freshly grated ginger
  • 1 pinch salt
  • 1 pinch black pepper
  • Sriracha Sauce, to taste.

Instructions

  1. 1. Devein the Kale, make it into a tight roll and chop chiffonade style.

    2. In a medium size bowl, place all ingredients and mix well.

    3. In a medium size pan heat up about 4-6 tablespoons of grape seed oil, peanut oil or coconut oil. With a small Ice cream scooper scoop about 6 patties into the pan and slightly flatten the tops. Cook for about 3-4 minutes on each side or until golden brown.

    4.Cool them on a rack.

    5. Mix all ingredients of the dipping sauce on a small bowl.

    Serve fritters while warm or at room temperature, with the ginger sauce on the side and some hot sauce of your preference. I highly recommend Sriracha…I love it….Enjoy!

    Happy cooking!


Recipe Notes


Music Pairing: Perhaps Perhaps Perhaps by Cake


View Post or View Comments 106

I SUPPORT Austin URBAN FARMS!!!

I-support-urban-Farms!!!~Yes,-more-please!

In the past few months Austin urban farms have been in an endangered situation by the new code of regulation and ordinance that it is claiming the East side zone as  “single family” under  zoning protection. My question to this new ordinance is:  Isn’t single families quality of life made greater by organic urban farms? I think the root of the problem is not the presence of urban farms but  the attitude about them. Why does the city sees opportunity on the weakest links, when it is a great opportunity to take care and promote these urban farms that add so much value to the neighborhoods and families.

I visit and shop for my produce regularly at the Boggy Creek Farm, which is one of the pioneer urban farms in Austin. I can not express the joy that shopping there brings me by only thinking that soon its going to be Wednesday or Saturday so I can have my piece of heaven, just 7 minutes from my home.

Arriving to the farm, everything smells alive and the rows of seasonal flowers receive you. They have their own inside parking area, you can ride a bicycle or walk if you live near by.  People arrive with their kids to feed the happy chickens, and you can take a walk around the beautiful fields of pampered vegetables. There is an open barn area where the workers bring the freshly cut and perfectly washed seasonal vegetables and  it is all arranged in baskets and tables with a beautiful array of colours and life! . Sometimes I just stare at the produce and think that I’m there to buy LIVE vegetables which where cut an hour ago, 20 minutes ago? It reminds me vegetables we eat should always be  this fresh and it makes me  feel grateful to have the opportunity to shop at a place like this.

I can not put into words how happy this makes me feel and how inspired I get from just seeing and knowing that somebody cares so much about what I’m going to buy and eat, and how much healthier I’ve become and feel better when I eat these fresh veggies…
I can not understand the motive of the city of trying to keep the zone of single family ordinance… isn’t these farms part of what makes a family happy?, improve their eating habits, teach children how to live and eat healthier?..We need to focus on  the other side of the coin for once and appreciate the great value that urban farms bring to our community and to become a city that leads the example of a new scheme of  urban life.

I just can say:

Carol Ann and Larry,
Thank you so much for making this world better one vegetable at the time!

Sincerely

Ian and Mariana McEnroe

We would like to share some of the pictures that we’ve taken when  we visit the farm or just after arriving home with all the beautiful produce that makes our week just full of life!

Boggy_Creek_Farms-Meals~Yes,-more-please!

Boggy Creek Farms inspire me every day! visit the farm every Wednesday and Saturday from 8-1:00 pm

Boggy-_Creek_Farms_I-support-Urban-Farms~Yes,-more-please!

How you can help? :

Austin’s urban farms provide a tremendous benefit to our community. Click here to read more about the importance of the farms to all Austinites.

Here’s a few ways you can help the farms:

1. Write a letter to the editor of the Austin American-Statesman in support of urban farms.Click on the link below and get active!

2. Help Austin Urban Farm Day with social media using hashtag #urbanfarmday.

3. Help spread the word! Ask your friends and neighbors to support Austin Urban Farms.


 The City Council next meeting is currently scheduled for November 21, 2013.

 “I support Urban Farms” you can vote and help TODAY!!!    http://www.austinurbanfarms.org

I-support-urban-Farms!!!~Yes,-more-please!

I Support Austin Urban Farms!!!

View Post or View Comments 0

Kale and Lentil Salad with Honey- Mustard Vinaigrette

Kale and Lentil Salad with Honey- Mustard Vinaigrette_kale purple leaf

Feeling blue?…Have some greens!. Kale is the number one power green, full of nutrients and rich in flavor.
If you wonder what the color green should taste like… it tastes just like kale.
It’s high percentage in Beta carotene, Vitamin K, vitamin A, Vitamin C, manganese, iron, potassium, calcium and fiber, make it the king of the greens. The season for this green is Autumn and Winter.
Kale salad will lift up your mood and give you plenty of energy through out the day.
There is Curly Kale, Dino Kale, Premier, Redboar, Siberian, Walking stick kale, Red russian, Kamome red, *sight and I assure you I’m missing more varieties, this are just a few of the ones I know and I’ve tried.
I remember the first time I tried Kale it was a bit intimidating, I felt like I was eating some prehistorical plant; it is a bit hard to chew when is raw and most of the varieties develop their nutrients and are easier to digest when they are steamed.
I’ve tried different cooking methods, some favorites of mine: Curly and Dino kale make great baked chips, Kamome is great for steaming it holds its shape beautifully, and the Redbor Kale I love it in salads like this because it adds great texture, I usually cut it or tier it in small pieces because is easier to chew, the vinaigrette helps to tenderize the leafy texture and what is great is that kale will not wilt when you add the vinaigrette.
Kale and Lentil Salad with Honey- Mustard Vinaigrette is a nutritious  and delicious combination. Kale, lentils, walnuts for some crunch is just what you need to boost your energy. This salad Makes a great Lunch or a light dinner side dish.

Kale and lentil salad with honey mustard vinaigrette_red kale

Kale and Lentil Salad with Honey- Mustard Vinaigrette_healthy and delicious

Kale and Lentil Salad with Honey- Mustard Vinaigrette.

Serves 4

4 cups of Redbor kale (washed and pad dry) ( you can use Dino Kale )
2-3 cups of cooked green lentils*
1 small red onion finely chopped
1 red bell pepper finely diced
1/4 cup chopped walnuts
1 tablespoon of finely chopped parsley
A couple of tablespoons of Bulgarian Feta cheese

Honey- Mustard vinaigrette

2 teaspoons of whole grain mustard
2 tablespoons Extra virgin Olive oil
¼ cup rice vinegar
3 tablespoons of honey or ambar agave nectar.
the juice and zest of ½ lime or lemon.
Fresh ground pepper to taste.

*How to cook Lentils?

These green Lentils are best cook in lots of salted water, just like pasta. Bring water to a boil add 1 generous teaspoon of kosher salt and a Bay leaf. Add the lentils, bring back to a boil and cook for 5 minutes, then lower the heat to low and gentle simmer you barely want to see little bubbles on the top. Cook for another 15-20 minutes with no lid. after 15 minutes check on doneness. I like mine al-dente, specially for a salad like this, I want them with a bite. So I usually remove from heat at 15 minutes and cover them for another 10 minutes. Strain them and let them air dry for a few minutes on a single layer in flat tray.  I usually serve this salad with barely warm lentils, I love the texture and comfort.

Directions:

Start by removing the stems of the kale leaves and breaking the pieces into small bite size. In a small bowl whisk the vinaigrette ingredients. In a platter, layer the kale, lentils, chopped onions, red bell pepper, parsley and walnuts. Drizzle over the mustard vinaigrette. Mix and top it all with crumbled feta cheese.
Serve the salad at room temperature. It is also great in a pita with some Greek yogurt or served in avocado halves!!!Kale-and-Lentil-Salad-with-Honey--Mustard-Vinaigrette_ingredients-layout

Kale and Lentil Salad with Honey- Mustard Vinaigrette_vegetarian_healthy dinner

Kale-and-lentil-salad-with-honey-mustard-vinaigrette_Yes,-more-please!

Enjoy!

Music Pairing: Don’t Worry be happy – Bob Marley

View Post or View Comments 2

Escabeche Pickled Vegetables

Escabeche-Pickled-Vegetables_-Mason-Jar_Yes,-more-please!

 What makes a sandwich great? The bread, the mustard, meat, or cheese? There are all kind of protagonist components that contribute to such a production. But, how about the supporting cast? Potato chips, salads and “the pickle” that green creature on the side of the plate almost invisible and that after the 3 bite of your sandwich you start looking for it.. where is it? Under the waxy paper? Far away in the refrigerator, last shelf oops! We are out of pickles! Suddenly you are missing him badly… If the word sandwich had an accent or a semicolon it will definitely be the “pickle”.

That’s what this recipe is all about, the supporting cast. That accent of a meal, sandwich, sea food, any fried concoction, needs a balance of a crunchy salty acidic note to spice up your meal.
Escabeche is one of hundreds of pickled recipes the Spaniards introduced to Mexico after having borrowed them from the Arabs and Persians. It has many different variations. In Mexico it is more commonly served with seafood, fish, or pork. And yes, the well known street food “the torta”(which is the equivalent of the american sandwich) that is almost always accompanied by the well-known infamous pickled jalapeño that comes with carrots and onions.

Escabeche-Pickled-Vegetables_Yes,-more-please!

This Escabeche vegetable medley recipe is all the “supporting cast” I desire when I’m eating a sandwich: potatoes, pearl onions, mushrooms, carrots and jalapeños. Sweet, starchy, crunchy, spicy mix all marinated in a tangy spiced slightly sweet vinegar. And please don’t limit your self this cast; okra, cauliflower, green beans, can be included…what ever rocks your boat. You can serve this over a bed of spinach and Romaine lettuce combining the vinegar with some extra virgin olive oil for a vinaigrette as a first course salad. Or as a simple informal appetizer with a beer on the side. You can marinate some cooked shrimp, a side for fried fish… I can go on and on…
Now, this is a refrigerator pickling method and its best to let it marinate over night. It will last in the refrigerator for about 3-4 weeks (if you are a self controlled person); Because for me every time I open the refrigerator my saliva glands start to contract my mouth waters, my tong shrinks just by looking at them, and before I know I have a fork in my hand to snack on them… so let’s get started…

Escabeche-Pickled-Vegetables_pickling-spices_Yes,-more-please!

Escabeche Pickled Vegetables

Makes about 6 -8oz  jars or  1 large 48oz jar.

1 lb. little red new potatoes cut in halves and cook al-dente.
4-6 carrots cut in ¼” thick round slices, blanched and drain.
1 lb. button white mushrooms or cremini cut in halves
1 lb. white pearl onions, peeled and halve the larger ones.
6-8 Fresh jalapeños cut into 1/4” round slices

Cauliflower florets, green beans, can also be added to this vegetable escabeche. The proportions between chiles and vegetables is up to you, just consider that the more chiles the more spicy the vegetables will be. 

For the pickling brine:

1/3 cup  Sun flower, or Grape seed oil or any mild flavor oil

1 cup of Apple Cider vinegar or Rice vinegar.
1 cup of distill Vinegar
1 -1/2 cups of water
4 garlic cloves
4 Bay leafs
4 sprigs fresh Thyme or 1/2 teaspoon dry thyme
2 sprigs fresh Oregano or 1/2 teaspoon dry Oregano
1 teaspoon black peppercorns.
3  Tablespoons of pickling spices
1/4 cup of turbinado sugar or white sugar, taste it, some people likes the brine tangier or sweeter.
1 tablesspoon sea salt, adjust salt to your taste.

Method:

In a large pot sauté with oil the pearl onions and garlic for about 2-3 minutes. Add the chiles Jalapeños and sauté until bright green. Add water, vinegar, salt, sugar and spices bring it to a simmer until sugar dissolves. Turn off add the fresh herbs, cover and let it steep for 5 minutes. Add the carrots, potatoes mushrooms and cauliflower florets. Let it rest for 30-45 minutes, once is cool down place it into a jar or glass container. (it is always best to use glass) Keep in the refrigerator, give them a little shake-arooh very now and then. These Escabeche Pickled Vegetables get better with time, wait for at least 1-2 days before ready to eat. Enjoy!

Escabeche-Pickled-Vegetables_making-the-pickled-vinegar_Yes,-more-please!

Escabeche-Pickled-Vegetables_ready-to-cook_red-le-creuset_Yes,-more-please!

Escabeche-Pickled-Vegetables_pooring-into-mason-jar_Yes,-more-please!

Escabeche_Pickled_ Vegetables_on a jar

~ Escabeche Pickled Vegetables are a  great little nibbling with a beer ~

Escabeche-Pickled-Vegetables_ready-to-serve_Yes,-more-please!

Music Pairing: Cafe Tacuba- Maria

View Post or View Comments 4

Panzanella Melon Salad

Panzanella Melon Salad ~ ingredients, Yes, more please!
My mouth waters for this Tuscan Salad! If we go back to the 16th century the Italian poet Bronzino, he praises the onions with oil and vinegar served with toast. Later on, when the tomatoes arrived to Europe, they were incorporated into the salad with other ingredients like cucumbers and capers. I’m not a food historian but it is of great interest and curiosity to know where food comes from, and the origin of dishes throughout history. Knowing these facts can sometimes lead you through perfecting a recipe, or re-inventing it. In this case I need to reinforce it because bread, onions, oil and vinegar simply are not gonna do it for me.

Many different versions of this traditional Panzanella Italian Salad can be made. From the type of bread, tomatoes, cucumbers, capers, onions, and a simple vinaigrette. One of the keys is goods Extra Virgin Olive Oil and Red wine vinegar. Playing a little bit with the sweet and savory notes,  I added Cantaloupe melon for sweetness and some prosciutto for a salty meaty note.

This would be just the thing for a summer picnic; something to combine all the flavors of the season. I like this salad texture and contrast, and that every bite has a different flavor depending upon what you pick with your fork. All these flavors on your palette produce a very savory and mouth-watering experience. Imagine, the crusty bread cubes absorb the juices from the tomatoes and the vinaigrette; that combined with the crunch of the onions, salty olives, juicy tomatoes and sweet cantaloupe with cracked pepper… the result, I just want the shade of a tall tree to dine under and my bread to be older. I hope you like my version of my version of Panzanella Melon Salad…Enjoy!

Panzanella Melon Salad ~ served, Yes, more please!

Panzanella Melon Salad_perfect summer brunch!  ~ Yes, more please!

Panzanella Melon Salad

Serves 4

½ loaf day old Italian or French crusty bread.

1 cup cherry tomatoes

1-2 small tomatoes cut into cubes

1 cup English cucumber into cubes

1-2 cups Cantaloupe Melon cut into cubes

½ red onion cut into slivers.

½ cup green Castelvetrano olives.

Arugula (optional)

6-8 Basil leaves

1 cup of bite size (bocconcini) Mozzarella or regular size cut into bite size cubes.

6 -8 Prosciutto slices

1/3 cup good quality fresh extra virgin olive oil.

1/4 cup red wine vinegar.

Fine sea salt and freshly ground black pepper to taste.

Method:

Start by cutting the bread into bite size cubes. If your bread is not a day old you can toast it in the oven at 350 F/175 C for 3-5 minutes. In a big salad bowl whisk the olive oil, red wine vinegar salt and pepper. Add the onions, tomatoes, cucumber, mozzarella olives and bread toss them lightly. Let the salad absorb the flavors for 15-30 minutes. Before serving, toss the salad and tear and sprinkle the basil leaves and prosciutto over the top. It’s best to serve this salad room temperature with a chilled glass of white wine…I hope you like it as much as I do.

When serving, drizzle some balsamic vinegar for sweetness.

*For a Vegan or Vegetarian Version, you can omit the prosciutto and mozzarella. Instead add some roasted red bell peppers it will be a great complement.

Panzanella Melon Salad _dicing bread-~ Yes, more please!

Panzanella Melon Salad-mouth watering flavors and textures!

Panzanella Melon Salad have some wine! ~ Yes, more please!

 Mouth watering Salad for the sumer…Enjoy!


View Post or View Comments 1

Sauteed Broccolini & Lemon Quinoa

Sauteed Broccolini & Lemon Quinoa_Yes,more please!

After the weekend taco indulgence, I’m craving Green! Green! Green!
Broccolini it is a Hybrid between Broccoli and Kai-Lan commonly known by the name of Chinese Broccoli. Broccolini inherited the best part of the broccoli, the little mini flowery tops and the long steams of the Kai-Lan.
The flavor profile is like eating broccoli and asparagus at the same time!. Sweet broccoli and crunchy yet delicate and full of tender green flavor. The best way to cook it is with absolutely no doubt sauteing. A high temperature quick saute turns it bright green, the heat cooks the tops and the steams stay a bit crunchy. What do I have on my produce basket tonight?… cherry tomatoes,lemons, and garlic. In the pantry I have some roasted almonds and quinoa. I ran out of Parmigiano but I had some Manchego cheese and it worked great, nutty and creamy with the quinoa. On the side green salad…I think this will make a great light and comforting dinner for tonight…a piece of fish or chicken on the side will go fantastic too…for us, sauteed broccoloni and lemon quinoa-vegetable night is enough…

Sauteed Broccolini & Lemon Quinoa_cutting steems

Sauteed-Broccolini-&-Lemon-Quinoa_healthy-and-delicious_Yes,more-please!

Sauteed Broccolini and Lemon Quinoa

Serves 2 for dinner or 4 as a side dish

1 Broccolini Bunch
1 cup of cherry tomatoes
4 tablespoons of extra virgin olive oil
1 tablespoon of butter (or soy butter if vegan)
3 cloves of garlic
The juice and the zest of one lemon.
Salt and Black pepper to taste

1 cup of Quinoa
1 garlic clove
The zest of one lemon
2 cups of water
salt

Garnish with:

Roasted Almonds chopped
Manchego or Parmesan cheese shavings or even crumbled Feta cheese will work too.*
Squeeze some lime juice right before serving.adjust salt and pepper.
*eliminate the cheese if you are Vegan.

Directions:

Quinoa cooks just like rice, is 2-1 ratio. In a medium size pot bring the water to boil add the garlic cut in half add the salt . Once water is boiling add the quinoa, lower the temperature to medium, and cook for about 18-22 minutes, at this point add the lemon zest and cover with a lid remove from stove and let it cook with the residual heat.

To avoid the blanching step, cut the broccolini stems in half-length wise (see photo above*). Heat up a large saute pan, add the extra virgin olive oil and add the broccolini. Toss and within 2 minutes, add the garlic, salt and pepper. Wait 1 minute, add the cherry tomatoes, lemon zest and squeeze some lemon juice. Keep moving the pan and toss the vegetables around. Once the tomatoes look like they are going to burst remove from fire add the tablespoon of butter, and toss. Fluff your quinoa with a fork, drizzle a little olive oil add salt and pepper to your taste. Promptly, on a large platter, serve the cooked quinoa topped with the sautéed broccolini and chopped roasted almonds, Manchego or Parmesan cheese shavings. Adjust with salt and pepper squeeze some lemon and drizzle a little more extra virgin olive oil to finish the dish.

Sauteed Broccolini & Lemon Quinoa_fluffy quinoa

Sauteed-Broccolini-&-Lemon-Quinoa_shaving-manchego

Sauteed Broccolini & Lemon Quinoa_healthy and delicious


View Post or View Comments 1

Summer Soba Noodles

Summer Soba Noodles_healthy and delicious

Lusciously light noodles, that’s my description for this dish. Cold soba noodles are a popular summer dish in Japan. The Japanese people are very wise by eating like this; light, savory, vegetable based; a good way to stay cool. The traditional way to serve them is without toppings; just the delicate flavor of the noodle with some dipping sauce on the side. You dip them as you go.
In my version I decided to give the dish a little kick and add some fresh vegetables and tofu. We usually have this for lunch or a light summery dinner. The combination of fresh crunchy vegetables, sweet-savory sauce and creamy tofu cubes, pairs really well with the tender noodle. The preparation could not be easier, and if we measure preparation time versus rewarding flavors it is a winner.
If you think this dish looks complicated, don’t worry, its easy to make. To save you some prep time I recommend you invest on a little kitchen gadget: get yourself a julienne peeler. It is one of my favorite tools. Its fun, easy to use, and easy to clean. You can use this peeler for any other vegetable or fruit. One of the best kitchen gadgets to have. Let’s cook!

Summer Soba Noodles_ sauce ingredientsSummer Soba Noodles_ ingredientsSummer Soba Noodles_Yes,more please!

Summer Soba Noodles

Serves 2-4

3-6  Soba noodle bundles approximately 1 bundle per person. I recommend you to get the Japanese kind. You can get them at any Asian specialty aisle of a supermarket…
2-4  green onions/scallions, finely sliced
2  carrots, shredded, julienned or grated
1  seedless English cucumber, julienned or thinly sliced
1  avocado
1/4-1/2 cup  unshelled and cooked edamame beans, optional
1 block of extra firm Tofu, remove the excess water patting it with paper towels and cut into small cubes

For the sauce:

3  tablespoons soy sauce.
3  tablespoons seasoned rice vinegar
2  tablespoons sesame oil + one extra tablespoon for finishing
2  tablespoons of honey or agave nectar
1  tablespoon brown sugar
1  tablespoon grated fresh ginger
1  garlic clove grated
the juice and the zest of one small orange

In a bowl Whisk all the ingredients. Reserve 1/3 of the sauce to marinate the tofu squares.

Garnish with:

Thai Basil to garnish
Black or gold sesame seeds
1 red Thai or Serrano chili, thinly sliced

Directions:

1. Start by making your sauce. Place all its ingredients in a bowl and whisk. Set aside 1/3 of the sauce and marinate the tofu. While the tofu is absorbing all the flavors, proceed to cut and prepare your vegetables and garnishes.

2. Bring a large pot of water up to a boil. Unlike regular pasta, you do not need to salt the water. Once the water is boiling place the noodles and monitor constantly, using a pasta spoon to prevent the noodles sticking. Bring the water up to simmering. Do not let it boil. Follow the instructions in the package, taste, it should have some elasticity to it. Usually takes around 4-5 minutes because they cook through quickly . Keep an eye on them to avoid over cooking. When the pasta is ready drain the noodles into a colander. Immediately return them to the pot and fill the pot with cold water. Leave the water running into the pot a bit until the noodles cool down. Gently with your hands rinse the noodles in threads.*( see picture below) until they feel less starchy. Drain them again into a colander and allow them to drain. You can transfer them to a bamboo mat, to remove the excess water.

Summer Soba Noodles_How to prepare soba noodles

3.  In a non-stick pan proceed to saute the marinated tofu until golden brown. A little scorching doesn’t hurt either.
In a large bowl season the noodles with a tablespoon of sesame oil and add sesame seeds.

Summer Soba Noodles_Sautee_marinated_Tofu

4. Divide all noodles evenly into 2 or 4 bowls, garnish with the Juliane carrots, cucumbers, avocado, sautéed tofu, edamame, red chilli.
Serve a small sauce bowl per person for extra dipping the noodles.

Summer Soba Noodles_for two

~Enjoy!~

Music Pairing: Pizzicato Five: Twiggy Twiggy

Summer Soba Noodles

Serves 2-4
Course Brunch, dinner, Lunch
Cuisine Japanese
Prep Time 20 minutes
Cook Time 10 minutes
Total Time 30 minutes
Servings 4

Ingredients

  • 3-6 Soba noodle bundles approximately 1 bundle per person I recommend you to get the Japanese kind. You can get them at any Asian specialty aisle of a supermarket
  • 2-4 green onions/chives – finely sliced
  • 2 carrots shredded, julienne or grated
  • 1 seedless cucumber julienne or thinly sliced
  • ½ avocado
  • 1/4-1/2 cup unshelled and cooked edamame beans optional
  • 1 block of extra firm Tofu remove the excess water patting it with paper towels and cut into small cubes.

For the sauce:

  • 3 tablespoons soy sauce.
  • 3 tablespoons seasoned rice vinegar
  • 2 tablespoons sesame oil + one extra tablespoon for finishing.
  • 2 tablespoons of honey or agave nectar.
  • 1 tablespoon brown sugar
  • 1 tablespoon grated fresh ginger
  • 1 garlic clove grated
  • the juice and the zest of one small orange.

Garnish with:

  • Thai Basil to garnish
  • Black or gold sesame seeds
  • 1 Red chili thinly sliced

Instructions

  1. In a bowl whisk all the sauce ingredients. Reserve 1/3 of the sauce to marinate the tofu squares.
  2. Start by making your sauce. Place all its ingredients in a bowl and whisk. Set aside 1/3 of the sauce and marinate the tofu. While the tofu is absorbing all the flavors, proceed to cut and prepare your vegetables and garnishes.
  3. Bring a large pot of water up to a boil. Unlike regular pasta, you do not need to salt the water. Once the water is boiling place the noodles and monitor constantly, using a pasta spoon to prevent the noodles sticking. Bring the water up to simmering. Do not let it boil. Follow the instructions in the package, taste, it should have some elasticity to it. Usually takes around 4-5 minutes because they cook through quickly. Keep an eye on them to avoid overcooking. When the pasta is ready drain the noodles into a colander. Immediately return them to the pot and fill the pot with cold water. Leave the water running into the pot a bit until the noodles cool down. Gently with your hands rinse the noodles in threads.*( see picture below) until they feel less starchy. Drain them again in a colander and allow them to drain. You can transfer them to a bamboo mat, to remove the excess water.
  4. In a non-stick pan proceed to saute the marinated tofu until golden brown. A little scorching on the edges adds great flavor.

  5. In a large bowl season the noodles with a tablespoon of sesame oil and the sesame seeds.

  6. Divide all noodles evenly into 2 or 4 bowls, garnish with the Juliane carrots, cucumbers, avocado, sautéed tofu, edamame, red chili.
  7. Serve a small sauce bowl per person for extra dipping the noodles. Enjoy!
View Post or View Comments 1

Beet Salad, Avocado spread & Pumpernickel crostini

Beet-Salad_avocado-spread_pumpernickel-crostini_table-ready

This weekend Ian and I had really good eats. Beets are one of my favorite root vegetables, My mom used to make steamed beets sliced with a squeeze of lime and salt and served as an afternoon snack for my brother and I when we where kids. As a grownup, I love them in all preparations; raw, shredded over salads, ROASTED, steamed, in soups, chips and one of my favorites is to pickle them. Sometimes I don’t have the patience to wait until they are pickled, so I refer to a recipe like this and it works like a charm.
I made this Beet Salad, with avocado spread and pumpernickel crostini last Sunday with the type of beets they had available at the farmers market, beautiful Golden and Chioggia Red beets. I believe some are sweeter than others; to me, golden beets taste less earthy and less sweet compared to Red beets. Every kind of beet is extremely healthful and full of anti-oxidants, phytonutrients, so use any kind you have available. They can lift up any simple green salad, or become a meal as in this instance. This light vinaigrette works like a charm in combination with the following cooking method: I steamed them for a short time until just al dente, with a little crunch. The contrast in textures between the bread and the avocado spread and the sweet-tangy beet salad is what grabs me the most. The vinaigrette is light and tangy with bright fresh herbs…. done! This is a very easy and full-flavored recipe. You can serve this as an appetizer, light lunch, or with the addition of the avocado in slices and some pecans as a great side salad.

Beet-Salad_avocado-spread_pumpernickel-crostini_-Golden-and-Chioggia-Red-beets.

Beet-Salad_avocado-spread_pumpernickel-crostini_sunnny-winter-salad

Beet Salad, Avocado spread & pumpernickel crostini

Serves 2-4

1 Golden Beet
1 Red Beet
1 small sweet potato ( it adds contrast and creamy texture)
¼ cup seasoned rice vinegar
2 tablespoons of Extra Virgin Olive Oil
1-2 Tablespoons of fresh thyme, tarragon and mint.
(you can replace any of these for dry, but at least use one fresh herb if you can.)

Avocado spread:

1 small avocado smashed
1 small clove of garlic grated
Lemon Juice, salt and pepper.
Pumpernickel Bread
Some butter or extra virgin olive oil to grill the crostini.

Beet-Salad_avocado-spread_pumpernickel-crostini_Tosted-with-butter

Directions:

Scrub and rinse really well. In a double boiler steam the beets whole do not cut them, for 15- 18 minutes*
set them aside and allow them to cool. Once cool, peel them and slice them thin. ( a little less than ¼” inch.) Place them in a Bowl, add the herbs, rice vinegar, oil, salt and pepper. Gently toss these together and set a side.
Smash the avocado with a fork in a small bowl. Add grated garlic, and a squeeze of lemon, with salt and pepper to taste.
For the Crostinis: on a medium-high heat nonstick skillet, add a dab of butter and toast about 4-6 pieces of bread, both sides. ( I highly recommend the butter , it plays so well with the bred and the tangy notes from the beets!… However, the vegetarian or vegan version using the extra virgin olive oil also tastes terrific. Enjoy!
For service there are two options: assemble to serve or serve everything separately and assemble as you eat.(the second option is more fun, and it prevents your crostini from getting soggy.
* note: if you keep your root vegetables in the refrigerator, allow them to come to room temperature before you start cooking them, to ensure they cook evenly.

Beet-Salad_avocado-spread_pumpernickel-crostini

Beet-Salad_avocado-spread_pumpernickel-crostini_table-ready-to-eat!

Beet-Salad_avocado-spread_pumpernickel-crostini_-Golden-and-Chioggia-Red-beets_under-the-sun

~ Enjoy under the sun ~

Music Pairing: THe las Beat of my heart – DeVotchka

https://youtu.be/knsDmfmOnas

Beet Salad, Avocado spread & pumpernickel crostini

Serves 2-4
Course Brunch, Lunch, Snack
Cuisine vegetarian, wholesome
Prep Time 15 minutes
Cook Time 25 minutes
Total Time 40 minutes

Ingredients

  • 1 Golden Beet
  • 1 Red Beet
  • 1 small sweet potato it adds contrast and creamy texture
  • ¼ cup seasoned rice vinegar
  • 2 tablespoons of Extra Virgin Olive Oil
  • 1-2 Tablespoons of fresh thyme tarragon and mint.
  • you can replace any of these for dry, but at least use one fresh herb if you can.

Avocado spread:

  • 1 small avocado smashed
  • 1 small clove of garlic grated
  • Lemon Juice salt and pepper.
  • Pumpernickel Bread
  • Some butter or extra virgin olive oil to grill the crostini.

Instructions

  1. Scrub and rinse really well. In a double boiler steam, the beets whole do not cut them, for 15- 18 minutes* set them aside and allow them to cool. Once cool, peel them and slice them thin. ( a little less than ¼” inch.) Place them in a Bowl, add the herbs, rice vinegar, oil, salt and fresh ground black pepper. Gently toss these together and set aside.
  2. Smash the avocado with a fork in a small bowl. Add grated garlic, and a squeeze of lemon, salt, and fresh ground black pepper to taste.

For the Crostinis:

  1. In a medium-high heat nonstick skillet, add a dab of butter and toast about 4-6 pieces of bread, both sides. ( I highly recommend the butter, it plays so well with the bred and the tangy notes from the beets!… However, the vegetarian or vegan version using the extra virgin olive oil also tastes terrific. Enjoy!
  2. For service there are two options: assemble to serve or serve everything separately and assemble as you eat.(the second option is more fun, and it prevents your crostini from getting soggy.

Recipe Notes

* note: if you keep your root vegetables in the refrigerator, allow them to come to room temperature before you start cooking them, to ensure they cook evenly.

View Post or View Comments 0

Privacy Policy Contact Us Yes, more please!