GLUTEN-FREE RSS feed for this section

Pizza Primavera

PIZZA-PRIMAVERA-~Yes,more-please!

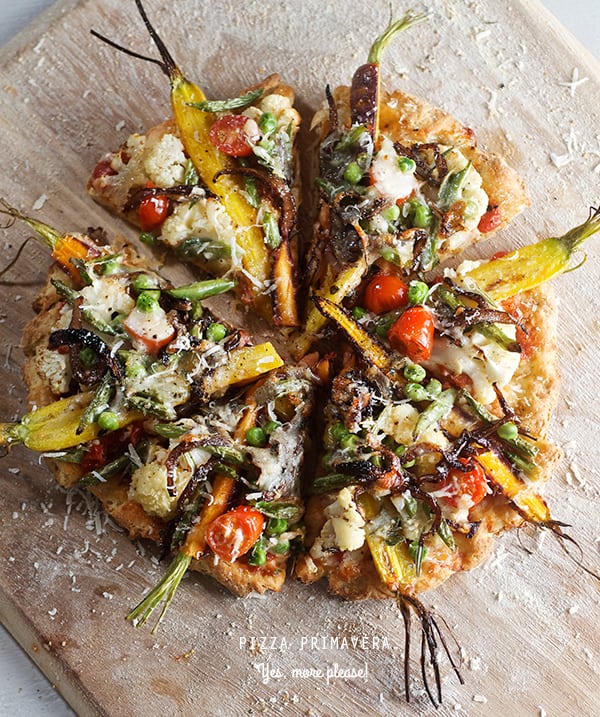
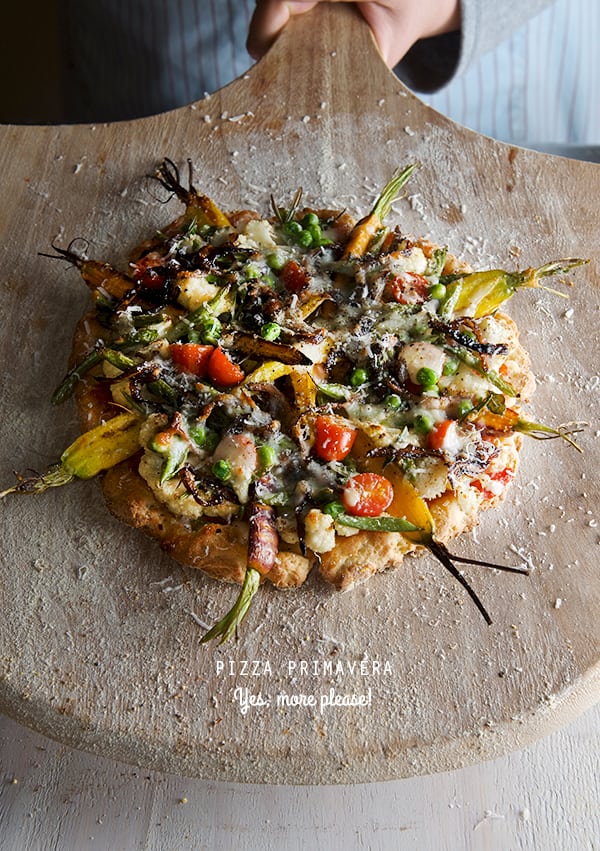
Pizza Primavera is a celebration of Spring! Using all the tender, sweet, crisp and fresh vegetables that the season gives us and inspired by all those beautiful shapes, colors, and textures this pizza has a refreshing taste of renewal. For me renewal translates as experimenting and trying ingredients and flavors that come with the new season.

Recently I’ve been experimenting with different gluten free flours, like oatmeal, brown rice, potato starch, tapioca, garbanzo, and quinoa. The fact that lately a lot of people have been diagnosed with a gluten intolerant condition means more are in need of extending their cooking horizons. Even if you don’t have gluten intolerance you should try this for its variation in flavor and texture.

Recently I baked an Irish Soda bread using 1/2-1/2 whole wheat and oat meal flour, which gave to the bread so much flavor than regular all purpose flour. That got me excited and I started to experiment with the not so easy task to come up with a gluten free pizza dough. For this pizza crust I experimented with different ratios, of brown rice flour, tapioca, potato and millet flour. The results were delicious and flavorful. However it ended up a bit overpriced for what a pizza dough should cost. I used 3-4 different types of flours each one had a mission to give the right texture to the crust, great achivement, but not very practical. So in my quest for a more reasonable option I stumbled upon a great mix, Bob Red Mill Gluten Free Organic Pizza Dough. I read the ingredients and to my surprise this mix is based on almost the same combination of 4 different flours I was trying to combine. The difference: I bought one bag. This simplifies the whole process for a fraction of the cost, and in my case pantry space. (I have a tiny pantry). 

Next, I gave myself the task to make this crust using this mix… and it was great!. Flavor and texture were spot on. When trying new things you have to see with new eyes, and tastebuds. The texture of a regular crust has a certain chewiness for which gluten is the responsible. When you have no gluten, other textures and flavor come to replace that chew factor. This crust has a lovely light texture, great flavor, and crunch, with a tender bite, making it easy to love. The tender light crusty and crunchy crust is the perfect canvas for the sweet delicate Spring vegetables. The mix is ready in 5 minutes and it does not requires kneading. Proofing time is 20 minutes and it bakes in 12 minutes total. It’s fun to make and I loved trying something new. This crust is a keeper!

For this Pizza Primavera, pre-roasting the vegetables is a must. They add extra flavor deep to the pizza. I love to leave the carrots al-dente, they add a bit extra crunch and texture to the pizza. Cheese?…my advice: go light on the cheese you want to be able to taste the vegetables. I chose a smoked provolone to balance the sweetness on the roasted vegetables. You must try this pizza, I assure you, you will fall in love with it. Give your self the chance to explore and renew your taste buds, perhaps for your next dinner party or get together… and have fun welcoming Spring!

Pizza-Primavera_Ingredients

Pizza Primavera

A pizza with spring vegetables and a delicious gluten free crust…

Makes 4 – 8”  pizzas

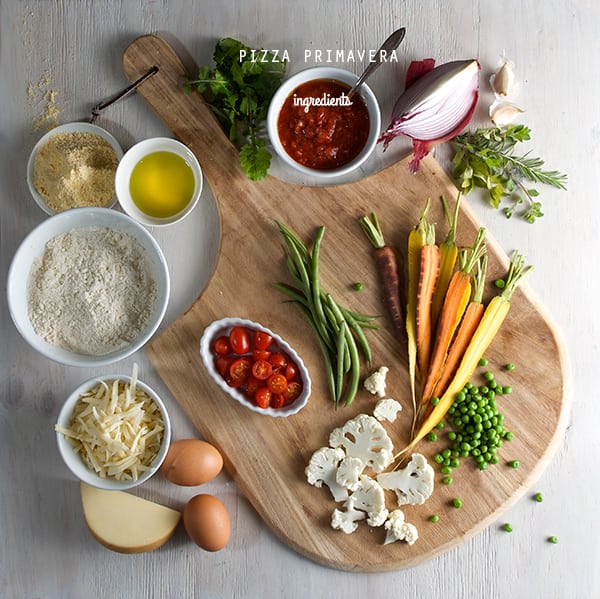
Vegetables:

12-16 small spring carrots cut in half.

2-3 bunches thin sweet green beans cut on a bias.

2 cups Sliced Cauliflower florets.

½ cup fresh peas

1 cup cherry or grape tomatoes halved

For the caramelized onions:

1 large red onion thinly sliced

a glug of extra virgin olive oil

2 tablespoons of balsamic vinegar

a pinch of salt and fresh cracked pepper.

For the sauce:

2 cups roasted crushed tomato sauce.

2 grated garlic

2 tablespoons extra virgin olive oil

Salt and pepper to taste.

2-4 sprigs of fresh herbs, like oregano, rosemary or basil.

Cheese:

3 cups grated smoked provolone cheese or tofu for  a vegan option.

Grated parmigiano regiano cheese.

Pizza crust:

1 package of Bob’s Red Mill Gluten Free pizza Dough

(The mix includes an envelope of dry active yeast, how awesome is that!)

1-1/2 warm water

2 eggs or 2 tablespoons of flaxseeds and 8 tablespoons of water for vegan option.

Follow the instructions on the package.


Gadgets and utensils:

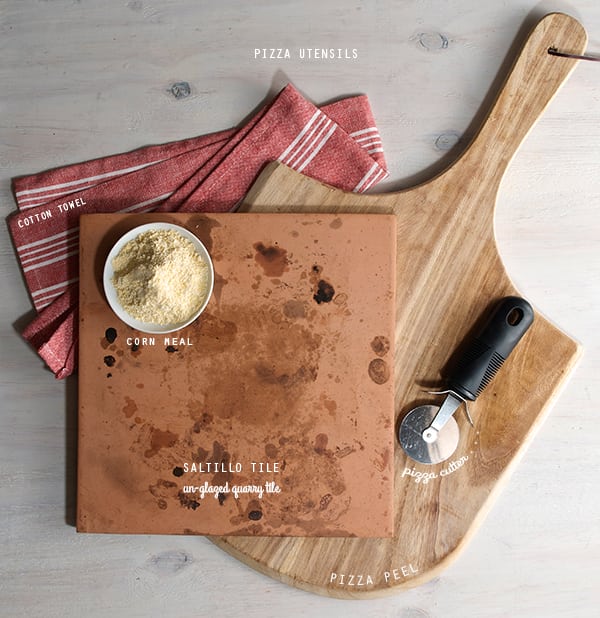
Pizza peel: It’s a must!, its so much fun to use and since it has a long handle keeps you safe from the oven heat. (I like this wood kind)

Pizza Stone or  Saltillo tile*

You can use a cookie sheet or a metal round pizza tray that will work too. I recommend, if you are a pizza lover, a pizza stone or the Saltillo tile, are a great investment. The crust gets a fantastic  color, and it gets crunchier when is cooked onto a stone surface.

*How or where to get a Saltillo tile? 
At your local home improvement store. You must make sure its and unglazed quarry tile.Usually the name is Saltillo tile, from the region in Mexico. They come in two sizes, I prefer the 11×11. Usually you can fit 4 into your oven, if you are planing to make a big pizza, For us 1 or 2 tiles are enough. A smaller size pizza like an 8” will cook great and evenly onto an 11x 11. The magic of these tiles is that you can use them in the oven and over the grill, if you feel like you want a grilled pizza, this works like a charm, price-wise we paid around 1-3 dollars per tile. This is a good solution if you don’t happen to have a pizza stone. And regarding durability: we’ve been using the same tile for six years!

To prepare the tiles for baking: Presoak them in water the day before, and let them air dry. Once they are totally dry they are ready to use. Be careful not to heat them wet to avoid cracking and of course let them cool before removing them from the oven or cleaning them.Pizza-utencils

Preparation Method:

Preheat your over at 450F/ 232C

Place your pizza stone or Saltillo tile into the oven to start warming up.

(This step is crucial, to get a great crusty crust, the hotter the surface the crustier it will get.)

Pizza dough:

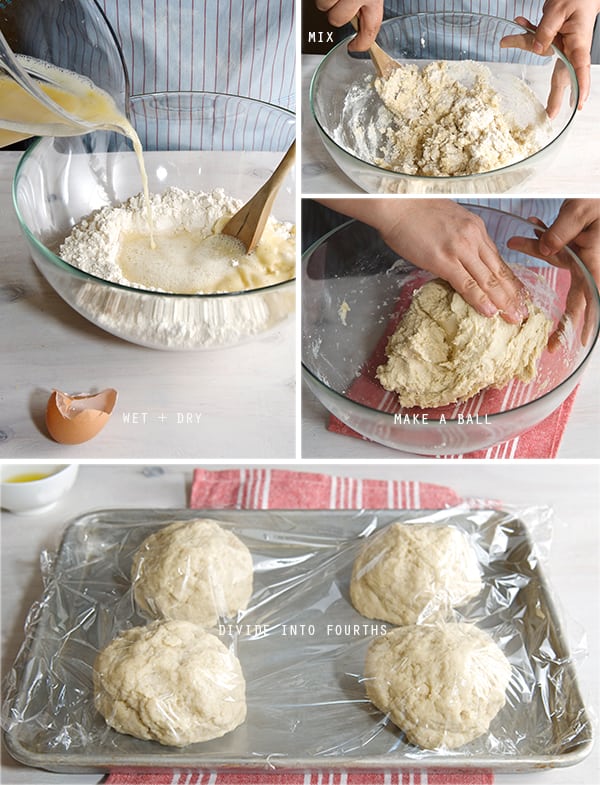
Start by making your pizza dough. Follow the instructions on the package, I did not use the mixer, I used a wood spatula and kneaded by hand for a bout 2 minutes. Divide the dough in 4 equal parts, pre shape into 4 balls, cover with plastic wrap and let it proof at rom temperature for about 20 minutes.

Pizza-Primavera_Making-the-dough

While your dough is resting, prepare your toppings:

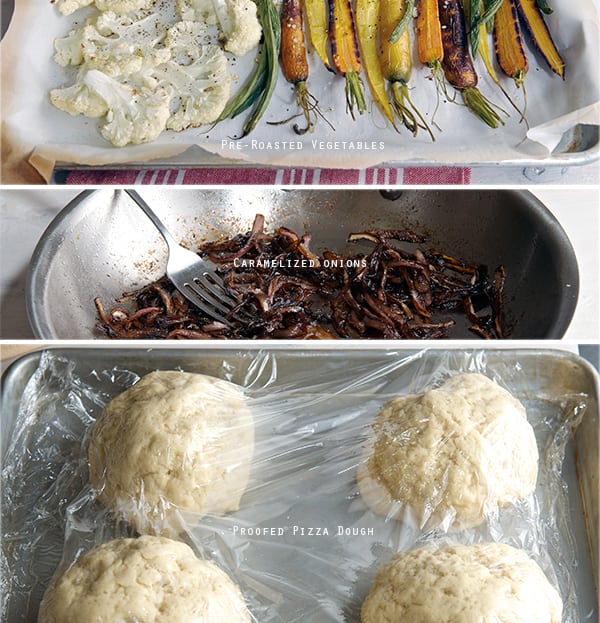
  1. In a sheet pan, lined with some parchment paper, place the carrots, cauliflower and green beans, drizzle with a bit of olive oil salt pepper and roast at 450 F for about 5-7 minutes. The vegetables should look not completely roasted, as they will continuously cook when placed on the pizza. You want the vegetables, tender with a bite.
  2. Meantime in a saute pan add a glug of extra virgin olive oil and the red onions and saute on medium heat for about 5 minutes, add some salt and pepper. Reduce the heat to low and add about 2 tablespoons of balsamic vinegar. Leave them on low heat tossing occasional for about 15 minutes or until tender and caramelized. (see picture below)
  3. Mix all your sauce ingredients, adjust salt and pepper, and warm for a few minutes to marry the flavors.
  4. Cut your tomatoes, grate the cheese, season your sauce, pre-roasted vegetables, have everything ready to have fun topping your pizza!

Pizza-primavera_mise-in-place

The making!

  1. Crank up the oven temperature to 500F. This gets the crust crunchy when it cooks on the hot pizza stone.
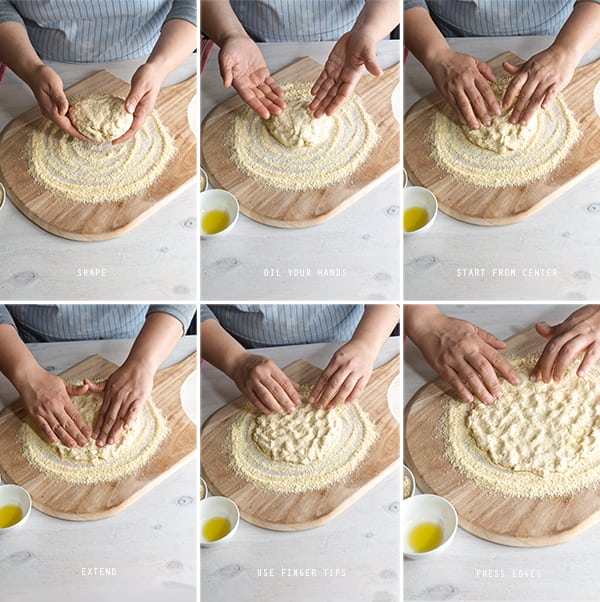
  2. Add a generous amount of corn meal onto the pizza peel. Apply some extra virgin olive oil in your hands and take one portion of pizza dough. Shape it into a disk and place it in the middle of the pizza peel. With the tip of your fingers, starting from the center out gently massage and start flatten and shape the dough into an 8-9” disk. (see picture below)
  3. Pizza-Primavera_-Shaping-the-pizza-dough
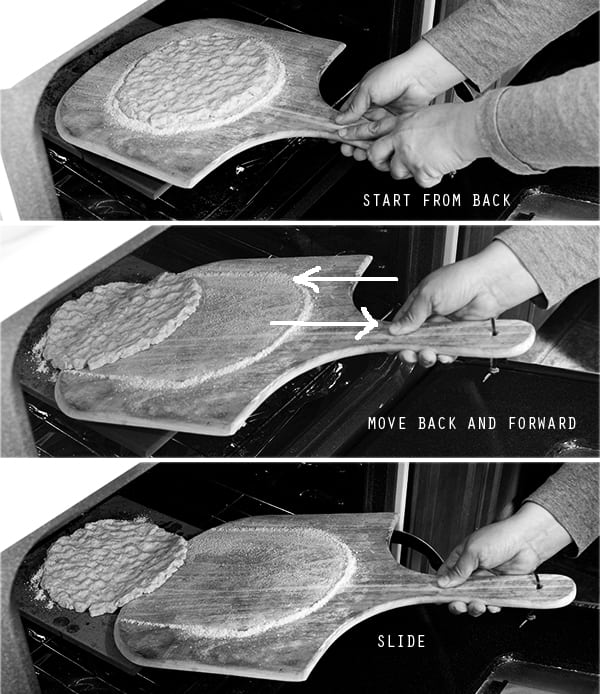
  4. Once you have the 8-9”round pizza dough, make sure its lose, by gently shaking the pizza peel in horizontal motion. The dough should scoot around easily.
  5. Place the pizza peel onto the pizza stone. Gently shake the wood peel back an gently forward to slide the pizza crust onto the pizza stone. See picture below. Be as quick as you can so the oven does not loose temperature.
  6. Immediately close oven door. And adjust oven temperature to 450.Bake crust for 5-7 minutes until slightly golden brown.
  7. Pizza-Primavera_-in-the-oven
  8. With the help of the pizza peel remove the crust from the oven and proceed to place the toppings.
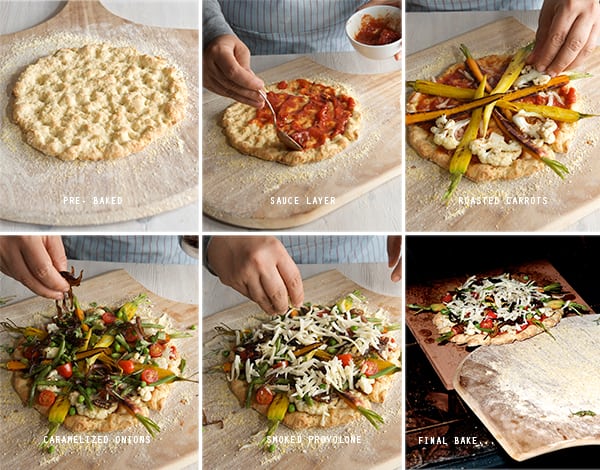
  9. Start with a thin layer of tomato sauce, and place the roasted carrots and veggies along the radius of the pizza crust. Add the caramelized onions, top with grated cheese, and sprinkle fresh herbs.
  10. Place the pizza back into the oven for another 7-8 minutes, or until the cheese is melted and it has some color. With the help of the peel pull out the pizza into a wood board. Let it rest for 1-2 minutes, and proceed to cut. You can use a pizza cutter or a chef’s knife.
  11. Pizza-Primavera_Assambling-the-pizzaPizza-Primavera-sliced~Yes,-more-please!

Serve immediately.

 Top with arugula, a drizzle of extra virgin olive oil, squeeze of lemon salt and pepper…
Enjoy! 

Pizza-Primavera_slices~Yes,-more-please!

View Post or View Comments 8

Avococo Salad Dressing

Avocado-Dressing-ingredients

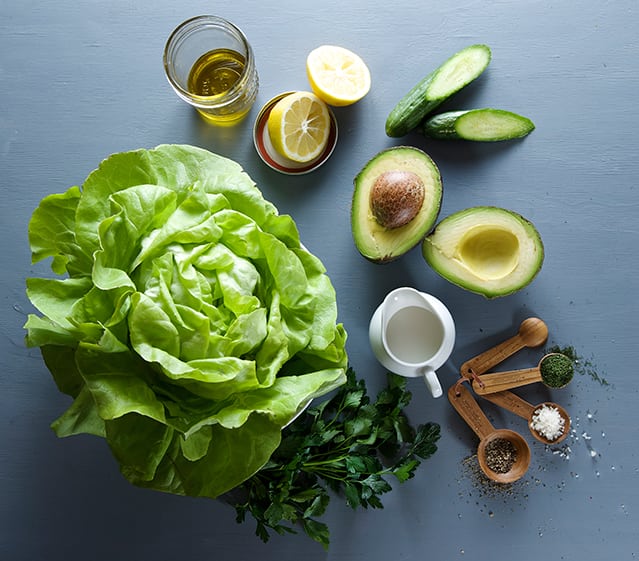
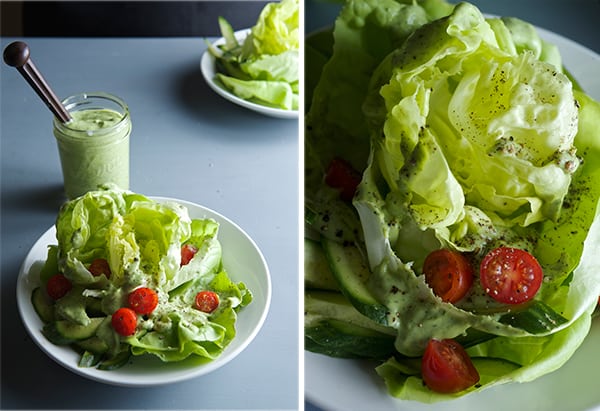
Wicked! Is how I describe this creamy dressing. Avocados the natural butter of the fruit kingdom, and coconut milk make a fantastic duo. Lemon Zest, Lemon juice, salt pepper and herbs is all you need.

You have to try this dressing, forget about that white stuff you have been dumping on your salads and make this spectacular dressing on a blink of an eye!

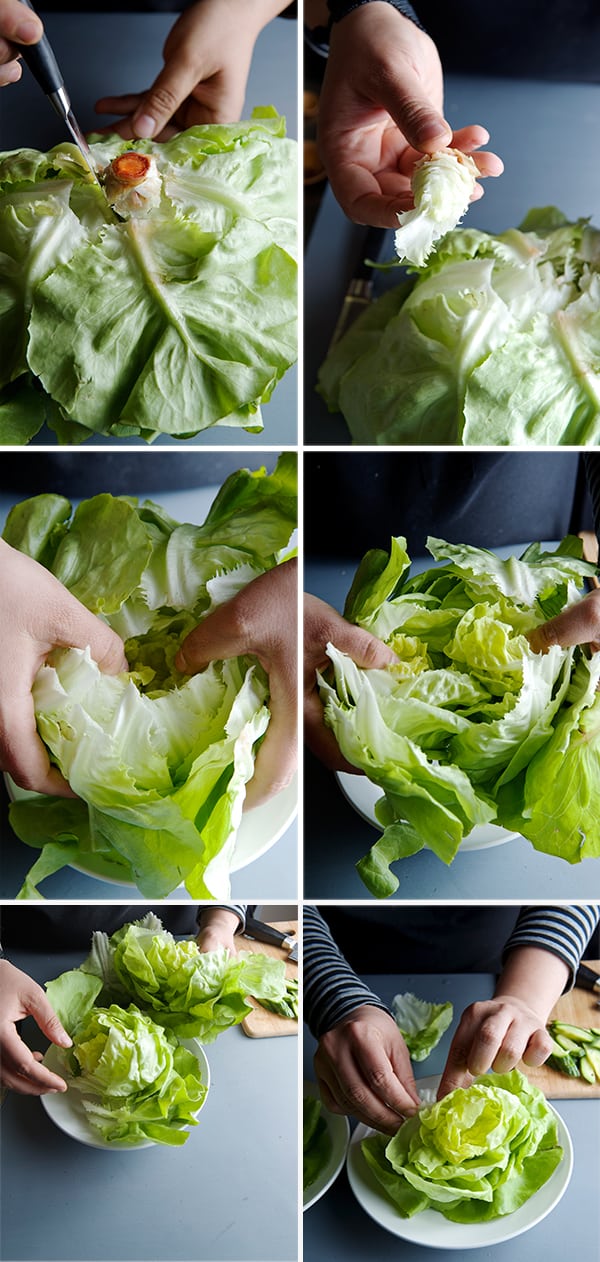
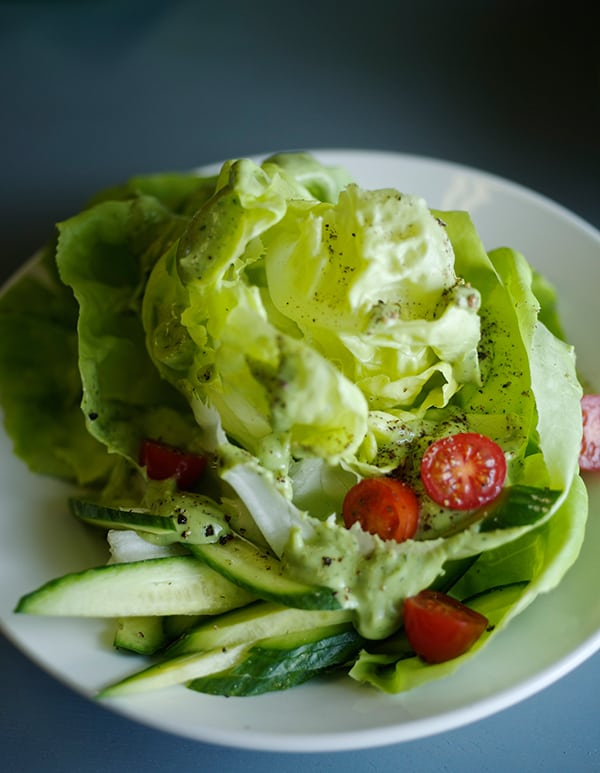
I used this avocado-coconut dressing over a Boston Lettuce, thats what I found on my farmers market incredible fresh and so beautiful that I could not resist to bring it home with me. I’ve included step by step photos of a 4 step easy method to leaf and separate with out bruising this gorgeous and delicate Boston lettuce, I really believe you gonna find this method a keeper for your vegetable techniques.

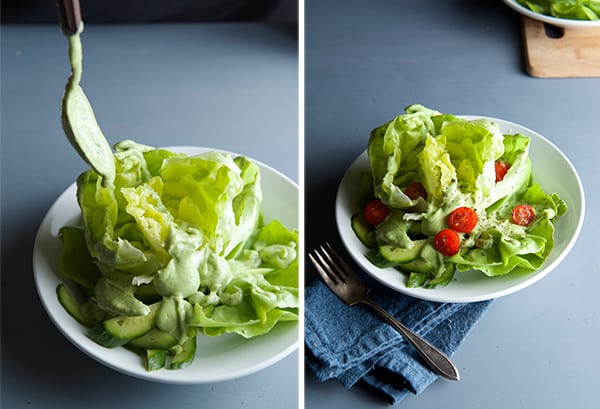
Avococo dressing drizzle liberally, over lettuce, carrots, fish chicken, your hiking boots, it’s delicious everywhere!…Celebrate and be green green green Spring time is here!

Avococo-salad-Dressing~Yes,-more-please!

Avococo Salad Dressing

Makes about 2-2.5 cups of dressing, it stays good for about 4 days, avoid plastic, save it in a glass jar with an air tight lid.

1 medium size ripe avocado
1 to 1-1/2 cup coconut milk (depending on avocado size and preferred consistency)
4 tablespoons good extra virgin olive oil.
2 tablespoons rice vinegar
the juice and zest of a lemon
1 teaspoon agave nectar
1  garlic clove
6-8 sprigs of parsley, basil, or cilantro. (use only the leaves)
1 teaspoon dry dill
1 teaspoon sea salt
1/2 teaspoon of fresh black pepper.

Preparation:

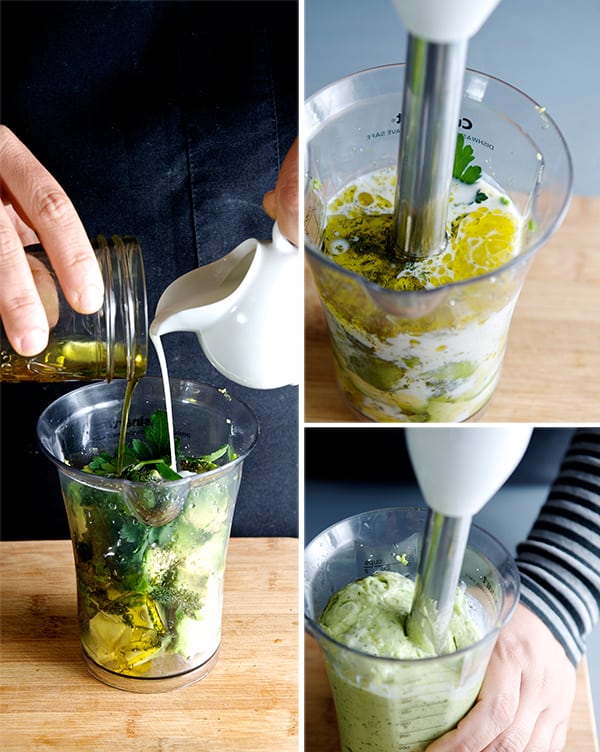
Place all ingredients on a blender or on a glass of an immersion blender, puree until smooth and desired thickness. If needed, adjust thickness by adding a bit more coconut milk.
Keep it on a glass jar with an air tight lid, it will keep for about 4 -5 days.

Avocado-Dressing-all-ingredients-to-the-blender!

How to wash and de-leaf a Boston lettuce?…

Wash:

Holding the head of lettuce upside down, submerge the lettuce into a big bowl with iced water and shake a few times. Leave the lettuce floating for a few minutes to allow the little dirt particles to sink to the bottom. Remove from water, shake several times, and live it air dry upside down over a clean kitchen towel. Shake 2- 3 more times to make sure all water is out. Then proceed to de-leaft.

De- leaf the lettuce:

1. Run a pairing knife around the back of the stem.
2. Gently pull the core of the stem.
3. Hold the head of lettuce in your hands and place your thumbs in the center, gently pull apart.
4. With a small lettuce, like this one, half will make a great portion, if bigger, arrange and divide leaves in 4 portions.

How-to-leaf-a-boston-Lettuce~Yes, more please!

Dress your lettuce and Enjoy!

Avocado-Dressing-Boston-Lettuce-~Yes,-more-please!Avocado-Dressing-Boston-salad~Yes,-more-please!

 Avococo Salad Dressing, Yes, more please!


View Post or View Comments 0

Caprese Tomato Spinach Soup

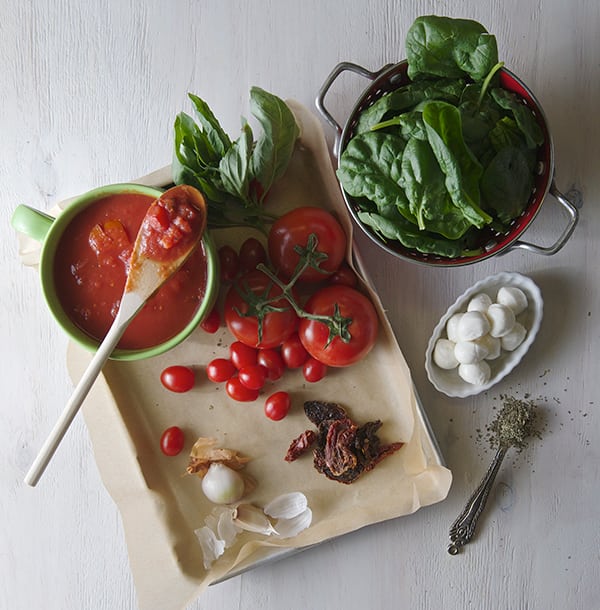
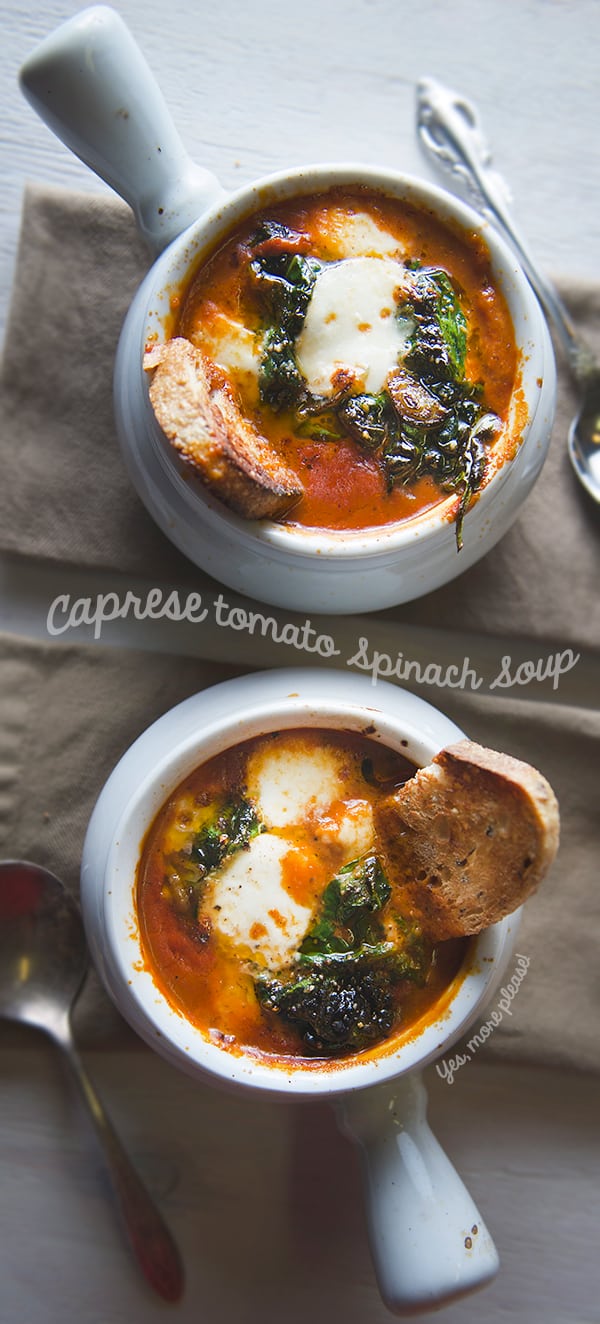
Tomato-Spinach-Soup-'caprese-style'-ingredients ~Yes, more please!ingredientsIs it Spring time yet?!!!…Well the thermometer is still going up and down like mad in Austin. And since yesterday was on the chilly side, I was craving tomato soup. I know I have to wait at least one more season to get great tomatoes at the farmers market. In the meantime what do you do when it seems only greens are in season?
So I had to improvise. I had two routes:
1. Try buy the best tomatoes I could find at the supermarket, roast them and enhance them…the problem with this solution, (even if it sounds the most viable route) is when you are truly committed to getting fresh organic produce you go to the supermarket and often the tomatoes look good but since your can’t sample them you get a lot of variation in flavor and sweetness. In my experience and in my opinion they often look better than they taste when out of season.

2. The short easy route: to buy a can of roasted organic tomatoes…
Well, sometimes you just have to use a salvation can when tomatoes are not in season and your frozen tomatoes are gone! If I know something for sure it is that I will learn how to can tomatoes for this coming season… fortunately there are plenty of options in canned tomatoes: from organic, no salt added, and no preservatives, (and in the case of Muir Glen, among others, no BPA’s if that concerns you , check this product list)  I find these canned options to have a more consistent quality if I can’t get them in season.

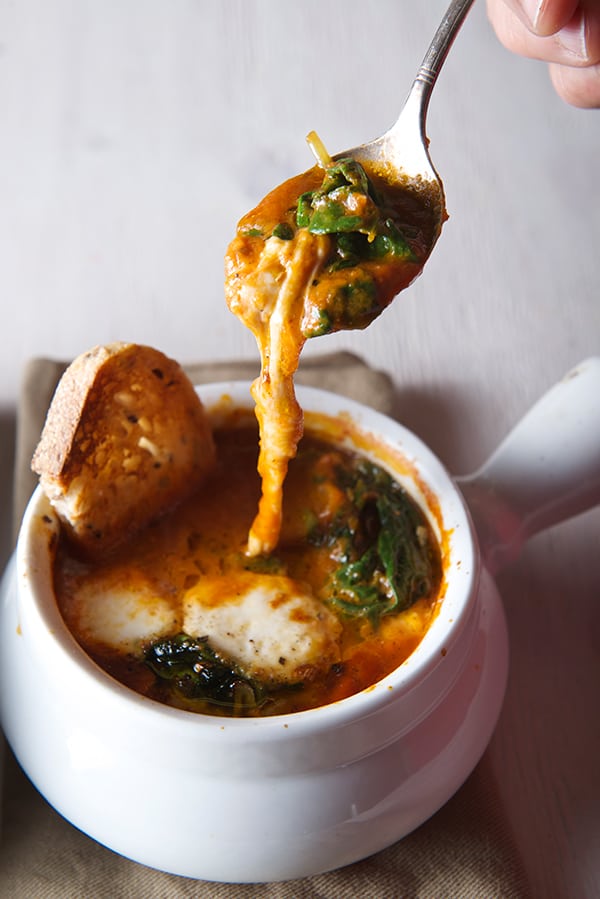
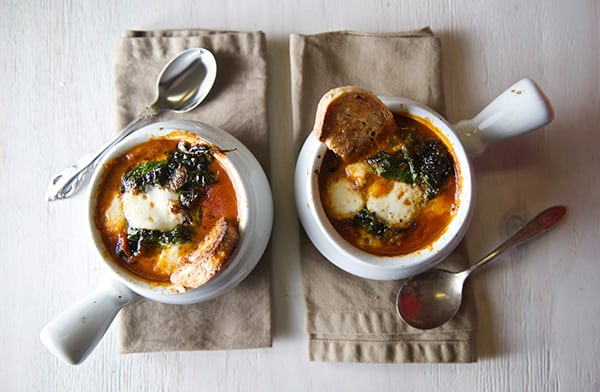
So I bought a can of tomatoes to satisfy my tomato soup craving. And here’s where I put my twist on things. I enhanced it with some dried herbs,sun-dried tomatoes, and aromatics. The result was scrumptious. It was good ‘ol tomato soup to warm us up on these strange cold March days. I added dried basil, a pinch of thyme, garlic, shallots and sun-dried tomatoes, plus a little Balsamic vinegar to balance the soup’s sweetness. I also added some sautéed spinach and mozzarella Ciliegine (cherry size mozzarella balls) as toppings before broiling in the oven. It turned out amazingly good. It reminded me of a caprese salad in soup form!.. I hope you like it as much as we did! And stay warm!

caprese-tomatoe-spinach-soup-yes-more-please

Caprese Tomato Spinach Soup

Serves 4

1 can (28 0z.) Organic Fire Roasted Tomatoes (I used Muir Glen organic) this is a must! the fire roasted tomatoes give all the flavor to the soup.
3-4 cups water or vegetable stock …start with 3, then add more to desired consistency.
2-3 glugs extra virgin olive oil
5-7 Sun dried tomatoes, chopped.
2 small shallots finely chopped
1 medium garlic clove thinly sliced
½ teaspoon dry basil
1 good pinch dry thyme
1 large bay leaf
½ teaspoon celery salt
1-1/2 teaspoons sea salt
½ teaspoon freshly ground black pepper
2 teaspoons balsamic vinegar

Toppings:

6-8 hand fulls of spinach
1 shallot
Extra virgin olive oil to saute
Salt and black pepper to taste.

Fresh Mozzarella Ciliegine
(if you can not find the Ciliegine, you can cut the mozzarella into small cubes)

Preparation:

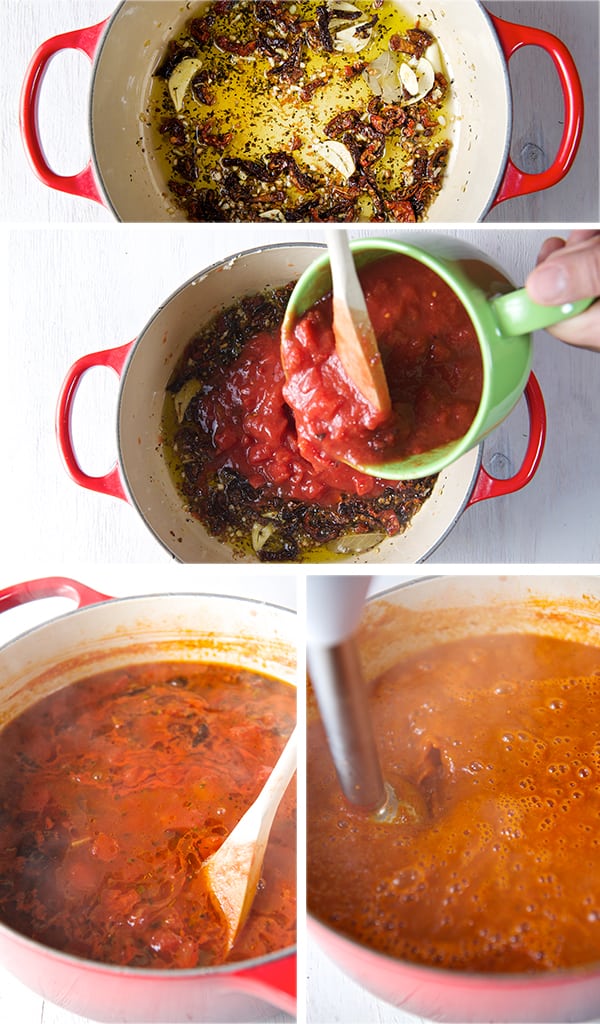
1. In a medium soup pot over medium heat, warm up the extra virgin olive oil. Add in the chopped shallots, garlic, sun dried tomatoes, bay leaf saute for 3-4 minutes.
2. Add the dry basil, thyme salt and black pepper, saute for another minute.
3. Add the can of crushed fire roasted tomatoes, and cook for 2-3 minutes on medium.
4. Add the water, stir until well incorporated, cover with a lid and reduce the heat to low, simmer for 6-8 minutes. With an immersion blender puree the soup. ( I love this gadget in the kitchen, it is so practical and easy to puree your soup on the same pot!)

Tomatoe-Spinach-Soup-Caprese-style-sautee-base-for-soup
5. Once its pureed, add the Balsamic vinegar, taste, adjust salt and pepper if necessary. Bring to slow simmer, turn off the heat, cover with a lid and keep it warm.
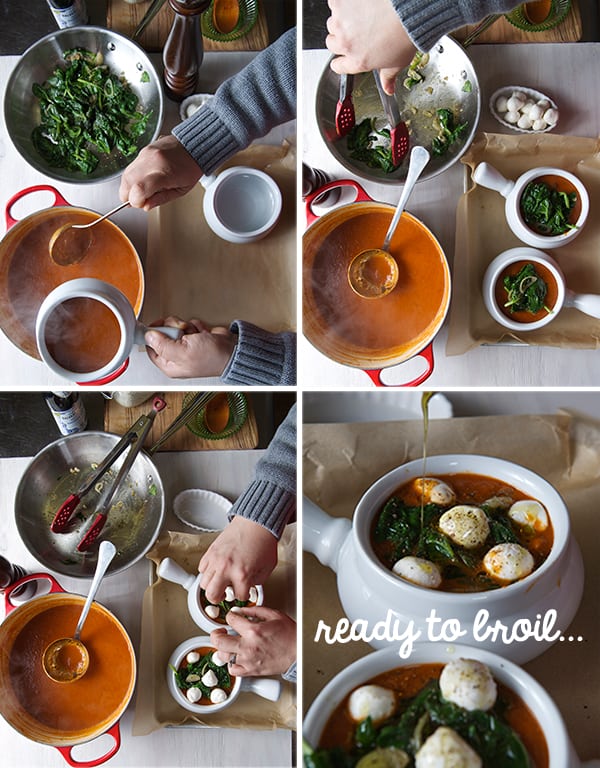
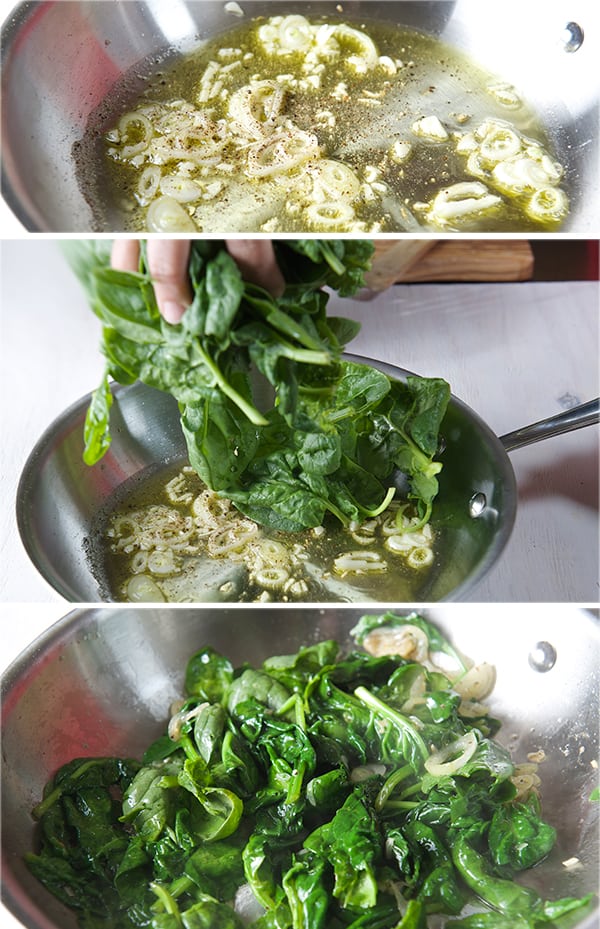
6. Quick Saute the spinach in a skillet over medium -high heat, heat up some olive oil, add shallots, garlic and saute for 15 seconds then add the spinach and toss until they are partially wilted, and coated with the hot oil, add salt and pepper. Set a side.

Flash-sauteed-spinach~-Yes,-more-please!
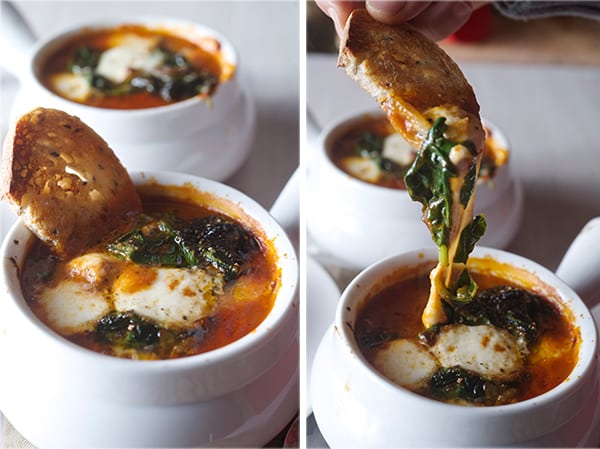
7. Using oven friendly soup bowls, scoop 2-3 ladles of tomato soup, add some of the sauteed spinach and top with the mozzarella buccatinis.
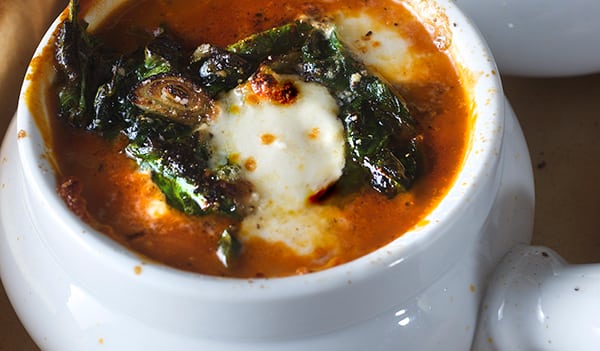
8. Place bowls onto a baking sheet and broil the soups for about 4-5 minutes, or until cheese is melted and slightly crust. Be careful to watch them so they don’t burn.

Tomato-Spinach-Soup-Caprese-style-assambling-the-soup-

Tomatoe-Spinach-Soup-Caprese-style-broil-your-soup

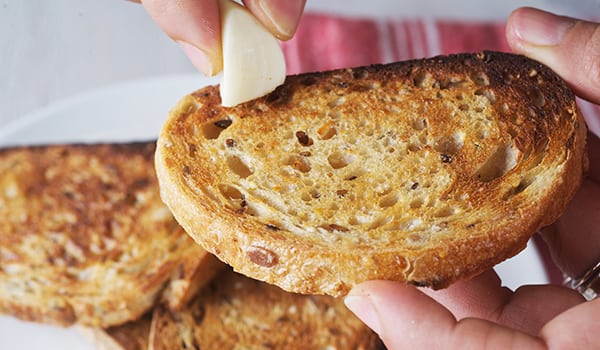
9. Serve with some toasted ciabatta or crusty bread slices and rub some garlic on the bread for extra flavor… Enjoy!

Tomatoe-Spinach-Soup-Caprese-style-rub-garlic-on-toastTomatoe-Spinach-Soup-Caprese-style-toasty,-melty,-Yes,-more-please!Tomatoe-Spinach-Soup-Caprese-style-Yes,-more-please! Caprese Tomato Spinach Soup

Music Pairing: Frank Sinatra,  “Fly me to the moon”

https://youtu.be/mhZ2X9znPxM

Tomatoe-Spinach-Soup-Caprese-style-Yes,more-please!


Caprese Tomato Spinach Soup

Course Lunch, Main Course, Soup
Cuisine American, Italian
Prep Time 10 minutes
Cook Time 25 minutes
Total Time 35 minutes
Servings 4

Ingredients

  • 1 28oz can Organic Fire Roasted Tomatoes, I used Muir Glen organic) this is a must! the fire roasted tomatoes give all the flavor to the soup.
  • 3-4 cups water or vegetable stock, start with 3, then add more to desired consistency.
  • 2 glugs extra virgin olive oil
  • 5-7 Sun dried tomatoes, chopped
  • 1 medium garlic clove, thinly sliced
  • 1/2 teaspoon dry basil, if fresh use about 5-6 leaves
  • 1 good pinch dry thyme
  • 1 large bay leaf
  • 1/2 teaspoon celery salt
  • 1-1/2 teaspoon sea salt
  • 1/2 teaspoon black pepper, freshly ground
  • 2 teaspoons balsamic Vinegar

Toppings:

  • 6-8 handfulls fresh spinach
  • 1 shallot, thinly sliced
  • extra virgin olive oil to sautee the spinach
  • Salt and black pepper to taste
  • Fresh Mozzarella Ciliegine, or frsh mozzarella cut into small cubes

Instructions

  1. 1. In a medium soup pot over medium heat, warm up the extra virgin olive oil. Add in the chopped shallots, garlic, sun dried tomatoes, bay leaf saute for 3-4 minutes.

    2. Add the dry basil, thyme salt and black pepper, saute for another minute.

    3. Add the can of crushed fire roasted tomatoes, and cook for 2-3 minutes on medium.

    4. Add the water, stir until well incorporated, cover with a lid and reduce the heat to low, simmer for 6-8 minutes. With an immersion blender puree the soup. ( I love this gadget in the kitchen, it is so practical and easy to puree your soup on the same pot!)

    5. Once its pureed, add the Balsamic vinegar, taste, adjust salt and pepper if necessary. Bring to slow simmer, turn off the heat, cover with a lid and keep it warm.

    6. Quick Saute the spinach in a skillet over medium -high heat, heat up some olive oil, add shallots, garlic and saute for 15 seconds then add the spinach and toss until they are partially wilted, and coated with the hot oil, add salt and pepper. Set a side.

    7. Using oven friendly soup bowls, scoop 2-3 ladles of tomato soup, add some of the sauteed spinach and top with the mozzarella buccatinis.

    8. Place bowls onto a baking sheet and broil the soups for about 4-5 minutes, or until cheese is melted and slightly crust. Be careful to watch them so they don’t burn. 

    Serve with some toasted ciabatta or crusty bread slices and rub some garlic on the bread for extra flavor… Enjoy!


View Post or View Comments 25

Rainbow Chard Korean Pancake

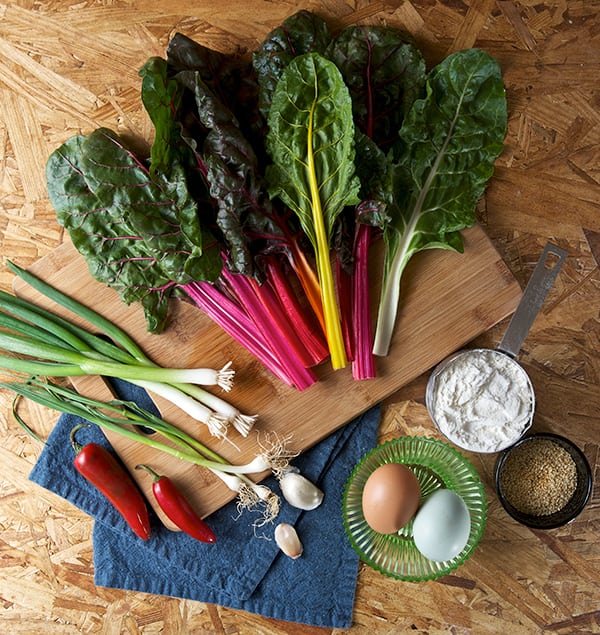
Rainbowchard-Korean-Pancakes_ingredientsI must confess that I have a weakness for Korean BBQ… I don’t always cook at home. When we decide to go out, Korean BBQ is on the top of our list. I am amused by all the fresh ingredients that are cooked before your eyes.  The orchestrated arrangement of little dishes with fermented vegetables, salty sweet, sour, spicy crunchy, juicy, is a circus of textures, temperatures, flavors and aromas. All my senses are awake.
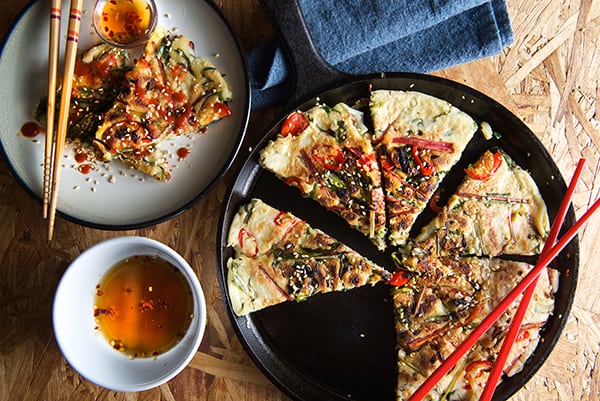
One of my favorite side dishes would be the the Pajeon or Korean pancake. A savory light pancake, made with eggs, rice flour, flour, scallions-green onions. All sorts of variations can be made, including beef, pork, sea food, shell fish, kimchi…Oh! the kimchi.. My favorite.
With this Korean pancake in mind and a little help of the current abundant green leafy season, I thought about making a lighter all veggie version using one of my favorite seasonal greens…“Rainbow Chard” this colorful happy leafy green, is a close relative of the beet family, delivers 3 major vitamins A, K and C. Loaded with phytochemicals rainbow chard is one of the healthiest, most beautiful, and tasty vegetables I know. Flavorwise, I would describe it as a cross between baby spinach with a bit of sweet beet background. Texturewise, the leaves are way softer than kale which makes it a bit more pleasant to eat raw or quick sautéed. Rainbow chard has it all, flavor, texture, and color.

Inspired by all these great leafy green qualities, I was almost in a rush to attempt to make an all veggie Rainbow Chard Korean Pancake. The result was fantastic, the rainbow chard’s sweetness and texture are a good match for this light savory pancake. The charred scallions, green garlic and the spicy jalapeño kick in combination with the rice vinegar dipping sauce for the perfect savory pancake match.
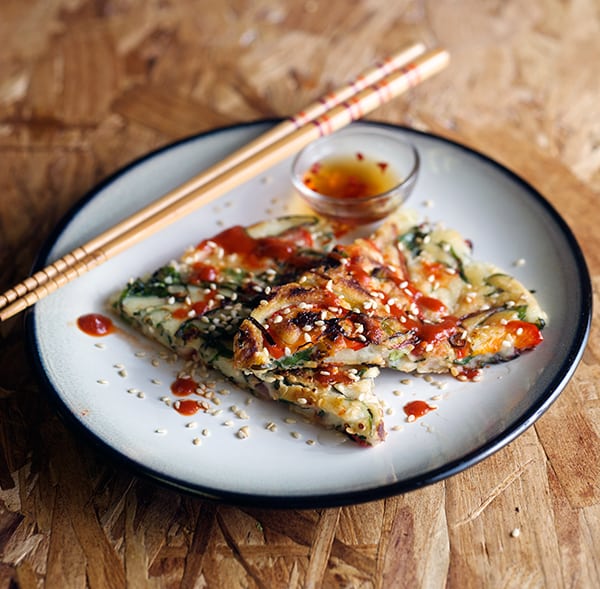
Once again I proved to myself that cooking with fresh ingredients is not only a great nutrition and a healthy value. It inspires me and it’s a feast for the eyes!. That for me makes it even more appetizing…Enjoy!Rainbowchard-Korean-Pancakes-ready-to-serve~Yes,-more-please!

Rainbow Chard Korean Pancake

Makes 2- 9” round savory pancakes

½ cup unbleached-all purpose flour or gluten free flour like all-purpose King Arthur like this
½ cup stone ground rice flour (I used Bob’s Red Mill)
1 egg or 1 tablespoon of ground flax seed + 3 tablespoons of water= 1 egg
2 teaspoons grapeseed oil, canola oil, or any neutral oil. And a little extra oil to pan fry the pancakes.
1 teaspoon roasted sesame oil
pinch of salt
pinch of white pepper
¾ -1 cup water

6-8 rainbow chard leaves
4 scallions
1 garlic clove or 3 green garlic shoots
1-2 red or green jalapeno or red thai chili
2 tablespoons sesame seeds

extra oil for pan fry the pancakes

Rice vinegar dipping sauce:

1 tablespoon rice vinegar
1 tablespoon water
1 teaspoon soy sauce
1 teaspoon agave nectar
a pinch of red dry chili flakes or a teaspoon of sambal sauce

Preparation method:

1. In a medium size bowl, mix the flours, egg, vegetable oil, sesame oil salt, pepper and water, whisk well until a smooth batter that resembles  a loose pancake batter. Set a side to rest.
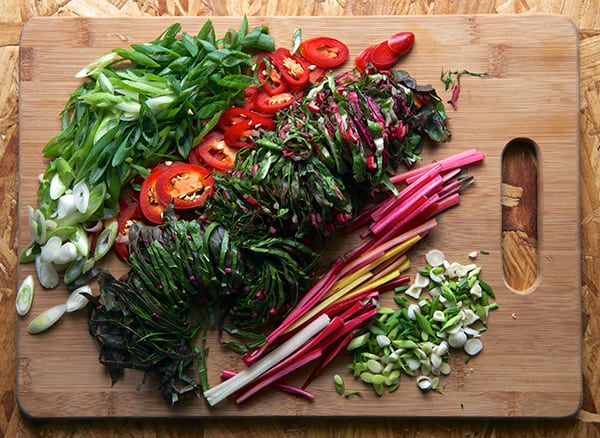
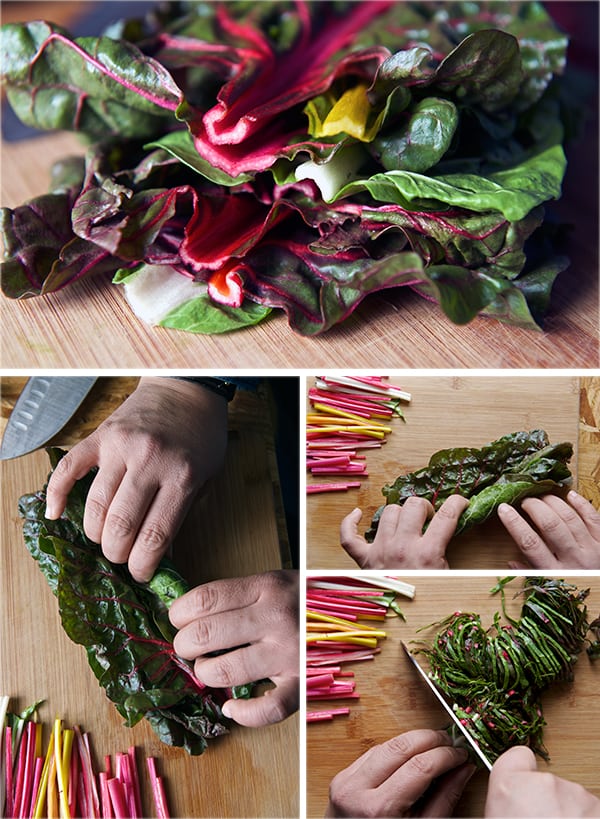
2. Chop all your vegetables, scallions and jalapenos on a bias. Make a roulade of rainbow chard leaves and chop them into a chiffonade, chop rainbow chard stalks into matchstick size.

Rainbow-Chard-Korean-PancakesRainbowchard-Korean-Pancakes-vegetables~Yes,-more-please!

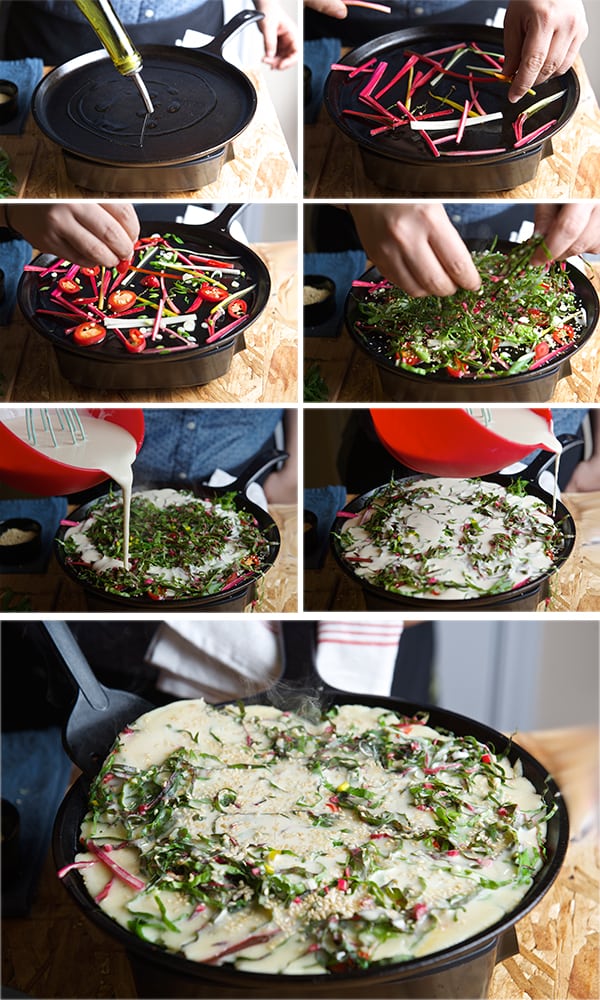
3. On a cast iron or nonstick skillet over medium-high heat drizzle some oil, and arrange a layer or vegetables, starting with the jalapenos, rainbow chard matchsticks, scallions, green garlic and rainbow chard chiffonade. Sprinkle some sesame seeds and promptly ladle half of the batter , spreading it out evenly into a circle.
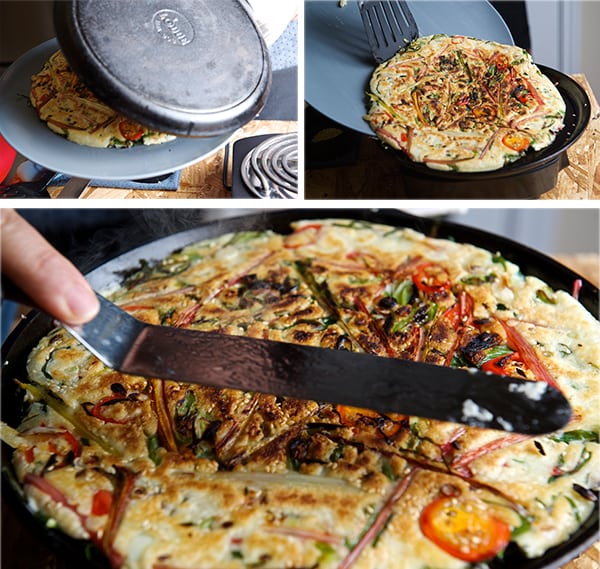
4. Reduce the heat to medium and cook until the bottom is golden brown, a few areas will have a bit of char which is perfectly fine. Cook for about 5 minutes per side.

Rainbow-Chard-Korean-Pancake-Steps
5. The “flipping matter”… you can use Julia’s Child encouraging words “flip it with conviction!!!”, or you can use a plate to flip the pancake upside down and then return it to the pan, to finish cooking…both methods work great!

Rainbow-Chard-Korean-Pancake--flip-a-rooh
6. Once both sides are cooked, transfer to a warm plate and repeat the process with the remaining ingredients.

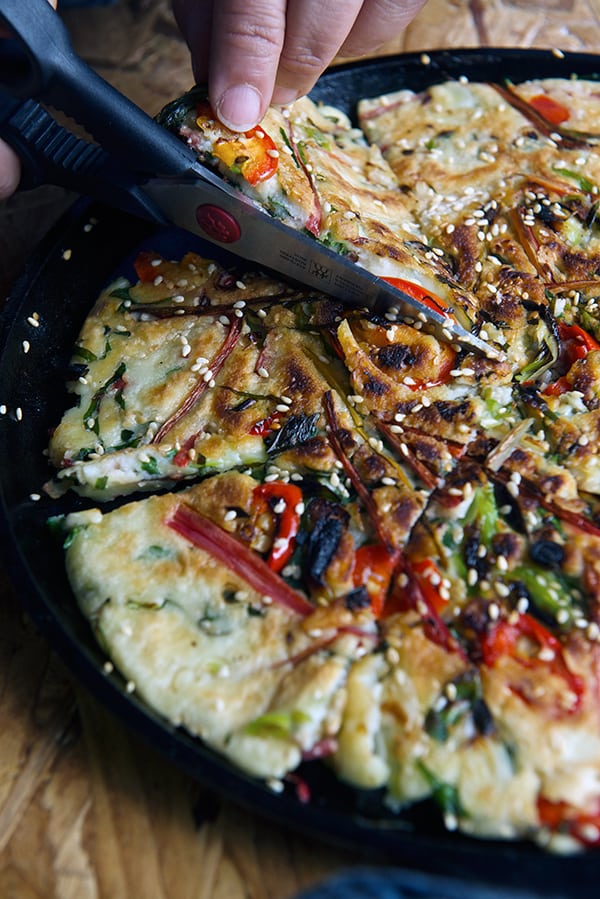
7. In a large platter, cut into triangles and serve warm with the rice vinegar dipping sauce.

Rainbowchard-Korean-Pancakes-cutting-the-pancake~Yes,-more-please!

Rainbowchard-Korean-Pancakes-bite!~Yes,-more-please!

Rainbowchard-Korean-Pancakes-ready-to-eat~Yes,-more-please!

Variations: You can add shrimp, small tofu squares, carrots, squash, kimchi!!!
Hey! the pancake is you canvas, have fun and enjoy!


View Post or View Comments 9

Stout Marshmallows, my favorite creatures!

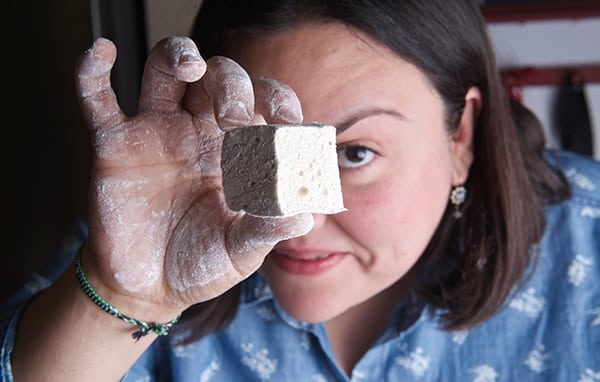
Stout-Marshmallows-texture~Yes,-More-please!

This sounds so wrong, but it taste so right that you will be stumbling back for more.
Homemade marshmallows are totally different creatures than store-bought, and incredible easy to make. Despite the intimidating words ”candy thermometer” and “powdered gelatin” Hey! Its easy, easy potatoes!,
You will need to flatten some dark beer, hydrate some gelatin, boil some sugary mixture, whip the hell out of it , add a powdery cloud of confectioners sugar and let it set…it is a fun process. To finish them up, drizzle chocolate and crunchy pretzels…What’s not to like?
Making candy and these confections is fun and if there is some leftover beer you should have a little glass, to cook along with … Music? Yes, more please! I was listening to one of my favorite bands “The Squirrel Nut Zippers” . For me, this is marshmallow music and I’m sharing the link:
https://www.youtube.com/watch?v=VdAt4qWvz_8

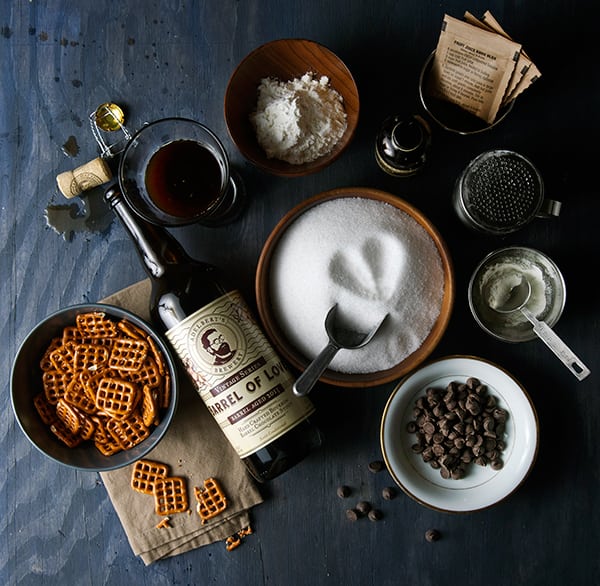
My twist in this recipe has to do with the choice of stout I used. My friend Andrea introduced me to this amazing stout from Adelbert’s “Barrel of Love”.  Adelbert’s is a local brewery that produces hand-crafted Belgian style ales here in Austin,Texas. Crazy good stuff! This beer was recently released, a dark beer with chocolate and whiskey notes…kiss me now!… Wait until you try these beer marshmallows creatures…Holy Shubangwaaa!
Ok too much Blah, blah blah, let’s get started. Hands up!
I will not describe the flavor for you… be brave, be adventurous and try this… you will go bananas… it is the best way to get happy-drunk on marshmallows! Have fun.

You want to know more about where to get this fantastic beer: http://adelbertsbeer.com

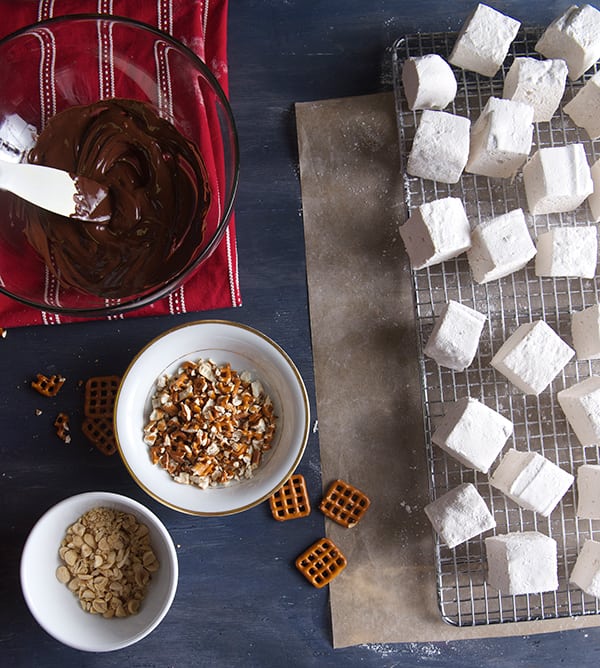
Stout-Marshmallow-Creatures~Ingredients-~Yes,-more-please!

Stout-Marshmallows~Yes,-More-please!

Stout Marshmallows, my favorite creatures!

Makes 9 large glutton size, or 120 skinny jeans size.
Technically if you use a 8×8 pan 36 pieces of 1.5×1.5 inches…

3 envelopes unflavored gelatin /approx. 21 grams (I used powder, you’re welcome to use gelatin sheets )
1 cup cold, flat beer, divided in two (I used Adelbert’s brewery “Barrel of Love”) You can use any dark stout like Guinness will be fantastic too!
For Kids version: 1 cup of Miller light… not! …Use 1 cup of  Cherry soda, Dr. Pepper soda, Cream of soda and use the same method of removing the gas as much as you can see step 1. Other options can be fruit juices, like apple, beet, carrot, they will taste delicious and will give a hint of color to the fluff.
2 cups granulated white sugar
1/2 cup corn syrup
2 pinches of sea salt
2 large egg whites beaten until stiff peaks.
1 teaspoon vanilla extract

To dust:

½ cup confectioners sugar
½ cup cornstarch

Toppings:

1 cup dark chocolate for melting.
3-4 tablespoons roasted salted peanuts crushed.
Salty, pretzels. (I used Snaps from Snyder’s)
1 teaspoon of sea salt.

Method:

1. Whisk the beer to flatten the beer. Remove some of the foam if necessary.
2. Lightly oil your 8×8 pan and generously dust with the confectioners sugar and cornstarch mixture. Reserve the rest for when cutting the marshmallows.
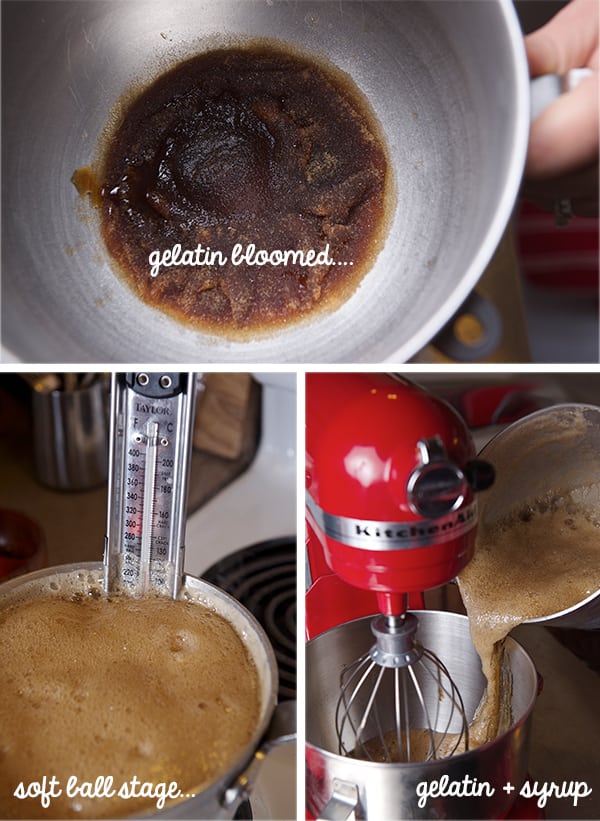
3. Using the mixing bowl of your stand mixer, place ½ cup of beer and sprinkle the 3 envelopes of gelatin powder.
4.Whisk your egg whites until stiff peaks set aside.
5. In a medium saucepan over medium high heat mix the sugar, corn syrup, and the other ½ cup of flat beer until the sugar is dissolved. At this point attach the candy thermometer to your saucepan and bring this sugary mixture to a slow boil until it reaches 240F/ 116C . Remove from heat.
6. Fitted with the whisk, start your stand mixer on the slowest speed. Being very careful, start adding the hot syrup in a low stream to incorporate with the bloomed gelatine.
Stout-Marshmallows_Blooming-gelatin,-soft-ball-syrup,-whisking
7.Once you poor all the syrup,mix for 2 minutes and proceed to add the fluffy egg whites along with the vanilla extract.
8.Mix  on high for about 10-12 minutes, until the mixture has double or tripled in size, it turns an off-white color, it has a nice shine to it and it holds stiff peaks.
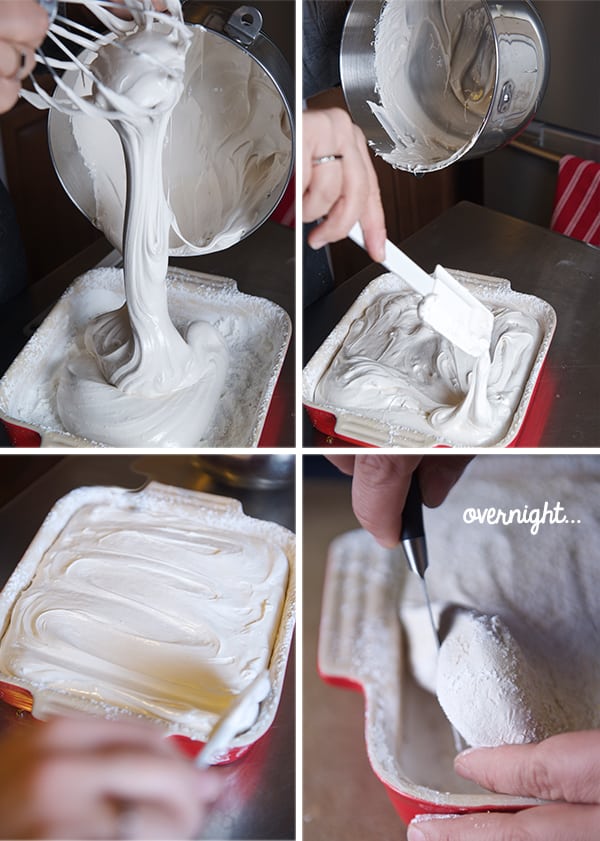
9. At this point with the help of a spatula (lightly spray the spatula with some nonstick spray), Poor all this fluffy and highly sticky gooey goodness into your greased and powdery pan.
10. Flatten the top and allow the marshmallow to dry for at least 4-6 hours. Overnight is best. The marshmallow should fill springy and soft  to the  touch.

Stout-marshmallow_molding-drying-overnight

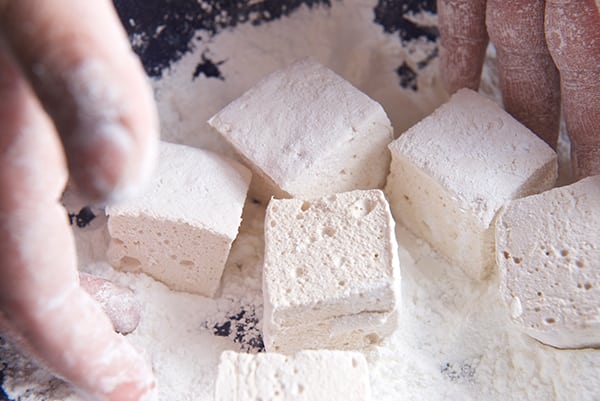
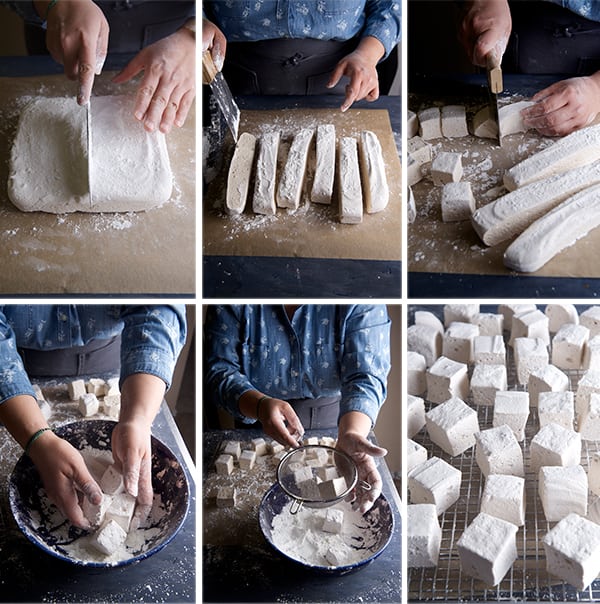
11. Once dry, over a piece of parchment paper generously dusted with powder sugar and cornstarch mixture, un-mold the marshmallow sheet with a little spatula pulling from one corner and place the big square on top of the paper. With the help of a dusted knife, pastry cutter, pizza cutter or scissors, cut your marshmallows into squares. Start by dividing them in half and then, thirds. When cutting any kind of pastry, it helps a lot start visualizing “half of the half” rather than five or six equal pieces. In this way you can end up with pretty much equal size marshmallows. Do not worry about the round edges, people is gonna eat them any way!…Although if you are going for perfect little squares just trim all the round edges to have a perfect square and then proceed to cut. (see photo below)
12. Once they are cut, place the remainder of the confectioners sugar and cornstarch mixture in a bowl and toss the squares, so every side is covered with powder to avoid sticking. Shake the excess powder, and place the marshmallows on a clean cookie rack.

Stout-Marshmallows_Cutting-and-dustingStout-marshmallows_Mariana_Yes,-more-please!

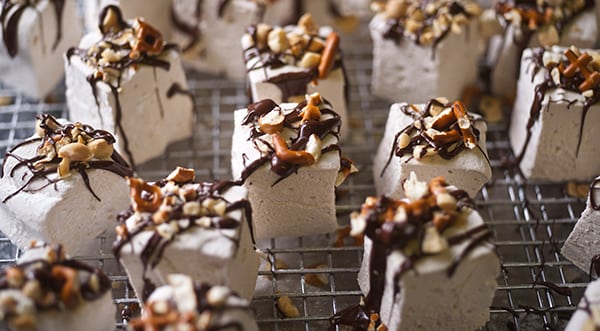
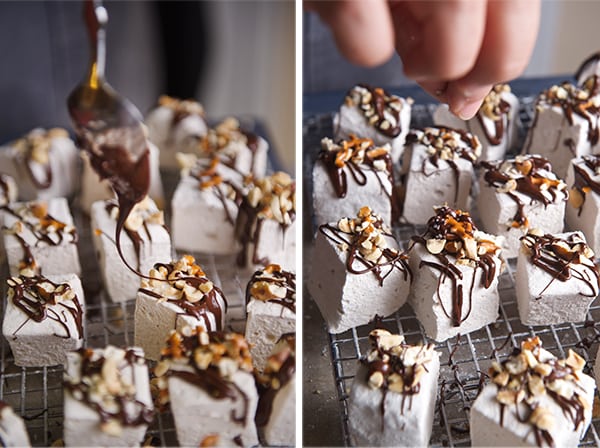
13. Melt the dark chocolate, and drizzle the marshmallows, sprinkle with pretzels and crushed peanuts.
14.Eat while the chocolate is warm…its crazy good!!!

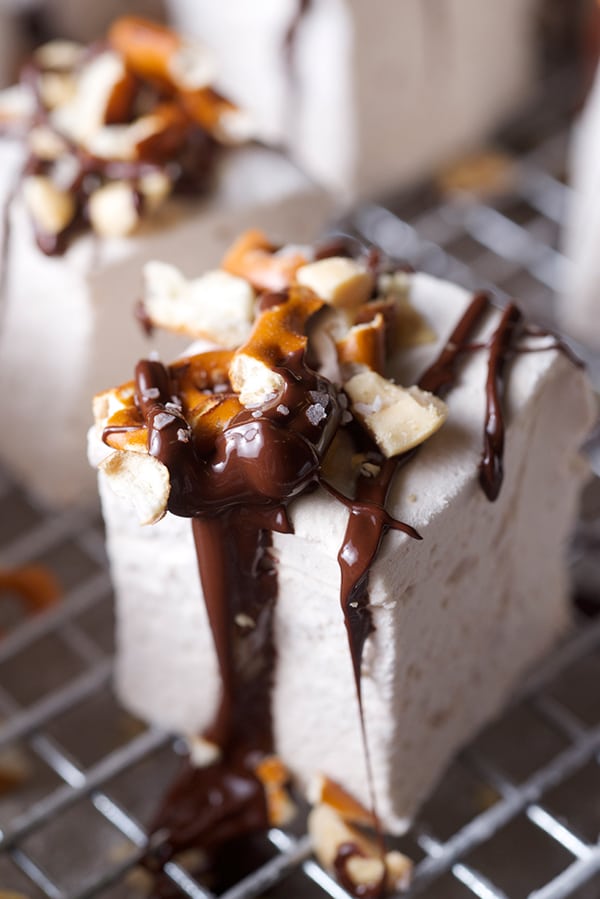
Stout-Marshmallows_toppingsStout-Marshmallows-drizzle-chocolate,-pretzels,-peanuts,-and-sea-salt~yes,-more-please!

Stout-marshmallows-bite-size~Yes,-more-please!

Stout Marshmallow creatures…Yes, more please!

Stout-marshmallow_Ian

Ian Loved them!

View Post or View Comments 8

Root-a–touille a Ratatouille made with root vegetables

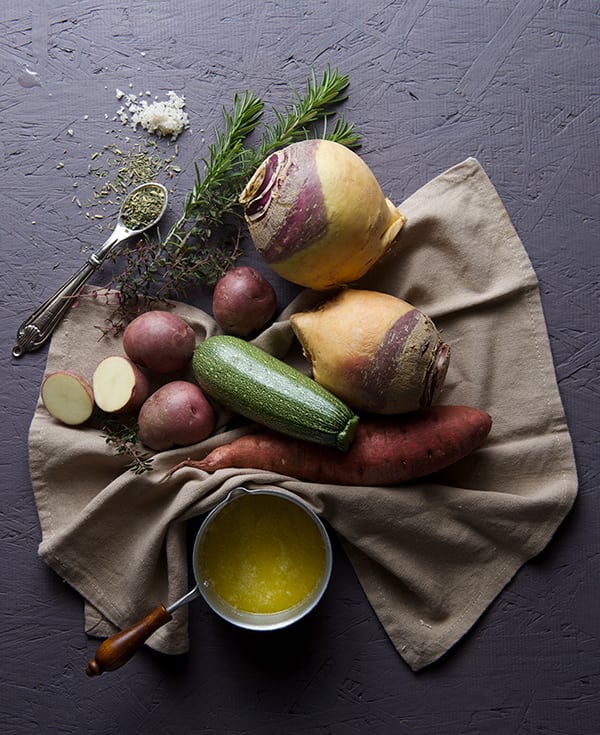
 Root-a-touille_ingredients-~-Yes,-more-please!

Because sometimes we need some silly in our lives, and because we must decide what to do with all the bountiful goodness of root vegetables currently in season, I decided to make Root–a-touille a Ratatouille made with root vegetables.

The star of this recipe, believe it or not, is the infamous rutabaga. You can smash, roast, make chips, soup… a rutabaga so many ways…and still not to be a great fan of it. I picked up some rutabagas from the Farmers market from the folks at Johnson’s Backyard Gardens. They have fantastic organic root vegetables. https://www.jbgorganic.com
Rutabaga has a very particular flavor, a cross between a radish and a potato (and some funk ca-baggey smell). This root vegetable is from Sweden and it is the result of crossing a cabbage and a turnip. But if you use this flavor profile in your favor it compliments and harmonize well with other roots. I thought about making a variation of ratatouille, using primarily roots. It was a success! In this particular dish the rutabagas bring the whole root clan together and the funky root smell cooks away. I really believe you are going to like rutabagas after eating them in this way.

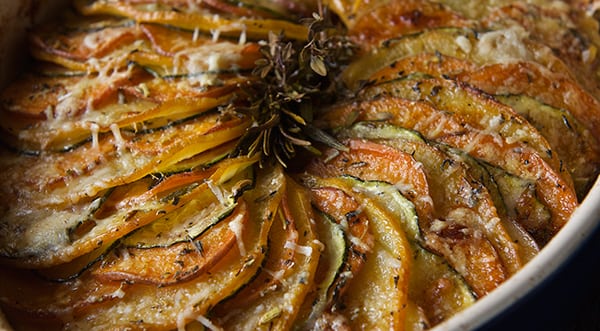
Cooking your vegetables in this ratatouille-like style is gonna make you want to eat them more often. I even made my Grandma this recipe and she thought she would not like, and she loved it!… The only objection she had? Too much rosemary. I adjusted the recipe so no worries. I hope you enjoy the recipe. It is a warm and easy to prepare casserole that your whole family will enjoy.

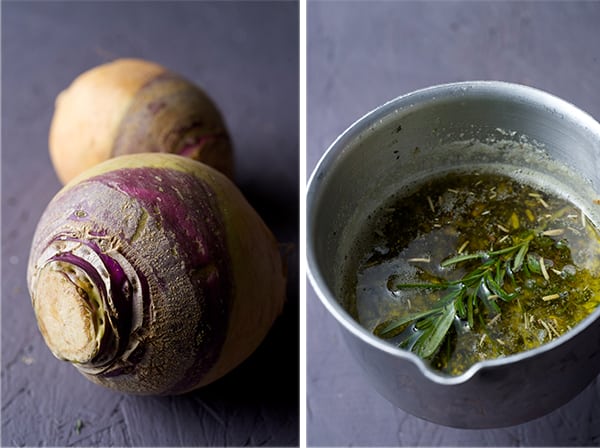
Root-a-touille-Rutabaga&Herb-ButterRoot-a-touille-layers-of-gratin-root-vegetables~Yes,-more-please!

Root-a- touille

Serves 4 or 2 hungry vegetarian for dinner.

1 rutabaga
1 sweet potato
1-2 green zucchini
(I use the light green zucchini or “mexican” zucchini as they call it here in austin)
2-3 small red potatoes

2 tomatoes diced
1 garlic clove
½ yellow onion small diced
1 glug of Extra Virgin Olive Oil.

2-3 tablespoons of melted butter
1 teaspoon Herbs de Provence
1 sprig of thyme and rosemary.
1 glug of Extra Virgin Olive Oil.
Salt and pepper to taste.

3-4 Tablespoons grated Parmesan cheese.

Preparation:

Preheat oven at 400F/200C

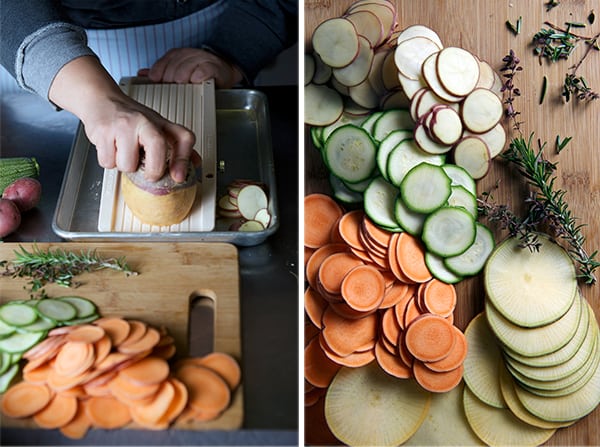
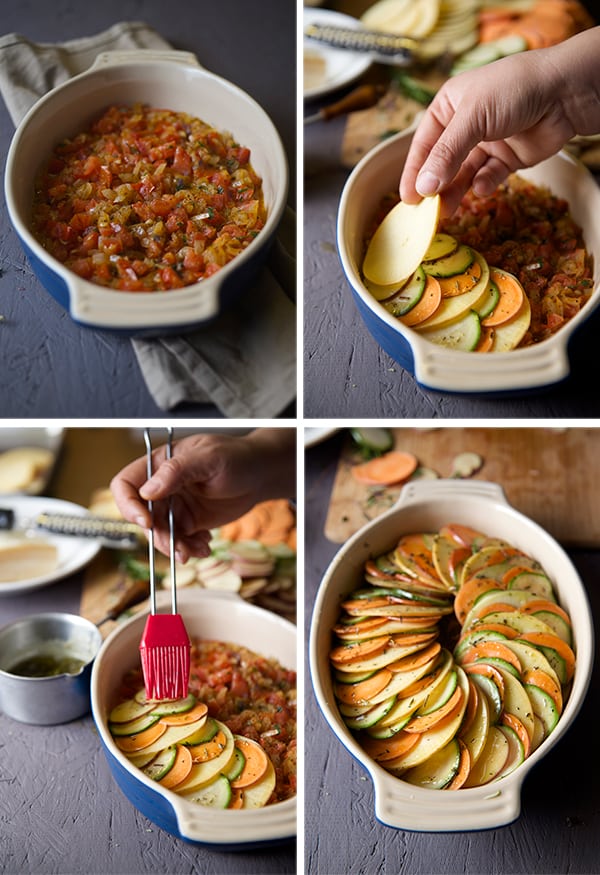
1. Using a Mandolin, thinly slice the rutabaga, sweet potato, zucchini, potatoes.
(I love this japanese mandolin is easy and fun  to use and clean up in a flash! next time I will make sure I have my gloves on!)

Root-a-touille--Slicing-Mandolin
2. Quick saute in Extra Virgin Olive Oil the Onions, garlic, tomatoes, season with salt and pepper a pinch of the herbs de provence, fresh thyme and the sprig of rosemary.
3. Place this tomato saute in a gratin-stone ware or glass baking dish will work to.
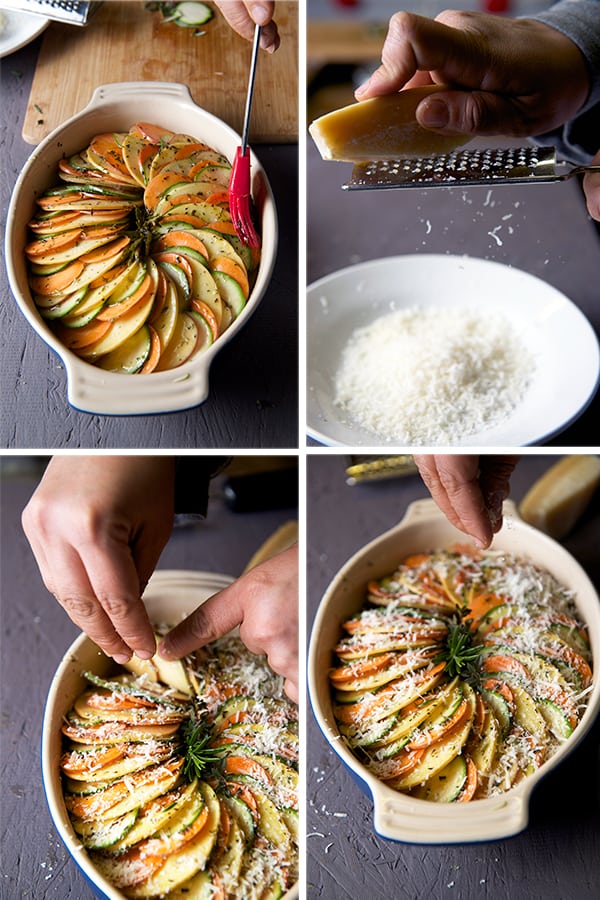
4. Start layering the root slices, over the sauteed tomato-onion-garlic. Alternate the colors and different type of roots and zucchini (see photo below) and work all your way around.

Root-a-touille-Assambling~-Yes,-more-please!
5. Brush the top with the melted butter and herbs and sprinkle with the grated Parmesan cheese.

Root-a-touille-parmessan-and-butter-gratin,-ready-for-the-oven
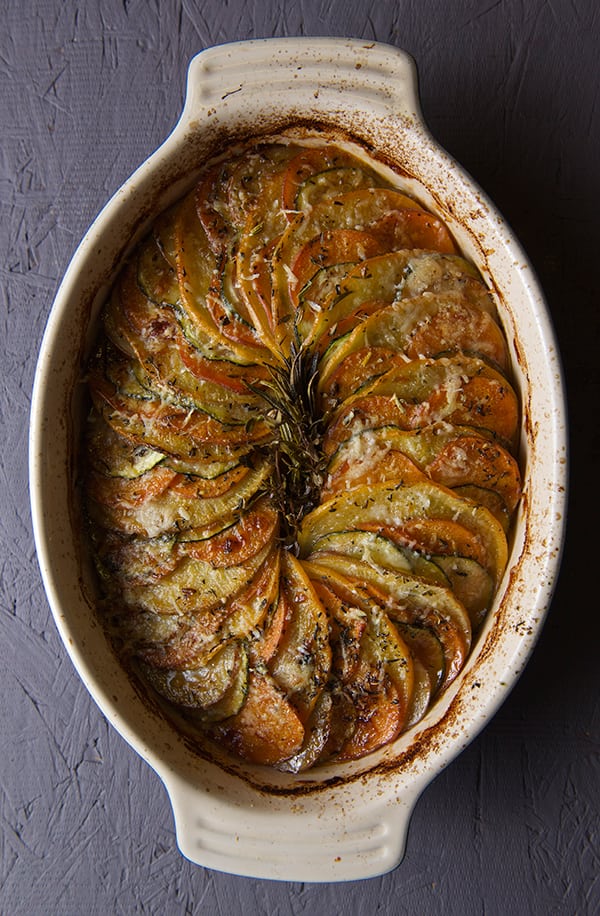
6. Bake for about 25-30 minutes, cover with foil for the first 15 minutes of baking, and remove for the last 10-15 minutes to achive a great gratin crust until golden brown.
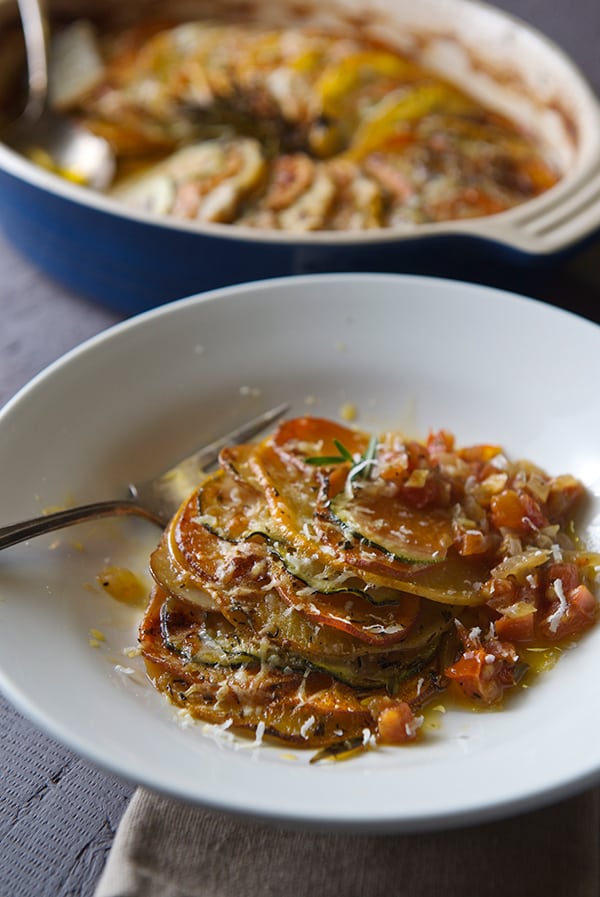
7. Serve warm.
You can serve it as a side dish with fish, chicken or a simple soup and crusty bread for a vegetarian meal.Enjoy!

Root-a-touille~Yes,-more-please!Root-a-touille-warm-roots-gratin~Yes,-more-please!

Enjoy!

View Post or View Comments 10

Roasted Carrot Salad with Hummus Vinaigrette

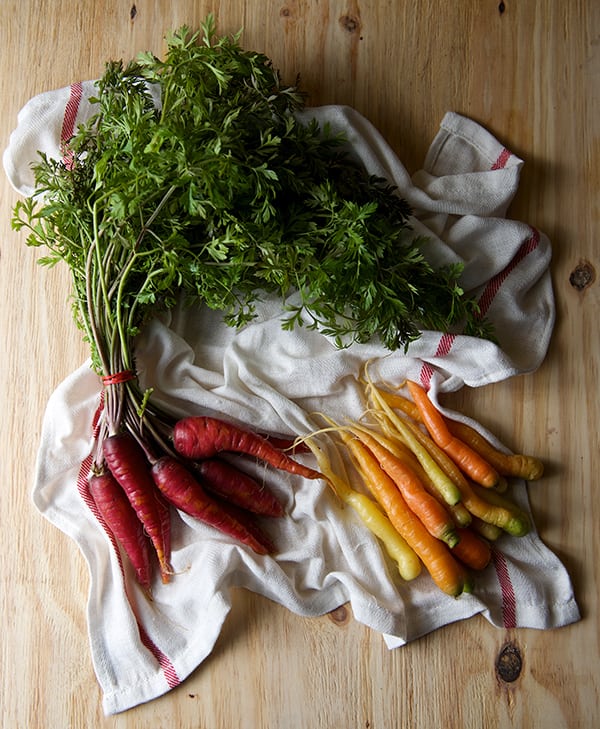
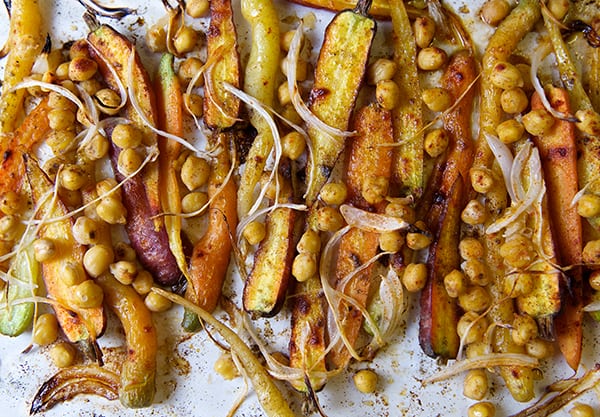
Roasted-Carrot-Salad-with-Hummus-Vinaigrette_red,-orange-and-yellow-Carrots

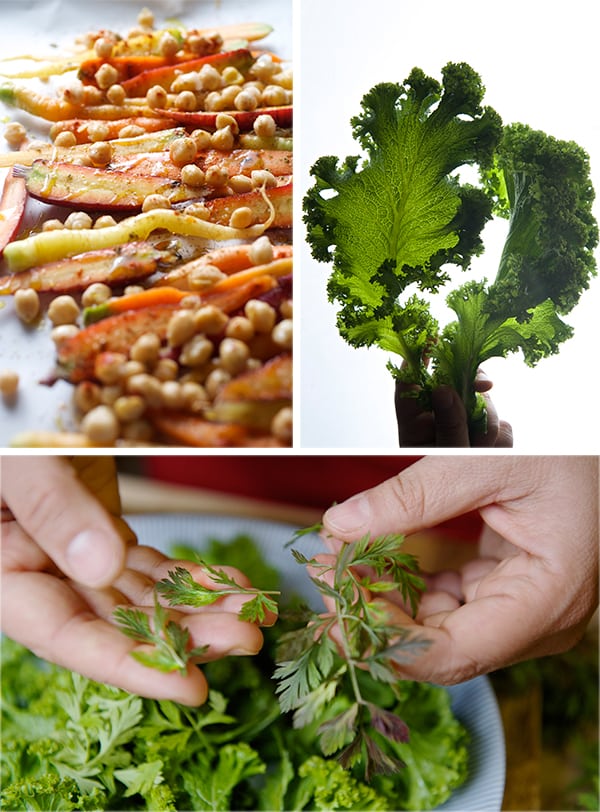
January brings the roots out. Its a fun time at the farmers market a great variety of root vegetables. What caught my attention this time were the carrots. Great variety of colors, from red, orange, yellow and pale cream color. How can you not get inspired from all this colors? So I bought a bunch of the red carrots including the greens. Carrot greens are really tasty and a great source of vitamin C, potassium, calcium and vitamin K and are also high in protein. Flavor-wise they taste a bit peppery and resemble parsley. They are also a great addition to any salad and you can make pesto or tabbouleh with them… in fact!… that might be the next recipe I will attempt. When you are buying carrots and carrot greens, make sure your source is organic. There is a bit of controversy about eating the tops or the carrot skins and other non-organic vegetables. Know your source and enjoy your carrot greens with no worries.

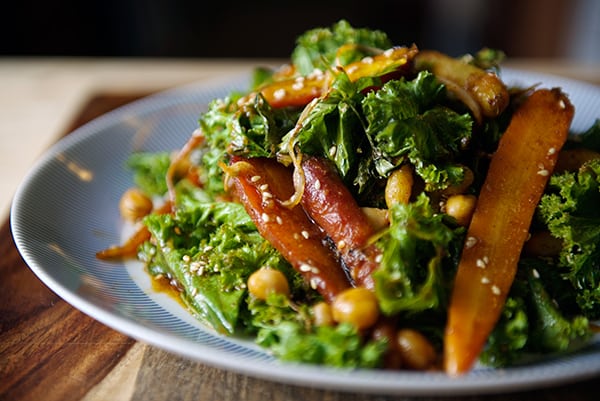
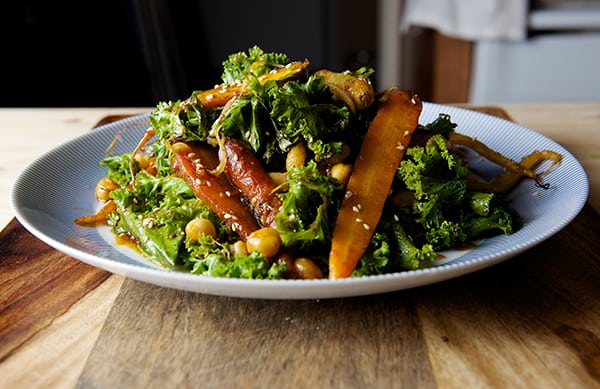
For me, roasting is one of the best ways to bring out the sweet flavor of the carrots. The skin gets caramelized while inside it remains tender and all the ‘carrotness’ flavor is contained in a little cute pencil shape. Delicious! For the vinaigrette I took the same spices you will use to make hummus and I mix them with some sesame oil, extra virgin olive oil, and lemon juice. This Roasted Carrot Salad with Hummus Vinaigrette Its easy to make, and very comforting. Enjoy!

Roasted-Carrot-Salad-with-Hummus-Vinaigrette--carrots,-mustard-greens,-carrot-greens~-Yes,-more-please!Roasted-Carrot-Salad-with-Hummus-Vinaigrette~-warm-salad-for-the-winter

Roasted Carrot Salad with Hummus Vinaigrette

Serves 2 as main course, 4 as side dish or 1 wabbit feast.

2 bunches of carrots red, orange yellow any kind will work.
½ cup carrot tops washed and leafs cut.
4 cups mustard greens washed and hand cut in pieces
½ small onion cut in slivers
½ cup garbanzos cooked.

For the Vinaigrette:

¼ cup sesame oil
¼ cup extra virgin olive oil
¼ cup apple cider vinegar
1 teaspoon agave nectar or honey
The juice and zest of half a lemon
½ teaspoon smoked paprika
½ teaspoon ground cumin
1 tablespoon toasted sesame seeds
2 tablespoons tahini
2-3 grated garlic cloves
2 good pinches of salt
Freshly ground black pepper to taste

Preparation:

Preheat the oven at 450F/230C
Wash and pad dry your carrots upon size, slice carrots in half or quarters for evenly roast.
In a baking sheet lined with parchment paper place the carrots, onions, garbanzos, drizzle a bit of olive oil and sea salt. Roast them for about 10-15 minutes or until caramelized and fork tender.

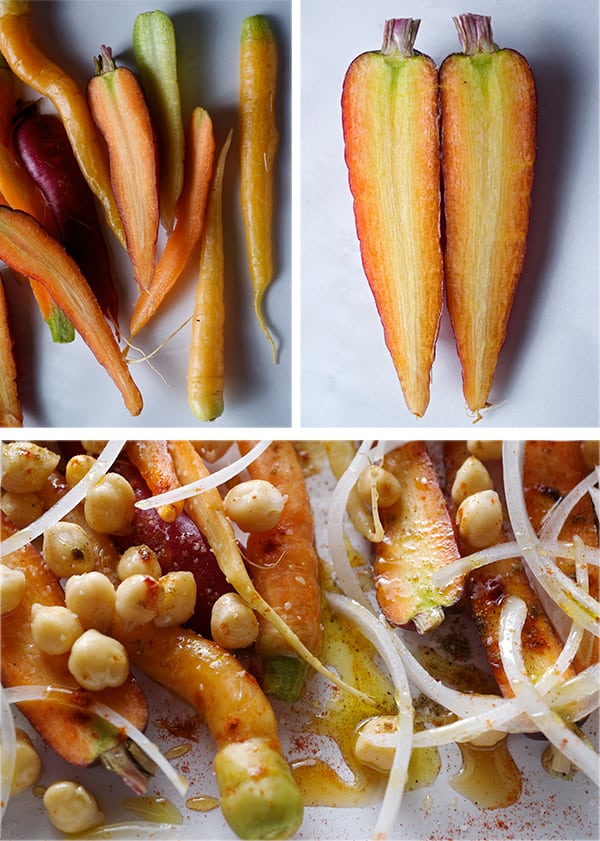
Roasted-Carrot-Salad-with-Hummus-Vinaigrette_red,-orange,-yellow-carrots

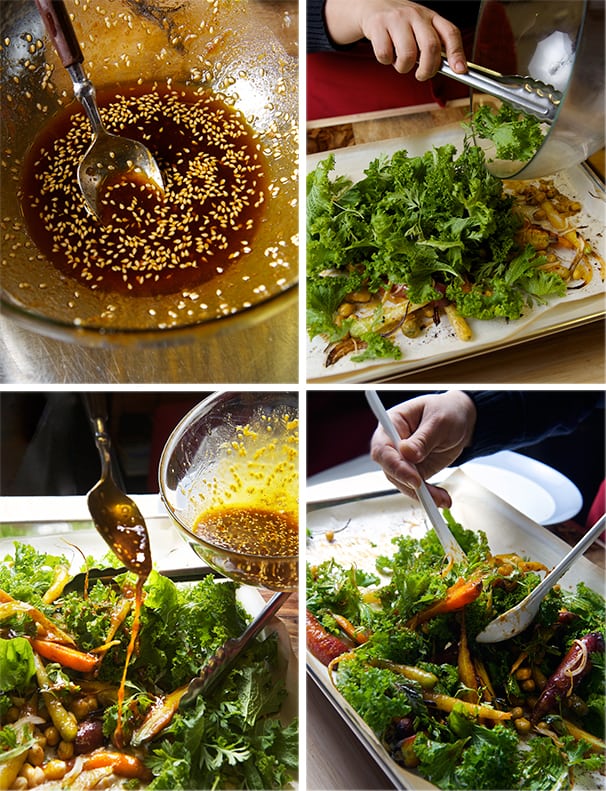
Mean time prepare your vinaigrette by simply combining all the vinaigrette ingredients in a small bowl whisk until well combined. Set aside.

Check on your carrots. If they look done they will show golden tones and edges a bit charred and fork tender.

Roasted-Carrot-Salad-with-Hummus-Vinaigrette_roasted-carrots~Yes,-more-please!

Remove them from the oven and in the same tray toss the mustard greens and half of the vinaigrette, toss and place back in the oven for about 1-2 minutes which will slightly warm up the mustard greens.

Roasted-Carrot-Salad-with-Hummus-Vinaigrette_tossing-the-salad

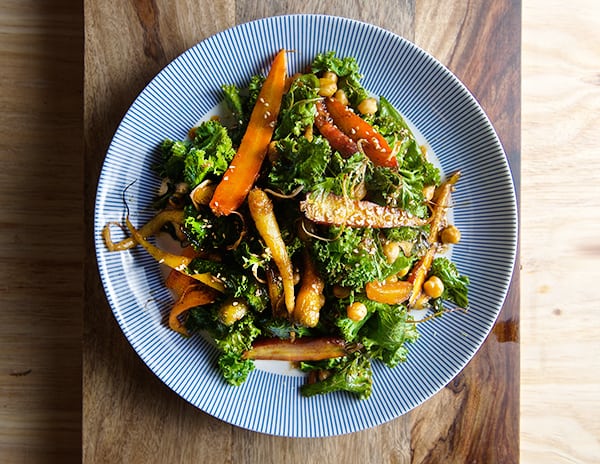
Serve immediately and drizzle the rest of the dressing, adjust salt and pepper, squeeze more lemon, sprinkle a few more toasted sesame seeds if desired.

Serve with toasted pita bread and a dollop of yogurt on the side. Enjoy!

Roasted-Carrot-Salad-with-Hummus-Vinaigrette~ready-to-serve

Roasted-Carrot-Salad-with-Hummus-Vinaigrette-~Yes,-more-please!

Scrumptious!

View Post or View Comments 4

Yogurt Panna Cotta with Pink Grapefruit Cardamom and Pistachios

Pink-Grapefruit-and-Cardamom-Yogurt-Panacotta

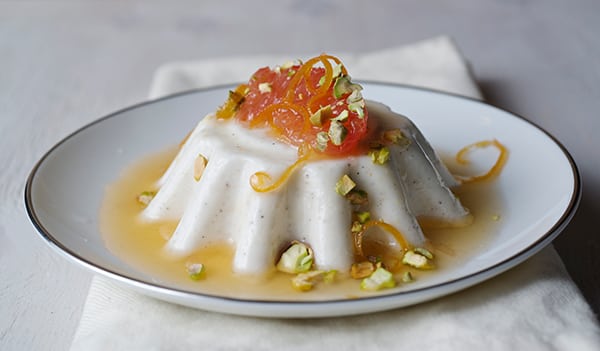
Citrus Season is here! I’ve been juicing, zesting, squeezing all the magic citrus kingdom; oranges, blood oranges, lemons, limes, mandarins, clementines, and Ooh the pink grapefruits! I love pink grapefruits. My mouth waters just to think of the plump and juicy semi-sweet segments. The aromatic smell and the pink flesh color; I love everything about this juicy citrus. Grapefruit it’s undoubtedly one of my favorite fruits.
I wanted to make a very simple citrus dessert using pink grapefruits, based on what I was craving.
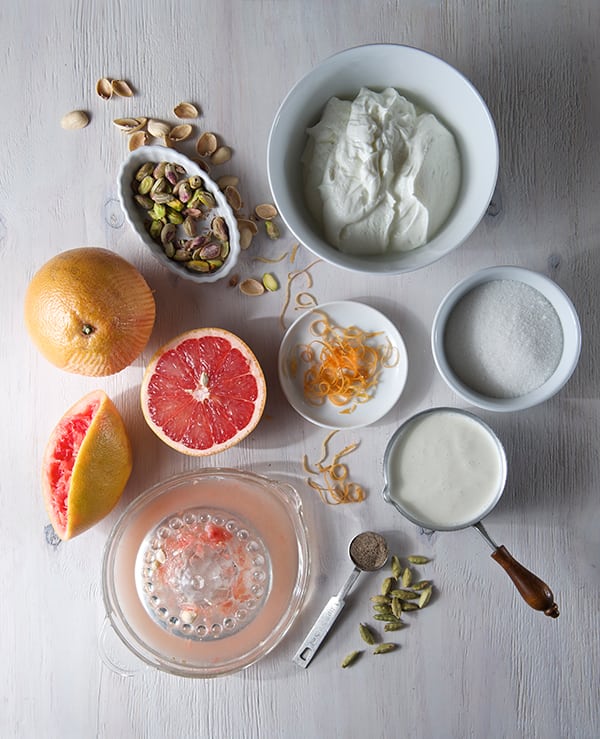
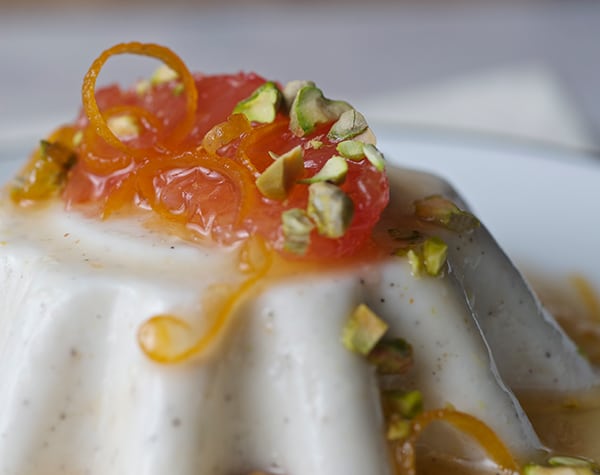
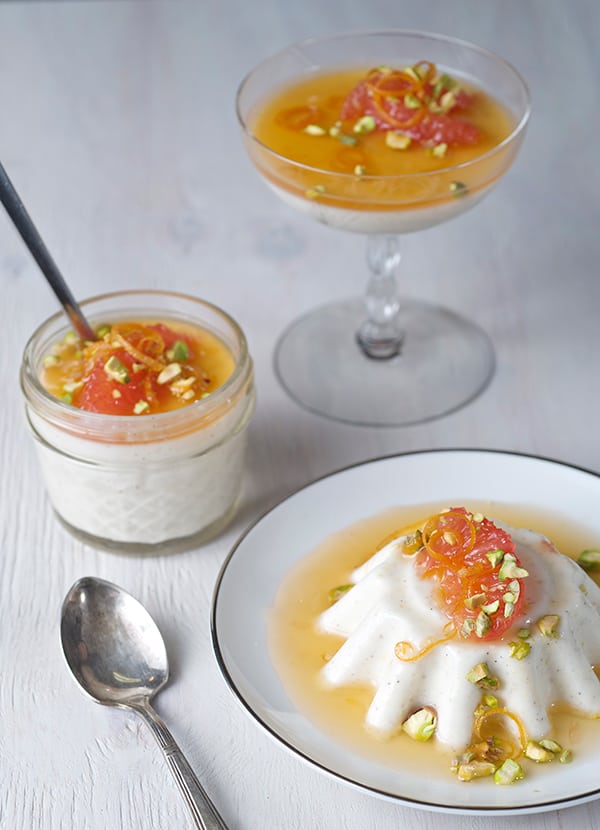
I imagined it to be a creamy and light, but not overly sweet dessert with fresh citrus, loaded floral ,and fragrant notes. Something very light on the palette…What would that be?… Yogurt Panna Cotta with Pink Grapefruit Cardamom and Pistachios.
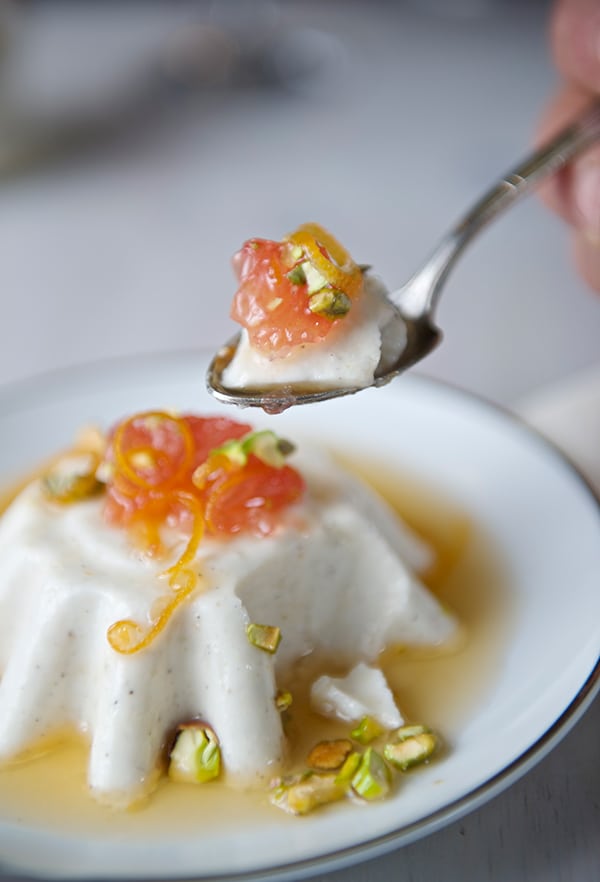
Panna Cotta is an Italian dessert, which means cooked cream. It sounds fancier that what it is, and is way easier to prepare than what you may think so it can make in a flash. In my recipe I added some cardamom in order to bring some floral notes to the creamy mixture. If you are not to crazy about cardamom you can substitute vanilla bean, lavender or thyme. I wanted to showcase the grapefruit segments, juice, and zest, so I made a light syrup to complement the silky creamy yogurt. For crunch and texture I sprinkled some roasted salted pistachios on top as a final touch.
This Panna Cotta is quite a delicious and dainty dessert. Simple ingredients, about 10-15  minutes of preparation and a few hours in the refrigerator and voilà you have a silky, creamy, aromatic, and light to the palette dessert that will satisfy your citrus cravings. Enjoy!

Pink-Grapefruit-and-Cardamom-Yogurt-Panacotta-~-Yes,more-please!

Pink-Grapefruit-and-Cardamom-Yogurt-Panacotta~-'what-ever-fits-your-fancy'

Yogurt Panna Cotta with Pink Grapefruit Cardamom and Pistachios

Makes 6 – 8 ½ cup ramekins, molds, 3 oz mason jars, or “whatever suits you fancy”

2 cups Greek yogurt (2%fat is what I used)
½ cup milk
½ cup Heavy Cream (you can substitute for milk if you want a lighter version)
½ cup sugar (you can replace with agave or honey)
6-8 green cardamom pods
1 teaspoon ground cardamom seeds
1 teaspoon vanilla extract
1 teaspoon fine grapefruit zest
½ cup grapefruit juice
3 teaspoons powder un-flavored gelatine
2-3 medium large PINK grapefruits will yield about 1 cup to 1-1/4 cup grapefruit juice.
¼ cup shelled roasted salted and chopped pistachios.

For the Light syrup:
½ – ¾ cup grapefruit juice
½ cup water
the zest of one grapefruit, long thin curls*
¼ cup agave nectar or sugar.
3-4 green cardamom pods
The segments of 1 whole grapefruit.

Preparing the Grapefruits:

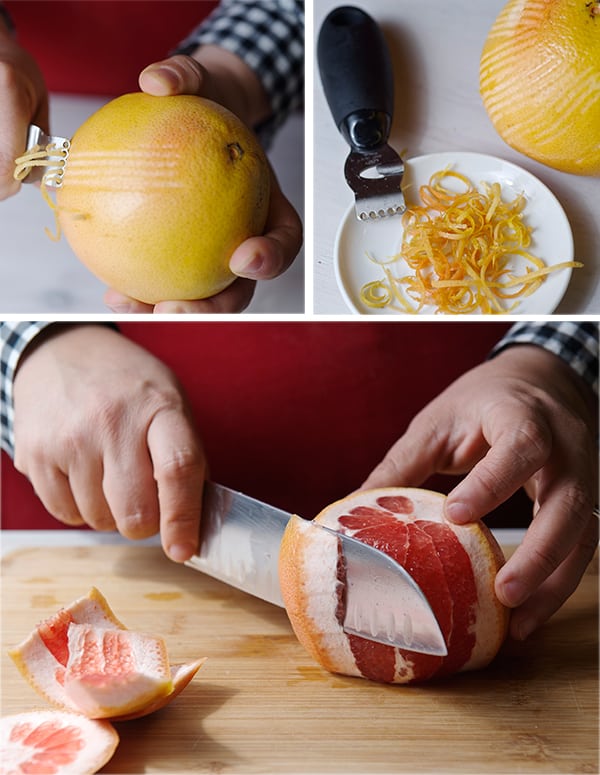
1. Fine zest one grapefruit Long zest one grapefruit.
If you do not have a zester, here is a good one for the fine zest; and for the long thin curls* I recommend this one like in the photo.
2. Juice one or two grapefruits until you have 1-1/4 cup juice.
3. Reserve ½ cup for the  Panna Cotta and  the rest for the syrup.
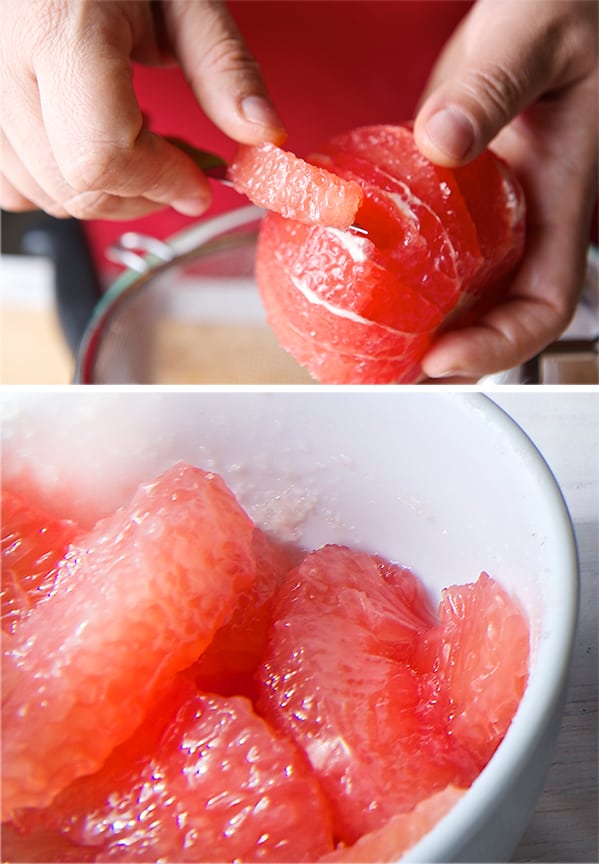
4. Cut the top and the bottom of one grapefruit. Following the curve of the fruit remove all the skin, leaving no skin in the flesh.
5. With a pairing knife working over a bowl to catch the juices slice in between the sections and carefully remove the grapefruit segments. Set them aside. Squeeze the remaining membrane to get all the juices out.

Pink-Grapefruit-and-Cardamom-Yogurt-Panacotta_Zesting,-juicing-the-grapefruit

Pink-Grapefruit-and-Cardamom-Yogurt-Panacotta_grapefruit-segments

Preparing the Panna Cotta:

1. In a medium sauce pan over medium-low heat, warm the milk, heavy cream, yogurt, sugar, cardamom pods and ground cardamom seeds. Warm up gently until sugar dissolves, and the cardamom seeds release their aroma. About 3-5 minutes. Set a side. Add the fine grapefruit zest to the mixture and stir well.

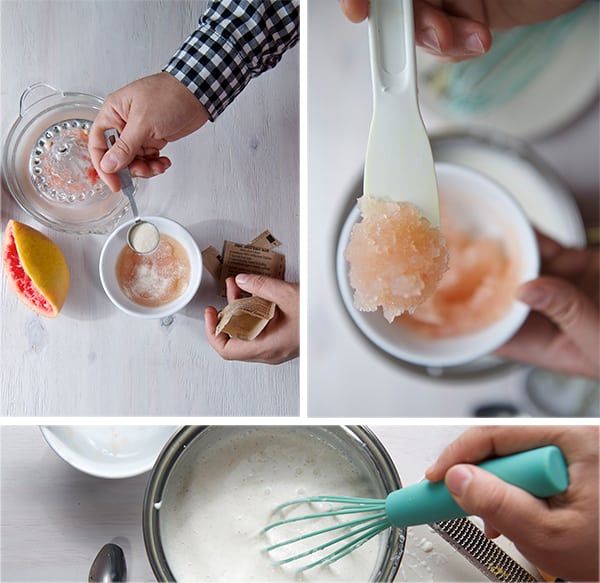
2. In a little bowl add ½ cup of grapefruit juice and sprinkle the gelatin powder let it bloom. The juice will dissolve all the gelatin granules, absorbing all the juices, it will look like a jelly paste.
This paste will be easier to incorporate to the yogurt mixture.

3. With the help of a spoon, remove the cardamom pods from the yogurt mixture, usually they float to the top so its easy to find them. Add the juice-gelatine paste to the yogurt mixture, making sure there  are no lumps.
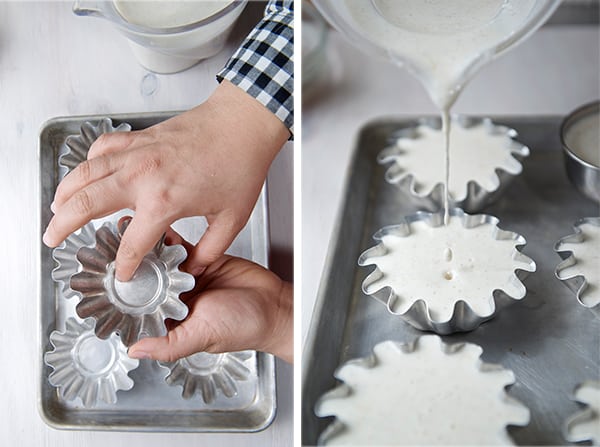
4. If you are using individual metal molds*, lightly grease them with some vegetable oil before pouring. Pour Panna Cotta mixture all the way to top and refrigerate for at least 2 hours, or until firm but tender and springy to the touch.

*( I love these mini tin plated steel  molds. I can use them for baking tarts and because they are metal they chill faster. Or you could use silicon molds like these which will work like a charm! for easy unmolding)

Pink-Grapefruit-and-Cardamom-Yogurt-Panacotta_disolve-gelatin-in-juicePink-Grapefruit-and-Cardamom-Yogurt-Panacotta_pouring-into-molds

Preparing the Syrup:

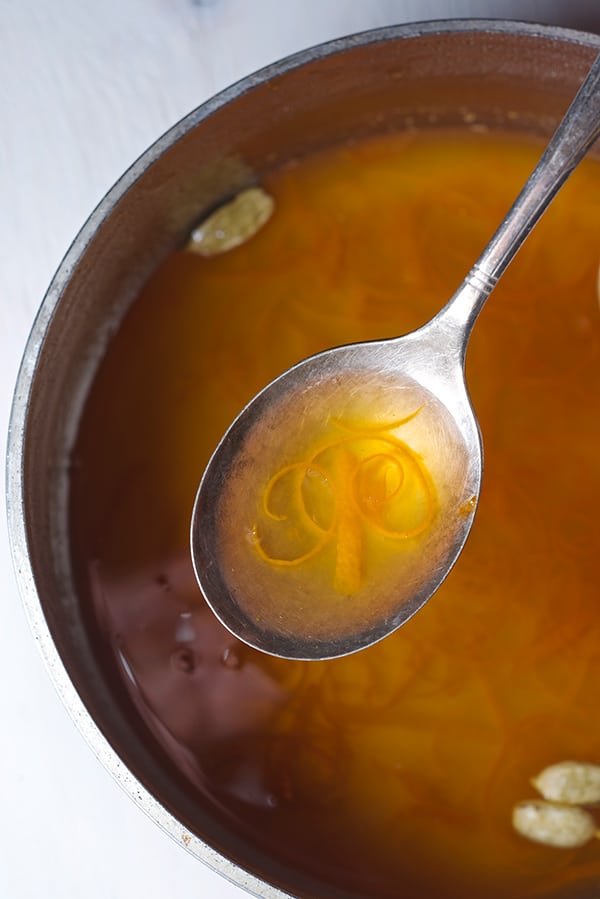
In a medium size pot combine the ¾ cup grapefruit juice, ½ cup water, cardamom pods, grapefruit zest, agave nectar or sugar, whisk until well combined. Bring to a slow simmer and reduce by half.
Remove from heat. Set aside. When the syrup is warm to the touch add the grapefruit segments, and refrigerate. Make sure to bring to room temperature your syrup before serving, it taste better this way.

Yogurt-Panna-Cotta-with-Pink-Grapefruit,-Cardamom-and-Pistachios-Grapefruit-syrup

To Serve:

To un-mold the panna cotta dip the metal molds in warm water for about 1-2 minutes (be careful about not to get water into the mold). Proceed to un-mold the Panna Cotta into an individual serving plate, then turn the mold upside down and tap the back of the mold with a spoon, this will help release the panna cotta. Drizzle the Grapefruit syrup and top it with 1 or 2 grapefruit segments, sprinkle the chopped pistachios. Enjoy.

Pink-Grapefruit-and-Cardamom-Yogurt-Panacotta-~Yes-more-please!-ready-to-serve

Pink-Grapefruit-and-Cardamom-Yogurt-Panacotta-~yes-more-please-bite!

~Creamy and Silky Grapefruit Yogurt Panna Cotta~

View Post or View Comments 5

Privacy Policy Contact Us Yes, more please!