Dessert

Yogurt Panna Cotta with Pink Grapefruit Cardamom and Pistachios

Pink-Grapefruit-and-Cardamom-Yogurt-Panacotta

Citrus Season is here! I’ve been juicing, zesting, squeezing all the magic citrus kingdom; oranges, blood oranges, lemons, limes, mandarins, clementines, and Ooh the pink grapefruits! I love pink grapefruits. My mouth waters just to think of the plump and juicy semi-sweet segments. The aromatic smell and the pink flesh color; I love everything about this juicy citrus. Grapefruit it’s undoubtedly one of my favorite fruits.
I wanted to make a very simple citrus dessert using pink grapefruits, based on what I was craving.
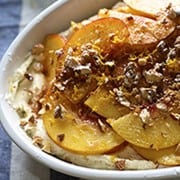
I imagined it to be a creamy and light, but not overly sweet dessert with fresh citrus, loaded floral ,and fragrant notes. Something very light on the palette…What would that be?… Yogurt Panna Cotta with Pink Grapefruit Cardamom and Pistachios.
Panna Cotta is an Italian dessert, which means cooked cream. It sounds fancier that what it is, and is way easier to prepare than what you may think so it can make in a flash. In my recipe I added some cardamom in order to bring some floral notes to the creamy mixture. If you are not to crazy about cardamom you can substitute vanilla bean, lavender or thyme. I wanted to showcase the grapefruit segments, juice, and zest, so I made a light syrup to complement the silky creamy yogurt. For crunch and texture I sprinkled some roasted salted pistachios on top as a final touch.
This Panna Cotta is quite a delicious and dainty dessert. Simple ingredients, about 10-15  minutes of preparation and a few hours in the refrigerator and voilà you have a silky, creamy, aromatic, and light to the palette dessert that will satisfy your citrus cravings. Enjoy!

Pink-Grapefruit-and-Cardamom-Yogurt-Panacotta-~-Yes,more-please!

Pink-Grapefruit-and-Cardamom-Yogurt-Panacotta~-'what-ever-fits-your-fancy'

Yogurt Panna Cotta with Pink Grapefruit Cardamom and Pistachios

Makes 6 – 8 ½ cup ramekins, molds, 3 oz mason jars, or “whatever suits you fancy”

2 cups Greek yogurt (2%fat is what I used)
½ cup milk
½ cup Heavy Cream (you can substitute for milk if you want a lighter version)
½ cup sugar (you can replace with agave or honey)
6-8 green cardamom pods
1 teaspoon ground cardamom seeds
1 teaspoon vanilla extract
1 teaspoon fine grapefruit zest
½ cup grapefruit juice
3 teaspoons powder un-flavored gelatine
2-3 medium large PINK grapefruits will yield about 1 cup to 1-1/4 cup grapefruit juice.
¼ cup shelled roasted salted and chopped pistachios.

For the Light syrup:
½ – ¾ cup grapefruit juice
½ cup water
the zest of one grapefruit, long thin curls*
¼ cup agave nectar or sugar.
3-4 green cardamom pods
The segments of 1 whole grapefruit.

Preparing the Grapefruits:

1. Fine zest one grapefruit Long zest one grapefruit.
If you do not have a zester, here is a good one for the fine zest; and for the long thin curls* I recommend this one like in the photo.
2. Juice one or two grapefruits until you have 1-1/4 cup juice.
3. Reserve ½ cup for the  Panna Cotta and  the rest for the syrup.
4. Cut the top and the bottom of one grapefruit. Following the curve of the fruit remove all the skin, leaving no skin in the flesh.
5. With a pairing knife working over a bowl to catch the juices slice in between the sections and carefully remove the grapefruit segments. Set them aside. Squeeze the remaining membrane to get all the juices out.

Pink-Grapefruit-and-Cardamom-Yogurt-Panacotta_Zesting,-juicing-the-grapefruit

Pink-Grapefruit-and-Cardamom-Yogurt-Panacotta_grapefruit-segments

Preparing the Panna Cotta:

1. In a medium sauce pan over medium-low heat, warm the milk, heavy cream, yogurt, sugar, cardamom pods and ground cardamom seeds. Warm up gently until sugar dissolves, and the cardamom seeds release their aroma. About 3-5 minutes. Set a side. Add the fine grapefruit zest to the mixture and stir well.

2. In a little bowl add ½ cup of grapefruit juice and sprinkle the gelatin powder let it bloom. The juice will dissolve all the gelatin granules, absorbing all the juices, it will look like a jelly paste.
This paste will be easier to incorporate to the yogurt mixture.

3. With the help of a spoon, remove the cardamom pods from the yogurt mixture, usually they float to the top so its easy to find them. Add the juice-gelatine paste to the yogurt mixture, making sure there  are no lumps.
4. If you are using individual metal molds*, lightly grease them with some vegetable oil before pouring. Pour Panna Cotta mixture all the way to top and refrigerate for at least 2 hours, or until firm but tender and springy to the touch.

*( I love these mini tin plated steel  molds. I can use them for baking tarts and because they are metal they chill faster. Or you could use silicon molds like these which will work like a charm! for easy unmolding)

Pink-Grapefruit-and-Cardamom-Yogurt-Panacotta_disolve-gelatin-in-juicePink-Grapefruit-and-Cardamom-Yogurt-Panacotta_pouring-into-molds

Preparing the Syrup:

In a medium size pot combine the ¾ cup grapefruit juice, ½ cup water, cardamom pods, grapefruit zest, agave nectar or sugar, whisk until well combined. Bring to a slow simmer and reduce by half.
Remove from heat. Set aside. When the syrup is warm to the touch add the grapefruit segments, and refrigerate. Make sure to bring to room temperature your syrup before serving, it taste better this way.

Yogurt-Panna-Cotta-with-Pink-Grapefruit,-Cardamom-and-Pistachios-Grapefruit-syrup

To Serve:

To un-mold the panna cotta dip the metal molds in warm water for about 1-2 minutes (be careful about not to get water into the mold). Proceed to un-mold the Panna Cotta into an individual serving plate, then turn the mold upside down and tap the back of the mold with a spoon, this will help release the panna cotta. Drizzle the Grapefruit syrup and top it with 1 or 2 grapefruit segments, sprinkle the chopped pistachios. Enjoy.

Pink-Grapefruit-and-Cardamom-Yogurt-Panacotta-~Yes-more-please!-ready-to-serve

Pink-Grapefruit-and-Cardamom-Yogurt-Panacotta-~yes-more-please-bite!

~Creamy and Silky Grapefruit Yogurt Panna Cotta~

View Post or View Comments 5

Thanksgiving Crostatas Pecan Apple & Pumpkin-Yam

Thanksgiving-Crostata_ingredients

I wish you could have smelled my kitchen the day I baked these crostatas, it was intoxicating!…
A cloud of buttery pecan, apple, cinnamon and allspice in the air.
Crostata, my absolutely favorite pastry. Let me tell you why…

During my sweet tooth life I’ve tried many pies: the open pies, the double crust, the lattice, you name it. I always felt there was too much sugary filling compared to the amount of crust. The pie ratio in most of the cases does not work for me.

The day I tried my first crostata I was madly in love. It was an apple crostata, in the town of apples Julian in California. It had the perfect ratio between crust and filling and the crust was golden brown , flaky and crumbly, tender, and buttery. The sensible single layer filling had a bubbly, slightly crusty caramelized top. Inside it was juicy and fruity, and I was lost. Yet, I felt illuminated, just like the Greeks when they discovered “the golden ratio”. I prefer to call it Crostata like the Italians, over Gallette like the French, and of course the less romantic name free form pie….any way you name it, it’s always so simply and utterly delicious.

What I call“The Crostata Golden Ratio” is that perfect amount of crust and filling, allowing you to savor the buttery flaky crust and the sensible layer of fruit topped with some sugar allowing the crust to stay crispy and flaky in every bite. The fruit acts like the butter; slightly sweet and a bit tart. Suddenly, all your tastebuds are  awake; sweet, tart, creamy, crusty , buttery flaky…even days after its made, you can warm it in a toaster oven and it feels like you just baked it.

Now, if we talk about appearance, I love crostata with its rustic and honest look. It’s not decorated and definitely you can apply some decor, however I think the beauty comes from its baked right ingredients, the simple look is what makes it so attractive to eat and to prepare, no fuss, it is what it is.

I serve these crostatas with a cinnamon whipped cream and a honey-balsamic vinegar reduction, I love the tangy-sweet note that the reduction brings to the crostata, a caramel sauce will go great too….

Thanksgiving Crostatas will make a fabulous and sweet end to your dinner.
~ Happy Thanksgiving ~ from Ian and Mariana.

Thanksgiving-Crostatas_Pecan,-apple-and-Pumpkin-Yam

Thanksgiving Crostatas: Pecan, Apple & Pumpkin-Yam

Makes 3 – 7 ” x 11″rectangular Crostatas. Serves 24 to 18 slices.

For the Crust:

3-3/4 cups of unbleached-all purpose flour
3 sticks of butter
1 tablespoon of sugar
1 pinch salt
3/4-1 cup Ice cold water

1 egg + 1 tablespoon water for egg wash
1 cup of turbinado sugar to top the edges of the crust.

Directions:

Measure all your ingredients. Place all the dry ingredients in a bowl and mix. Place the bowl in the freezer. Meantime cut your cold butter, and iced water ready to measure. Remove the bowl of dry ingredients from freezer and add the butter. With a pastry blender incorporate the butter and flour until the mixture resembles a coarse meal, and the butter pieces are small like the size of a pea. Slowly add the cold water and carefully, with your hands, form a dough that just holds together. Be careful not to over work the dough. 
Once that the dough holds together. Shape it into a rectangle about 9”x6” and then divide that rectangle into 3 pieces (see picture below) Wrap each rectangle with plastic wrap and refrigerate for at least 1 hour; you can rush it by placing into freezer for 20-25 minutes.

Thanksgiving-Crostatas_The-crustThanksgiving-Crostatas_dividing-the-crust

~ R o l l i n g ~

On a clean work surface, dusted with flour, unwrap the dough let sit for a couple of minutes and then roll the dough into a 13”x 9” rectangle and about 1/8″and 1/4″thin.
Rolling little by little, rotating the rectangular, for even thickness (see picture below).

Thanksgiving-Crostata_rolling-the-crust.. roll it!Thanksgiving-Crostata_rolling-the-crust_one-sheet

~  F i l l i n g s  ~

Thanksgiving-Crostatas_fillings


Pumpkin- Yam Crostata

Thanksgiving-Crostata_Pumpkin-yam-slice

Filling:

1 cup hefty pumpkin purée.
1 egg
1 tablespoon of heavy cream
¼ cup brown sugar
¼ teaspoon allspice
¼ teaspoon cinnamon
1 tablespoon of heavy cream
pinch of salt
2-3 small Yams or sweet potatoes.
3 Tablespoon butter cut into little squares to top the yams.
½ cup turbinado sugar
extra cinnamon for dusting

Directions:

In a bowl, mix the pumpkin pure, egg, heavy cream, sugar and spices and salt until well combined.
Yams: steamed, peel and slice into ½ “ slices. Set aside room temperature. Preheat Oven at 400. In a 1/4 sheet pan lined with parchment paper, place the 9″x13″ crust spread the layer of pumpkin mixture leaving a 1.5” inch margin around the rectangle to be folded. arrange the slices of yam and sprinkle with the little squares of butter, turbinado sugar, and dust with some cinnamon. Fold the sides and fold the corners into a triangle, (see picture below) Egg wash and sprinkle the turbinado sugar all around the crust and a little over the filling. Bake for 25-30 minutes. Until golden brown.

Thanksgiving-Crostatas_Pumpkin-YamThanksgiving-Crostatas-Pumpkin-Yam


Apple Crostata

Thanksgiving-Crostata_apple-slice

Filling:

2 granny smith apples peeled and sliced.
1 Honey suckle or pink lady peeled and sliced.
2 tablespoons butter
1/4 cup turbinado sugar (taste your apples! if they are two sweet you might need less sugar, if they are to sour, you need to add a bit more!)
1 teaspoon cinnamon
½ teaspoon nutmeg freshly grated.
the zest of half a lemon about ½ teaspoon.
1 teaspoon lemon juice
Smidge of salt

Directions:

In a sauté pan melt the butter, add the sliced apples, brown sugar, cinnamon, nutmeg, lemon zest and juice, salt. Saute until the apples are slightly tender and the liquids reduce. Remove from stove and cool down filling before use. Preheat Oven at 400. In a 1/4 sheet pan lined with parchment paper, place the 9″x13″ crust spread the saute apples in an evenly layer  leaving a 1.5” inch margin around the rectangle to be folded. Fold the sides and fold the corners into a triangle, (see picture below) Egg wash and sprinkle the turbinado sugar all around the crust and a little over the filling. Bake for 25-30 minutes. Until golden brown.

Thanksgiving-Crostatas_apple-assambling-crostataThanksgiving-Crostatas-Apple


Pecan Crostata

Thanksgiving-Crostata_Pecan-slice

Filling:

1 cup pecans halves roasted
½ cup fine chopped pecans
8 oz cream cheese softened
1 egg
1 teaspoon vanilla
1 pinch of salt
1 tablespoon sugar
2 tablespoons brown sugar

Directions:

In a mixing bowl combine cream cheese, chopped pecans, egg, vanilla and one tablespoon of sugar.
Toast the pecans and quick sauté them using a little butter and 2 tablespoons of brown sugar, set aside and let them cool before using. Preheat Oven at 400. In a 1/4 sheet pan lined with parchment paper, place the 9″x13″ crust and spread the cream cheese filling leaving a 1.5” inch margin around the rectangle to be folded. Top with the sautéed pecans. Fold the sides and fold the corners into a triangle, (see picture below) Egg wash and sprinkle the turbinado sugar all around the crust and a little over the filling. Bake for 25-30 minutes. Until golden brown.

Thanksgiving-Crostatas_pecan-assambling-the-crostataThanksgiving-Crostata-Pecan

~ T o p p i n g s ~

Thanksgiving_Crostatas_Toppings

Cinnamon Whipped cream:

½ cup heavy whipping cream
dash of vanilla extract
1 tablespoon powder sugar
1/2 teaspoon cinnamon

In a clean chilled metal bowl, whisk all ingredients until it forms soft peaks.
Keep refrigerated until serving.

Honey-Balsamic reduction:

½ cup balsamic vinegar
2 tablespoons honey

In a small sauce pan combine honey and balsamic bring it to a slow simmer, check for desired consistency by running your finger on the back of the spoon. Serve warm.

Thanksgiving-Crostata_Balsamic-Honey

~ D r i z z l e ~

Thanksgiving-Crostata_beauty-close-up_vertical_01

Happy Thanksgiving…ENJOY!!!

View Post or View Comments 6

Ricotta Cake & Honey-Lemon-Thyme Glaze

Ricotta-Cake-with-honey-lemon-thyme-glaze~Yes-more-please!

It is cakes like this that make me happy…really simple cakes with a light crumb and buttery flavor. It’s so basic and cozy that hits you straight in your heart.
The flavors in this buttery Ricotta cake stand alone and the honey and lemon make a good balance of sweetness;  the thyme adds a little herbal note and enhance the lemon zest in the batter. This cake is pure comfort and simplicity.

Honey Lemon and Thyme it ‘s one of my favorite glazes for this type of cakes, there are many other good glaze flavor combinations that I will recommend like Honey and rosemary, lavender, orange, camomile you name it, or just dust it with a little confectioners sugar. It’s a cloud of buttery and light cheesy crumble goodness.

You can make this cake in the morning for a nice breakfast or brunch. Or it can be part of your bake-goods repertoire for Thanksgiving….why not? Give it a try.

This Ricotta Cake & Honey-Lemon-Thyme glaze is great with a cup of tea in a rainy afternoon, or a glass of milk for the little ones.
You can add some fresh fruit or whipped cream on the side to complement this cake… enjoy!

Ricotta-Cake-with-honey-lemon-thyme-glaze_honey-lemon-thyme-glazeRicotta-Cake-with-honey-lemon-thyme-glaze_Ricotta-Cake-with-honey-lemon-thyme-glaze_texture-and-glaze

Ricotta Cake & Honey-Lemon-Thyme Glaze

Serves 12-14

2 cups All purpose flour
2 tablespoons Baking Powder
1 pinch of salt
½ pound ricotta cheese (strain some of the liquid with a cheese cloth or fine sieve)
2 cups sugar
4 Large eggs
1 cup whole milk – room temperature.
8 oz / butter melted
1 teaspoon lemon zest

For the Glaze:

¼ cup Honey
the juice of half a lemon
3-4 thyme sprigs and a little more for garnish.

In a small pot, gently warm the honey lemon juice and thyme once that the honey  resembles a light syrup. Remove from heat and let it cool down. ( do not let the honey boil or to form small bubbles around the pot)

Directions:

Preheat Oven at 350 F /
1. Grease a 10” x 3” round aluminum cake pan (use a light color pan for best results).
2. In a medium size bowl, sift the flour, salt and baking powder.
3. In a large bowl mix sugar, ricotta, eggs, and melted butter mix well.
4. Start alternating flour and milk in 3 additions. Until well incorporated, do not over mix.

Ricotta-Cake-with-honey-lemon-thyme-glaze_mixing-steps

5. Pour the batter into your prepared pan and bake for about 25-30 minutes or until a skewer comes out clean or with a few little crumbs.
6. Cool on a rack for 15-20 minutes and unmold.
7. Place the cake on a plater and poke the top of the cake with a fork or skewer.
8. Once the cake is cool, with a pastry brush, apply the honey- lemon-thyme glaze .
9. Garnish with a few more sprigs of thyme on the side and sprinkle some leaves on top.

Ricotta-Cake-with-honey-lemon-thyme-glaze_poking-and-glazing

Ricotta-Cake-with-honey-lemon-thyme-glaze_slice-missing!

Ricotta-Cake-with-honey-lemon-thyme-glaze_slice

 Ricotta Cake & Honey-Lemon-Thyme Glaze

Enjoy!


View Post or View Comments 7

Devil’s Chocolate and Ganache Cake…get happy!

Devil's Chocolate and Ganache Cake_close up delight

Chocolate, One of the most beautiful words in the world!… Just to say the word makes me happy, and reminds me of the Judy Garland song… when I’m making this Devil’s Chocolate and Ganache Cake. I always think positive thoughts. When it comes out of the oven, Hallelujah!.. get happy… forget your troubles…you better chase all you cares away… Oh yeah! That’s how happy this chocolate cake makes me. And well what else is there to say about the comfort that brings you when you bake your own cake?. The whole house smells like warm endorphins that activate your happy brain cells.
It’s a simple batter. You’ll need one bowl or two, and the best quality butter and cocoa powder you can get. The better your ingredients, the better results you will get.
That’s one of the keys when you are baking: always use good quality ingredients (from the eggs to the vanilla extract). If you care about them, it will be fantastic!. All ingredients when you are baking MUST be at room temperature. Read the recipe twice. Measure everything correctly using measuring cups for dry ingredients and a larger liquid measuring cup for wet ingredients. Get in the baking groove, nice music, enjoy yourself…
Here is some music link that will set your baking mood…  http://www.youtube.com/watch?v=VGk3tY4yP7k

Devil's Chocolate and Ganache Cake_Coseup slice

Devil’s Dark Chocolate Cake… get happy!

Makes 1 -12 cup bundt cake

4 ounces bittersweet chocolate, chopped *
½ cup Vegetable Oil
1/2 cup melted butter
1 cup sugar
2 large eggs
2 cups unbleached all-purpose flour
½ – ¾ cup dutch Process cocoa Powder (Valrhona, Cocoa Barry)
1 tablespoon baking soda
¾ teaspoon salt
1 cup strong-brewed coffee -not hot just warm.(I used Medaglia D’Oro instant espresso powder)
1 cup of butter milk ( or 1 cup of whole milk + 1 tablespoon of vinegar or lemon juice)
1 teaspoon Vanilla extract

Method:

Preheat the oven 350F / 176C
Butter and dust with cocoa a 12 cup bundt pan.
Melt the bitter sweet chocolate, using a double boiler on low heat, stirring constantly. Scrape the melted chocolate into a medium size bowl and let cool slightly.
Whisk in the melted butter, oil, and sugar until smooth. Add eggs one at a time and mix.
In a small bowl, Mix the dry ingredients, flour, cocoa powder, baking soda, salt.
Start by combining half of the dry ingredients to the chocolate mixture along with ½ cup of the coffee and ½ a cup of the butter milk. Whisk until smooth. Add the remaining dry ingredients, coffee and butter milk and whisk. until smooth.
Poor the batter into the prepared pan and bake in the lower third of the oven for about 45 minutes or until a toothpick inserted in the center of the cake comes out with a few moist crumbs attached. Remove from oven and cool on a rack for about 10-15 minutes, then turn it out and let it cool completely.

Devil's Chocolate and Ganache Cake_baking chocolate

* My favorites: 70% Cacao Bittersweet Scharffen Berger, 72% bitter-sweet Michael Cluizel, El Rey Venezuelan chocolate, 70%- 80% Callebaut.

Chocolate Ganache:

1 cup heavy cream
10 oz. Semi-sweet or bitter-sweet chocolate finely chopped.
1 tablespoon of butter
1 tablespoon of agave nectar
1 tablespoon of brandy or cognac or any liquor of your preference. ( omit this ingredient if cooking for kids)

Method:

In a small pot heat the heavy cream until small bubbles form around the pan ( do not let it boil)
Place the chopped chocolate in a medium size bowl, pour the hot heavy cream over the chocolate let it stand for 3-4 minutes so the chocolate warms through. Whisk gently until the mixture is smooth, add butter mix until is melted, add the liquor mix. Add the agave nectar for a shiny finish.

Devil's Chocolate and Ganache Cake_How to make Ganache

Spoon the Ganache over the cake… save extra for plating.. for when you want a little more …

Devil's Chocolate and Ganache Cake_spreading ganache
Sprinkle cayenne pepper or cinnamon for a little  accent on the cake…

Devil's Chocolate and Ganache Cake_Cayenne

Devil's Chocolate and Ganache Cake_ with cayenne

Get happy, Chocolate cake!

Music Pairing:Judy Garland “Get Happy”

View Post or View Comments 6

Raspberry Pistachio Tart

Raspberry Pistachio Tart~Yes, more please!

I know you might be asking why Raspberries in September?…. I have no Idea! Usually berry season is from June to mid August… I was planning to get some stone fruit… and what grabbed me were these ruby-red fruits. I guess this will be the last post to say good-bye to the summer and what a better farewell that a Raspberry Pistachio Tart.  Here in Texas its still warm and we are on the high of 90F… but we are finally starting to experience some weather changes.
I’m ready to welcome to the baking season!!! Yes, gear up those ovens because we will bake… and we will bake a LOT!… in the meantime, just to warm up and dust off the oven I made this tart as my farewell summer treat. Fresh raspberries, buttery pistachio crust, a layer of hazelnut cream, vanilla bean pastry cream .… *sigh*
I have no further explanation on this simple and delicious dessert, you can make the components one or even two days in advance and assemble an hour before you want to serve it… It is one simple and delightful sweet treat…

Raspberry Pistachio Tart-ingredients

Raspberry Pistachio Tart

Serves 10-12

3-4 cups chilled pastry cream (recipe follows)
1 Tart Shell cooked and room temperature (see recipe follows)
½ cup of nutella warmed up.
2-3 cups of fresh raspberries
¼ cup Extra toasted pistachios and powder sugar to dust.

For the Pastry cream:

2 cups of whole Milk
½ cup sugar
½ Vanilla Bean paste or Vanilla Bean pods.
5 egg yolks
¼ cup cornstarch
2 tablespoons of unsalted cold butter cut into small squares.
pinch of salt

Directions:

In a small sauce pan , combine the milk, ¼ cup of sugar , and pinch of salt. Cook until the mixture became to a simmer or small bubbles form around the edge of the pan. Set a side do not let it come to a boil.
In a separate bowl, whisk the egg yolks, ¼ sugar and cornstarch until well combined. Slowly and while whisking at all times temper the egg yolks by adding about 1/3 cup of the hot milk-mixture, once incorporated continue adding the rest of the hot milk. Once is all incorporated, Pour mixture back in the sauce pan and cook on medium heat for about 8-10 more minutes, whisking constantly until starts to thicken. With a cooking thermometer, make sure the pastry cream riches 160 F.
Transfer to a bowl and keep whisking to cool down the mixture and start adding the cold butter one square at a time. Whisking for about 5- 8 minutes until the pastry cream cools down. Cover the bowl with plastic wrap making sure the plastic touches the pastry cream, this will ensure the formation of a skin. Refrigerate until well chilled at least 2-4 hours. Works best to chill overnight. When ready to use, just whisk thoroughly by hand to smooth consistency.

For the Tart Shell :

1 ½ sticks of unsalted butter room temperature
½ cup powder sugar
2 large egg yolks
1 ¼ cup un-bleached all-purpose flour
½ cup unsalted shelled and finely ground pistachios. ( You can use Almonds, pecans any nut of your preference.)
1/8 teaspoon salt
2 teaspoons of heavy cream
¼ teaspoon almond extract
In a large bowl combine the butter and powder sugar until well combined and creamy. (you can use a hand mixer, an electric mixer fitted with the paddle attachment, or a wood spoon and your strong-arm!). Add egg yolks and almond extract mix for about a minute until well incorporated. (Scrape the side of the bowl to get everything evenly combined) Start adding the flour 1/3 at the time. Mix gently, add the ground pistachios, salt, and cream. Mix just enough until all the flour is incorporated maybe 1 minute or less. The less you mix the more tender the crumb in your tart. Place all the dough onto a piece of plastic wrap, flatten to form a 1 inch tick block the shape of your tart mold round, square or rectangular, this step will help you later on when is time to roll the dough. Wrap tight, and refrigerate at least 1 hour, is better over time.

Directions:

Preheat the oven at 375 F/ 190 C
Lightly flour your work surface, roll out the dough to about ¼- inch thickness. And fit it carefully into your pan. Use your fingers to slightly press the dough into the edges and with a paring knife cut the edges. ( see picture below). Line the tart dough with a piece of parchment paper and pie weights* to bake and Place the pan into a baking sheet pan lined with parchment paper.
Bake for about 15 minutes. Remove the paper and the pie weights and bake for about 8-10 more minutes or until golden brown. If the edges are getting to toasty cover them with foil and keep baking until the center is golden brown.
Lets talk about pie weights, they are usually used for what is called “blind baking” which is a technique used to bake these types of crusts so as to prevent them from shrinking and puffing up also to bake the crust more evenly. You can buy pie weights at any baking-supply store, or use any type of beans or rice that you are gonna designate their use for only this purpose. I used old nuts in a shell, the house smells great when I use them…

Raspberry Pistachio Tart_How to make a tart crust

Raspberry Pistachio Tart_Unshell-Tart


Assembling the tart:

Evenly spread the warm Nutella into the bottom of the tart shell. Spoon the pastry cream and spread in an even layer. Top and garnish with fresh raspberries, pistachios and dust with powder sugar.
Refrigerate for 1 hour. Serve cold enjoy!


Nutella layer…

Raspberry Pistachio Tart_Nutella-Layer

Pastry cream layer…

Raspberry Pistachio Tart_Pastry-cream

Raspberry layer…

Raspberry Pistachio Tart_fresh raspberries, pistachios the final touch!

Powder sugar dust…

Raspberry Pistachio Tart_dusting powder-sugar

Raspberry Pistachio Tart_summer dessert for two

ENJOY!

Variations…

I used a 12 “x 16” rectangular pan with a removable bottom it makes the un-molding so easy.
You also can make this recipe into an individual 4” tarts it will make around 8-10, or a 12” round or 2 -8” round tarts
Pastry cream: you can add lemon or orange zest.
For the crust: You can interchange any nut you like, or omit it and replace the 3 ½ cup of nuts for flour.
For the spread: If you don’t like Nutella (I believe there’s nobody on the face of earth that does not likes it) replace with melted chocolate of your preference, dark or milk .

Vegan version…

Replace Butter for 2/3 cup of earth balance spread or vegan margarine. Replace heavy cream with almond milk or coconut butter.
Replace pastry cream for soybean yogurt adding vanilla paste and some agave nectar.
Replace the Nutella, for melted vegan chocolate.

View Post or View Comments 2

Yogurt Mini Popsicles

Yogurt Mini Popsicles ~ Yes, more please!

The ultimate Summer treat, yogurt mini popsicles, I have seen the fever of these cuties and I did not imagine why?…Well let me tell you, now that I have made them… I’m crazy for them! It is awesome what 4 ingredients can do for you. Greek yogurt, agave nectar (I substitute agave instead of sugar because its healthier for you and the little ones too), fresh fruit, herbs or spices.

Its so easy to make, you’re gonna laugh about it. You can get creative with the flavors and the creamy yogurt because it is the perfect canvas to showcase any fresh seasonal fruit. I already have a sinful list of the next combinations to try.

This popsicles are creamy and not too sweet, the texture is a little different from store bought. They are a bit more Icy due to the lack of extra fat and overdose of sugar; But thats exactly the kind of ice cream I crave in the summer; light and not too sweet. I combined different herbs with the fruits, lemony thyme with fresh strawberry puree, lavender with Texas peaches and pineapple coconut with rosemary. The combination of fruit and herbs give a little extra flavor.

If you are concerned for your kids or not too crazy about the herbs in your popsicle just omit them. (Ian was not to crazy about me adding rosemary to the pineapple and coconut ones, but he loved the peach and lavender…go figure!).

The other part I love about these mini popsicles is that you don’t have to buy fancy equipment to make them, you can get any small plastic or paper dixie cups and wood sticks. They are the perfect size for a snack or dessert.

Yogurth Mini Popsicles ~ Yes, more Please!Yogurth Mini Popsicles ~ Yes, more Please!

Yogurt Mini Popsicles

Strawberry & Thyme

Makes 6

2 cups of fresh strawberries pureed.
8 tablespoons Honey (agave nectar, sugar or mascabado)
1-½ cup of Greek yogurt plain. I used Fage.
2 sprigs of thyme

Method:

Mix the Greek yogurt and 6 tablespoons of honey. In a blender, puree 2 cups of strawberries and 2 tablespoons of honey.  Remember to taste your fruit first, you might need less or more honey depending on the natural sweetness of the fruit. Place all the dixie cups in a baking pan and start layering the strawberry puree and the yogurt into the cups a little at a time. Do not fill them up to the top; leave a little room like a ¼ of an inch. Place the tray in the freezer. Wait 10-15 minutes and insert the wood sticks. Chill for 3-4 hours for best results.
*aluminum pans are great conductors of temperature so your pops will freeze faster.

Pops_02

Peach and Lavender

Makes 6

2 cups of fresh peaches pureed.
8 tablespoons of Honey (agavenectar, sugar or mascabado)
1 ½ cup of Greek yogurt plain. I used Fage.
½ teaspoon of dry lavender

Method:

Mix the Greek yogurt and 6 tablespoons of honey. In a blender, puree 2 cups of peaches and 2 tablespoons of honey.  Remember to taste your fruit first, you might need less or more honey depending on the natural sweetness of the fruit. Fold the peach puree into the yogurt and sprinkle the dry lavender until well combined. Arrange the thinly sliced peaches into the walls of the dixie cup. Place all the cups in a baking pan and proceed to fill them with the yogurt and peach mixture. Fill them almost to the top, leave a little room (like a ¼ of an inch). Place the tray in the freezer. Wait 10-15 minutes and insert the wood sticks. Chill for 3-4 hours for best results.

Pops_06

PineappleCoconut and Rosemary

Makes 6

2 cups fresh pineapple pureed.
4 tablespoons toasted coconut
8 tablespoons Honey (agave nectar, sugar or mascabado)
1 ½ cup Greek yogurt plain. I used Fage.
1 sprig fresh Rosemary.

Method:

Mix the Greek yogurt and 4 tablespoons of honey. In a blender puree 2 cups of fresh pineapple, 1 teaspoon of fresh rosemary, 4 tablespoons of honey.  Remember to taste your fruit first, you might need less or more honey depending on the natural sweetness of the fruit. Fold the pineapple puree and the toasted coconut into the yogurt until well combined. Proceed to fill the dixie cups with the yogurt and pineapple mixture. Fill them almost to the top, leave a little room like a ¼ of an inch. Sprinkle some extra toasted coconut and the sprigs of rosemary. In a 8” round baking pan place all the dixie cups Place the tray in the freezer. Wait 10-15 minutes and insert the wood sticks. Chill for 3-4 hours for best results.

Yogurt-Pops_paletas-de-yogurt_Yes,-more-please!

Yogurt-Pops_Yes,-more-please!

Scrumptious summer treat…

https://youtu.be/jn8EtaxGJP0

View Post or View Comments 2

Peach & Cinnamon Trifle

Peach & Cinnamon Trifle_fresh Texas Peaches ~ Yes, more please!

Peach & Cinnamon Trifle_beautifull and smells amazing!~ Yes, more please!

Let me count the ways to summer dessert submission… I’ve had many Trifles in my life. Usually, a Trifle is a cold dessert that consists of multiple layers of sponge or pound cake cut into cubes, soaked in liquor, rum or syrup, thick custard, fresh fruit and whipped cream. All the layers are arranged beautifully on the glass so you can see the beautiful colors. From this premise, everything can go deadly wrong or you can orchestrate a sinful chaos. For example, using store-bought cake, instant pudding from a little box, frozen fruit, conspicuous jellies with brilliant colors and the abominable “whipped topping”.

And then there are the ones prepared with a little more effort that includes brioche bread, fruit liquors, crème anglaise, heavy cream whipped with vanilla bean, and delectable fresh fruits…No matter what they are made of trifles end up appealing to the eye and are most often all soft and mushy, with uniform texture. This is not good at all… I want and I seek the contrast in textures and flavor spectrum in my palette from beginning to end. Why not reconfigure the construction a bit?… Creamy, crunchy, juicy; that sounds better already!… This Trifle by any means has fancy written on it. In fact, it is the antithesis of fancy dessert. It is the greatest collaboration of the right ingredients, in the right place and at the right time. It mimics it’s Italian cousin the Tiramisu.

Let’s call it the Texan Tiramisu. I start my recipe with a craving for crunch: almonds, and ladyfingers (Savoiardi). For Creamy: no whipped toppings for me! I want light and sweet almost feathery silky mascarpone cheese. For juicy: Texas peaches. And a little acidity from the orange juice, orange liquor, and great aromatic touch of cinnamon is a simple sinfulness. In the hot summer months, you will find it difficult to avoid coming back for an extra serving of this fresh and light delicious dessert.

Peach & Cinnamon Trifle_scrumptious summer dessert ~ Yes, more please!

Peach & Cinnamon Trifle_bite me! ~ Yes, more please!

Peach and Cinnamon Trifle

Serves 6-8

The juice of 2 oranges and the zest of one

2 shots of Orange Liquor (2-3 ounces)

12 pieces of ladyfingers (Savoiardi)

8 oz of Mascarpone Cheese

¼ cup of heavy cream

¼ cup powder sugar

1 teaspoon of vanilla extract or Vanilla bean paste

½ teaspoon of almond extract

¼ cup chopped roasted almonds

½ teaspoon of cinnamon

Powder sugar for final dusting.

Basil if you like to garnish with.


 Method:

In a 2”- 3”shallow dish, Whisk the Orange juice, the orange zest, 2 shots of orange liquor, one pinch of cinnamon, and 1-2 tablespoons of agave nectar or powder sugar. Taste the mixture adjust for sweetness if necessary. Arrange the ladyfingers on the bottom of the dish in a single layer ( see picture below).

In a separate bowl, with a rubber spatula, mix the Mascarpone, the heavy cream, vanilla bean or extract with some orange zest until smooth. Proceed to spread this mixture over the layer of ladyfingers. Slice the peaches thinly, and add some orange juice, almond extract, and cinnamon. Toss the macerated peaches well in a bowl and place them over the mascarpone layer. For the topping, sprinkle the chopped roasted almonds and some cinnamon. Refrigerate at least 30 minutes. Dust with powder sugar at serving time.

Peach & Cinnamon Trifle_step by step ~ Yes, more please!Peach & Cinnamon Trifle_almonds t, the final touch~ Yes, more please!

~ Fresh peaches, the ideal summer dessert ~

Peach & Cinnamon Trifle_the ultimate summer dessert ~ Yes, more please!

Peach and Cinnamon Trifle

Serves 6-8
Course Dessert
Cuisine Americana
Prep Time 25 minutes

Ingredients

  • The juice of 2 oranges and the zest of one
  • 2 shots of Orange Liquor 2-3 ounces
  • 12 pieces of ladyfingers Savoiardi
  • 8 oz of Mascarpone Cheese
  • ¼ cup of heavy cream
  • ¼ cup powder sugar
  • 1 teaspoon of vanilla extract or Vanilla bean paste
  • ½ teaspoon of almond extract
  • ¼ cup of chopped roasted almonds
  • ½ teaspoon of cinnamon
  • Powder sugar for final dusting.
  • Basil if you like to garnish with.

Instructions

  1. In a 2”- 3”shallow dish, Whisk the Orange juice, the orange zest, 2 shots of orange liquor, one pinch of cinnamon, and 1-2 tablespoons of agave nectar or powder sugar. Taste the mixture adjust for sweetness if necessary.
  2. Arrange the ladyfingers on the bottom of the dish on a single layer.
  3. In a separate bowl, with a rubber spatula, mix the mascarpone, heavy cream, vanilla bean paste or extract with some orange zest whip until smooth.
  4. Proceed to spread this mixture over the layer of ladyfingers.
  5. Slice the peaches thinly, and add some orange juice, almond extract, and cinnamon. Toss the macerated peaches well in a bowl and place them over the mascarpone layer. If desired, make 2. or even 3 layers if you want!

  6. For the topping, sprinkle the chopped roasted almonds or pecans, dust with cinnamon. Refrigerate at least 30 minutes. Dust with powder sugar at serving time. Enjoy!

Music paring: SEnd me a Peach – Over the Garden Wall Soundtrack

View Post or View Comments 1

Privacy Policy Contact Us Yes, more please!