Escabeche Pickled Vegetables

Escabeche-Pickled-Vegetables_-Mason-Jar_Yes,-more-please!

 What makes a sandwich great? The bread, the mustard, meat, or cheese? There are all kind of protagonist components that contribute to such a production. But, how about the supporting cast? Potato chips, salads and “the pickle” that green creature on the side of the plate almost invisible and that after the 3 bite of your sandwich you start looking for it.. where is it? Under the waxy paper? Far away in the refrigerator, last shelf oops! We are out of pickles! Suddenly you are missing him badly… If the word sandwich had an accent or a semicolon it will definitely be the “pickle”.

That’s what this recipe is all about, the supporting cast. That accent of a meal, sandwich, sea food, any fried concoction, needs a balance of a crunchy salty acidic note to spice up your meal.
Escabeche is one of hundreds of pickled recipes the Spaniards introduced to Mexico after having borrowed them from the Arabs and Persians. It has many different variations. In Mexico it is more commonly served with seafood, fish, or pork. And yes, the well known street food “the torta”(which is the equivalent of the american sandwich) that is almost always accompanied by the well-known infamous pickled jalapeño that comes with carrots and onions.

Escabeche-Pickled-Vegetables_Yes,-more-please!

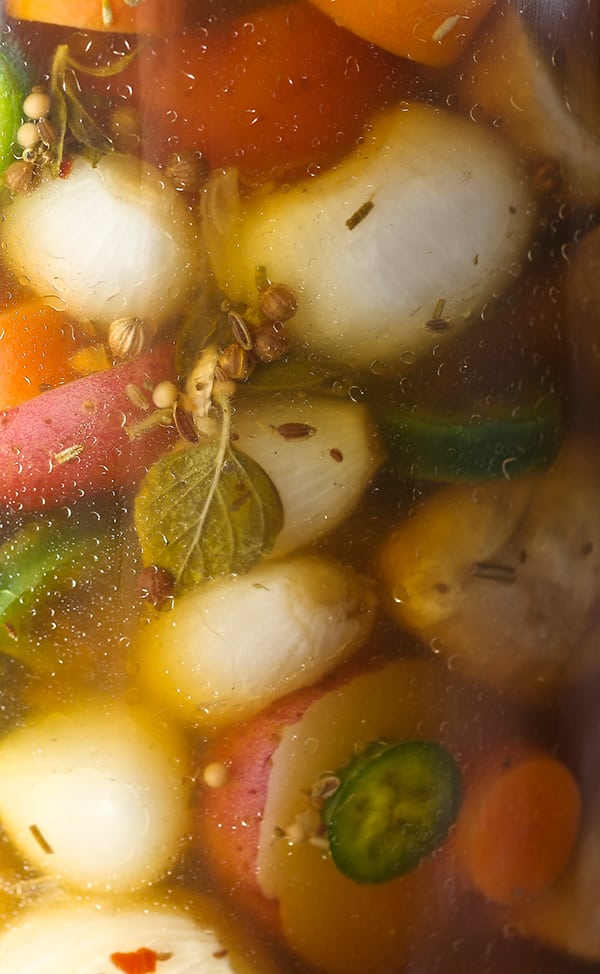
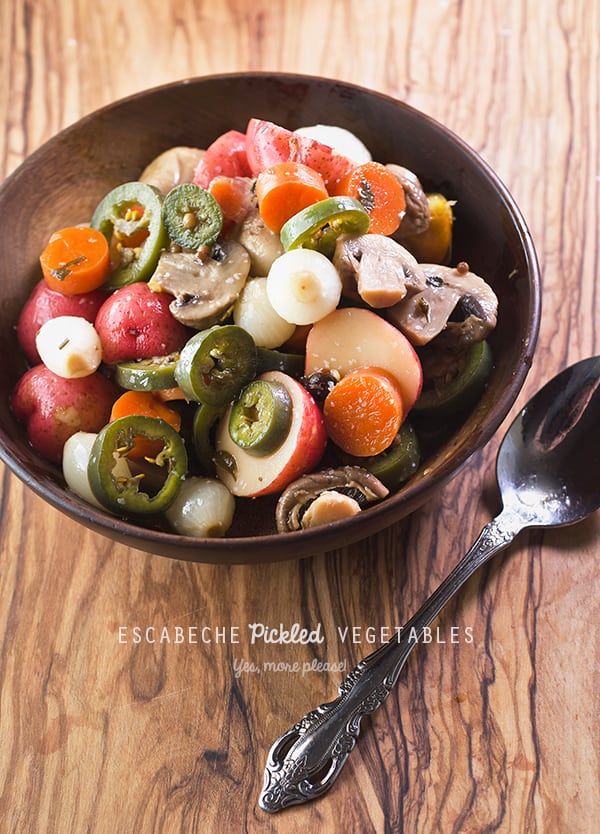
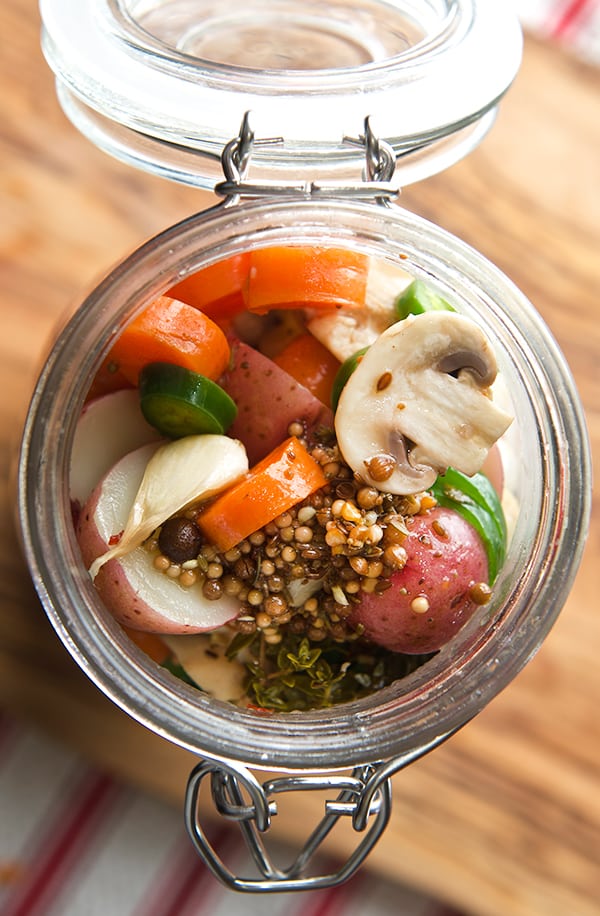
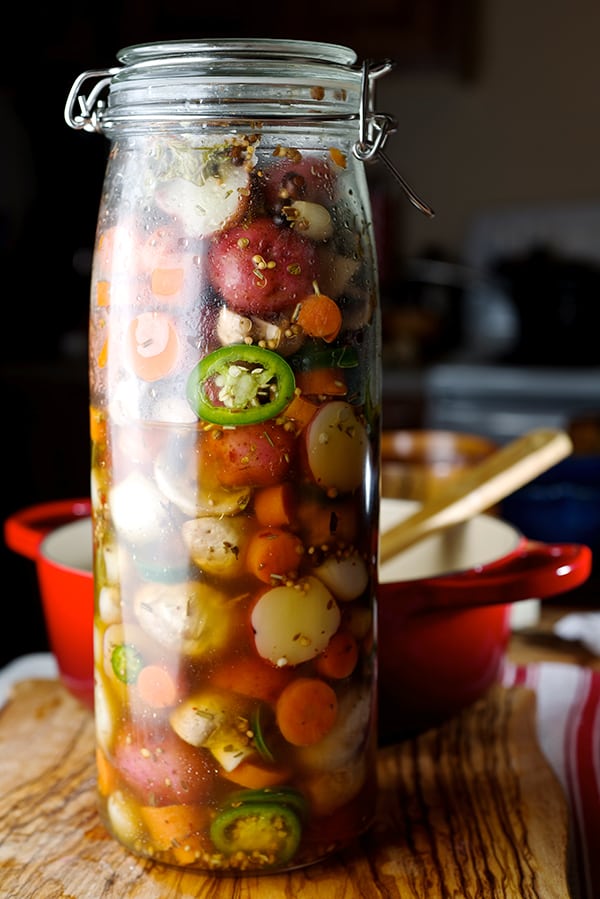
This Escabeche vegetable medley recipe is all the “supporting cast” I desire when I’m eating a sandwich: potatoes, pearl onions, mushrooms, carrots and jalapeños. Sweet, starchy, crunchy, spicy mix all marinated in a tangy spiced slightly sweet vinegar. And please don’t limit your self this cast; okra, cauliflower, green beans, can be included…what ever rocks your boat. You can serve this over a bed of spinach and Romaine lettuce combining the vinegar with some extra virgin olive oil for a vinaigrette as a first course salad. Or as a simple informal appetizer with a beer on the side. You can marinate some cooked shrimp, a side for fried fish… I can go on and on…
Now, this is a refrigerator pickling method and its best to let it marinate over night. It will last in the refrigerator for about 3-4 weeks (if you are a self controlled person); Because for me every time I open the refrigerator my saliva glands start to contract my mouth waters, my tong shrinks just by looking at them, and before I know I have a fork in my hand to snack on them… so let’s get started…

Escabeche-Pickled-Vegetables_pickling-spices_Yes,-more-please!

Escabeche Pickled Vegetables

Makes about 6 -8oz  jars or  1 large 48oz jar.

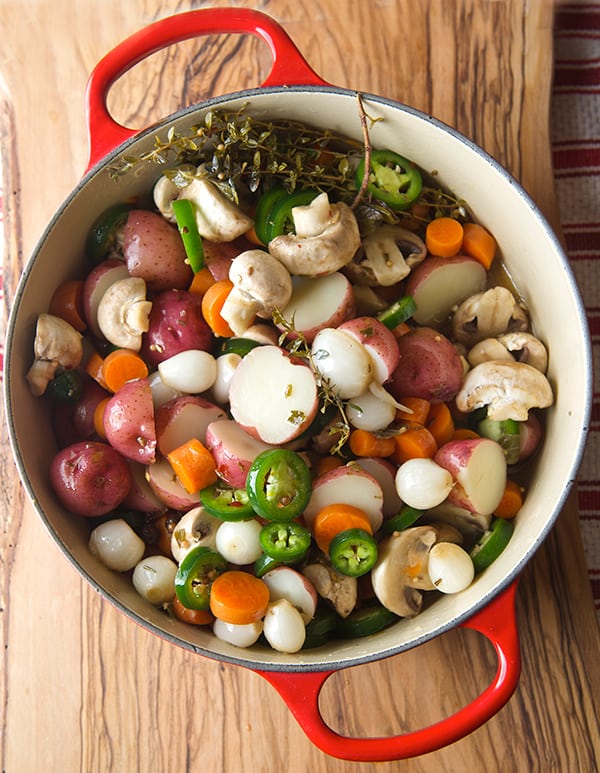
1 lb. little red new potatoes cut in halves and cook al-dente.
4-6 carrots cut in ¼” thick round slices, blanched and drain.
1 lb. button white mushrooms or cremini cut in halves
1 lb. white pearl onions, peeled and halve the larger ones.
6-8 Fresh jalapeños cut into 1/4” round slices

Cauliflower florets, green beans, can also be added to this vegetable escabeche. The proportions between chiles and vegetables is up to you, just consider that the more chiles the more spicy the vegetables will be. 

For the pickling brine:

1/3 cup  Sun flower, or Grape seed oil or any mild flavor oil

1 cup of Apple Cider vinegar or Rice vinegar.
1 cup of distill Vinegar
1 -1/2 cups of water
4 garlic cloves
4 Bay leafs
4 sprigs fresh Thyme or 1/2 teaspoon dry thyme
2 sprigs fresh Oregano or 1/2 teaspoon dry Oregano
1 teaspoon black peppercorns.
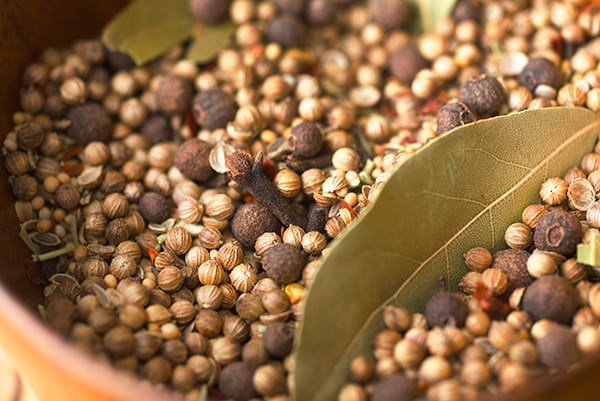
3  Tablespoons of pickling spices
1/4 cup of turbinado sugar or white sugar, taste it, some people likes the brine tangier or sweeter.
1 tablesspoon sea salt, adjust salt to your taste.

Method:

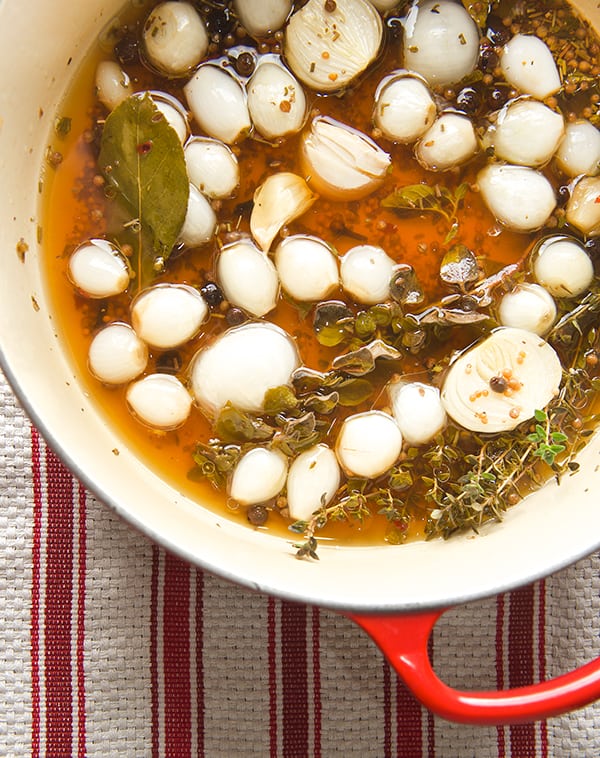
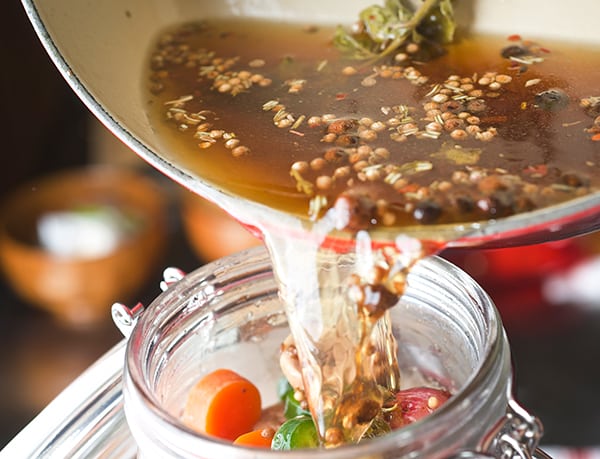
In a large pot sauté with oil the pearl onions and garlic for about 2-3 minutes. Add the chiles Jalapeños and sauté until bright green. Add water, vinegar, salt, sugar and spices bring it to a simmer until sugar dissolves. Turn off add the fresh herbs, cover and let it steep for 5 minutes. Add the carrots, potatoes mushrooms and cauliflower florets. Let it rest for 30-45 minutes, once is cool down place it into a jar or glass container. (it is always best to use glass) Keep in the refrigerator, give them a little shake-arooh very now and then. These Escabeche Pickled Vegetables get better with time, wait for at least 1-2 days before ready to eat. Enjoy!

Escabeche-Pickled-Vegetables_making-the-pickled-vinegar_Yes,-more-please!

Escabeche-Pickled-Vegetables_ready-to-cook_red-le-creuset_Yes,-more-please!

Escabeche-Pickled-Vegetables_pooring-into-mason-jar_Yes,-more-please!

Escabeche_Pickled_ Vegetables_on a jar

~ Escabeche Pickled Vegetables are a  great little nibbling with a beer ~

Escabeche-Pickled-Vegetables_ready-to-serve_Yes,-more-please!

Music Pairing: Cafe Tacuba- Maria
View Post or View Comments 4

Chiles en Nogada – Poblano Peppers with Farro and Walnut Sauce…Vegetarian Style

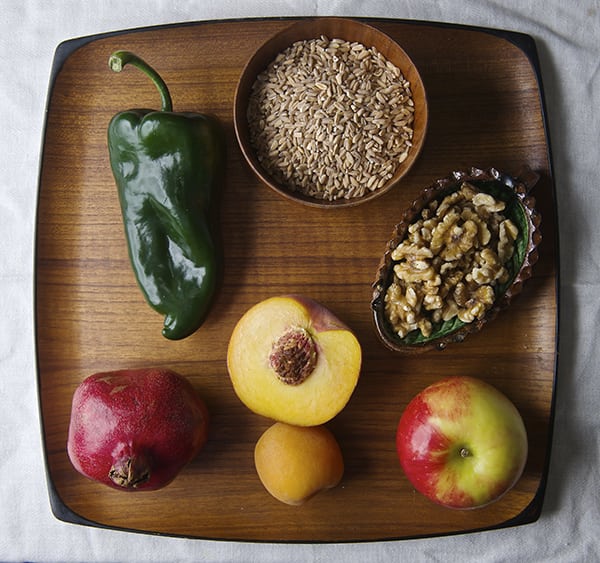
Chiles en Nogada-Poblano Peppers stuffed~ Yes, more please!_seasonal ingredients

The month of September is the time in Mexico when we celebrate Independence Day, Viva Mexico Goat creatures! That’s the way we shout and celebrate along with lots of tequila and food. There are many traditional dishes that are prepared for this celebration, but the one that represent the season and the first celebration of independence is the Chiles en Nogada.

Chiles en Nogada is a regional culinary dish from Puebla. It’s origin dates from 18th century and it is considered a recipe of Baroque style, because of the amount of ingredients and the elaborate and detailed preparation. Many tales and stories argue the origin of this dish. In my curiosity of knowing the most accurate story, I found an article written by Eduardo Merlo Juarez*, from the Investigation Center of INAH-Puebla (INAH-“National Institute of Anthropology and History in Mexico) which I found very credible and congruent. He explains that this dish was made in the Viceroyalty period in Mexican history as a dessert. It was created in the month of August with seasonal ingredients from the region; like Poblano peppers, Nueces de Castilla (walnuts), pomegranates, and stone fruits like peaches, apples, pears that the Friars cultivate in the orchards.

The nuns, Madres Agustinas Recoletas of the Convent of Santa Monica were the ones who originally prepared this dish for the dinner that was given in honor of the Military Commander Agustin de Iturbide, who entered the city of Puebla in triumph after signing the Treaty of Cordova in Veracruz. This event granted the Mexican Independence from Spain. For such an important celebration the nuns used as garnish for the first time, parsley for the green and pomegranate for the red to symbolize the colors of the Mexican Flag.

This dish was probably served as dessert, roasted poblano pepper filled with a concoction of delicious stone fruits, that tamed the spiciness of the chile and the creamy sauce to marry the flavors. As in today the chiles are stuffed with a combination of the stone fruits and a 50% ground pork and beef.

There has been no way to track who added the ground pork and beef to make the sweet picadillo which is now traditionally used as filling. Many arguments have been raised about whether they should or should not be covered in the egg batter as in Chile Relleno style; the truth is you can find them both ways based upon preference. The original sauce was made with walnuts, Goat cheese, a little bit of milk, and a dash of sherry vinegar. It is preferable to serve them at room temperature and the sauce is always best served cold.

In this recipe I wanted to keep the essence of the dish and simplify the preparation time without compromising the flavors, I prepared the filling using Farro to make it lighter (and because it has a meaty texture that resembles to ground pork). I maintain the use of stone fruits and spices. And versus the original long cooking method, I added the fruits later on in the cooking process to have contrast in textures. I believe that this recipe is simple enough to make and results in a light entrée for you to serve, rich in flavors, culture and tradition.

Viva Mexico!!!

Chiles en Nogada-Poblano Peppers stuffed~ Yes, more please!

Chiles en Nogada – Poblano Peppers stuffed with Farro and Walnut Sauce Vegetarian

Serves 4

Roasting the Chiles:

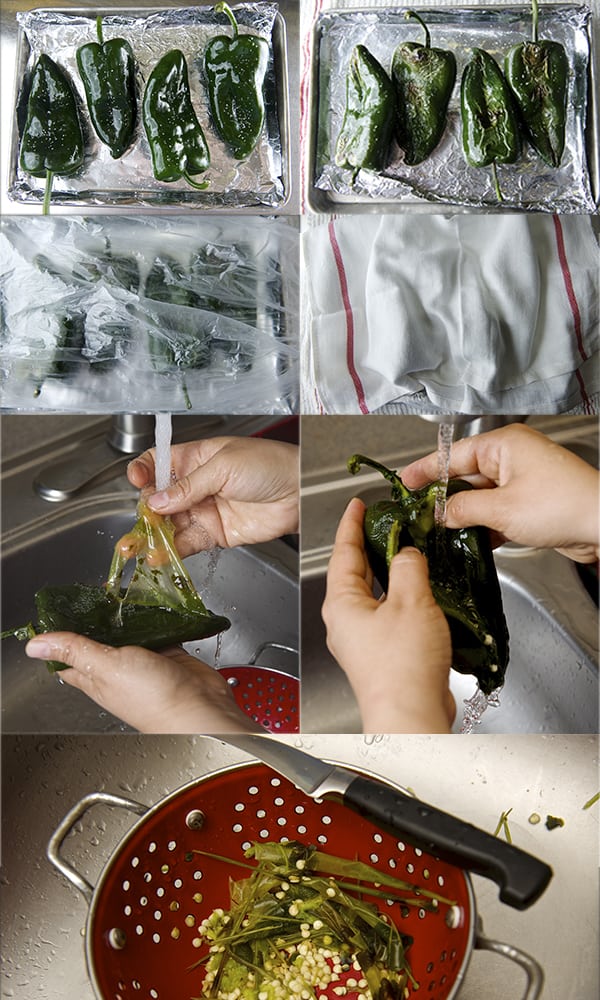
4 Poblano peppers roasted, deveined, and de-seeded* (reference in below photos)
In a baking sheet pan lined with aluminum foil place the poblano peppers and rub them with a little canola oil and sprinkle some sea salt. Roast them for about 3-4 minutes per side at a 450 F pre-heated oven. It is best to char them on the stove over direct flame because it gives them more flavor. In this case I do not own a gas stove or a torch (sad, sad…but the oven method works great to easily remove the skins) I did not grill them. I think the flavor of the smoke charcoal would be too overwhelming for the filling.

Chiles en Nogada-Poblano Peppers stuffed~ Yes, more please!_Chiles skined sequence
Making the Filling:

2 cups of cooked Farro (or brown rice will work too)
1 apple chopped in small cubes
1 Bosc Pear chopped in small cubes
1 Peach chopped in small cubes
1 apricot chopped in small cubes
½ cup golden raisins
½ cup roasted almonds
½ medium size red onion finely diced
1 garlic clove
2-3 tablespoons canola oil
1 teaspoon of sherry vinegar.
Mexican cinnamon ground
a pinch of ground clove.
A pinch of white pepper.

Directions:

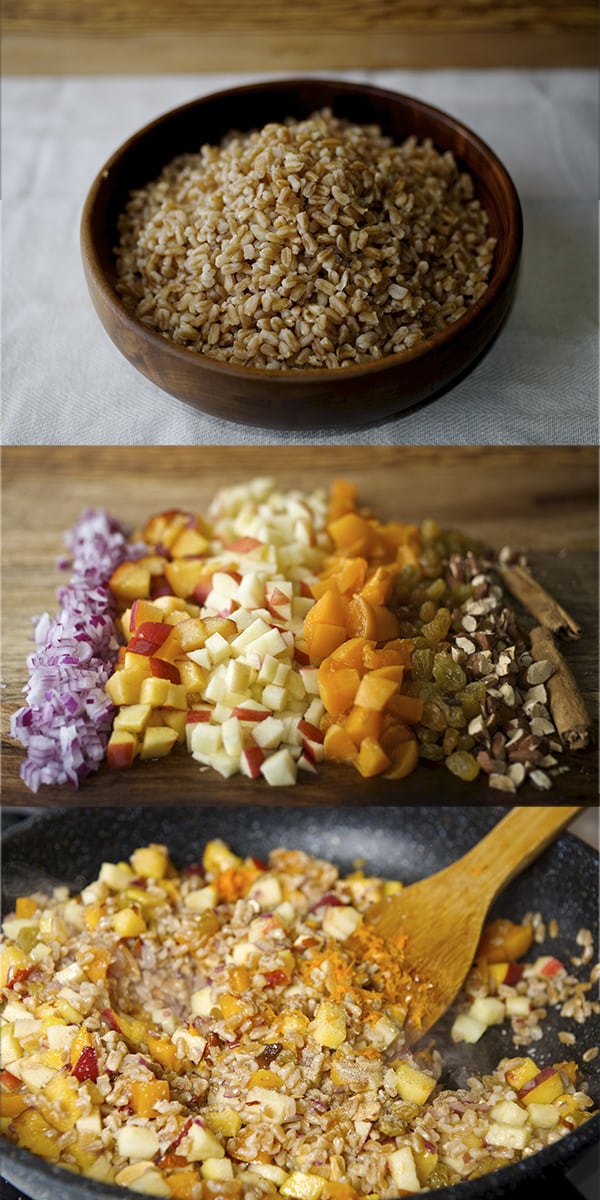
Start by adding your Farro to a small sauce pan with a little canola oil and sauté it until slightly golden brown. Add 2 cups of water and let it come to a boil, then reduce the heat, cover and let it simmer. Add a pinch of salt. Keep an eye on it since you want to leave it a little under done for the best texture and flavor. Once it is cooked, spread the Farro on a platter to stop the cooking process and to release some of the moisture. Let it cool for about 10-15 minutes.

Meantime, chop the rest of the ingredients. Now that you have everything ready, heat a sauté pan with about 2 tablespoons of canola oil, sauté onions and garlic and cook for about 2 minutes. Next, add apples, pears, almonds, raisins, sherry and spices cook for 2 minutes. Add the Farro and sauté for another 2 minutes. Then add the peaches and apricots. Adjust salt and pepper. Remove from stove and let it cool to room temperature before stuffing the roasted poblano pepper.

Chiles en Nogada-Poblano Peppers stuffed with Farro and walnut sauce_ stuffing ingredients
For the Walnut Sauce:

6-8 ounces of Goat cheese
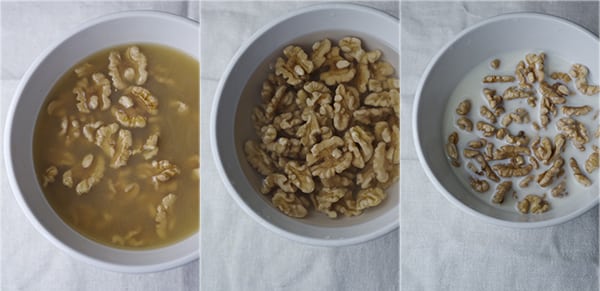
1 ½ cup of Walnut halves soaked and twice rinsed.
1/4-1/2 cup of milk
a dash of sherry vinegar
a pinch of sugar.

Directions:

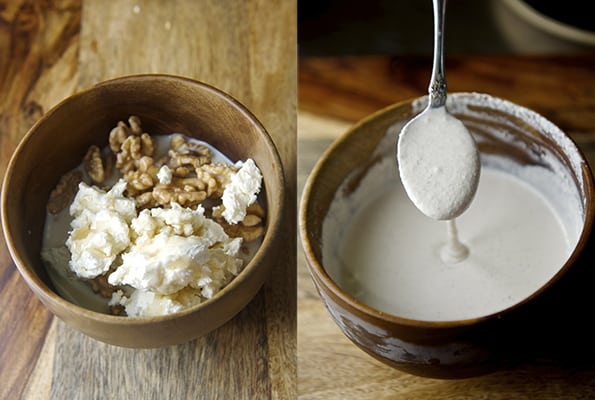
Blend everything until smooth and refrigerate for about 30 min. before serving
The traditional recipe calls for peeling each walnut by hand…I have not a lot of patience for this process, however I found that if you soak the walnuts in hot water for 20 minutes, and rinse them twice,it removes almost all the bitterness from the skins.(see picture below)

Chiles en Nogada-Poblano Peppers stuffed~ Yes, more please!_Walnut sequenceChiles en Nogada-Poblano Peppers stuffed~ Yes, more please!_Walnut sauce
Garnish with:

Finely chopped Parsley
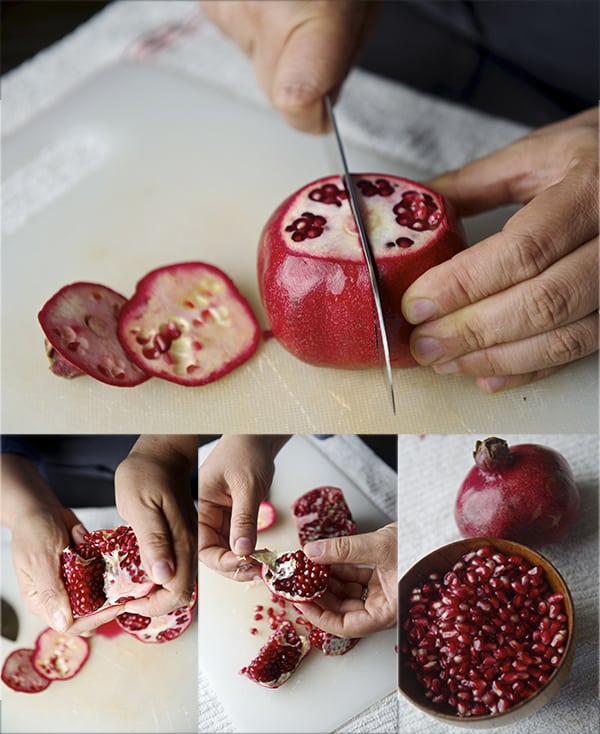
Pomegranate Kernels (see photos for easy peel and kernels extraction pomegranate)

Chiles en Nogada-Poblano Peppers stuffed~ Yes, more please!_Pomegranate sequence
To serve:

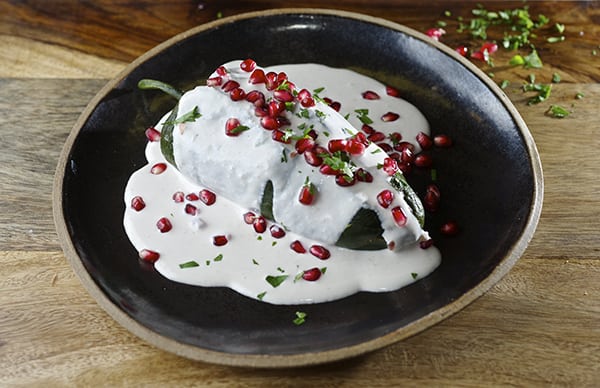
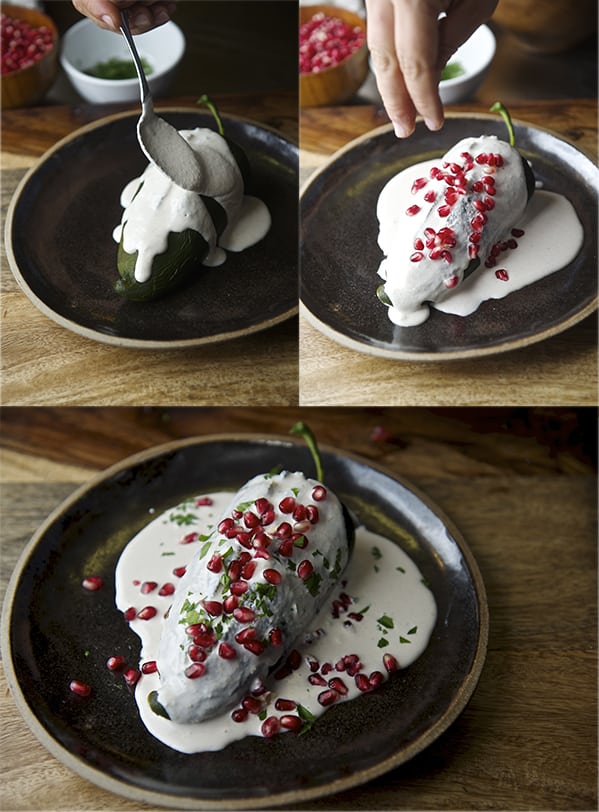
Start by stuffing the poblanos, arrange them on a platter or in individual plates, cover them with the walnut sauce, garnish with pomegranate kernels and finely chopped parsley.
Traditionally they are serve in Talavera plates from the state of Puebla.
I chose this beautiful stoneware plate with an iridescent brown-black glaze made by a Local Artist her name is Barbara Breyfogle she has her own studio and makes one of a kind handmade stoneware pottery. She has been making pottery since 1974. In some of her pieces she uses lace and nature to stamp some designs on her plates and serving platers.You can find her and her beautiful creations at Boggy Creek Farms on Saturdays from 8-1 pm. Or send her an e-mail: [email protected]……Thank you Barbara!!

Chiles en Nogada-Poblano Peppers stuffed with Farro and Walnut Sauce_serving
VIVA MEXICO!!!

* Source of the historical facts:  http://www.elfinanciero.com.mx/secciones/estilo-de-vida/28659-debe-mantenerse-receta-original-del-chile-en-nogada-investigador.html

View Post or View Comments 8

Yogurt Mini Popsicles

Yogurt Mini Popsicles ~ Yes, more please!

The ultimate Summer treat, yogurt mini popsicles, I have seen the fever of these cuties and I did not imagine why?…Well let me tell you, now that I have made them… I’m crazy for them! It is awesome what 4 ingredients can do for you. Greek yogurt, agave nectar (I substitute agave instead of sugar because its healthier for you and the little ones too), fresh fruit, herbs or spices.

Its so easy to make, you’re gonna laugh about it. You can get creative with the flavors and the creamy yogurt because it is the perfect canvas to showcase any fresh seasonal fruit. I already have a sinful list of the next combinations to try.

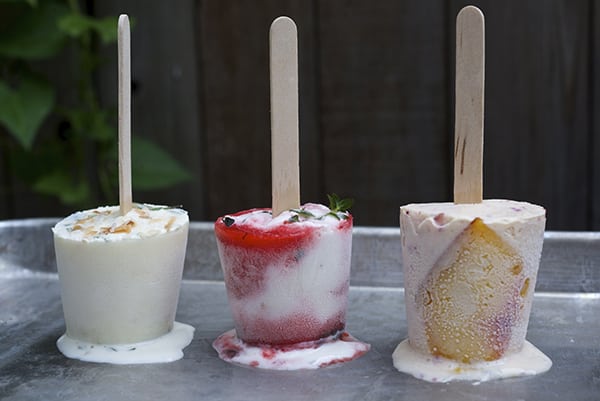
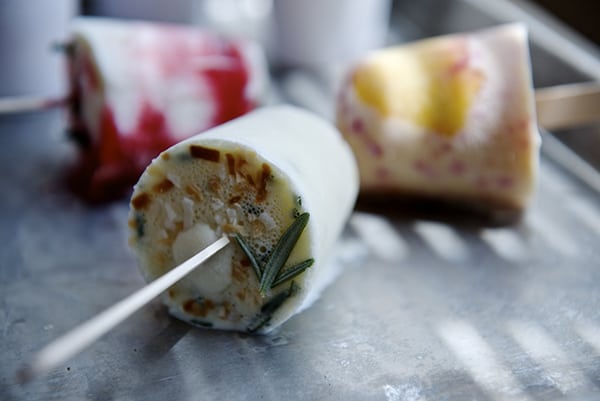
This popsicles are creamy and not too sweet, the texture is a little different from store bought. They are a bit more Icy due to the lack of extra fat and overdose of sugar; But thats exactly the kind of ice cream I crave in the summer; light and not too sweet. I combined different herbs with the fruits, lemony thyme with fresh strawberry puree, lavender with Texas peaches and pineapple coconut with rosemary. The combination of fruit and herbs give a little extra flavor.

If you are concerned for your kids or not too crazy about the herbs in your popsicle just omit them. (Ian was not to crazy about me adding rosemary to the pineapple and coconut ones, but he loved the peach and lavender…go figure!).

The other part I love about these mini popsicles is that you don’t have to buy fancy equipment to make them, you can get any small plastic or paper dixie cups and wood sticks. They are the perfect size for a snack or dessert.

Yogurth Mini Popsicles ~ Yes, more Please!Yogurth Mini Popsicles ~ Yes, more Please!

Yogurt Mini Popsicles

Strawberry & Thyme

Makes 6

2 cups of fresh strawberries pureed.
8 tablespoons Honey (agave nectar, sugar or mascabado)
1-½ cup of Greek yogurt plain. I used Fage.
2 sprigs of thyme

Method:

Mix the Greek yogurt and 6 tablespoons of honey. In a blender, puree 2 cups of strawberries and 2 tablespoons of honey.  Remember to taste your fruit first, you might need less or more honey depending on the natural sweetness of the fruit. Place all the dixie cups in a baking pan and start layering the strawberry puree and the yogurt into the cups a little at a time. Do not fill them up to the top; leave a little room like a ¼ of an inch. Place the tray in the freezer. Wait 10-15 minutes and insert the wood sticks. Chill for 3-4 hours for best results.
*aluminum pans are great conductors of temperature so your pops will freeze faster.

Pops_02

Peach and Lavender

Makes 6

2 cups of fresh peaches pureed.
8 tablespoons of Honey (agavenectar, sugar or mascabado)
1 ½ cup of Greek yogurt plain. I used Fage.
½ teaspoon of dry lavender

Method:

Mix the Greek yogurt and 6 tablespoons of honey. In a blender, puree 2 cups of peaches and 2 tablespoons of honey.  Remember to taste your fruit first, you might need less or more honey depending on the natural sweetness of the fruit. Fold the peach puree into the yogurt and sprinkle the dry lavender until well combined. Arrange the thinly sliced peaches into the walls of the dixie cup. Place all the cups in a baking pan and proceed to fill them with the yogurt and peach mixture. Fill them almost to the top, leave a little room (like a ¼ of an inch). Place the tray in the freezer. Wait 10-15 minutes and insert the wood sticks. Chill for 3-4 hours for best results.

Pops_06

PineappleCoconut and Rosemary

Makes 6

2 cups fresh pineapple pureed.
4 tablespoons toasted coconut
8 tablespoons Honey (agave nectar, sugar or mascabado)
1 ½ cup Greek yogurt plain. I used Fage.
1 sprig fresh Rosemary.

Method:

Mix the Greek yogurt and 4 tablespoons of honey. In a blender puree 2 cups of fresh pineapple, 1 teaspoon of fresh rosemary, 4 tablespoons of honey.  Remember to taste your fruit first, you might need less or more honey depending on the natural sweetness of the fruit. Fold the pineapple puree and the toasted coconut into the yogurt until well combined. Proceed to fill the dixie cups with the yogurt and pineapple mixture. Fill them almost to the top, leave a little room like a ¼ of an inch. Sprinkle some extra toasted coconut and the sprigs of rosemary. In a 8” round baking pan place all the dixie cups Place the tray in the freezer. Wait 10-15 minutes and insert the wood sticks. Chill for 3-4 hours for best results.

Yogurt-Pops_paletas-de-yogurt_Yes,-more-please!

Yogurt-Pops_Yes,-more-please!

Scrumptious summer treat…

https://youtu.be/jn8EtaxGJP0

View Post or View Comments 2

Panzanella Melon Salad

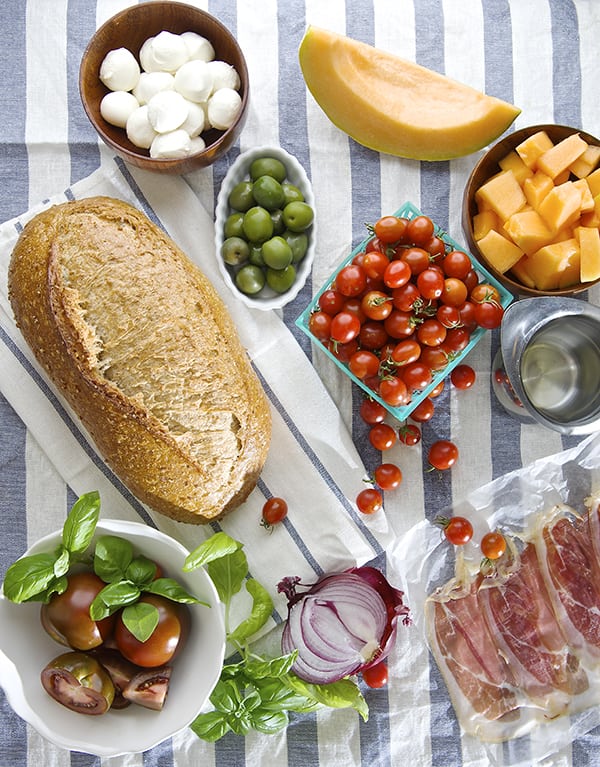
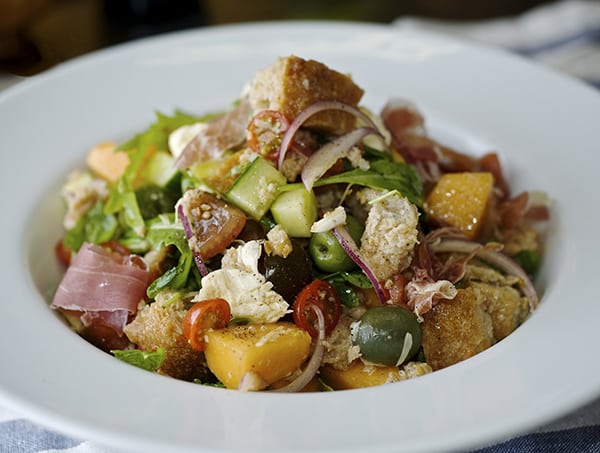
Panzanella Melon Salad ~ ingredients, Yes, more please!
My mouth waters for this Tuscan Salad! If we go back to the 16th century the Italian poet Bronzino, he praises the onions with oil and vinegar served with toast. Later on, when the tomatoes arrived to Europe, they were incorporated into the salad with other ingredients like cucumbers and capers. I’m not a food historian but it is of great interest and curiosity to know where food comes from, and the origin of dishes throughout history. Knowing these facts can sometimes lead you through perfecting a recipe, or re-inventing it. In this case I need to reinforce it because bread, onions, oil and vinegar simply are not gonna do it for me.

Many different versions of this traditional Panzanella Italian Salad can be made. From the type of bread, tomatoes, cucumbers, capers, onions, and a simple vinaigrette. One of the keys is goods Extra Virgin Olive Oil and Red wine vinegar. Playing a little bit with the sweet and savory notes,  I added Cantaloupe melon for sweetness and some prosciutto for a salty meaty note.

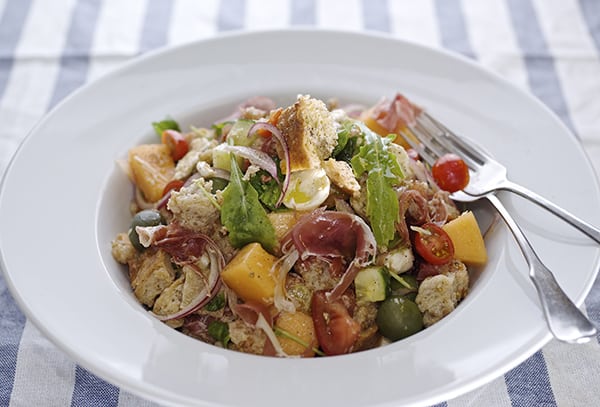
This would be just the thing for a summer picnic; something to combine all the flavors of the season. I like this salad texture and contrast, and that every bite has a different flavor depending upon what you pick with your fork. All these flavors on your palette produce a very savory and mouth-watering experience. Imagine, the crusty bread cubes absorb the juices from the tomatoes and the vinaigrette; that combined with the crunch of the onions, salty olives, juicy tomatoes and sweet cantaloupe with cracked pepper… the result, I just want the shade of a tall tree to dine under and my bread to be older. I hope you like my version of my version of Panzanella Melon Salad…Enjoy!

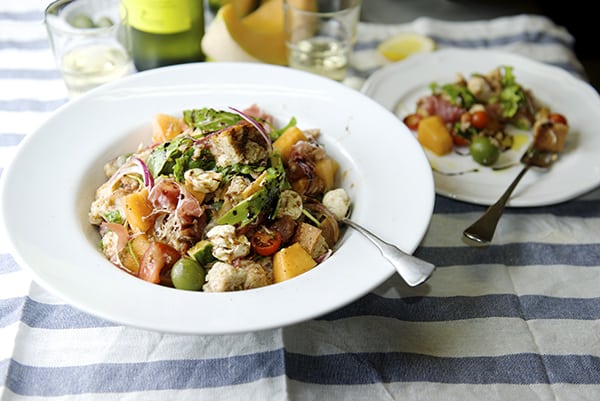
Panzanella Melon Salad ~ served, Yes, more please!

Panzanella Melon Salad_perfect summer brunch!  ~ Yes, more please!

Panzanella Melon Salad

Serves 4

½ loaf day old Italian or French crusty bread.

1 cup cherry tomatoes

1-2 small tomatoes cut into cubes

1 cup English cucumber into cubes

1-2 cups Cantaloupe Melon cut into cubes

½ red onion cut into slivers.

½ cup green Castelvetrano olives.

Arugula (optional)

6-8 Basil leaves

1 cup of bite size (bocconcini) Mozzarella or regular size cut into bite size cubes.

6 -8 Prosciutto slices

1/3 cup good quality fresh extra virgin olive oil.

1/4 cup red wine vinegar.

Fine sea salt and freshly ground black pepper to taste.

Method:

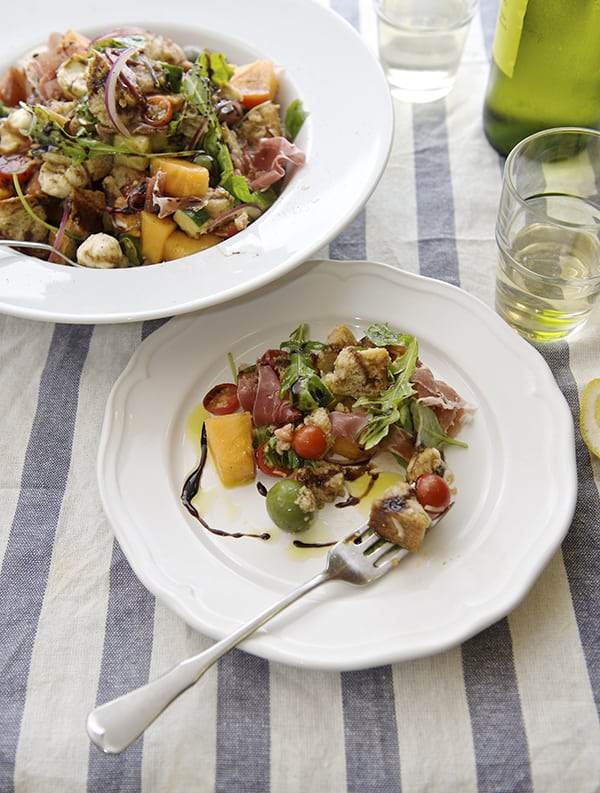
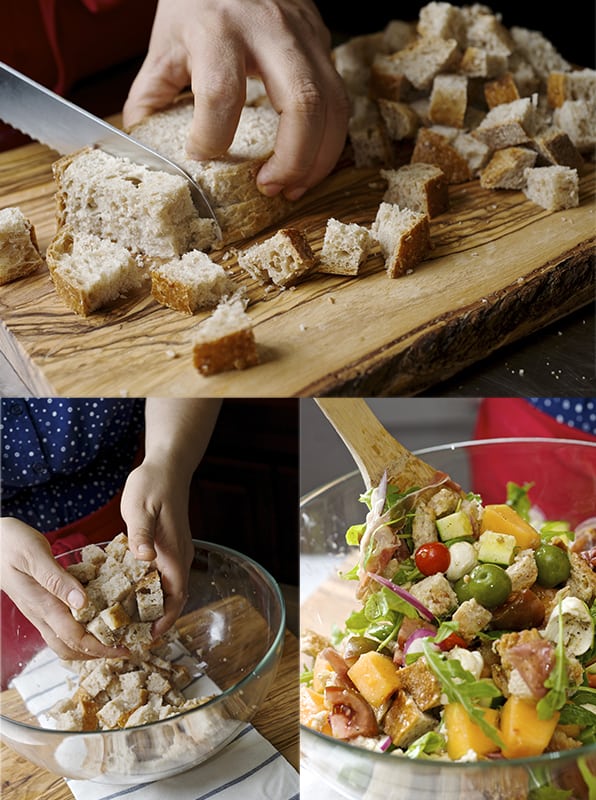
Start by cutting the bread into bite size cubes. If your bread is not a day old you can toast it in the oven at 350 F/175 C for 3-5 minutes. In a big salad bowl whisk the olive oil, red wine vinegar salt and pepper. Add the onions, tomatoes, cucumber, mozzarella olives and bread toss them lightly. Let the salad absorb the flavors for 15-30 minutes. Before serving, toss the salad and tear and sprinkle the basil leaves and prosciutto over the top. It’s best to serve this salad room temperature with a chilled glass of white wine…I hope you like it as much as I do.

When serving, drizzle some balsamic vinegar for sweetness.

*For a Vegan or Vegetarian Version, you can omit the prosciutto and mozzarella. Instead add some roasted red bell peppers it will be a great complement.

Panzanella Melon Salad _dicing bread-~ Yes, more please!

Panzanella Melon Salad-mouth watering flavors and textures!

Panzanella Melon Salad have some wine! ~ Yes, more please!

 Mouth watering Salad for the sumer…Enjoy!


View Post or View Comments 1

Watermelon Grasshopper Cocktail

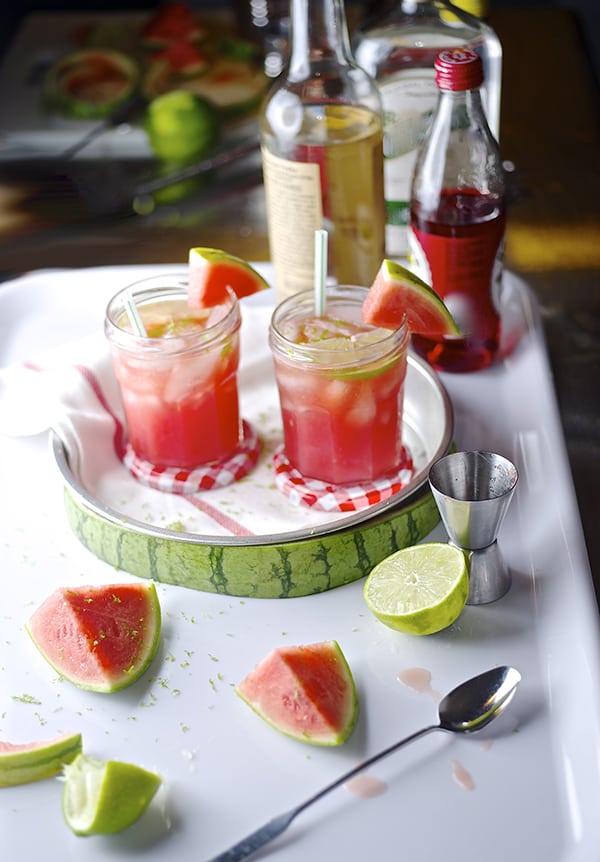
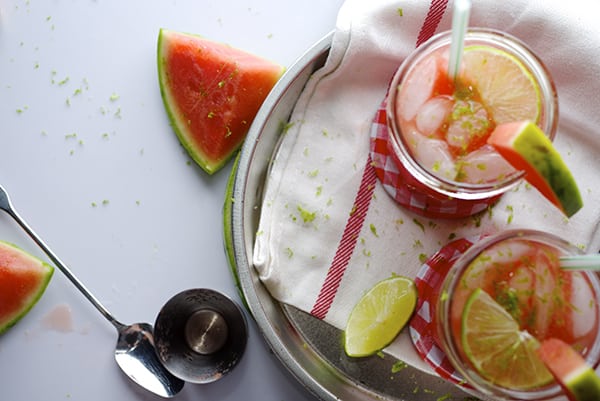
watermelon grasshopper Cocktail so refreshing!

I’m fascinated by grasshoppers. With their large and powerful back legs they can jump and leap virtually unlike any other animal on earth. Also in many tales grasshoppers are the  voice of your conscience like Jiminy Cricket. To farmers and even backyard gardeners, the appearance of a swarm of grasshoppers is second only to a swarm of locusts as the most devastating insect attack that can happen. Their voracious appetites can lead to stripped fields faster than seems possible. Its like summer heat, relentless and voracious!… Is it winter yet?.
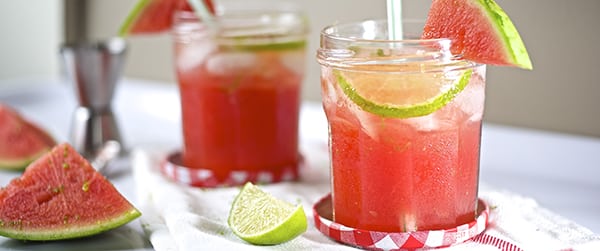
The grasshopper in this drink is a good blast of freshness it’s so refreshing and light, the peppermint liquor gives it a breeze feel without being overwhelming. It finishes with a subtle note of fresh peppermint that complements well with the sweetness from the watermelon. It is just the drink you want to have in a hot summer afternoon.
Beat the heat! Make yourself a Watermelon grasshopper for the weekend!…

Watermelon grasshoper cocktail, cold and refreshing summer drink!


Watermelon Grasshopper Cocktail

3 cups watermelon seeded and blended until smooth.
2 parts of vodka
2 teaspoons of peppermint liquor ( choose one with out the green coloring)
1 tablespoon Grenadine
A shake or two of Angostura bitters.
4-6 cups of ice
Garnish with:
1 lime juice and zest.
4 cups of ice

Directions:

In a Glass pitcher combine everything, mix well. Serve on short glasses squeeze some lime juice and lime zest. Enjoy!

watermelon grasshopper  cocktail cold and refreshing...

Watermelon Grasshopper drink away your cocktail...

The grasshopper on the picture scientific name is:  Caloptenus femur-rubrum.

Their legs are actually reddish in color. These red-legged demons eat everything, including the tops of potato plants.

So, I think he likes Vodka!…


View Post or View Comments 2

Sauteed Broccolini & Lemon Quinoa

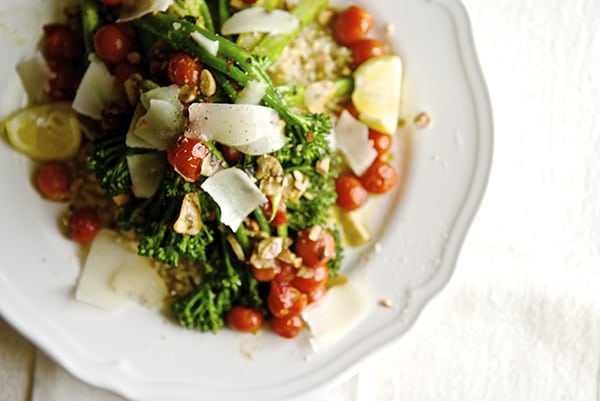
Sauteed Broccolini & Lemon Quinoa_Yes,more please!

After the weekend taco indulgence, I’m craving Green! Green! Green!
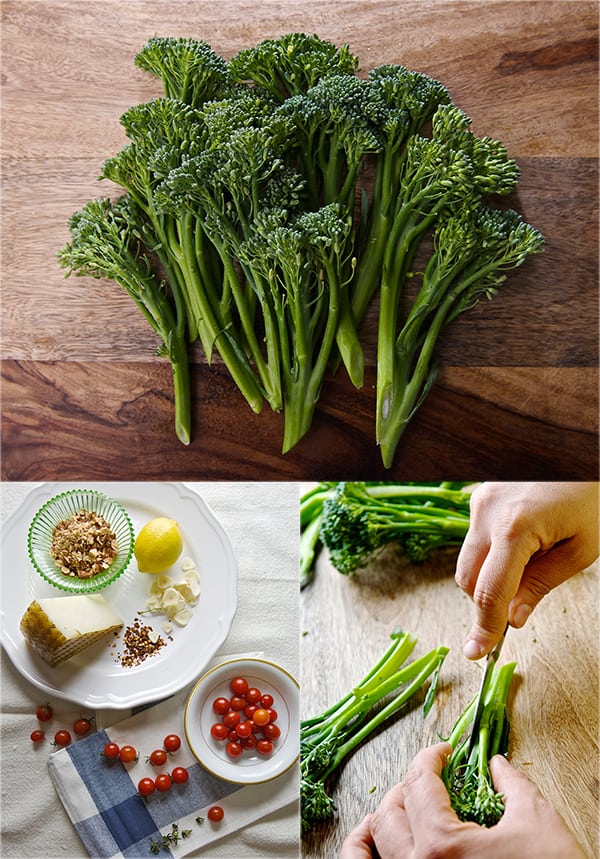
Broccolini it is a Hybrid between Broccoli and Kai-Lan commonly known by the name of Chinese Broccoli. Broccolini inherited the best part of the broccoli, the little mini flowery tops and the long steams of the Kai-Lan.
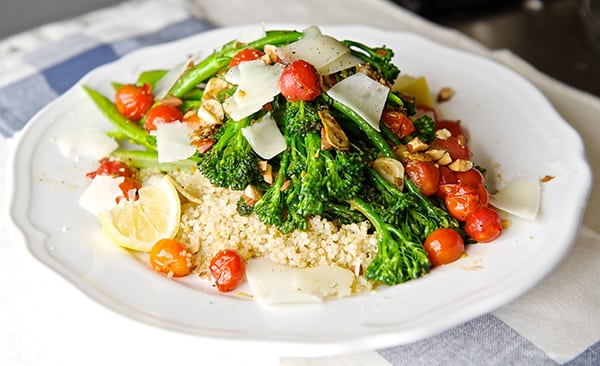
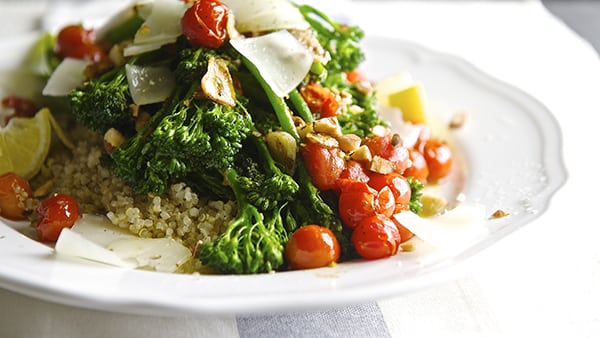
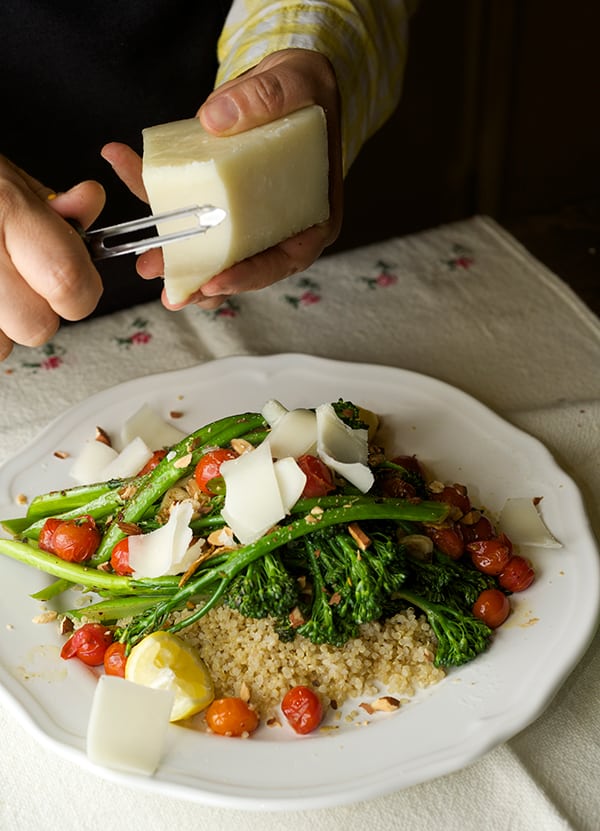
The flavor profile is like eating broccoli and asparagus at the same time!. Sweet broccoli and crunchy yet delicate and full of tender green flavor. The best way to cook it is with absolutely no doubt sauteing. A high temperature quick saute turns it bright green, the heat cooks the tops and the steams stay a bit crunchy. What do I have on my produce basket tonight?… cherry tomatoes,lemons, and garlic. In the pantry I have some roasted almonds and quinoa. I ran out of Parmigiano but I had some Manchego cheese and it worked great, nutty and creamy with the quinoa. On the side green salad…I think this will make a great light and comforting dinner for tonight…a piece of fish or chicken on the side will go fantastic too…for us, sauteed broccoloni and lemon quinoa-vegetable night is enough…

Sauteed Broccolini & Lemon Quinoa_cutting steems

Sauteed-Broccolini-&-Lemon-Quinoa_healthy-and-delicious_Yes,more-please!

Sauteed Broccolini and Lemon Quinoa

Serves 2 for dinner or 4 as a side dish

1 Broccolini Bunch
1 cup of cherry tomatoes
4 tablespoons of extra virgin olive oil
1 tablespoon of butter (or soy butter if vegan)
3 cloves of garlic
The juice and the zest of one lemon.
Salt and Black pepper to taste

1 cup of Quinoa
1 garlic clove
The zest of one lemon
2 cups of water
salt

Garnish with:

Roasted Almonds chopped
Manchego or Parmesan cheese shavings or even crumbled Feta cheese will work too.*
Squeeze some lime juice right before serving.adjust salt and pepper.
*eliminate the cheese if you are Vegan.

Directions:

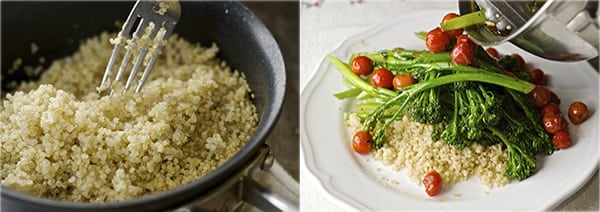
Quinoa cooks just like rice, is 2-1 ratio. In a medium size pot bring the water to boil add the garlic cut in half add the salt . Once water is boiling add the quinoa, lower the temperature to medium, and cook for about 18-22 minutes, at this point add the lemon zest and cover with a lid remove from stove and let it cook with the residual heat.

To avoid the blanching step, cut the broccolini stems in half-length wise (see photo above*). Heat up a large saute pan, add the extra virgin olive oil and add the broccolini. Toss and within 2 minutes, add the garlic, salt and pepper. Wait 1 minute, add the cherry tomatoes, lemon zest and squeeze some lemon juice. Keep moving the pan and toss the vegetables around. Once the tomatoes look like they are going to burst remove from fire add the tablespoon of butter, and toss. Fluff your quinoa with a fork, drizzle a little olive oil add salt and pepper to your taste. Promptly, on a large platter, serve the cooked quinoa topped with the sautéed broccolini and chopped roasted almonds, Manchego or Parmesan cheese shavings. Adjust with salt and pepper squeeze some lemon and drizzle a little more extra virgin olive oil to finish the dish.

Sauteed Broccolini & Lemon Quinoa_fluffy quinoa

Sauteed-Broccolini-&-Lemon-Quinoa_shaving-manchego

Sauteed Broccolini & Lemon Quinoa_healthy and delicious


View Post or View Comments 1

Pulled Pork Tacos & Hatch-banero Mango Slaw

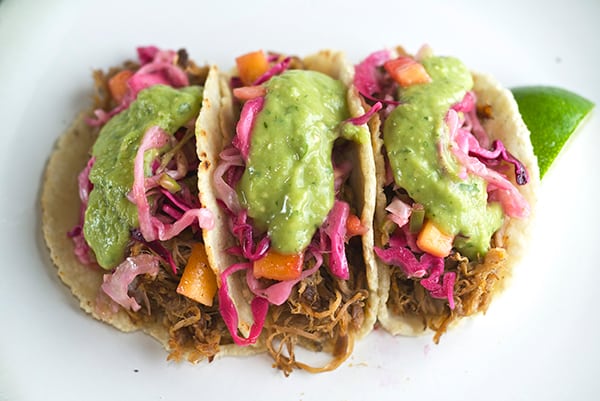
Pulled-Pork-Tacos-&-Hatch-banero-Mango-Slaw-Green-Tomatillo-and-Avocado-Salsa-~Yes,-more-please!

I consider myself a part-time vegetarian but every now and then my carnivorous side knocks at my door. In this case I was craving for a good fresh pork taco. This is an lengthy description right?    Good – fresh – pork – taco? Let me explain myself. “Good”: high quality meat well prepared and well seasoned. “Fresh” : I make it from scratch no short cuts. I want something that is really gonna satisfy my craving. I could go to buy a taco but its better when you make them. Its easy to follow these few steps and….. Done! The formula is ready so you can have the best tacos in town, because you made them!
Being from Mexico, its been hard for me to find good tacos in town (how come something so simple can get so screwed up at the restaurants?). I think the best ones I had here in Austin were prepared in my kitchen. Why? Not because I’m a taco genius, its do to a simple easy equation: handmade tortilla + quality meat cook properly + fresh salsa = the best taco. Want to make fresh corn tortillas?… check our step by step tutorial click here.

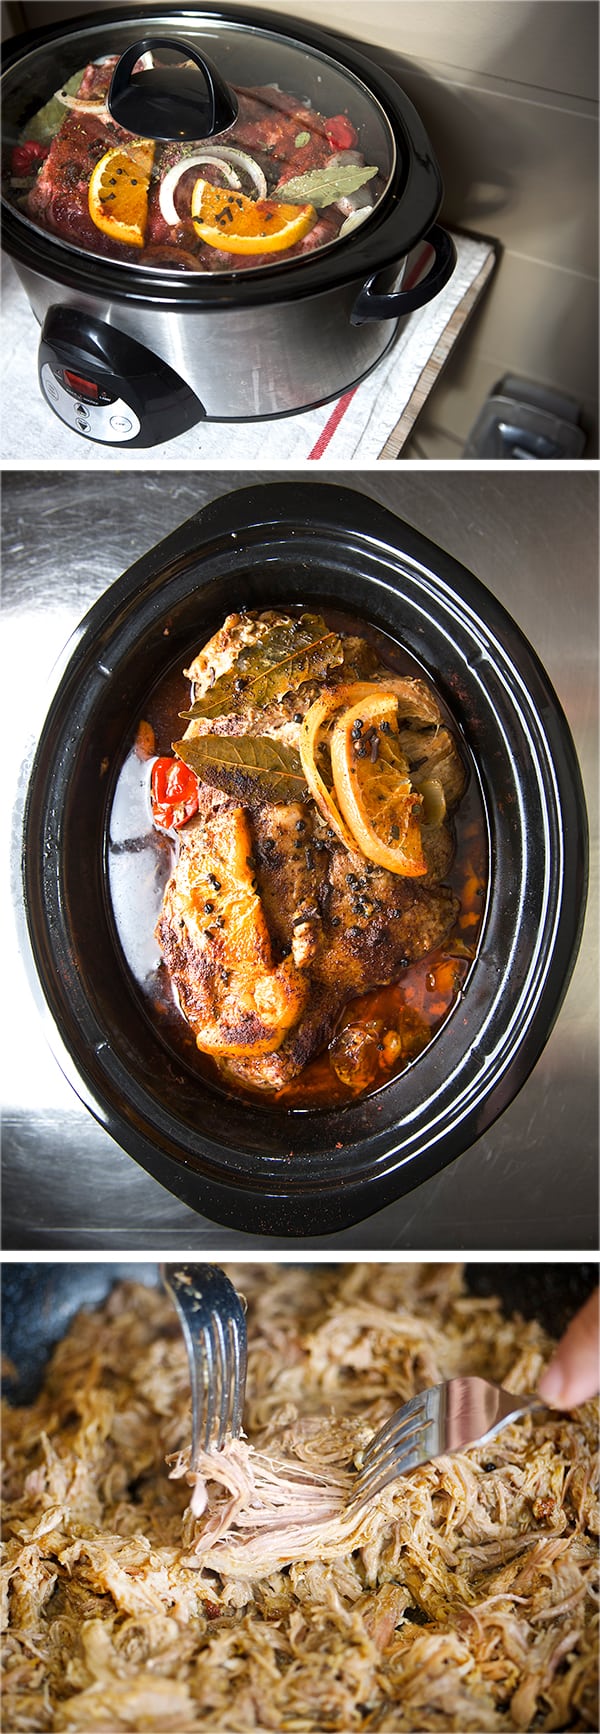
In this case, this is more like an adaptation taco recipe, I used the pork shoulder, or pork butt, because its a good substantial cut of meat. It has a balanced percentage of fat and meat and is great for braising. Yes I wish I could have a copper pot with a huge wooden spoon and cook the pork in hot lard (like carnitas style) and also a huge powerful vent in my tiny kitchen for the smell to go away!. Yes, I love tacos but the smelly vapors in my house? Not so much. Therefore I’m using my handy dandy slow cooker. I place a little table outside in my patio and leave it there for about 3-6 hours, depending on how many lbs. of meat I’m cooking. The result is the neighbors want my fork tender juicy meat. (See pictures below). Its such a great method because it allows you to go to work come back with dinner ready! If you are planning a dinner party its also a really easy one pot wonder, everybody happily assembles their tacos.

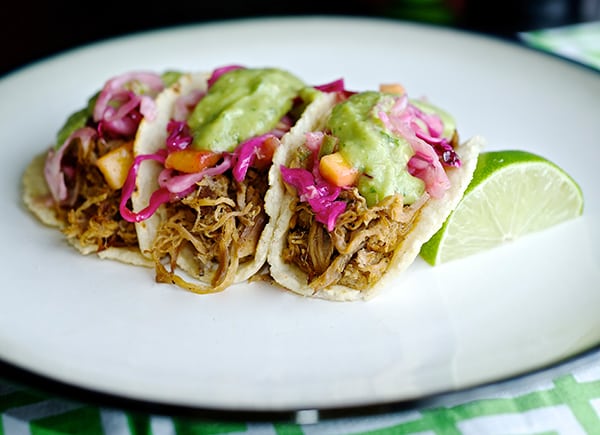
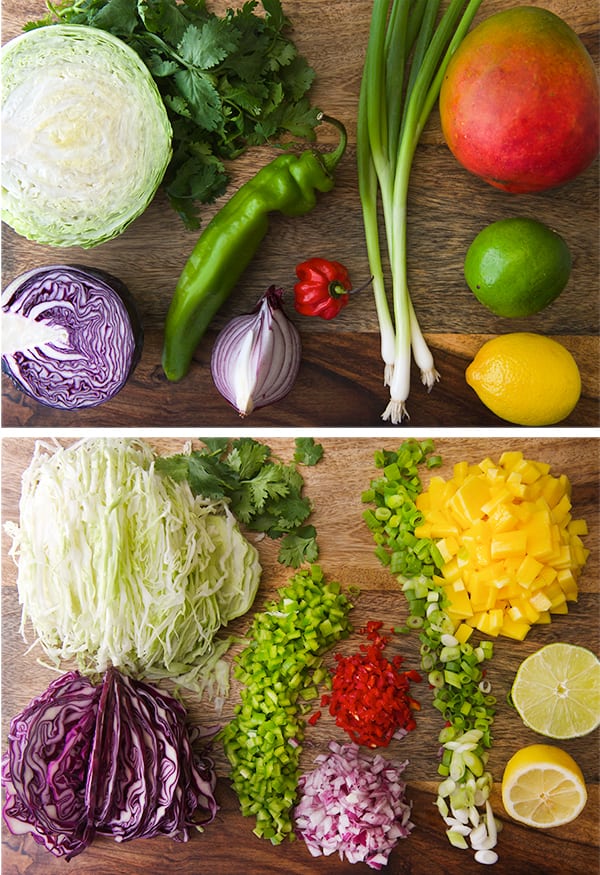
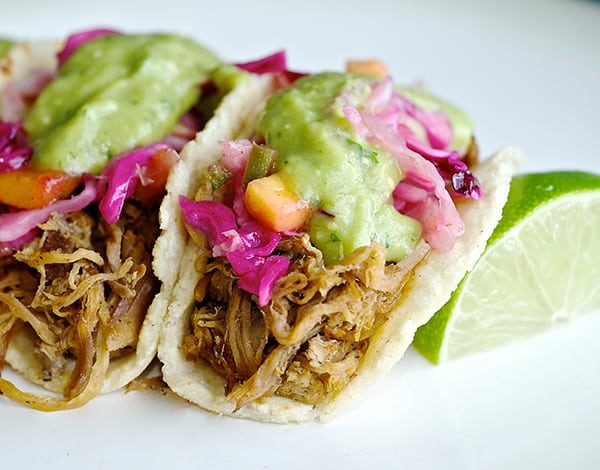
In this case I wanted to make some sweet and sour cole slaw instead of the traditional cilantro and onions or pickled red onions. I added some mango for sweetness and spicy hatch chilies.For the salsa I used creamy avocado and green tomatillos to balance the acidity from the spicy mango slaw (as I’m writing my mouth is watering). These are good fresh pork tacos to me, for now let the pictures do the talking…
This is three recipes in one all fairly easy considering the pork cooks by itself, a Taco Feast that will satisfy any crowd… Enjoy!

Pulled-Pork-Tacos-&-Hatch-banero-Mango-Slaw-crowd-pleaser-how-to-make-tacos~Yes,-more-please!

Pulled Pork Tacos & Hatch-banero Mango Slaw

Serves 6-8 mexicans, 8-12 americans, 12-16 french.

Ingredients:

3-5 lbs pork shoulder or pork butt roast
1 orange ½ juiced the other half cut in thick slices
4-6 garlic cloves
½ medium size onion cut into thick rings
2 bay leaf
1 teaspoon of whole black pepper corns
6 whole cloves
2 tablespoons of dry chile powder
1 tablespoon dry mexican oregano
2 tablespoons of sea salt
2 red habanero peppers
3/4 cup of apple cider vinegar
2 tablespoons brown sugar
½ cup water

Preparation:

On the bottom of the slow cooker sprinkle some salt , half of the pepper corns, half cloves, 2-3 crushed garlic cloves add vinegar and water. Remove some of the excess fat then place the pork roast in the slow cooker. Sprinkle all the rest of the aromatic ingredients on top, add onion rings, orange slices, chili powder, brown sugar, red habanero peppers, garlic cloves. Cover with a lid and follow the instructions for your slow cooker. I cooked this amount of meat in 4 hours (the 3 first hours in high, the last hour on low). Cook until the center of your meat reaches 145F / 62C measured with a meat thermometer. Once your meat is ready turn off the slow cooker and let it rest for about 30-45 min.
Remove all the topping spices and pieces of orange, onion and bay leaf. Transfer the meat into a bowl, and then proceed to fish out all the peppercorns and cloves once you remove all the aromatics, Remove some of the extra fat, but not too much (Leave some for flavor). Place the meat back into the juices and with the help of 2 forks start shredding the meat. It will be easy since the meat has been cooking for so long. Leave it in the pot to keep it warm.

Pulled-Pork-Tacos-&-Hatch-banero-Mango-Slaw_Pork-cooked_step-by-step~Yes,-more-please!

On the bottom of the slow cooker sprinkle some salt , half of the pepper corns, half cloves, 2-3 crushed garlic cloves add vinegar and water. Remove some of the excess fat then place the pork roast in the slow cooker. Sprinkle all the rest of the aromatic ingredients on top, add onion rings, orange slices, chili powder, brown sugar, red habanero peppers, garlic cloves. Cover with a lid and follow the instructions for your slow cooker. I cooked this amount of meat in 4 hours (the 3 first hours in high, the last hour on low). Cook until the center of your meat reaches 145F / 62C measured with a meat thermometer. Once your meat is ready turn off the slow cooker and let it rest for about 30-45 min.
Remove all the topping spices and pieces of orange, onion and bay leaf. Transfer the meat into a bowl, and then proceed to fish out all the peppercorns and cloves once you remove all the aromatics, Remove some of the extra fat, but not too much (Leave some for flavor). Place the meat back into the juices and with the help of 2 forks start shredding the meat. It will be easy since the meat has been cooking for so long. Leave it in the pot to keep it warm.

Spicy Hatch & Habanero Mango Cole Slaw

Serves 6-8
Hatch-banero-Mango-Slaw-~-Yes,-more-please!

Ingredients:

2 cups or ½ small size red cabbage
4 cups or ½ medium size green cabbage
1.5-2 cups 1 big mango 2 medium size peeled and medium diced
3 green onions finely chopped
½ red onion finely chopped
¼ cup cilantro finely chopped
1 Hatch pepper seeded and finely chopped* ( you can replace the hatch for fresh jalapeños )
1 red habbanero pepper seeded and finely chopped*
*Rub a little canola oil in your hands specially your finger tips before start cutting the peppers, this will help avoid burning your hands.

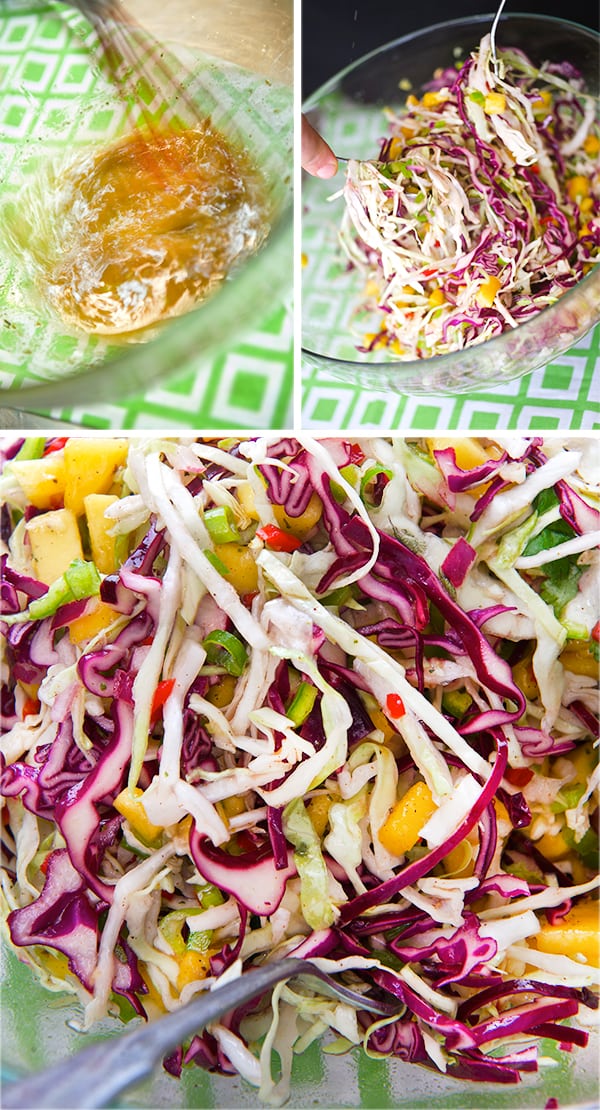
Vinaigrette:

1/3 cup of canola Oil
½ cup of apple cider vinegar
1 tablespoon brown sugar
2 tablespoons honey
1 teaspoon sea salt
1 teaspoon of dry oregano
½ teaspoon of celery salt
½ lime juice
½ lemon juice

Preparation:

In a large bowl whisk all the vinaigrette ingredients. Add the 2 types of cabbage and the rest of the chopped ingredients. Mix well set a side let it get happy for about 20-30 minutes.

Mango_ColeSlaw_02

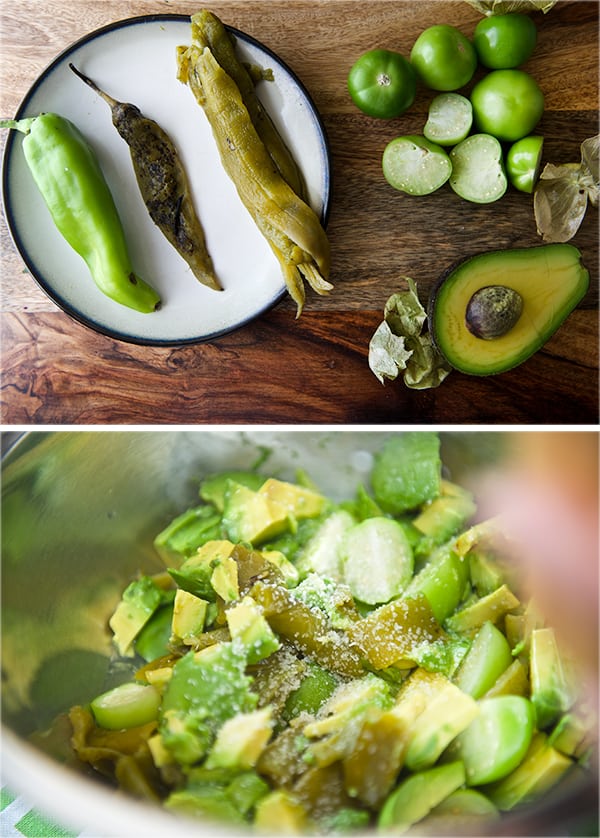
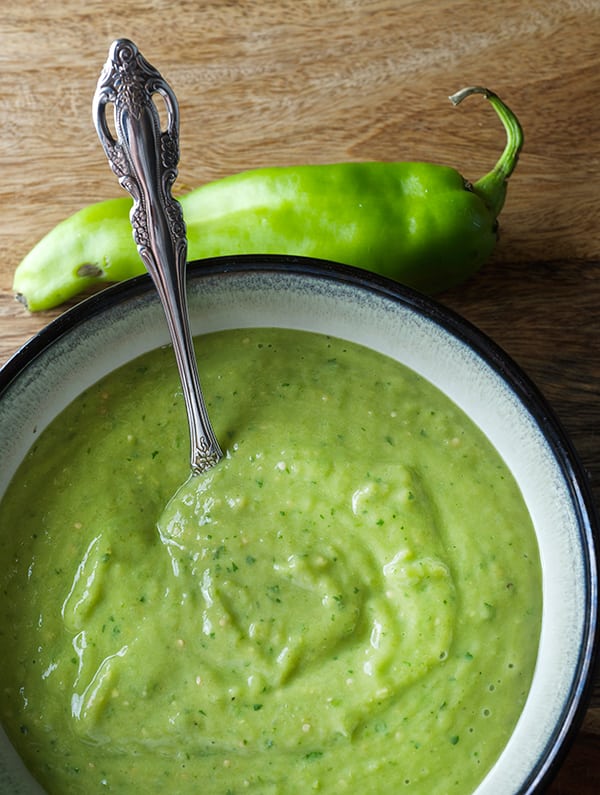
Green Tomatillo and Avocado Salsa

Pulled-Pork-Tacos-_Green_avocado_Salsa-how-to-make-~Yes,-more-please!

Ingredients:

6-8 Small fresh green tomatillos
2 hatch peppers roasted skinned and seeded
1 ripe Hass avocado
3-4 cilantro sprigs
juice of ½ lemon
¼ cup of water
salt and pepper to taste

Method:

In a stand blender or using a hand blender, puree all ingredients until smooth and creamy consistency. Adjust for salt and pepper.

Pulled-Pork-Tacos-_Green_avocado_Salsa-~Yes,-more-please!

How does all this work together?…

Place everything on the table like a buffet style, warm up your tortillas, keep the shredded pork warm on the slow cooker, cut some extra limes, some Cholula red sauce, or any of your preference. Layout the coleslaw, the green avocado salsa and let everybody assemble their own tacos. Open a cold bottle of amber beer like Victoria (this beer is from Mexico but now available in Austin!!!) squeeze a lime juice and Salud!…Share with friends!
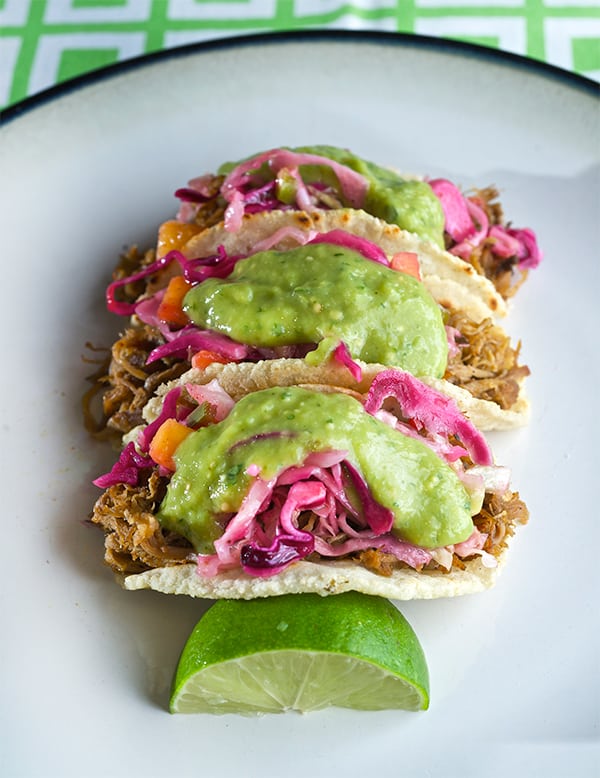
Pulled-Pork-Tacos-&-Hatch-banero-Mango-Slaw-~Yes,-more-please!

Pulled-Pork-Tacos-&-Hatch-banero-Mango-Slaw_bite!--~-Yes,-more-please!

Enjoy!

View Post or View Comments 6

Peach & Cinnamon Trifle

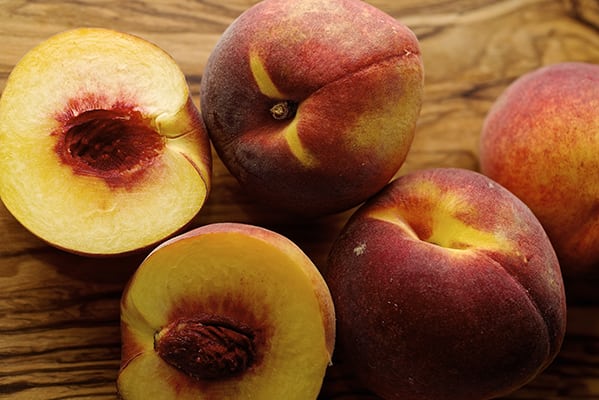
Peach & Cinnamon Trifle_fresh Texas Peaches ~ Yes, more please!

Peach & Cinnamon Trifle_beautifull and smells amazing!~ Yes, more please!

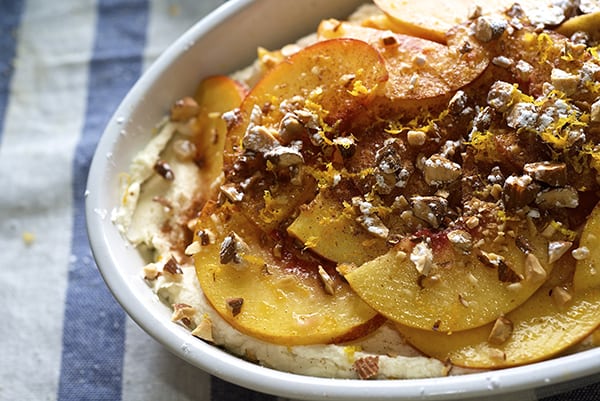
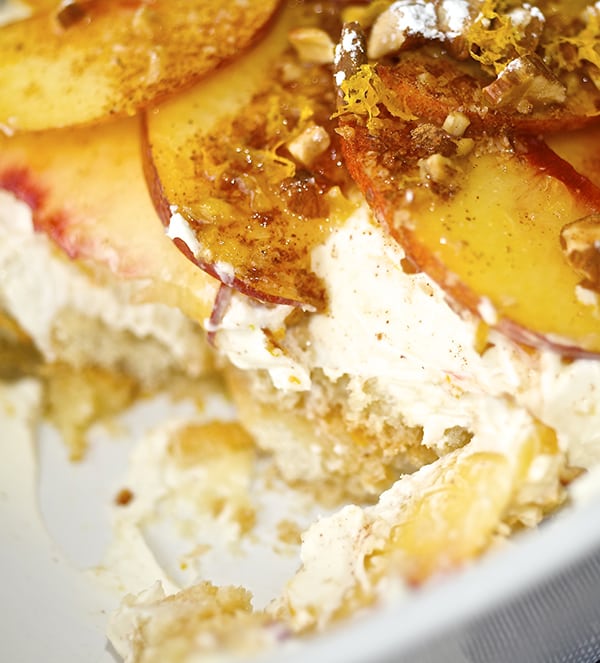
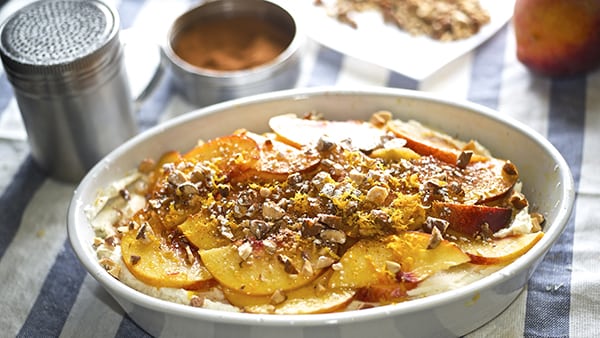
Let me count the ways to summer dessert submission… I’ve had many Trifles in my life. Usually, a Trifle is a cold dessert that consists of multiple layers of sponge or pound cake cut into cubes, soaked in liquor, rum or syrup, thick custard, fresh fruit and whipped cream. All the layers are arranged beautifully on the glass so you can see the beautiful colors. From this premise, everything can go deadly wrong or you can orchestrate a sinful chaos. For example, using store-bought cake, instant pudding from a little box, frozen fruit, conspicuous jellies with brilliant colors and the abominable “whipped topping”.

And then there are the ones prepared with a little more effort that includes brioche bread, fruit liquors, crème anglaise, heavy cream whipped with vanilla bean, and delectable fresh fruits…No matter what they are made of trifles end up appealing to the eye and are most often all soft and mushy, with uniform texture. This is not good at all… I want and I seek the contrast in textures and flavor spectrum in my palette from beginning to end. Why not reconfigure the construction a bit?… Creamy, crunchy, juicy; that sounds better already!… This Trifle by any means has fancy written on it. In fact, it is the antithesis of fancy dessert. It is the greatest collaboration of the right ingredients, in the right place and at the right time. It mimics it’s Italian cousin the Tiramisu.

Let’s call it the Texan Tiramisu. I start my recipe with a craving for crunch: almonds, and ladyfingers (Savoiardi). For Creamy: no whipped toppings for me! I want light and sweet almost feathery silky mascarpone cheese. For juicy: Texas peaches. And a little acidity from the orange juice, orange liquor, and great aromatic touch of cinnamon is a simple sinfulness. In the hot summer months, you will find it difficult to avoid coming back for an extra serving of this fresh and light delicious dessert.

Peach & Cinnamon Trifle_scrumptious summer dessert ~ Yes, more please!

Peach & Cinnamon Trifle_bite me! ~ Yes, more please!

Peach and Cinnamon Trifle

Serves 6-8

The juice of 2 oranges and the zest of one

2 shots of Orange Liquor (2-3 ounces)

12 pieces of ladyfingers (Savoiardi)

8 oz of Mascarpone Cheese

¼ cup of heavy cream

¼ cup powder sugar

1 teaspoon of vanilla extract or Vanilla bean paste

½ teaspoon of almond extract

¼ cup chopped roasted almonds

½ teaspoon of cinnamon

Powder sugar for final dusting.

Basil if you like to garnish with.


 Method:

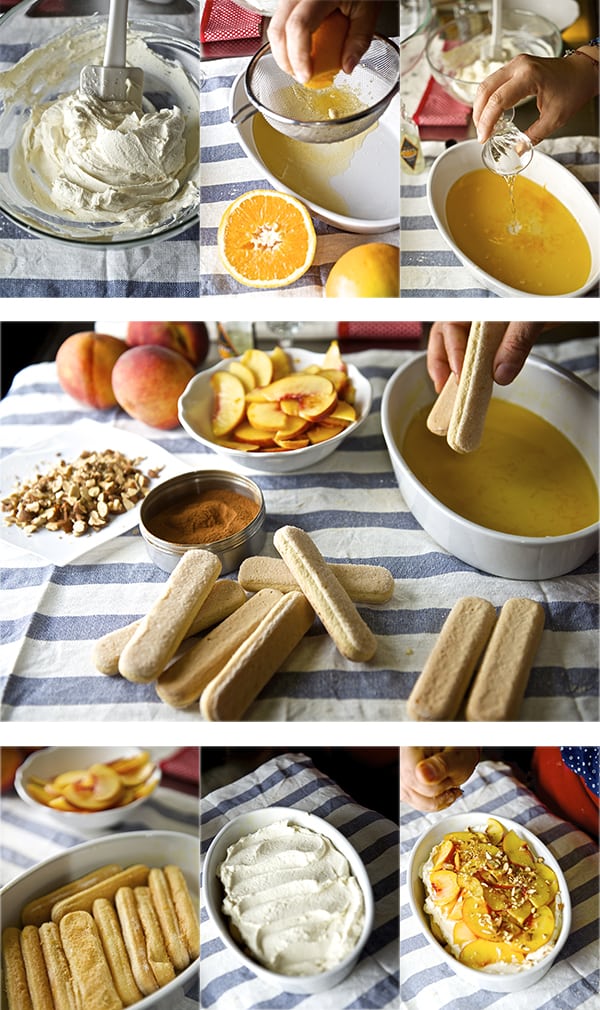
In a 2”- 3”shallow dish, Whisk the Orange juice, the orange zest, 2 shots of orange liquor, one pinch of cinnamon, and 1-2 tablespoons of agave nectar or powder sugar. Taste the mixture adjust for sweetness if necessary. Arrange the ladyfingers on the bottom of the dish in a single layer ( see picture below).

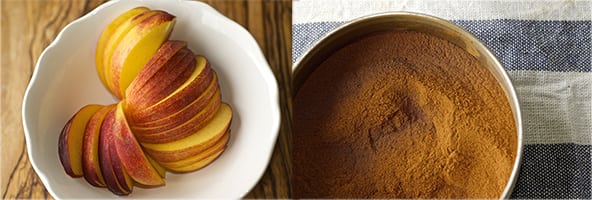
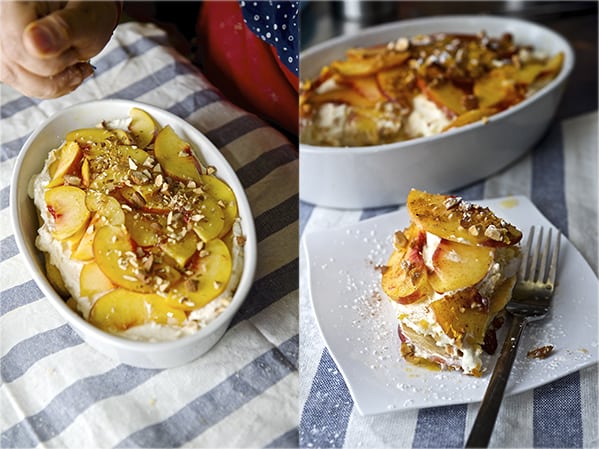
In a separate bowl, with a rubber spatula, mix the Mascarpone, the heavy cream, vanilla bean or extract with some orange zest until smooth. Proceed to spread this mixture over the layer of ladyfingers. Slice the peaches thinly, and add some orange juice, almond extract, and cinnamon. Toss the macerated peaches well in a bowl and place them over the mascarpone layer. For the topping, sprinkle the chopped roasted almonds and some cinnamon. Refrigerate at least 30 minutes. Dust with powder sugar at serving time.

Peach & Cinnamon Trifle_step by step ~ Yes, more please!Peach & Cinnamon Trifle_almonds t, the final touch~ Yes, more please!

~ Fresh peaches, the ideal summer dessert ~

Peach & Cinnamon Trifle_the ultimate summer dessert ~ Yes, more please!

Peach and Cinnamon Trifle

Serves 6-8
Course Dessert
Cuisine Americana
Prep Time 25 minutes

Ingredients

  • The juice of 2 oranges and the zest of one
  • 2 shots of Orange Liquor 2-3 ounces
  • 12 pieces of ladyfingers Savoiardi
  • 8 oz of Mascarpone Cheese
  • ¼ cup of heavy cream
  • ¼ cup powder sugar
  • 1 teaspoon of vanilla extract or Vanilla bean paste
  • ½ teaspoon of almond extract
  • ¼ cup of chopped roasted almonds
  • ½ teaspoon of cinnamon
  • Powder sugar for final dusting.
  • Basil if you like to garnish with.

Instructions

  1. In a 2”- 3”shallow dish, Whisk the Orange juice, the orange zest, 2 shots of orange liquor, one pinch of cinnamon, and 1-2 tablespoons of agave nectar or powder sugar. Taste the mixture adjust for sweetness if necessary.
  2. Arrange the ladyfingers on the bottom of the dish on a single layer.
  3. In a separate bowl, with a rubber spatula, mix the mascarpone, heavy cream, vanilla bean paste or extract with some orange zest whip until smooth.
  4. Proceed to spread this mixture over the layer of ladyfingers.
  5. Slice the peaches thinly, and add some orange juice, almond extract, and cinnamon. Toss the macerated peaches well in a bowl and place them over the mascarpone layer. If desired, make 2. or even 3 layers if you want!

  6. For the topping, sprinkle the chopped roasted almonds or pecans, dust with cinnamon. Refrigerate at least 30 minutes. Dust with powder sugar at serving time. Enjoy!

Music paring: SEnd me a Peach – Over the Garden Wall Soundtrack

View Post or View Comments 1

Privacy Policy Contact Us Yes, more please!