Sides

Cucumber Avocado Pico de Gallo Salsa

Cucumber-avocado-Pico-de-Gallo-and-Salsa-tips-Yes,-more-please!

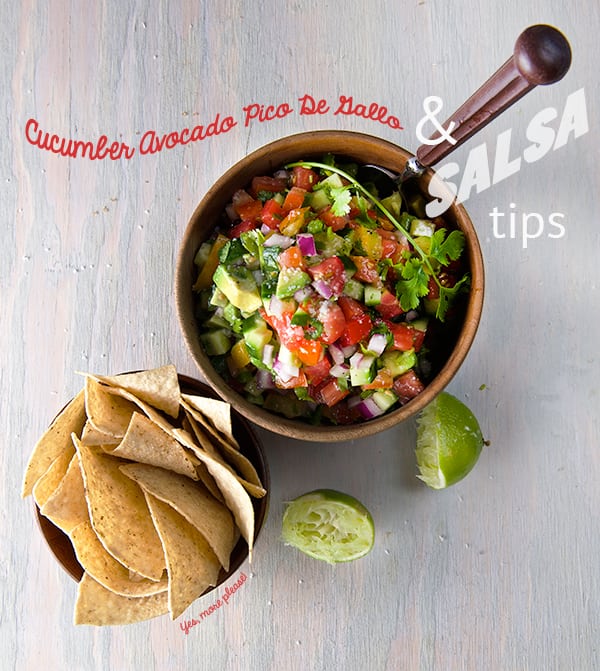
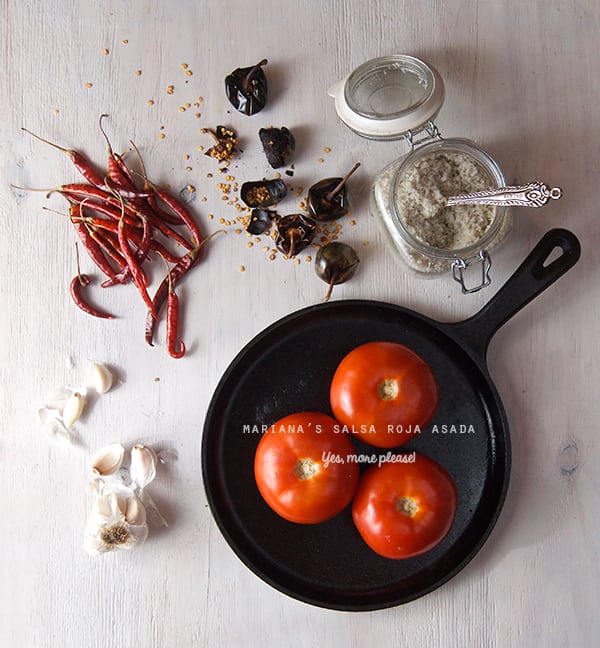
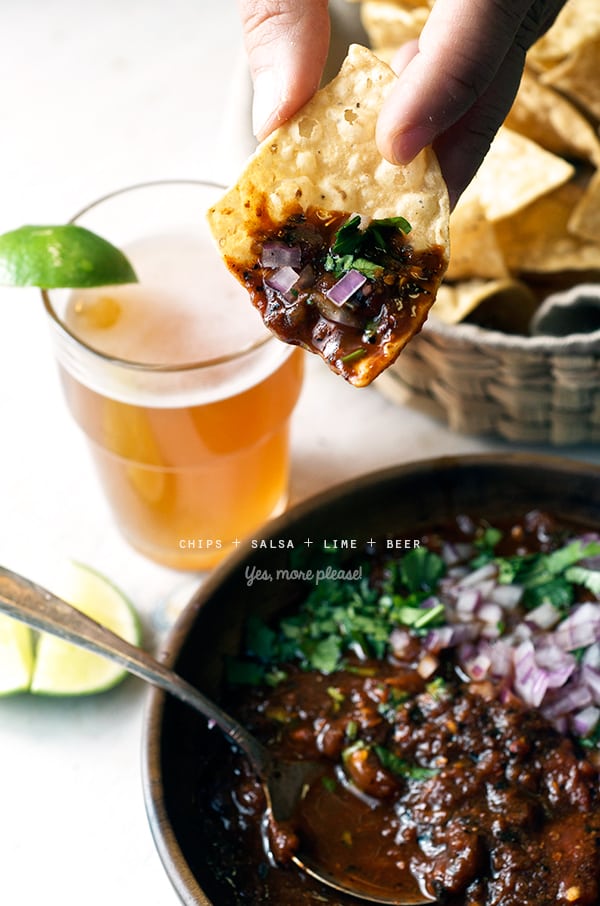
Hello friends, a quick recipe for your weekend. This is a great fresh salsa-guac! It is not a guacamole, it is not your usual Pico de Gallo, its both! The cucumber adds crunch and extra freshness and the avocado adds a bit of creamy goodness. What else could you ask for?… It is a quicky to make just what you need on a long weekend, something fresh to snack on along with some refreshing drinks, perhaps like this fabulous Texas Caipirinha… ehehm…

Besides the recipe which is so easy to make, I would love to share with you a few of my tips when making Fresh chopped Salsa fresca, mostly known here in USA as “Pico de Gallo”. Enjoy!

Sharp knife:
Everything has to begin with a sharp knife. Nothing ruins good salsa more than a dull knife. Mushy cuts do not make a salsa very appealing and ruins the texture. So, sharpen those blades, baby!
Tomatoes:
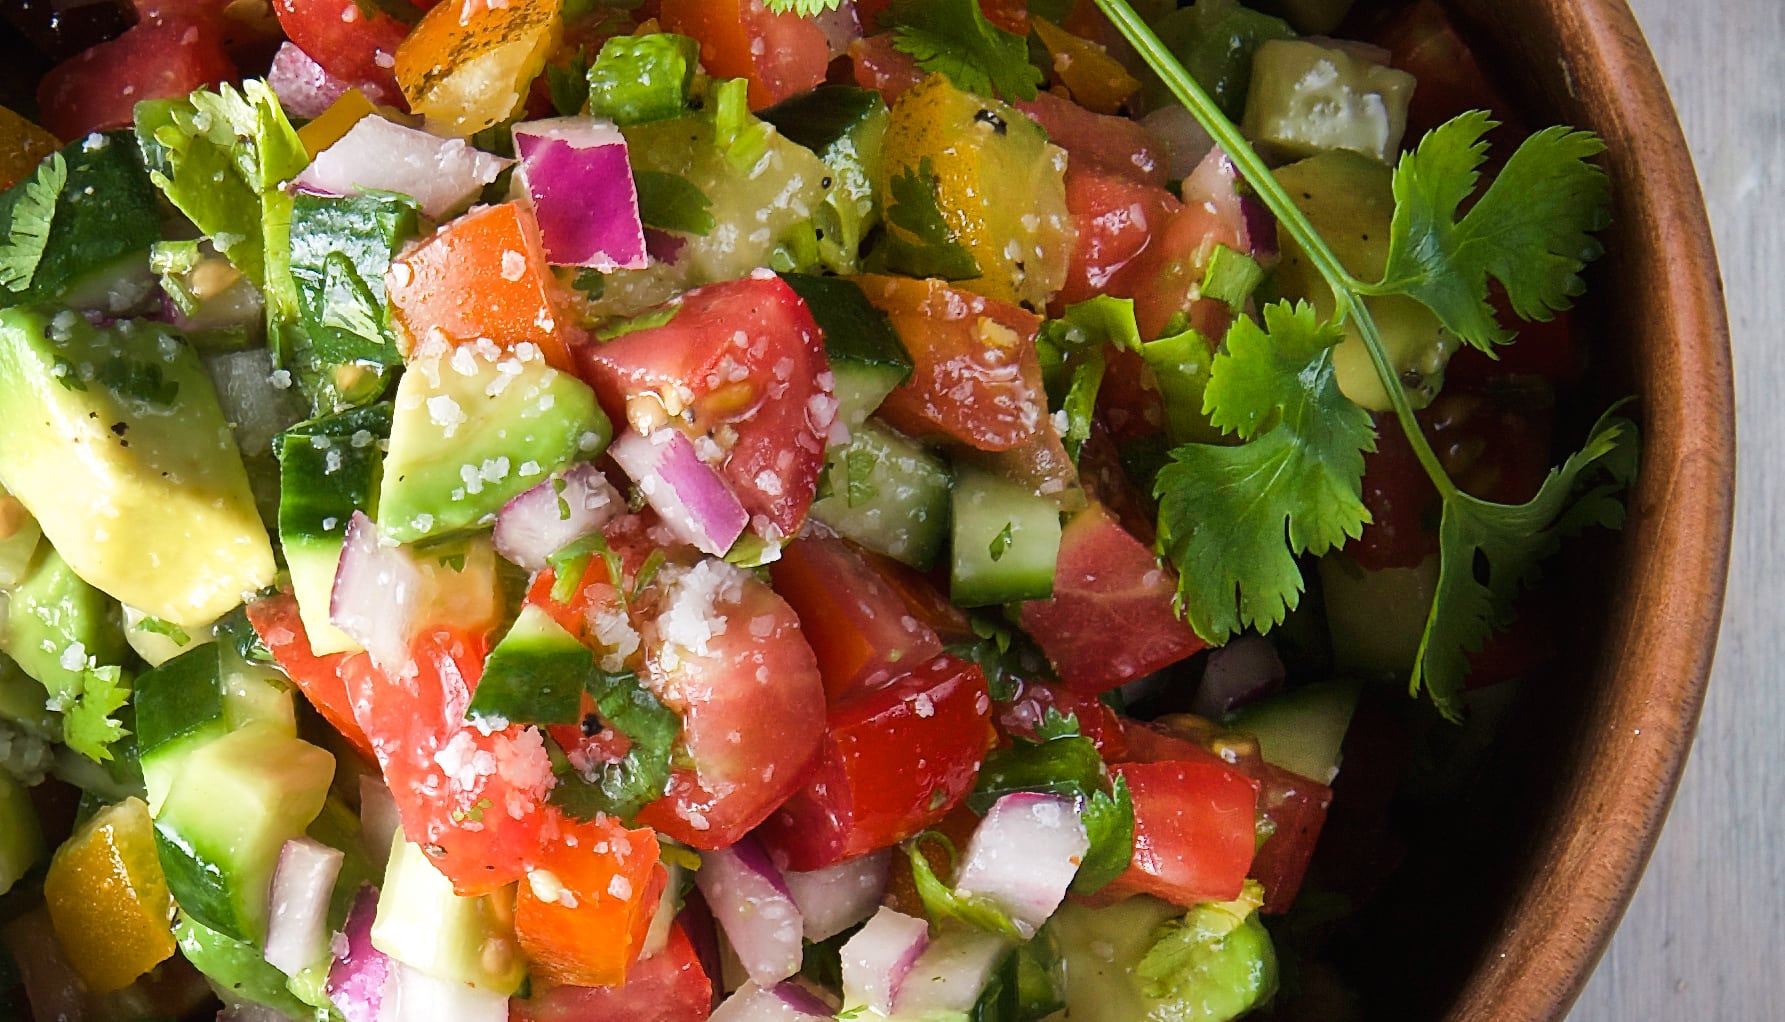
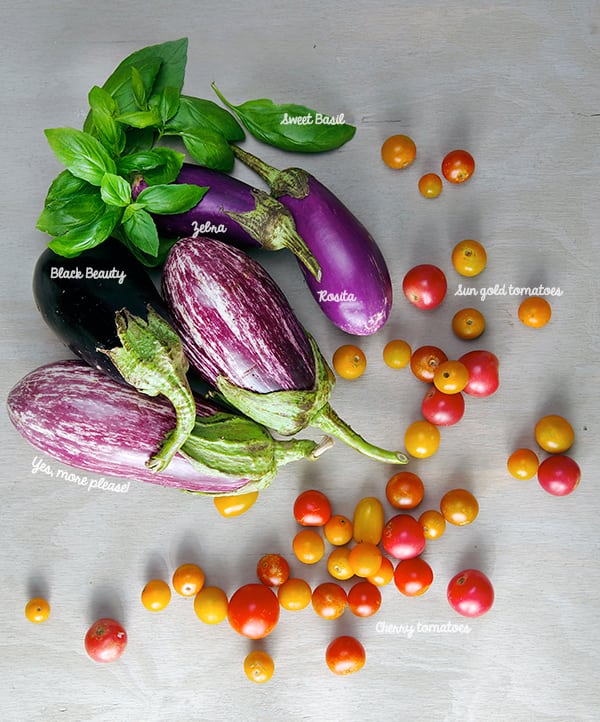
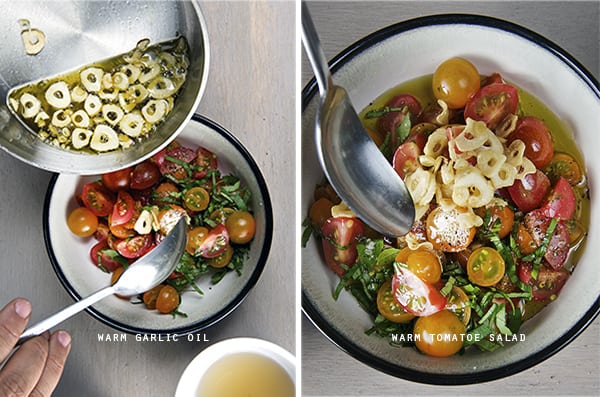
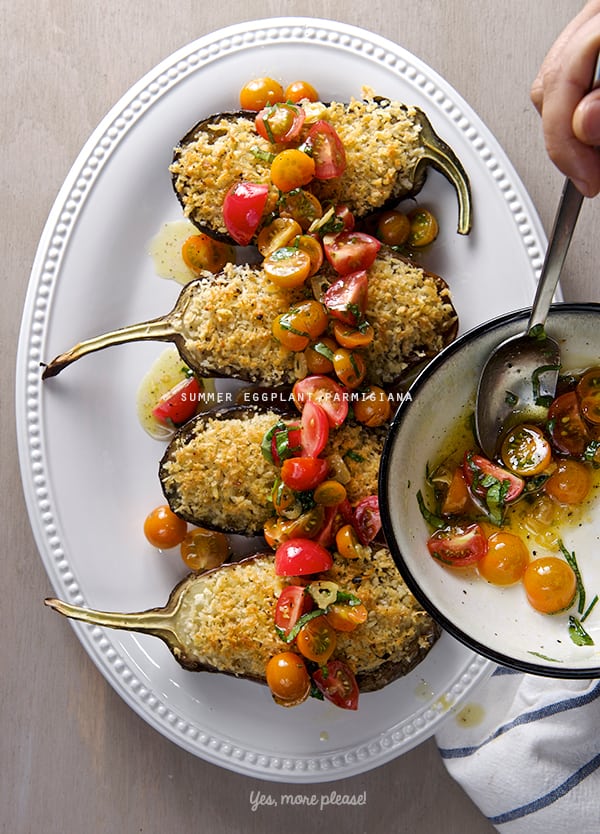
Mix them up! Juliet, Cherry tomatoes, Sun golds, Lemon Boy, Roma, Heirloom, right now is the right season were there is plenty tomato goodness to choose from. 
My favorite Tomatoes in Austin, TX are the ones that Boggy Creek Farms produce. Click here to visit this beutiful Austin Urban Farm is one of the best.
Cucumbers:
English cucumber, or Jade are my favorite since they don’t have to many seeds, thin skin, they keep their crispy texture when marinated.
Red Onions:
Red onions  are  sharp in flavor. My advice is after dicing the onions give them a quick rinse, drain them and add them to your salsa. Rinsing them will make them milder by washing away that milky pungent liquid. You, your loved ones and your guests will appreciate the little extra care!
Avocado Hass:
This kind is the creamiest of all avocados. They have a fleshier inside and small oval pit. Choose the ones that are firmer to the touch it should feel like well done steak. These level of ripeness will hold better in this kind of salsa-guac, creamy, not mushy.
Dicing Jalapeños:
Rub a bit of cooking oil in your hands before cutting a jalapeño, this will protect your hands from the spicy burn.
Remove seeds and vein or leave them up to how spicy you want it!
 A good way to know when a pepper is spicy, is to smell the pepper. Cut the pepper length wise. Smell it. If it smells like fresh-cut grass it will be very mild. But, if it smells like fresh cracked black pepper you hit the jack pot is a spicy one. Watch out! maybe you just one one jalapeño in your salsa…
Limes:
Use limes, instead of lemons. They have a sharper acidity that balances great with the sweetness from the tomatoes.
Sea salt:
Why Sea salt instead of Kosher? It tastes fresher and the salt crystals brighten up the salsa flavor.
Fruit:
You can add other fresh fruit if you feel adventurous like Mangos, Strawberries, Green papaya, Pinneapple, Jicama, Peaches, the world is your canvas!

I hope these simple tips help you to get inspired and give a refresh spin to your salsa. Do you have any tips when making salsa? I will love to read about them.
Share them here and shoot us a comment!

Relax and have a great weekend!

Cucumber-avocado-Pico-de-Gallo-and-Salsa-tips-chips

Cucumber Avocado Pico de Gallo Salsa

Makes 1, 2, 3 or 4 people dance!

2 cups diced fresh tomatoes of your choice, check out my tips above.
2 cups finely chopped cucumbers
½ cup finely dice white onion
1 medium size avocado Hass chopped in small cubes
1-2  jalapeños small diced one with seeds one with out.
1 small bunch of cilantro, finely chopped
2 large juicy limes
2 good pinches of dry mexican oregano
1 teaspoon sea salt

Corn Chips… lots of them!

Preparation:

In a large bowl combine all the chopped ingredients, season with salt and add the oregano by rubbing between your fingers like if you where to snap the oregano at it. This warms up the herb and makes it into smaller pieces which flavors the salsa better. Add the lime juice 
toss and serve with corn chips and your fabulous Texas Caipirinha like this on the side…Enjoy!

Cucumber-avocado-Pico-de-Gallo-and-Salsa-tips-make-salsaYes,-more-please!

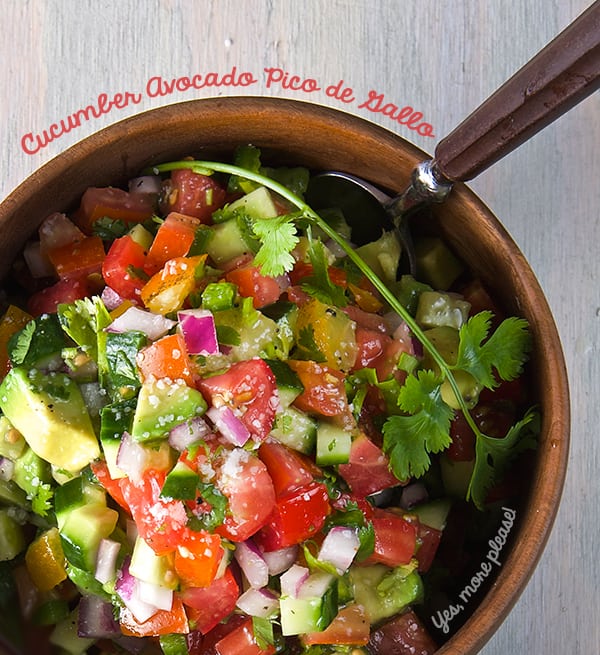
Make your Salsa dance…

Music Pairing: Salsa – Tito Puente

View Post or View Comments 0

Butternut squash Cannelloni with Walnut-Sage Béchamel Sauce

Butternut-Squash-Cannelloni-with-Walnut-Sage-Sauce_Yes,-more-please!
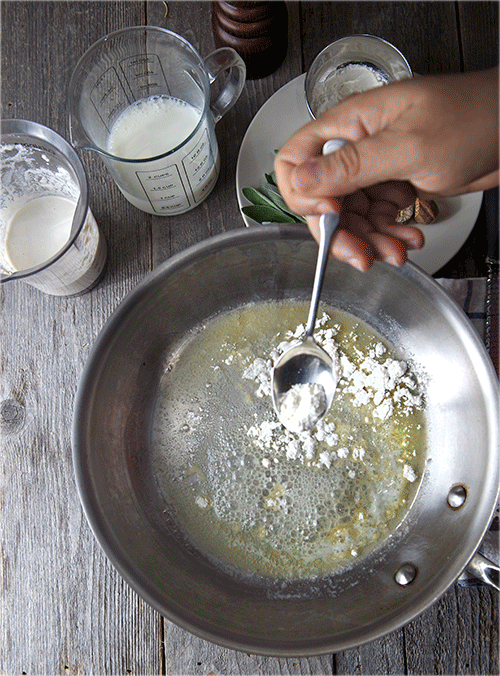
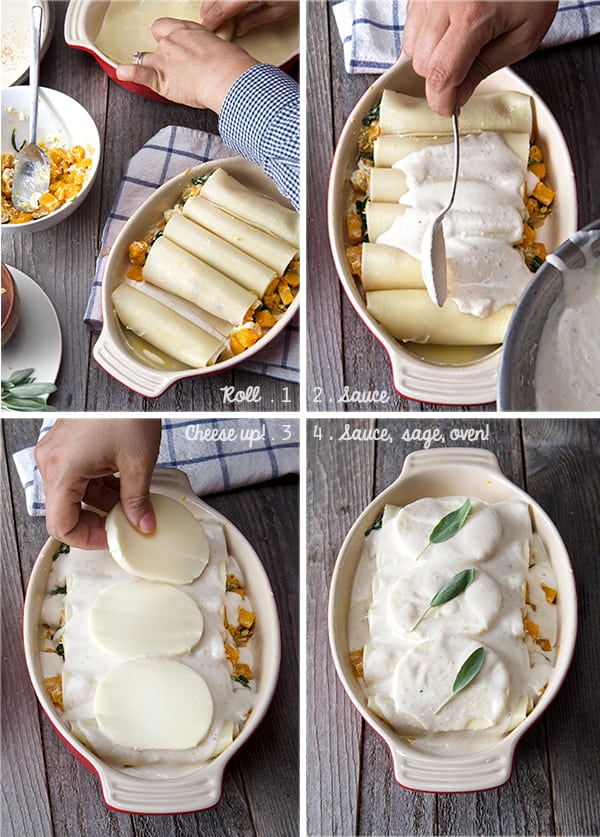
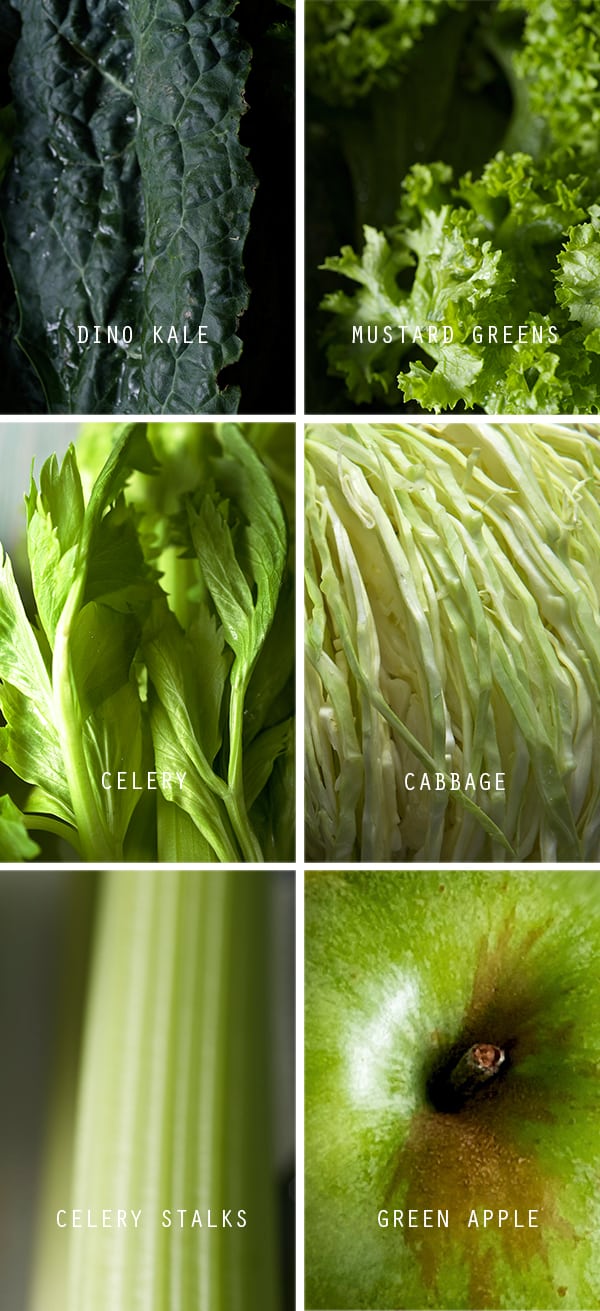
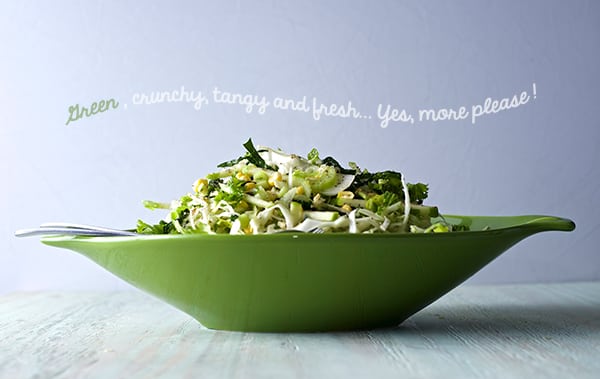
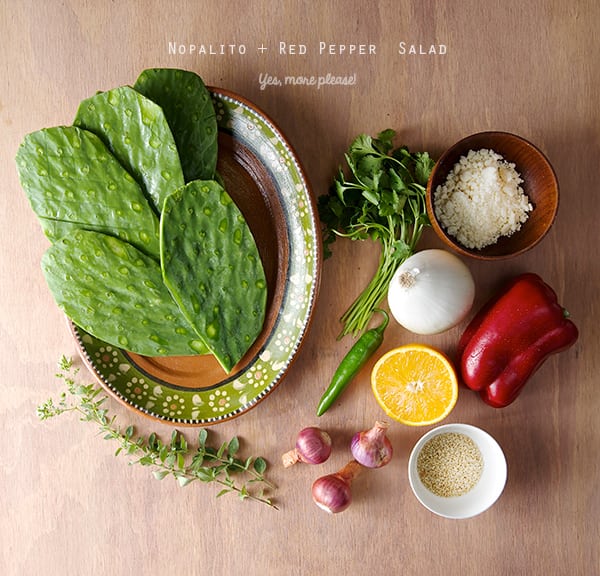
Its warm in the Lone Star State. We’re still waiting in Texas for some cool Autumn weather. We are still in the 80’s around here if you know what I mean. The only indication of Fall, besides the calendar, are the beautiful pumpkins, squashes, sweet potatoes, root vegetables and leafy greens at the markets.

This last Sunday, I found small butternut squash, acorn squash, and some white mini pumpkins. While some people are turning them into candle holders, I think they are the perfect individual size for dinner. They cook fast and leave no left-overs.

Buternut-squash-Cannelloni_the-vegetables

With this in mind, and the romantic idea of having a Fall season, I turned my oven on and thought about the most autumn dish I could bake, and this is what I came up with: Butternut Squash Cannelloni with a Walnut-Sage Bechamel sauce. Dreamy. This recipe has a long name and a short preparation. It is not hard to Imagine pasta sheets filled with delicate butternut squash, baby spinach, onions and goat cheese; rolled and smothered with a light creamy, nutty walnut-sage béchamel sauce, some mozzarella on top and.. Kazam! You have Fall on a plate. Nutty, creamy, warm, cheesy, the kind of dinner you want to snuggle with…In Texas we snuggle in shorts and t-shirts. Or you can fake it and watch a movie with maple trees, and turn your A/C to 64F grab a little blanket and for a few hours pretend is Fall….Not that we have done this…ehem, ehem.

Mean time we will patiently wait in shorts and T-shirts for the winter… maybe I should make Margaritas instead!… Enjoy the recipe.

Buternut-squash-Cannelloni_pasta-and-sauce-ingredients

Butternut squash Cannelloni with Walnut-Sage Bechamel Sauce.

Serves 4

12 cannelloni pasta tubes or 12 lasagna sheets.

For the filling:

1 small butternut squash peeled and cut into small cubes
2 cups baby spinach or baby kale
1/2 medium onion small diced.
1 glug extra virgin olive oil
2 pinches of nutmeg
Salt and pepper to taste
4 oz. Chèvre Goat cheese

For the sauce:

1/2 cup blanched and toasted walnuts
2 cups milk
2 tablespoons flour
4 tablespoons butter
Zest 1/2 lemon
1-2 pinches nutmeg (freshly grated preferred )
2-3 Sage leaves whole*
1/2 teaspoon salt
4-6 cranks of fresh ground black pepper

Fresh mozzarella ( liberal amounts upon your preference)

3-4 Sage leaves to garnish

*Note: Sage its a powerful herb, I levee it whole to just perfume the sauce and leave it whole as garnish also enhances the dish and brings out delicious aromas. I prefer not to chop the sage on dishes like this, because it becomes a bit bitter, and is not very pleasant to bite into them, they will overwhelm the delicate flavor of the butternut squash. However, If you love sage and its a flavor you enjoy, feel free to adjust to your taste.

Preparation:

1. Using a little glug of olive oil Sauté the onions and butternut squash until tender. Finally add spinach salt, pepper and nutmeg; toss well then remove from stove and let it cool down. Add the goat cheese in crumbles once the filling is cool, toss gently.
2. Pre-cook your pasta sheets according the directions on your package. Remember to salt your water to flavor the pasta. Remove the sheets from boiling water 3-4 minutes before, according to directions. Shock them in iced water to stop cooking, and avoid to stick together.

Buternut-squash-Cannelloni_pasta-and-sauce-preparation
3. Make the sauce.  Start by blanching the walnuts in warm water for 5 minutes, this will eliminate any bitterness from the walnut skins. Drain the walnuts and toast them on a large skillet for a few minutes. Blend the walnuts with 1/2 cup of the milk until smooth. Then incorporate with the rest of the milk.

Walnuts
4. In the same large skillet, over medium heat, place the butter until melted and bubbly. Add the flour and whisk well to combine until no lumps and the buttered flour looks light golden-yellow in color. Start adding the walnut-milk in smaller additions and whisk at all times to avoid lumps, until the 2 cups of milk are incorporated. You might need to reduce the heat to medium low while whisking. After all the milk is incorporated season with salt, pepper, and nutmeg and sage leaves. Bring too a slow simmer and remove from heat. The consistency should be of a light creamy thickness, if to thick, add more milk, to lose, place it back to the heat and whisk until desired consistency.
It should cover the back of a spoon see picture below.

Butternut-Squash-Cannelloni_how-to-make-bechamel-walnut-sage-sauce
3. Prepare a baking dish with butter, or a little olive oil, add a bit  of the sauce on the bottom.
4. Start by filling the cannelloni’s pasta tubes or by placing the filling on one end of the precooked pasta sheets and roll them up tightly. Proceed to do the same with each pasta sheet. Place the cannelloni rolls into your baking dish as you go.
5. Cover all the pasta rolls with the walnut-sage sauce, reserve some of the sauce.
6. Cover with mozzarella slices, then pour the remainder of the sauce, top with some sage leaves.

Butternut-Squash-Cannelloniwith-sage-and-walnut-sauce_assambling-the-rolls
7. Bake at 375F for 20-30 minutes until cheese is melted and top is blistered.
8. Let it rest for 10 minutes before serving. Enjoy!

Note: Not too fond of rolling? make it into lasagna layers, you also can add some cooked ground turkey or sausage to the butternut -spinash filling and it will be equally delicious. I just love the way the Cannellonis portions out. Enjoy!

Butternut-squash-Cannelloni-with-Walnut-Sage-Sauce_out-of-the-oven-

Butternut-squash-Cannelloni-with-Walnut-Sage-Sauce_Yes,-more-please!-

 Music Pairing: Autum Leaves – Miles Davis

View Post or View Comments 2

Green Green Coleslaw

Green_Green-Cole-Slaw_ready-to-eat!_Yes,-more-please!

Texas summer heat is like Kryptonite. Do you remember how Superman used to get exposed to this green glowing Kryptonite and you could hear a sound like this: ~ waaayioh, waaayioh, waaayiho )) ) ) ) ) you could almost see the waves that debilitated the strongest blue and red caped man in the comic world… Well, I’m not muscled or caped like Superman, but the Summer sun is my Kryptonite.

I often can see and hear the heat waves whispering:

~ waaayioh, waaayioh, waaayiho )) ) ) )

~ Am I delirious?…

No, the truth is that I’m in much need of a little break from the high temperatures. I needed a boost of fresh glowing green in my life and I could not resist some leafy crunchy vegetable medley action. We all know what this leafy greens are brimming with fiber along with vitamins, minerals, and plant-based substances. Imagine what they can do for you.

August is a hard month to get great produce; too much heat here in Texas. I know the green leafy season is not here yet, but thanks to California’s amazing weather and hard-working farmers, I armed myself with some of my favorite green vegetables: kale, mustard greens, green cabbage, green apples, celery, onions and a little fresh corn. After a little chopp-ah-rooh, and combining all this shredded goodness with some light vinaigrette, this Green Green Coleslaw was born.

Green-Green-Cole-slaw

The combination of the different greens add great flavor and texture. A tangy oil honey and apple vinegar dressing, with a good punch of dry oregano, and seasons, make this green-green coleslaw light and crunchy. It is lightly dressed. No soggy cole slaw for me, thank you. If you are the creamy cole slaw type, this will convert you into the vinaigrette version.

This Green Green Coleslaw, makes a great side dish for, salmon, any white grilled fish, chicken, pork, beef , shrimp, tofu, tempeh, rice, lentils, white beans…you name it. You can add some roasted almonds, walnuts, or sunflower seeds and it will be a great left over for next day lunch.

Nice and easy, this recipe is all about fresh and nutritious green power all in one bowl. A salad
with great personality and flavors, this green-green cole slaw will restore your energy and refresh you on this fiery Summer. Like a good Kryptonite, you know? hehehe Enjoy.

Green--Green-Cole-slaw_Vegetables

Green Green Coleslaw

Serves 4-6 or 1 super man.

The vegetable action:

½ half of a small green cabbage head
4-5 San Jacinto Kale leaves
1 large mustard green leaf.
2 celery stalks
1 ear of sweet yellow corn
1 medium-large green apple
½ medium onion

For the dressing:

¼ cup grape seed oil
4 tablespoons apple cider vinegar
2 tablespoons honey
1 heaping teaspoon dry oregano. (Not crazy about oregano?, tarragon, dry basil will go great too…)
½ teaspoon celery salt
½ teaspoon kosher salt
½ teaspoon fresh ground pepper
The zest and the juice of one lemon.

Feel free to add some nuts, for crunch and protein, toasted almonds or walnuts will taste fantastic.
Or some golden raisins will add an extra sweet note. If you are a Mayonnaise lover, substitute the oil for 1/2 cup of mayonnaise and 2 tablespoons of plain greek yogurt.

Preparation:

1. Finely chop the cabbage, the kale (remember to remove the hard steam on the kale and the mustard greens), Finely chop the onions, celery and de-kernel the sweet corn. Chop the apple like  matchsticks.

Green-Green-Cole-slaw_chop,-chop,-chop
2. In a large bowl, whisk all your dressing ingredients, add all the chopped vegetables and toss well.

Green-green-Cole-slaw_dressing-and-de-kerning-the-corn
3. Set a side and let it rest for 10 to 15minutes before serving.
4. Taste, adjust for salt and pepper if necessary. Serve and Enjoy!

Green-Green-Cole-slaw_toss-well_Yers,-more-please!

Green-Green-Cole-slaw_close-up

Green-Green-Cole-slaw_Vegetables_tangy-and-fresh


View Post or View Comments 1

Watermelon Wedge Salad

Watermelon-wedge-salad_fresh-and-crisp!_ready-to-serve

Its hot in here! Austin is reaching 100F temperatures. All I can think of is something refreshing. I’m craving lots of juicy ingredients. So what to make?… Watermelon and iceberg lettuce together its the ultimate ode to crisp and fresh.
Inspired by the classic wedge salad, I played with summer flavors and made a Watermelon Wedge Salad. It consists of one head of iceberg lettuce cut into quarters plus a good sweet crisp watermelon dressed with a light and clean, olive oil + salt + black pepper dressing. 
One bite has it all; crisp crunch of the iceberg lettuce, tangy lemony light dressing, sweet juicy watermelon, creamy and salty pancetta, fragrant basil adds a great herb note.

What is not to like ?

This recipe is a pairing of summery ingredients that work divine together. Much like a summer gathering of good old friends having a good time.
Easy, fast and fun to make, in a blink of an eye this salad is ready to cool you down.

Music pairing: Our favorite music band : SPOON just released its new album: “They want my soul “
that is what is playing on the background.

Keep it fresh. Enjoy!

Watermelon-wedge-salad_ingredients

Watermelon Wedge Salad

Serves 4 warm souls

1 head of iceberg lettuce
4 cups seedless watermelon chilled.
½ cup goat cheese crumbs.
2 half inch thick slices of pancetta.
Small bunch 6-8 large leaves fresh basil.
2-3 tablespoons fresh finishing extra virgin olive oil
2 juicy lemons
1 teaspoon Kosher salt
Fresh ground black pepper to taste.

Preparation:

1. Cut the pancetta in small cubes, sauté until crisp and render the fat. Place them over a paper towel to absorb the excess fat.

Watermelon-wedge-salad_render-pancetta
2. Remove the hard steam of the lettuce. Cut the head lettuce in four wedges.
3. With a melon baller scoop 4-5 cups of watermelon balls.

Watermelon-wedge-salad_pin--poing-and-wedges

Watermelon-wedge-salad_ready-set-go!
4. Place the lettuce wedges on a plater, and drizzle olive oil, the juice of 1 lemon, generous amounts of kosher salt and black pepper.

Watermelon-wedge-salad_crisp-and-fresh-lettuce
5. Add the watermelon balls, crumbled goat cheese, crispy pancetta.

Watermelon-wedge-salad_close-up-ingredients

6. Tier the basil leaves and sprinkle on top, add the rest of the lemon juice a little extra drizzle of olive oil, serve.

Note: Make sure your watermelon is cold, place it into the refrigerator hours before to ensure maximum chill! This salad taste better when the crisp clean iceberg lettuce and the juicy watermelon are cold.

Watermelon-wedge-salad_squezee-lemonand-EVOO

Watermelon-wedge-salad_Yes,-more-please!

Mirror, mirror on the wall who’s the freshest of them all?

Music Pairing: Spoon – They want My Soul

View Post or View Comments 3

Summer Eggplant Parmigiana


Summer-Eggplant-Parnigiana_Yes,-more-please!Eggplant-Parmiggiana_Ingredients

The first days of summer are arriving in Texas, and with them an incredible vegetable abundance.
This weekend eggplants at the Farmer’s Market grabbed my attention in such a way that I bought too many!… That’s the the way my crave of cooking works, with my eyes. I’m a very visual person and I believe good, healthy, fresh vegetables have to look good and smell good. Being visually inspired at the farmers market helps me create and translate my cravings into recipes. When I saw these eggplants I immediately thought of eggplant parmigiana. I love eggplant parmigiana, although to be honest sometimes the delicate eggplant flavor gets lost in the breading, frying , melted cheese, and marinara sauce. Don’t get me wrong, I love all these components, but maybe in Autumn or winter…

With this memory of flavors in mind, I started to think of how could I transform a classic into a more simple and Summery version. I came up with this Summery eggplant parmigiana recipe. A lighter version in which instead of breading and frying the eggplant I cut them lengthwise and roast them in the oven. Eggplants when roasted this way, develop a buttery flavor almost like a vegetable custard contained in it’s own skin. That’s why Im skipping the melted cheese on these recipe. Believe me you have to try them, you will be enjoying the delicate eggplant flavor. To add texture and contrast to this custard I added a combination of panko bread crumbs and Parmigiano-Reggiano cheese. If you have a gluten allergy these can easily be replaced with ground pecans,or almonds instead of panko breadcrumbs which it will be equally or even more delicious.

Instead of the warm marinara sauce, I made a warm tomato salad with a garlic oil dressing combining the first sweetest cherry and sun gold tomatoes of the tomato season. These little tomato marbles are incredibly flavorful, I never feel like cook them I almost eat them like grapes, as a snack in the afternoon. That’s one of the reasons this simple warm salad enhance their great qualities.

This summer eggplant parmigiana version will warm your heart. It is easy to make, light, and comforting.

Welcome to the summer, and enjoy!

Eggplant-Parmiggiana_beauty-ingredients

Summer Eggplant Parmigiana

Serves 4

2 large eggplants
1-2 glugs of grape seed oil
sea salt and Black pepper

For the topping:

1 cup panko bread crumbs
½ cup Parmigiano-Reggiano cheese grated.
1/4 teaspoon salt
2-3 teaspoons of extra virgin olive oil.
fresh cracked black pepper to taste.
A pinch of red flake peppers (optional)

For the warm tomato salad:

2 cups of a combination of cherry and sun gold tomatoes.
2-3 sprigs of fresh Basil
3 tablespoons Extra Virgin Olive Oil
2 large garlic cloves thinly sliced
3 tablespoons Seasoned Rice Vinegar.
(Rice Vinegar goes so well with the sweetness of the tomatoes. Since this little tomatoes are so sweet, you need to balance the acidity , and the seasoned rice vinegar pairs fantastic , bringing all the notes together, sweet, salty and tangy.)
salt and fresh black pepper to taste.

Preparation method:

1. Preheat the oven 450F/ 230C
2. Cut the eggplants length wise and score them with a pairing knife.Rub the eggplants with some olive oil or grape seed oil, season them with salt and fresh cracked black pepper.
3. Place the eggplants on a baking sheet and roast them for about 15-18 minutes.

Eggplant-Parnigiana_-how-to-bake-it
4. Mean time, in a bowl combine the Panko bread crumbs, grated Parmigiano-Reggiano cheese, red pepper flakes, olive oil, salt and pepper until well combined and the mixture resembles moist sand. Set a side.
5. Start making the warm tomato salad, by cutting the cherry and sun gold tomatoes into halves or quarters depending on size. Chifonade the basil. Combine them in a bowl, toss them with the rice vinegar, salt and pepper.
6. In a small pot add the extra virgin olive oil along with the thinly sliced garlic and using the lowest possible heat on the stove, start warming up the oil. This will infuse the oil with the garlic and the thin slices of garlics will start turning golden brown.

Eggplant_Parmigiana_tomatoe_salad_ingredients

7. Check your Eggplant, take out of the oven top each half with a generous amount of the panko mixture. Place them into the oven for another 5 minutes until the topping is golden brown.

Eggplant-parmigiana-baked_panko-crust
8. Mean time check your garlic and olive oil. Once the eggplants come out of the oven, remove the warm oil from the stove and add this to the cherry and sun gold tomato salad toss well.
The warm oil will gently warm up the tomatoes,the garlic chips will add flavor and aroma to the tomato salad it is a fantastic!

Eggplant_Parmigiana_tomatoe_salad

Eggplant-Parnigiana_-out-of-the-oven
9. Once your eggplants are ready out of the oven transfer them onto a platter, and top with the warm tomato salad, grate a little extra Parmigiano-Reggiano and fresh basil. Enjoy!

Summer-Eggplant-Parnigiana_Yes,-more-please!ready-to-serve!

Summer-Eggplant-Parnigiana_Yes,-more-please!eat-me!

Welcome the Summer!

Music Pairing: Ella Fitzgerald & Louis Armstrong – Summertime

View Post or View Comments 3

Grilled Nopalitos and Red Bell Pepper Salad

Grilled-Nopalitos+RED-Pepper-Salad

Have you ever had Nopalitos? Nopalitos are traditionally used in Mexican cuisine, they are part of the cactus family, there are more species than you want to know about. The word “Nopal” comes from the Nahuatl word meaning “pads” refers to the plant shape. They are a great source of Vitamin C, minerals like magnesium, manganese, calcium,and  also a great source of fiber. Besids their delicious and nutritious qualities, recent research studies have shown a positive effect on glycemic index which could be useful and a great value to add to your diet when managing diabetes or to include on your weight loss diet.

Anyhow, what you really need to know about Nopalitos and what I want to share with you is how delicious they are when prepared in a right simple manner.

Nopalitos have a bad reputation among vegetables because of their slimy and viscous flesh. However there are different ways to prepare them and a couple of tricks to avoid the slimy culinary disaster.

Like any other vegetable, Nopalitos can be boiled, steamed, sautéd, grilled or eaten raw, and there is a trick for each one of these cooking methods. Just to mention one of these tricks briefly, boiling nopalitos is the most common of all methods. When boiling Nopalitos, the trick to it is to add 4-6 tomatillo husks along with a piece of onion, a small bunch of cilantro and some sea salt in a pot of simmering water. The tomatillo husks will avoid the slimy matter. Simmer them in a pot over medium heat  for about 15-20 minutes, until they change of color. Turn the heat down, and  let them cool.  Strain and rinse thoroughly. Combine the nopalitos with a good amount of Pico de Gallo salsa, toss and they are ready to serve. As you can see, with a little effort you can make the fastest salad of them all!

This kind of Nopalito salsa/salad is ideal to have as a side dish. You can make tacos, sprinkle some queso fresco, and  even cook some of this left over salad with scrambled eggs, to prepare nopalitos egg breakfast tacos. OMG I just gave you another recipe! hehehe…

My favorite way to eat nopalitos it’s grilled. The char gives them a great flavor, firm texture and reduces the slimy texture almost to zero when you grill them. Therefore it’s one of my favorite ways of cooking them. Nopalitos when grilled, make the best tasting salad. This is definitely one of my personal favorite Mexican dishes, so simple and full of great flavors.

This Grilled Nopalitos and Red Bell Pepper Salad, combines simple ingredients and a crisp and tangy simple vinaigrette. As easy as it sounds it’s a great summer dish. This salad can be served as a side dish to accompany any grilled meat or fish. It can be made into vegetable medley tacos or as a vegetable complement over rice, quinoa, or whole black beans.

I hope you enjoy the recipe and give yourself the opportunity to try something new. Nopalitos salad has been in Mexican cuisine for a long time and it is too delicious to be ignored.

Give nopalitos a chance!

I would love to hear back from your culinary adventures. Remember to check our music pairings, if you are in need to shimmy while you grill…Enjoy!

Nopalito-Salad_Ingredients_Yes,-more-please!

Grilled Nopalitos and Red Bell Pepper Salad.

Serves 4… or 2 hungry Vegetarian Mexicans!

5-6 Nopalito pads, cleaned and thorn removed.*
1 large red bell pepper
3 small shallots or 1 small white onion thinly sliced.
1 small bunch cilantro (leaves only)
1 serrano pepper no-seeds finely chopped (optional)

For the vinaigrette:

1/3 cup Orange juice
2 tablespoons apple cider vinegar
4 tablespoons grape seed oil
2 tablespoons agave nectar
1 tablespoon toasted sesame seeds.
2 sprigs of fresh oregano or 1 teaspoon dry mexican oregano.
1 teaspoon sea salt.
Fresh cracked black pepper to taste.

Garnish with:

Toasted sesame seeds.
¼ cup Cotija cheese crumbled.

*Nowadays it’s very easy to find fresh Nopalitos that have been cleaned and de-thorned. If you are lucky enough to have your very own nopalito cactus plant, gear up! Use thick leather gardener gloves, a pair of tongs, and a  sharp fillet knife to shave the thorns off. Rinse and wash thoroughly. Now it’s ready to use!
If you live here in Texas this type of Cactus Plant is very common to find in the prairie. Have a culinary adventure!
Tip: when choosing wild nopalitos: you will want to pick the medium-small size, deep green, about 1/4 inch thin or less. They look tender and have plump edges with no dry spots.These are the best tasting nopalitos and tender when cooked.

Preparation Method:

1.Wash and with a pairing knife gently score your clean nopalitos.
2.Prepare your vinaigrette by combining all the ingredients on a bowl and whisk.

Nopalito+Red-Pepper-Salad_vinaigrette+redpeppers

3. Fire up your grill. Grill Nopalitos and red bell pepper. Grill both sides until cooked and charred.
Nopalitos turn color from bright green to a olive green when cooked. Be sure to blister them. This will add so much flavor to the salad.

Nopalito-+-Red-pepper-Salad_grilled

4. Slice your grilled Nopalitos into ¾” ribbon strips, slice your grilled bell peppers into a thinner strips.

Nopalitos+RED-Pepper-Salad_nopalito-ribbon-slices 
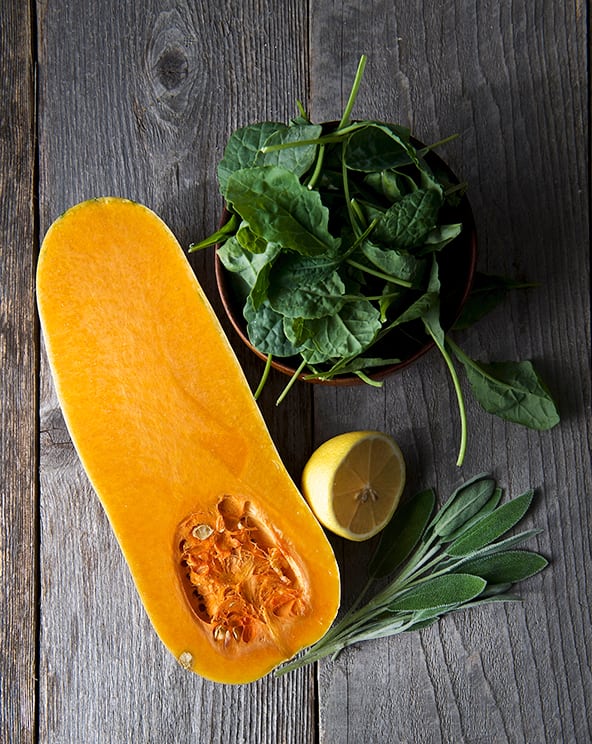
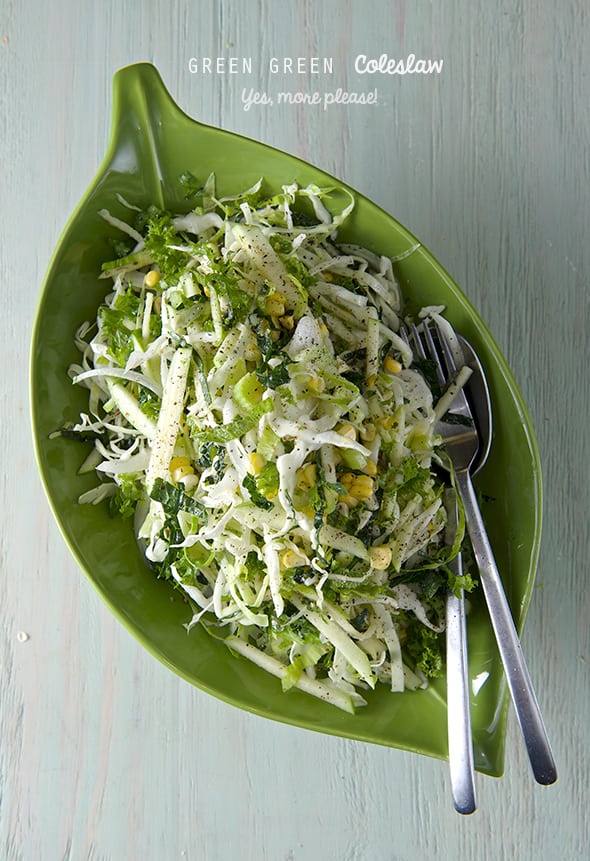
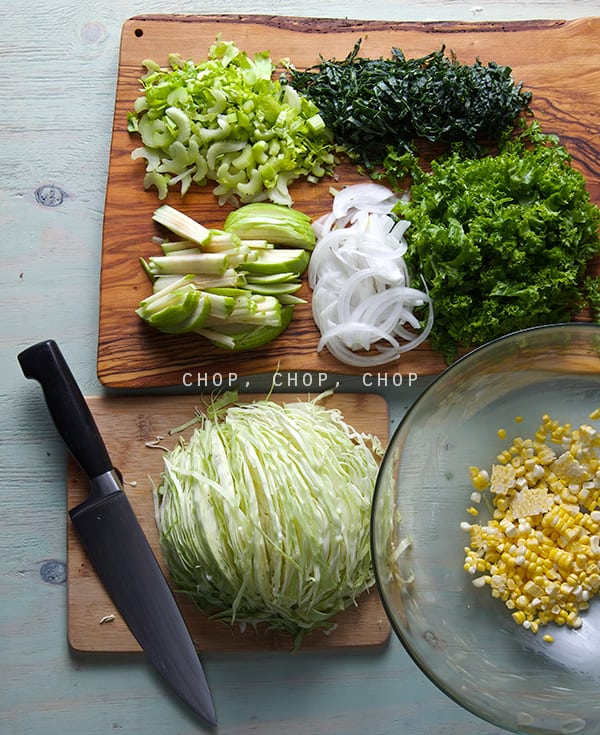
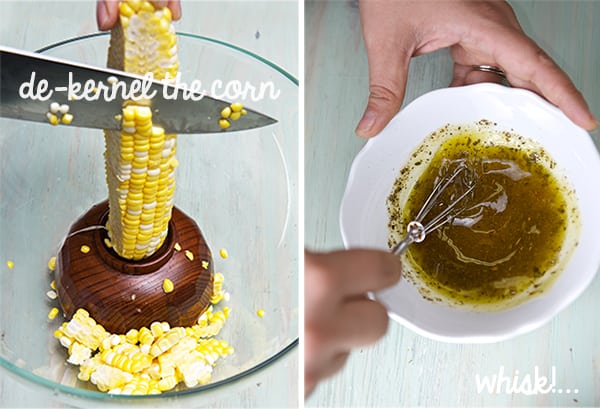
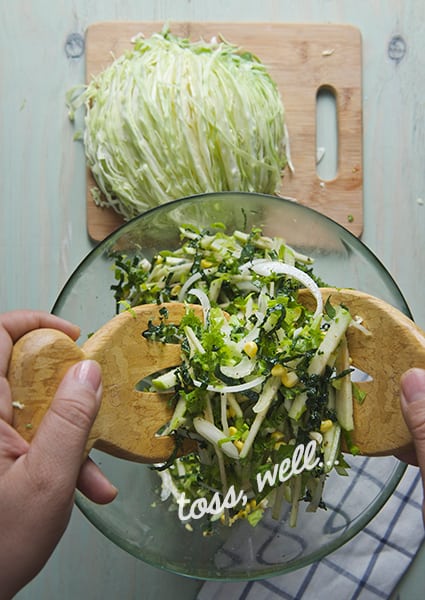
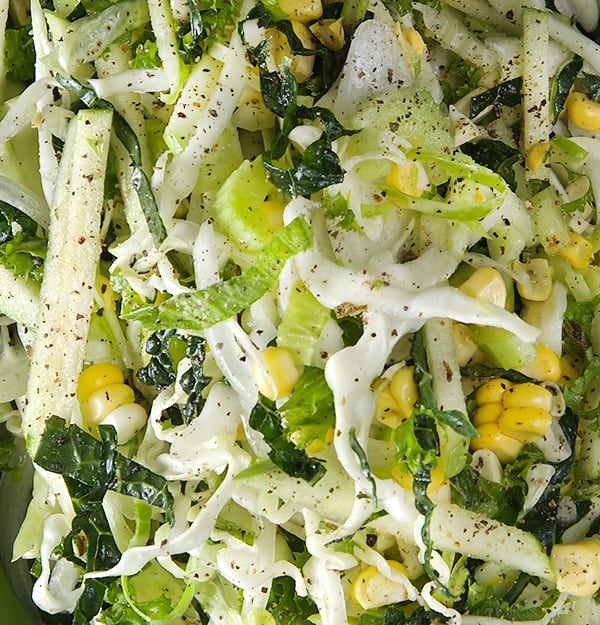
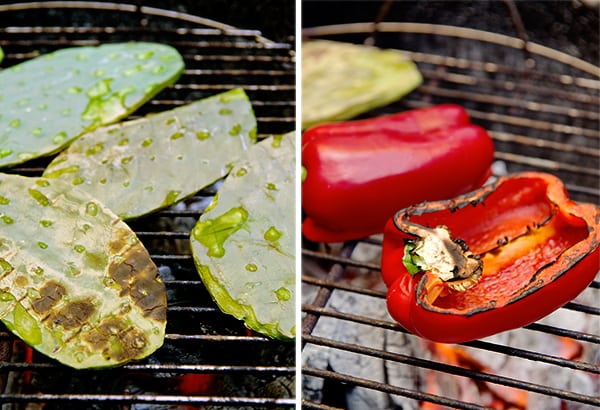
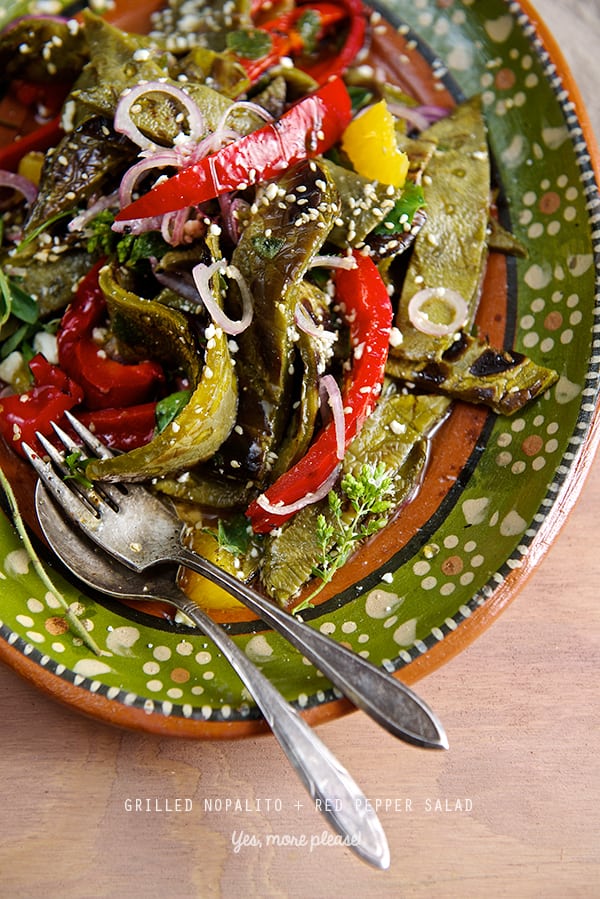
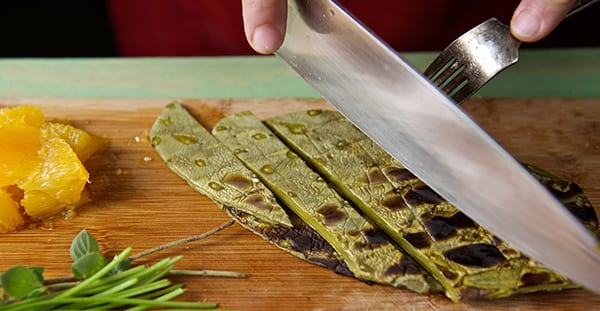
5. On a platter toss all ingredients and drizzle the vinaigrette. Sprinkle some toasted sesame seeds and/or some Cotija cheese crumbled. Serve room temperature.

Nopalitos+RED-Pepper-Salad_assambling_Yes-more-please!

Nopalitos+RED-Pepper-Salad_Yes-more-please!

Special Thanks to my Aunt Paloma,  who sent us this beautiful hand painted clay platter

from Guadalajara Jalisco, Mexico. XoXo 

Best, Ian & Mariana.

Music Pairing: John Lennon – Give Peace a Chance

View Post or View Comments 0

Red Charred Salsa

Salsa-Roja-Asada_Ingredients

It seems like magic to me how with just a few ingredients you can achieve a whole lot of attitude, an incredible amount of deep of flavor, and spice. I’ve seen lots of recipes calling for way more trouble and ingredients than this one and they do not end up tasting half as good. This recipe has only four ingredients.

What makes this salsa dance?…It’s all about the cooking method. Slow charred tomatoes, toasted dry chiles and a lot of arm work make this salsa like no other you’ve ever had.

If you have the time to disconnect for a bit and make this recipe the old fashioned way, you will find the salsa bright center of the universe. What is the difference between blenders, food processors and immersion blenders versus mortars or pestles? Well its in the name. All a blender does well is as its name describes; it blends, which leaves more whole seeds in the salsa than you might wish for. Now, let’s talk about mortars-molcajetes. For me, there is a tremendous amount of nostalgia in using a mortar/molcajete because the act of using a stone vessel is a whole different experience in the kitchen. It relaxes me and makes me conscience of the transformation of the ingredients and therefore I savor the whole process. Besides the romantic aspect, the difference I see between blenders and Mortars is that mortars pulverize the seeds, as you smash them against the stone adding extra flavor to the salsa. The stone adds flavor to the sauce and you are able to enjoy the earthy aromas when smashing the garlic and the sea salt, the toasted chiles, the smell of the fruity tomatoes as the consistency of the salsa changes. I would recommend you try to make the salsa this way for the simple pleasure of it.

Salsa-Roja-Asada_Molcajetes&modern-blenders

I know nowadays we all are creatures of convenience; if you are not as romantic as me about the whole traditional process~ Hey! Food processor or immersion blender are my weapons of choice. They get the job done in a fraction of a second and get you ready to enjoy the salsa in less that 5 pulses. Best of all is that with this recipe you can still achieve a great deal of flavor by using them.

Flavor wise this salsa has a smokey background and medium moderate spiciness. Please don’t be scared about the amount of chiles. Dry chiles when toasted, become smokey and very pleasantly pungent. Combining these kinds of chiles balances the act. Chile de arbol brings the spicy note and chile cascabel adds deep, color and character. The charred tomatoes and the garlic make this salsa extra savory. Fresh onion and chopped cilantro add a bit of fresh texture that makes the salsa irresistible to eat with chips.

Despite your method of choice, I assure you this red charred salsa will make you dance. It is a staple at our house I make a batch every other week. It keeps really well in the refrigerator for up to ten days.
It is quite a versatile salsa. I use it to top ranchero eggs, breakfast tacos, pork loin, carne asada, beans, bean soup, shrimp, whole fish (like red snapper), and if you add more tomatoes it is a great salsa to use in chilaquiles rojos. And of course its great with chips and salsa a good pilsner beer for spicy little snack. Enjoy!

Salsa-Roja-Asada_Yes,-more-please!

Red Charred Salsa

Makes 4 cups

3 medium large tomatoes about 4”round is what I used.
(like Better boy, Big Beef, Bush big boy. Any juicy, meaty tomato with high acidity content work best)
8-10 dry chiles de arbol
3-4 dry chile cascabel
2 medium garlic cloves, peeled
1-1 1/2 teaspoon sea salt
water

Garnish with:

½ medium size red onion and small bunch of cilantro, finelly choped

Preparation

1. In a cast iron pan or “comal” toast the chiles at medium heat, turning them constantly using a wood paddle. Once they look evenly toasted and showing an intense dark red remove the pan from fire and let them cool a bit until easy to handle. Remove chile stems.

2. Using the same cast iron pan, place tomatoes upside down, set the heat over medium, cover them with a lid to apply some pressure on them so heat will cook them more evenly. Turn them upside up and keep rotating them until well blistered, charred skins and they look cook through. About 8-10 minutes.
Once the tomatoes are charred and cooked set them aside until easy enough to handle. Remove skin, and with a paring knife remove the core of the tomatoes.

3. If making salsa in the food processor or blender:
Place tomatoes, garlic, sea salt, and toasted chiles in blender or food processor and pulse until coarsley or smooth blend. Add a little water if needed. Taste and adjust for salt if needed.

4. If making salsa in the molcajete or mortar:
Place garlic cloves and sea salt in the mortar, smash until pureed. Add toasted chiles 2 at the time and smash until a coarse paste, make sure you smash almost all the chile seeds. If you need more traction add a pinch of sea salt. Once you have a paste, add one tomato at the time into the mortar and smash until well combined. Repeat until you add all 3 tomatoes. Taste and adjust for salt and salsa consistency. This is entirely up to you. Add a bit of water at a time, until you feel is the right consistency for you.

Salsa-Roja-Asada_Toasting-chilesSalsa-Roja-Asada_grinding-chilesSalsa-Roja-Asada_Grounding_chilesSalsa-Roja-Asada_chilie-pasteSalsa-Roja-Asada_detail-smashed-seedsSalsa-Roja-Asada_Chard-tomatoesSalsa-Roja-Asada_grinding-the-tomatoesSalsa-roja-Asada_Yes,-more-please_spicy!

Red Charred Salsa

Top with fine diced onion and cilantro, serve at room temperature,

along with chips and a nice cold beer. Eat with abandon!

Salsa-Roja-Asada_Yes,-more-please!_chips+salsa+lime+beer

View Post or View Comments 5

Rainbow Chard Korean Pancake

Rainbowchard-Korean-Pancakes_ingredients
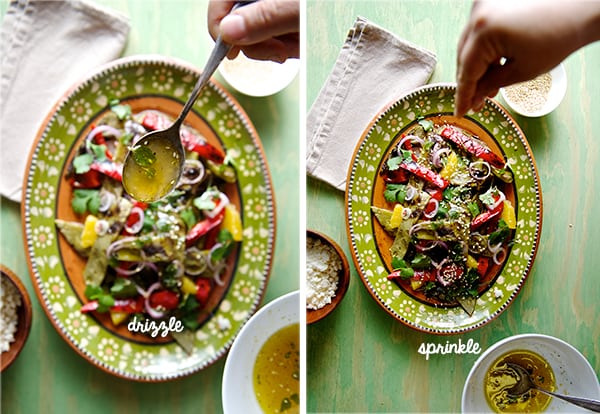
I must confess that I have a weakness for Korean BBQ… I don’t always cook at home. When we decide to go out, Korean BBQ is on the top of our list. I am amused by all the fresh ingredients that are cooked before your eyes.  The orchestrated arrangement of little dishes with fermented vegetables, salty sweet, sour, spicy crunchy, juicy, is a circus of textures, temperatures, flavors and aromas. All my senses are awake.
One of my favorite side dishes would be the the Pajeon or Korean pancake. A savory light pancake, made with eggs, rice flour, flour, scallions-green onions. All sorts of variations can be made, including beef, pork, sea food, shell fish, kimchi…Oh! the kimchi.. My favorite.

With this Korean pancake in mind and a little help of the current abundant green leafy season, I thought about making a lighter all veggie version using one of my favorite seasonal greens…“Rainbow Chard” this colorful happy leafy green, is a close relative of the beet family, delivers 3 major vitamins A, K and C. Loaded with phytochemicals rainbow chard is one of the healthiest, most beautiful, and tasty vegetables I know. Flavorwise, I would describe it as a cross between baby spinach with a bit of sweet beet background. Texturewise, the leaves are way softer than kale which makes it a bit more pleasant to eat raw or quick sautéed. Rainbow chard has it all, flavor, texture, and color.

Inspired by all these great leafy green qualities, I was almost in a rush to attempt to make an all veggie Rainbow Chard Korean Pancake. The result was fantastic, the rainbow chard’s sweetness and texture are a good match for this light savory pancake. The charred scallions, green garlic and the spicy jalapeño kick in combination with the rice vinegar dipping sauce for the perfect savory pancake match.

Once again I proved to myself that cooking with fresh ingredients is not only a great nutrition and a healthy value. It inspires me and it’s a feast for the eyes!. That for me makes it even more appetizing…Enjoy!Rainbowchard-Korean-Pancakes-ready-to-serve~Yes,-more-please!

Rainbow Chard Korean Pancake

Makes 2- 9” round savory pancakes

½ cup unbleached-all purpose flour or gluten free flour like all-purpose King Arthur like this
½ cup stone ground rice flour (I used Bob’s Red Mill)
1 egg or 1 tablespoon of ground flax seed + 3 tablespoons of water= 1 egg
2 teaspoons grapeseed oil, canola oil, or any neutral oil. And a little extra oil to pan fry the pancakes.
1 teaspoon roasted sesame oil
pinch of salt
pinch of white pepper
¾ -1 cup water

6-8 rainbow chard leaves
4 scallions
1 garlic clove or 3 green garlic shoots
1-2 red or green jalapeno or red thai chili
2 tablespoons sesame seeds

extra oil for pan fry the pancakes

Rice vinegar dipping sauce:

1 tablespoon rice vinegar
1 tablespoon water
1 teaspoon soy sauce
1 teaspoon agave nectar
a pinch of red dry chili flakes or a teaspoon of sambal sauce

Preparation method:

1. In a medium size bowl, mix the flours, egg, vegetable oil, sesame oil salt, pepper and water, whisk well until a smooth batter that resembles  a loose pancake batter. Set a side to rest.
2. Chop all your vegetables, scallions and jalapenos on a bias. Make a roulade of rainbow chard leaves and chop them into a chiffonade, chop rainbow chard stalks into matchstick size.

Rainbow-Chard-Korean-PancakesRainbowchard-Korean-Pancakes-vegetables~Yes,-more-please!

3. On a cast iron or nonstick skillet over medium-high heat drizzle some oil, and arrange a layer or vegetables, starting with the jalapenos, rainbow chard matchsticks, scallions, green garlic and rainbow chard chiffonade. Sprinkle some sesame seeds and promptly ladle half of the batter , spreading it out evenly into a circle.
4. Reduce the heat to medium and cook until the bottom is golden brown, a few areas will have a bit of char which is perfectly fine. Cook for about 5 minutes per side.

Rainbow-Chard-Korean-Pancake-Steps
5. The “flipping matter”… you can use Julia’s Child encouraging words “flip it with conviction!!!”, or you can use a plate to flip the pancake upside down and then return it to the pan, to finish cooking…both methods work great!

Rainbow-Chard-Korean-Pancake--flip-a-rooh
6. Once both sides are cooked, transfer to a warm plate and repeat the process with the remaining ingredients.

7. In a large platter, cut into triangles and serve warm with the rice vinegar dipping sauce.

Rainbowchard-Korean-Pancakes-cutting-the-pancake~Yes,-more-please!

Rainbowchard-Korean-Pancakes-bite!~Yes,-more-please!

Rainbowchard-Korean-Pancakes-ready-to-eat~Yes,-more-please!

Variations: You can add shrimp, small tofu squares, carrots, squash, kimchi!!!
Hey! the pancake is you canvas, have fun and enjoy!


View Post or View Comments 9

Privacy Policy Contact Us Yes, more please!