Cold weather, soups and blankets. The time has come and I’m setting you up with the most delicious Mexican mushroom soup. I was planning to make cream of mushrooms since one of my friends asked me for a recipe I made many years ago when I was a student in Guadalajara. (Rosi, if you are reading this please make this soup I think you’re gonna love it more than the cream of mushroom…although the cream of mushroom recipe is in your e-mail by now.)
As usual my brain went in multiple directions when I was at the market. I saw the epazote, smelled it and immediately thought of the Pasilla peppers I had at home. Suddenly it evoked the smells and flavors the recipe which were in my head and I could almost taste this delicious mushroom soup.
As you can see it has nothing to do with the cream of mushrooms I had plan to made, but I have to say that when I trust my instincts and let go, a wonderful recipe arises. I think when the soup was ready, it knock me down it tasted so good and it is so easy to make.
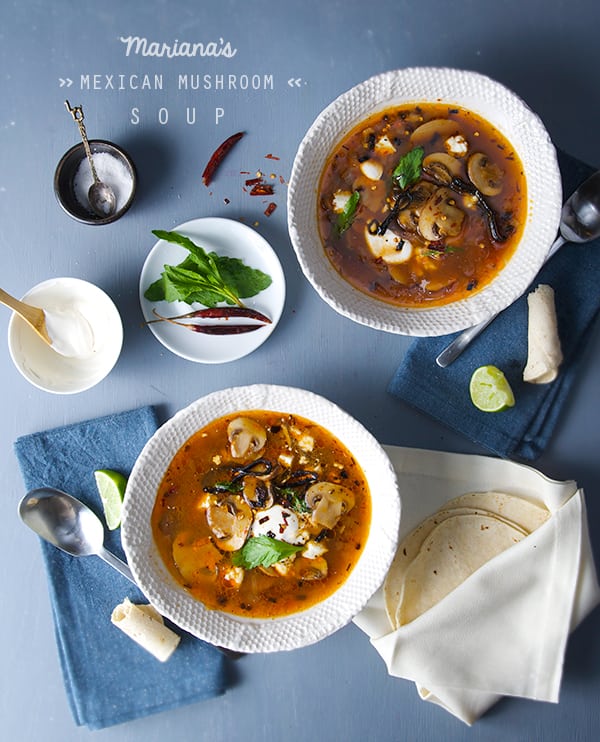
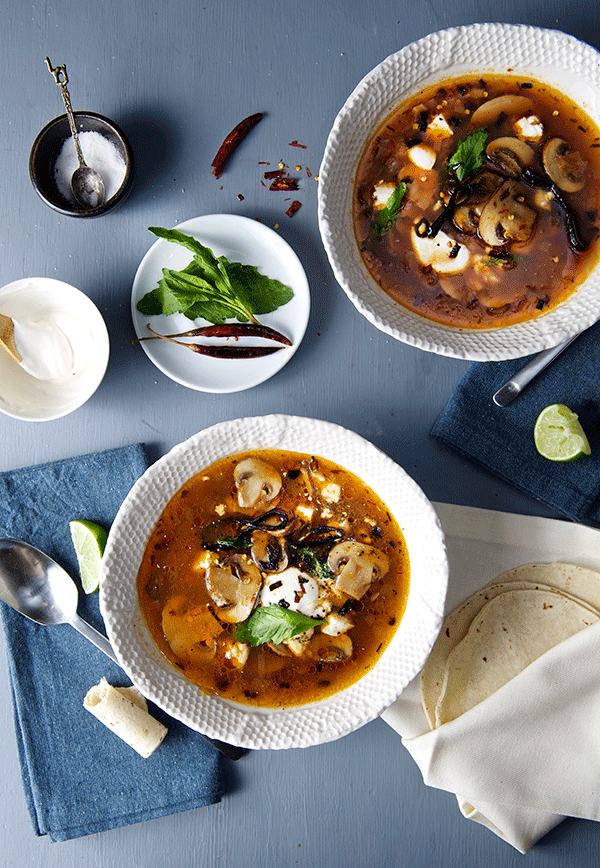
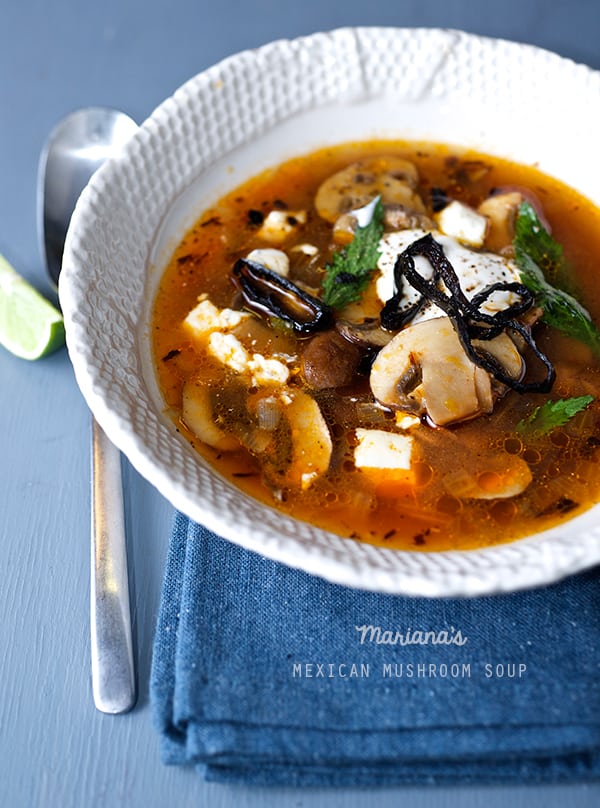
Warm and earthy yet light at the same time, this mushroom soup has the distinct flavor of the Pasilla peppers which tint the broth with a mahogany color and a faint spice. The Cremini mushrooms’ heartiness shine through along with the epazote licorice-minty flavor. The corn masa rue gives the broth a nutty corn flavor and great consistency.
To top it off, I recommend a bit of fresh crema or a dollop of plain greek yogurt which can be added along with some queso panela or queso fresco. For a Vegan version, you can add tofu squares, and a bit of unsweetened coconut cream. If you are looking for a soup that will warm you up with a friendly calorie count this Mariana’s Mexican Mushroom Soup might be just what you where waiting for… Mmm!!!
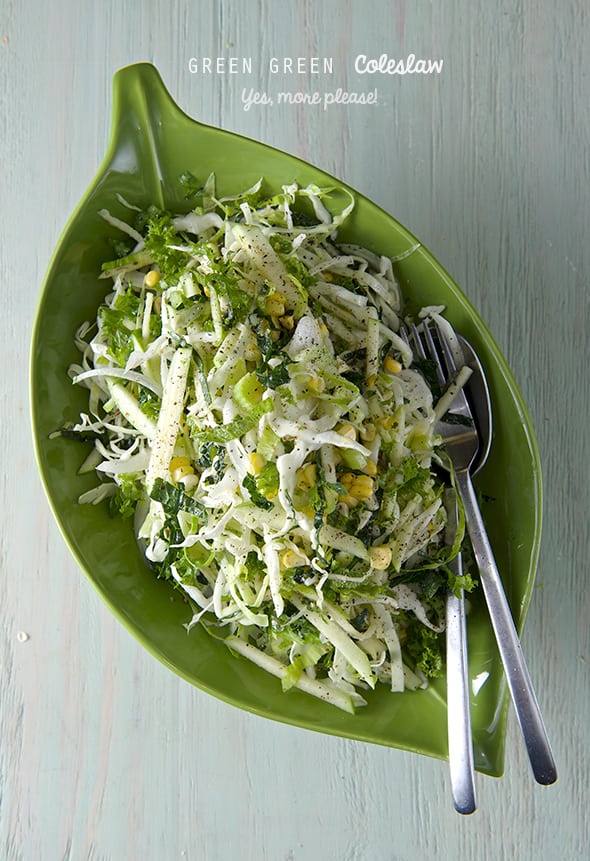
Mariana’s Mexican Mushroom Soup – a.k.a. M-mmm Soup!
Serves 4 or 2 hungry Mexican Yetis.
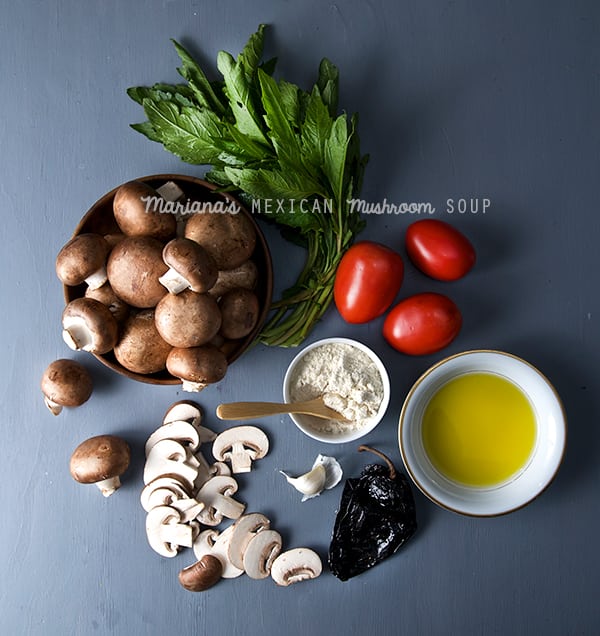
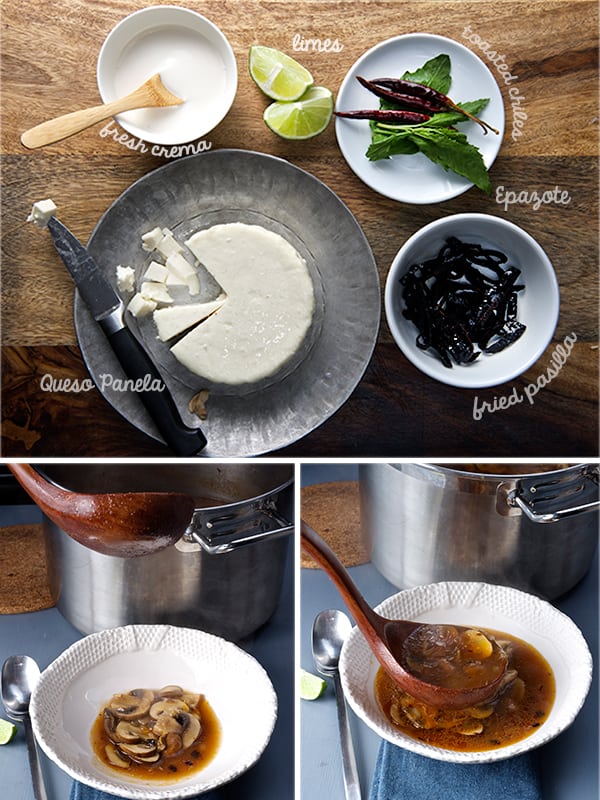
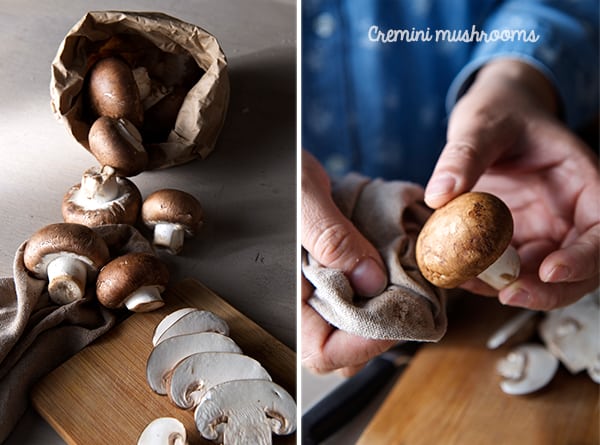
1 lb cremini mushrooms, clean and medium thin sliced.
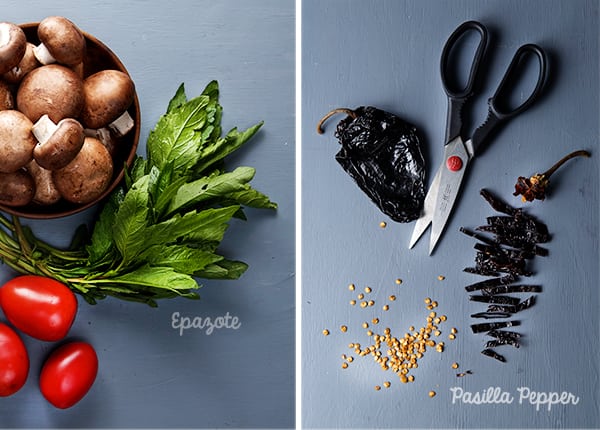
1 large or 2 small dried pasilla chile seedless and cut with scissors
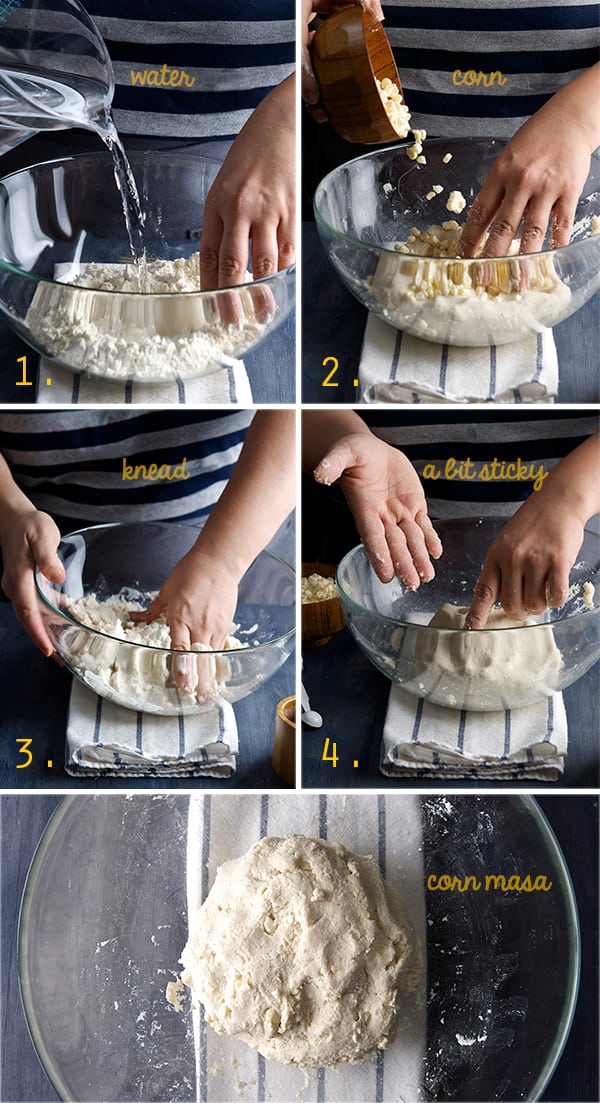
1 tablespoon corn masa-harina “Maseca”
½ medium white onion small diced
1 medium garlic clove finely diced
4 roma tomatoes
4 cups chicken, beef or vegetable stock
1 glug corn oil or extra virgin olive oil (what ever flavor you prefer)
2 sprigs of epazote (if you are using Mexican epazote, use just one)
Sea salt to taste.
2-3 cranks of Fresh Black Pepper
Garnish with:
Fresh Mexican crema, crème fraîche or plain greek yogurt
Queso Panela or queso fresco
Fresh epazote
Vegan substitutions:
Vegetable stock
Garnish with: unsweetened coconut milk, and firm tofu squares.
Preparation method:
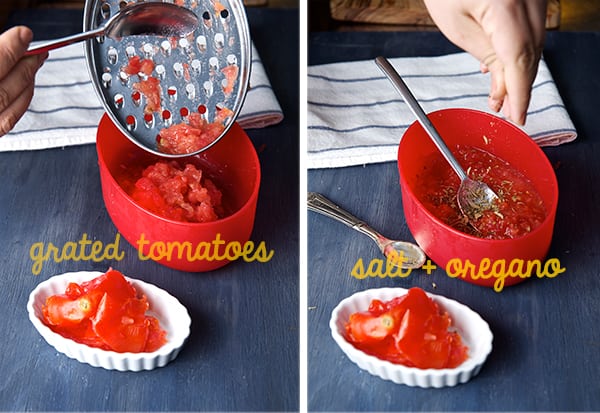
1. Cut a little cross on the bottom of each tomato. In a small pot boil your tomatoes until soft. Remove the skins. Reserve one cup of the boiling water and blend them until smooth. Set aside.
2. Remove the stem of the chile pasilla and shake to remove all the seeds and core.With the help of kitchen scissors slice the chile pasilla into an 1/8” inch thin strips.
3. Have everything ready beside your stove to start the soup.
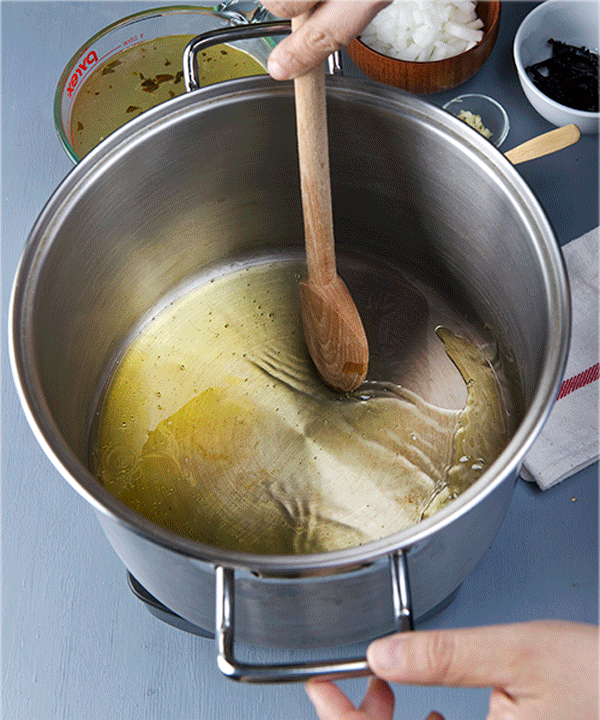
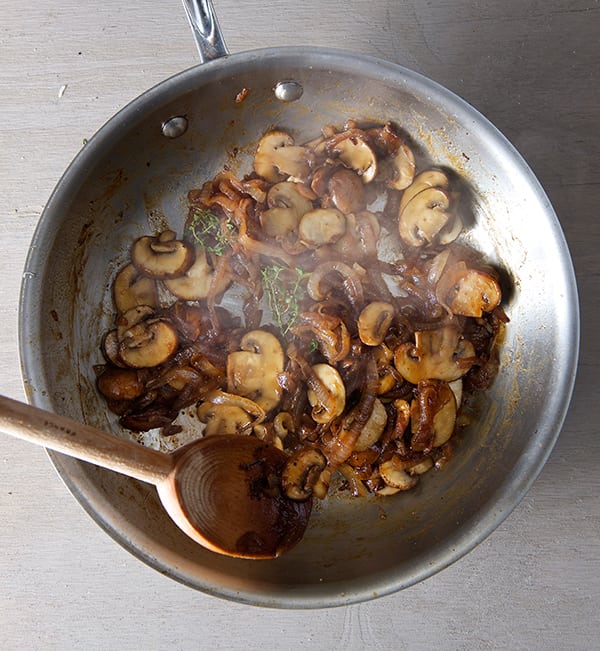
4. In a medium large soup pot, over medium high heat add the oil, wait until warms up and then add the pasilla strips. Toss with a wood spoon for 1-2 minutes until they start looking crispy and they release their flavor. After 2 minutes the color of the oil is orange. Remove the crispy rings from oil and reserve them for garnish.
5. Lower the heat to medium and add 1 tablespoon of the corn-masa harina and stir until slightly golden brown. Add the diced onions and garlic, toss for 1-2 minutes, add the tomato pure, toss and season salt and pepper, bring to a boil.
6. Add the chicken stock, and the epazote sprig. Bring to a boil and then simmer for 5 minutes. Add the cremini Mushrooms and crush some of the fried pasilla reserved. Bring to a slow simmer, cover and cook for 15-20 minutes until the mushrooms are tender and the broth has a richer consistency.
7. Taste for salt and pepper. Turn down the heat and let the soup rest for 10 minutes.
8. Meantime prepare your garnishes. Warm up some corn tortillas, serve the soup and garnish with crema, queso panela o fresco, some of the crispy pasilla rings, fresh epazote, and Warm up!
Note: If you are the spicy soul like me, toast some chile de arbol with a little bit of oil and crush some of this spicy chile on top… mmm spicy!
Warm up!
Note: Now that I think about it.. it will be delicious if you add some kale or swiss chard, even baby spinach…at the end of the preparation…yum!
Music Pairing: Lila Downs – Llorona Frida Kahlo
http://youtu.be/NiDezIf-_ZA

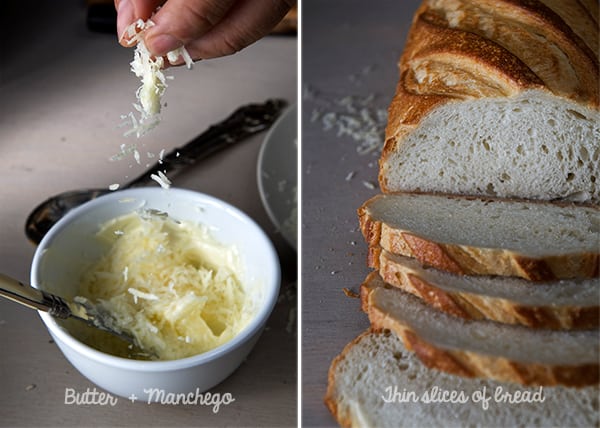
 3. Evenly spread one side of each of the bread slices with the Manchego-butter spread.
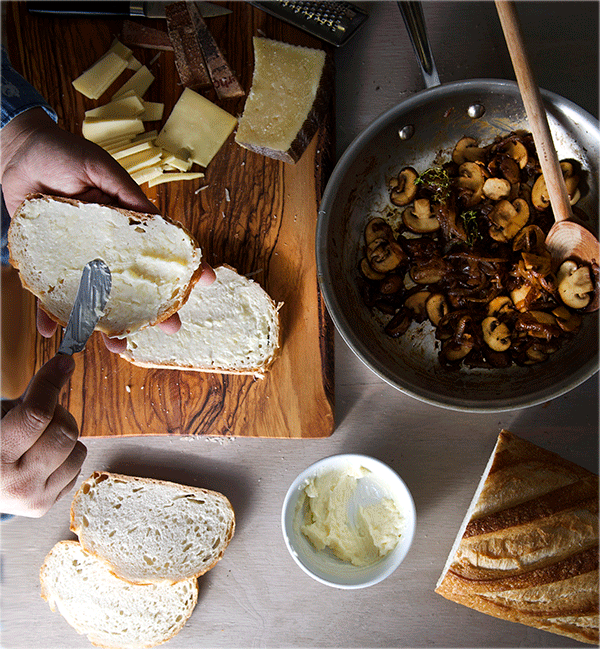 5. On a medium heat warm up a non-stick pan, cast iron pan or plancha. Once is hot, place both of your sandwiches and grill for about 4 minutes each side, until mahogany golden brown, and the cheese is melted.
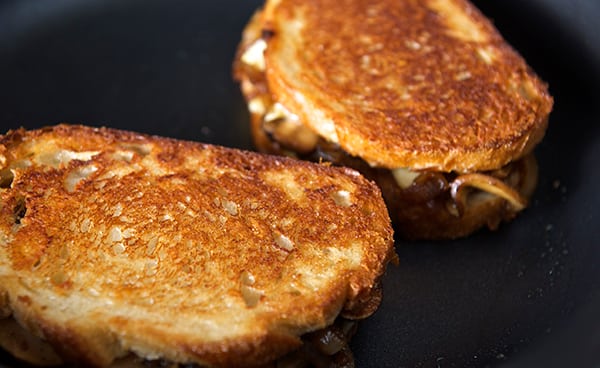 6. Remove from pan into a cutting board and slice in half.
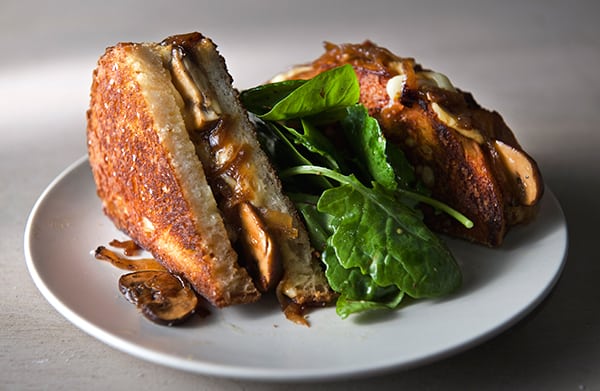


