How can I begin to tell you that the infamous “Scotch Egg” is not Scottish. It is believed that it was created by a London department store Fortnum and Mason in the 18th century. However, origins may go back to Algerian cooking or possibly to a fish paste and egg recipe that produced ‘Scotties’. want to know more about the history of these creatures, click here.
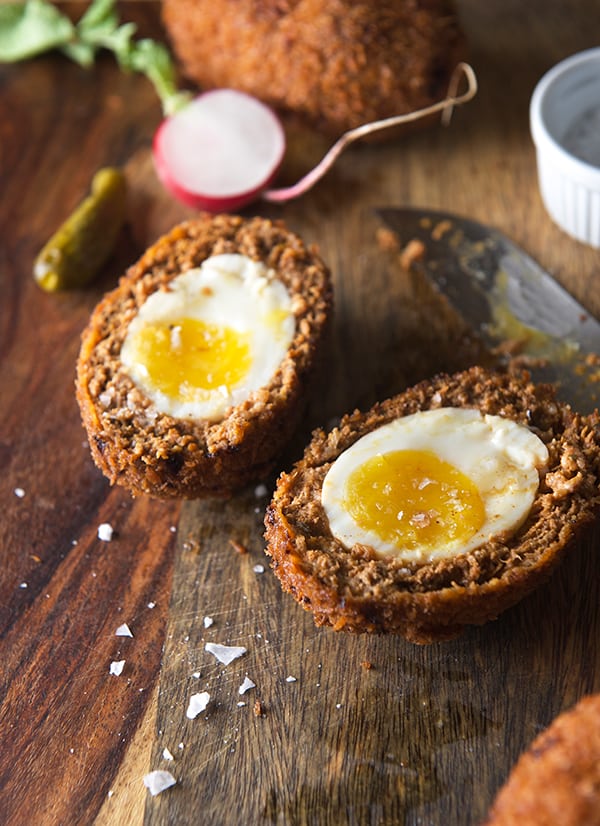
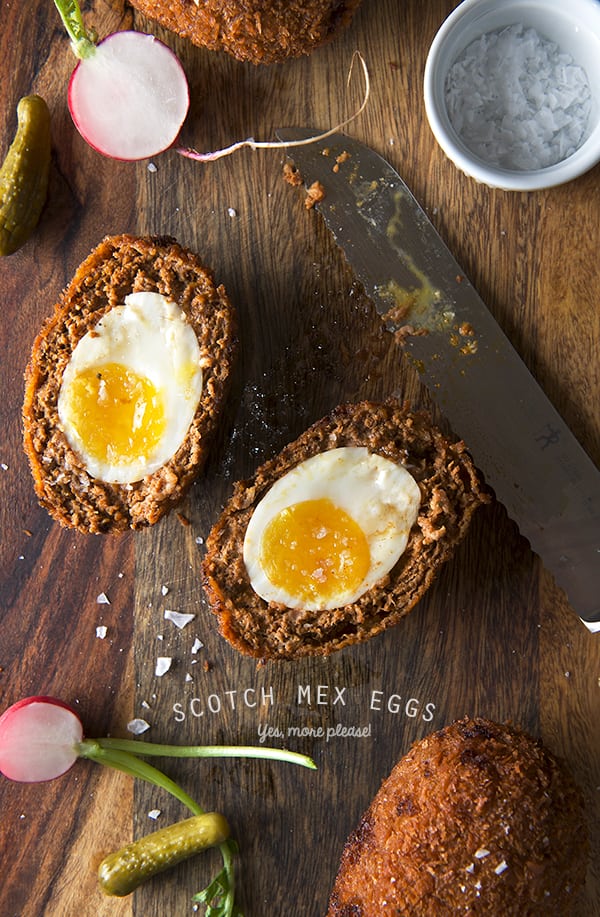
This etymological confusion distracts from what could be the best picnic food not yet consumed widely in the US. We love to eat hard boiled and deviled eggs at picnics. We also love delicious salty savory fried treats. This is only the marriage of each to the other. The crunchy breadcrumb exterior of the egg covered in sausage is from the deep frying technique and enhances the experience of eating this savory delight. When prepared correctly the yolk will be cooked through but still soft and creamy. The Scotch Egg we present in this recipe has been further enhanced by the seasoning of the meat with Mexican spices adding a smokey and spicy note to the sausage mixture.
The result is a New World revision of an Old World treat. And doesn’t it seems appropriate that this recipe was created by a Mexican for his Husband which happens to be an American of Scottish ancestry?
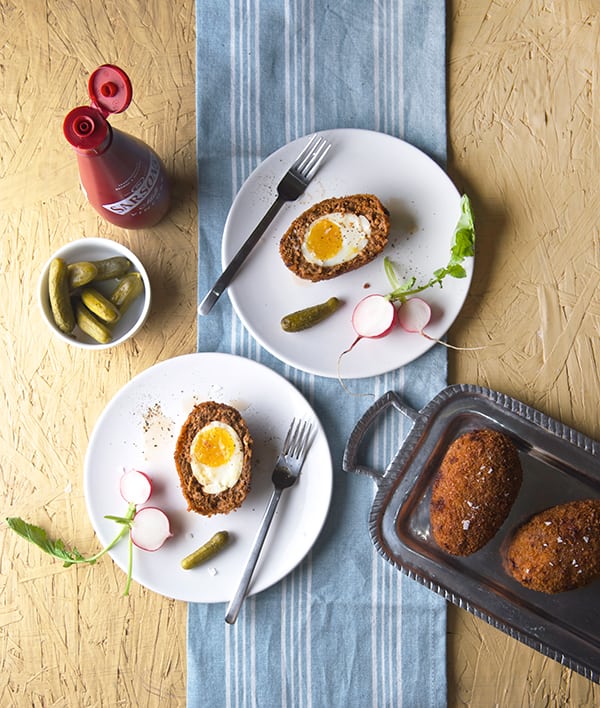
This Eggs could be served many ways and for different occasions. It is certainly terrific on its own or served with some pickled vegetables, but may be the shining star of an Easter appetizer plate or as a side for an outdoor grilling gathering. It holds up well to dipping sauces but to tell you the truth all it needs is a good splash of malt vinegar to balance the richness, and put the British accent on it.
These eggs take a little discipline and patience to prepare but the effort is worth it. They can be the perfect new thing to try this Easter or on your next picnic and you may be shocked by the flavor explosion that this Algerian-British-Mexican Scotch Egg delivers. Enjoy!
Let’s cook! here comes the recipe…
Scotch Mex Eggs:
Makes 6 eggs, feeds ½ dozen rabbits.
6 large chicken eggs
1 tablespoon baking soda
1 lb. Ground pork
½ lb. Lean ground Turkey
For the seasoning on the meat:
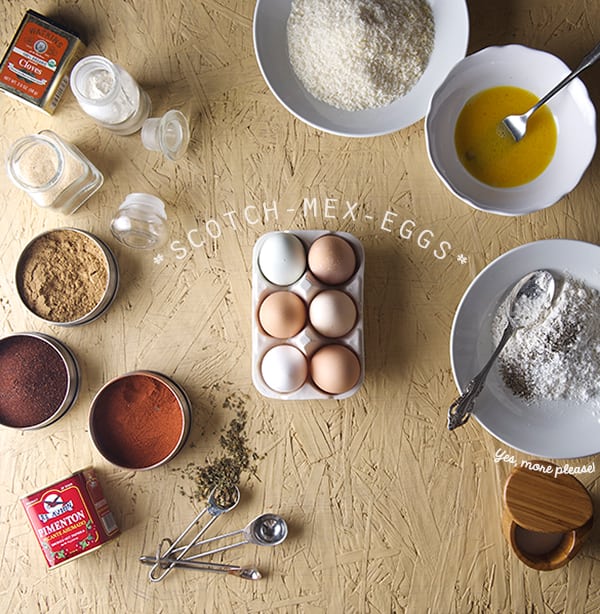
2 teaspoons Ancho chili powder
1 teaspoon Santa fe mild chili powder
½ teaspoon Smoked paprika
1 teaspoon Garlic Powder
1 teaspoon Onion powder
1/8 teaspoon ground clove
1 teaspoon dry Mexican Oregano
¼ teaspoon Black pepper
½ teaspoon salt
¼ cup apple cider vinegar
For the breading:
1 cup panko
1 egg bitten with a little splash of milk.
¼ cup flour
2 tablespoons cornstarch
a pinch of salt and pepper
For frying:
3-4 cups of grape-seed oil, or peanut oil for frying.
Depending on the size of the pot you are using. I will recommend a small tall aluminum pot, in this way you will use less oil. I always fry 1 egg at the time for best results.
Serve with: Radishes, Gherkins, Malt Vinegar, Crunchy flaky salt.
Or a dollop of sour cream. Honestly, it does not need it this is just a suggestion.
Preparation Method:
1. Fill a medium size pot with enough water to cover the eggs about 2 inches above. Add 1 tablespoon baking soda and dissolve into the water. Place eggs. Bring water to a rapid simmer. Cover with a lid, remove from the warm burner and set timer for 4 ½ minutes. Be ready with a bowl with water and lots of ice. Once the timer goes off, immediately toss the hot water and place the eggs into the ice bath. Allow them to chill. I like the soft boiled egg texture, fully cooked whites but slightly creamy yolks, if you prefer a more well done egg check this great link from our friends, for timing and egg preferences. click here
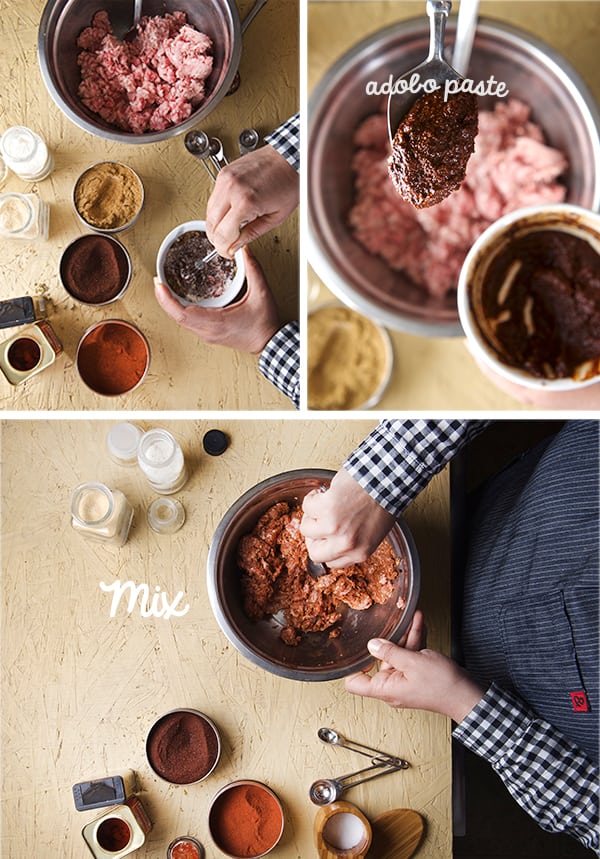
2. Meantime prepare the adobo by mixing all the spices into the vinegar until you have a paste. Mix the 2 ground meats and add the adobo paste. You can use your hands or the food processor. Hands are best, any way you gonna form the eggs, you might get on it. Once is well mixed, cover and refrigerate, while you peel the eggs.
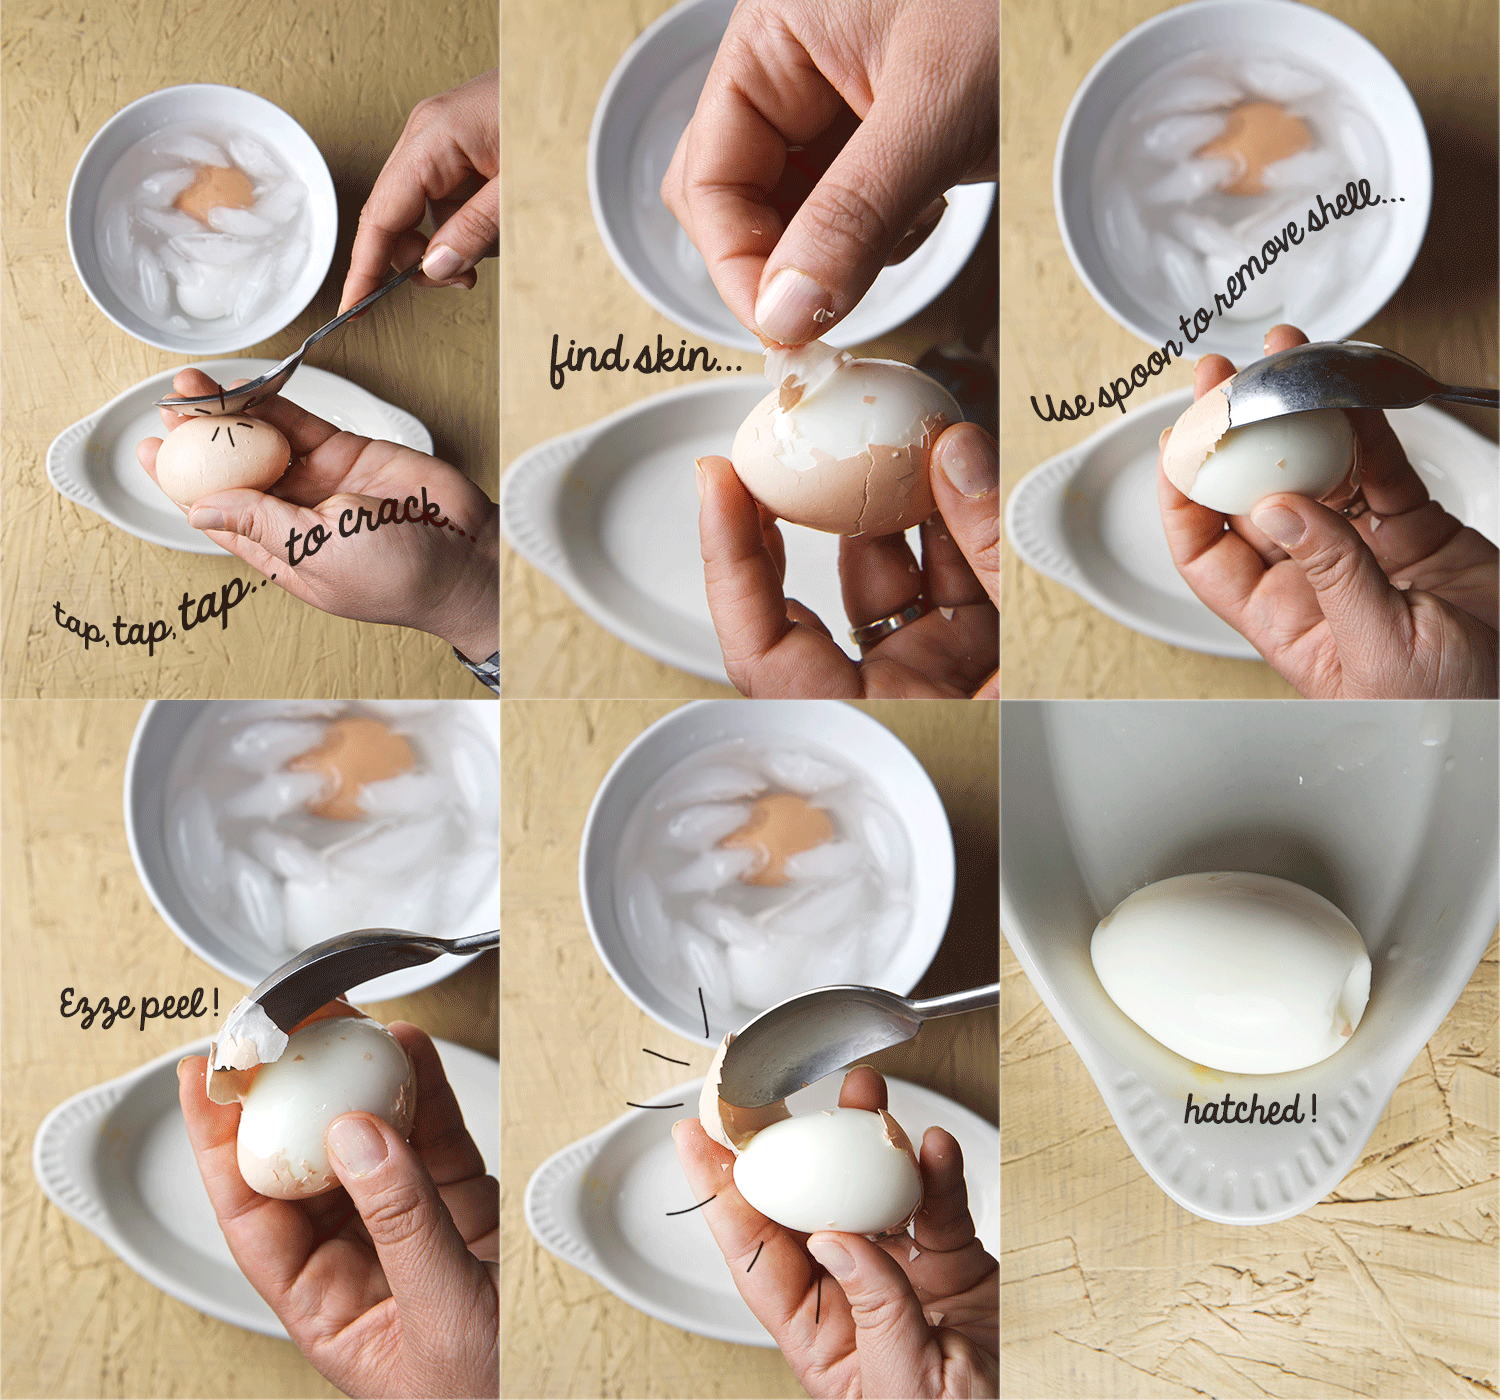
3. Peeling the eggs: This is the part of the recipe that needs more care and attention. I tried different methods and this is the one that worked the best for me. By adding the baking soda it makes the eggs peel easier. I tried both methods with and with out and for me it did made a difference.
1. I start by gently taping the egg all over to crack all the shell.
2. You eventually find the bubble that forms usually on the wider part of the egg some times on the side. With your fingers, start peeling and try to find the thin membrane between the egg white and the shell once you find it use a thin spoon and gently run it in between the shell and the cooked egg white.
3. The shell usually comes in big pieces, and since you tap it all around the shell is malleable and will not hurt the egg white.
4. Proceed with the rest of the eggs an rinse them in to the bowl with cold water.
Note: Please do not be discouraged if pieces of egg come with the shell, it is ok and perhaps once you will encased the egg in the meat coat who is there to see?… don’t worry be happy. I’s just an egg.
4. Now you have all the components ready, its fun time!
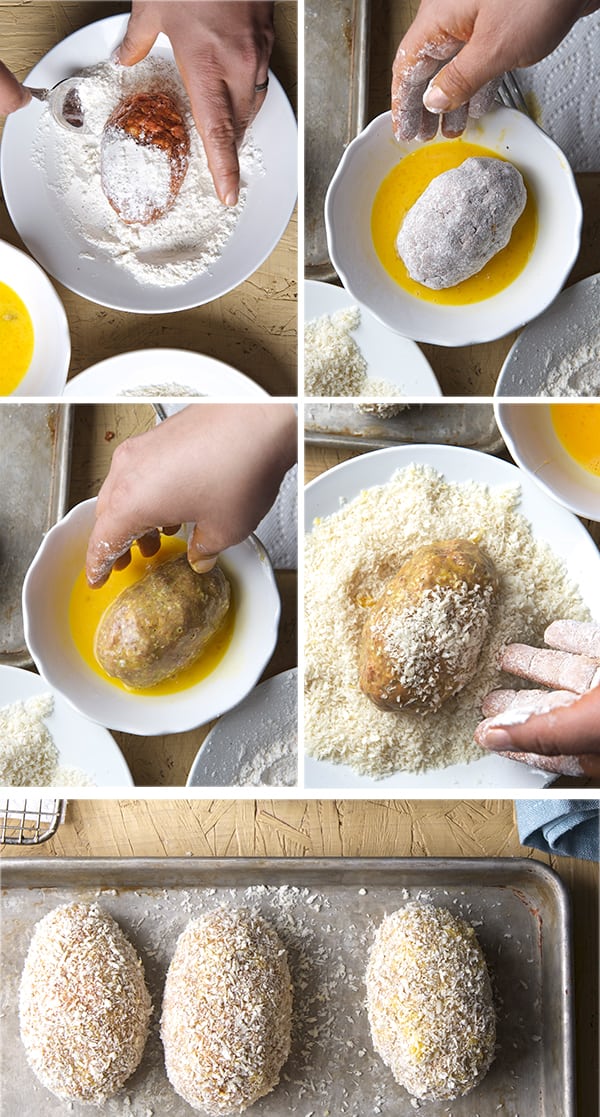
Prepare your breading station, 1- flour, 2- egg wash, 3- Bread crumbs.
5. Remove ground meat mix from refrigerator and Start by dividing your meat in 6 approximately equal portions.
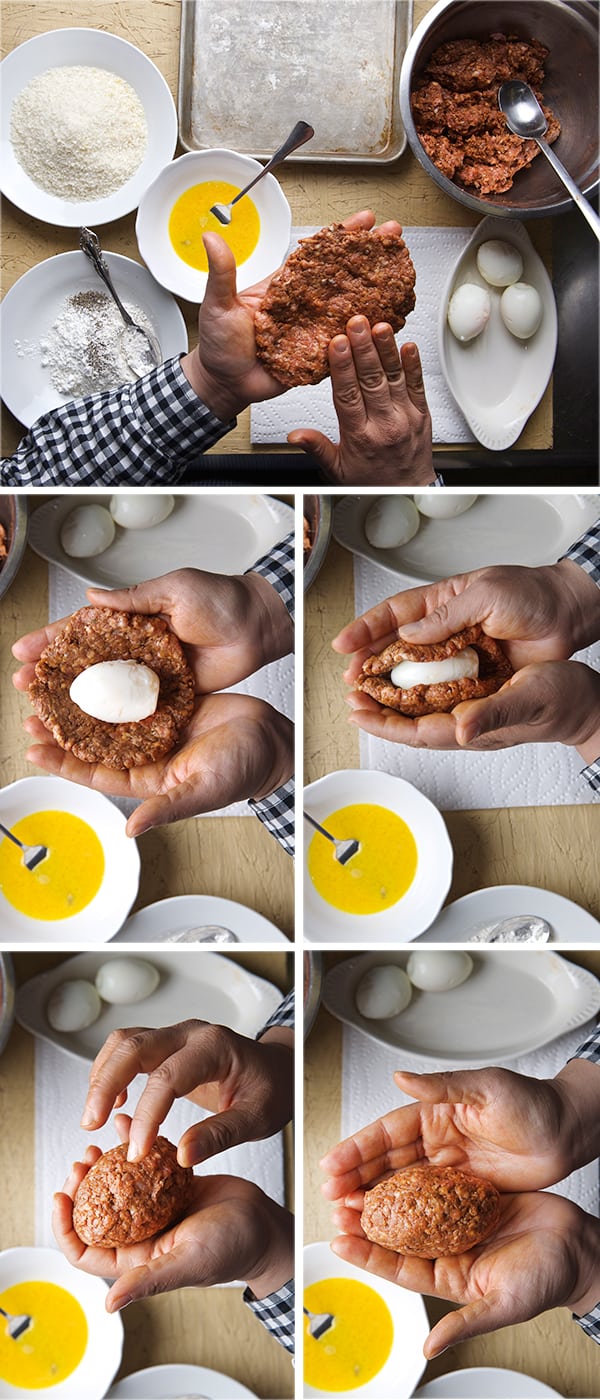
6. Grab one ground meat portion and flatten in your hd like making a round patty big enough to cover the egg.
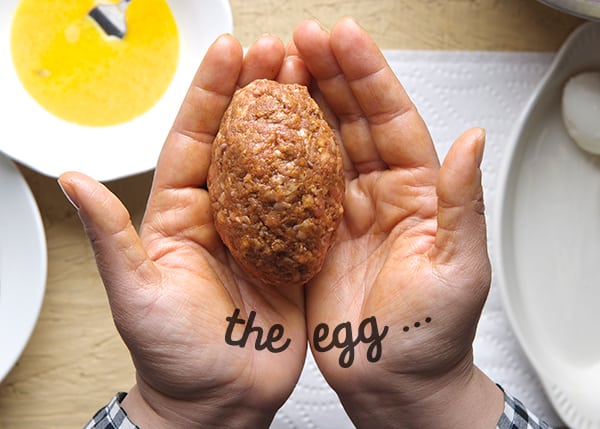
7. Place one egg in the center and pretend you are covering the egg with a blanket. Pinch the seams, and smooth them with your finger tips. If there is excess of meat on the top of the egg just remove the excess. Be gentle. And shape meat around the egg.
8. Once ready, roll it into flour, dust the excess flour, add into egg wash, then roll it into panko, and make sure every single area is covered.
Note: Remember your hands are the best tools you have, I always keep one hand for dry ingredients, the other for wet so I do not end up with breaded fingers.
9. Place into a dry tray sprinkled with some panko in the bottom to avoid sticking. Proceed with the rest. If you are not to fast at this egg situation, place the ready covered egg tray into the refrigerator while you cover the rest.
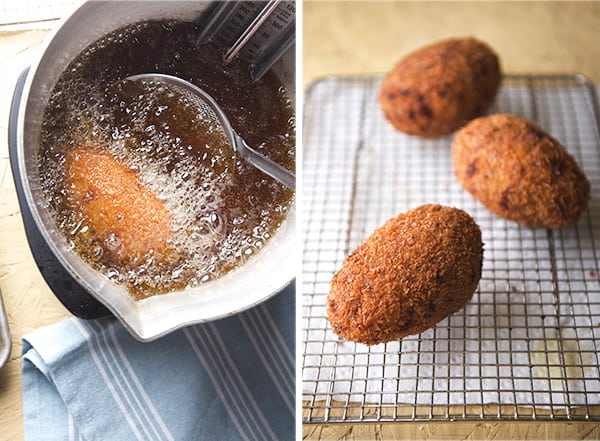
10. Once you have all eggs covered. In a small tall aluminum pot bring your oil to a 375F (It is best if you use a thermometer) and fry one egg at a time by placing the egg into the frying spoon and then carefully drop it into the oil. Carefully roll the egg all sides so it starts forming a evenly crust.
11. It will take between 3-4 minutes, best advice is to watch the bubbles. Small bubbles is still cooking, when big bubbles start appearing your egg is done.
12. Place the eggs on a cooling rack, with a paper towel under to absorb any oil drippings. Proceed with the rest. If making more than half a dozen, turn you oven on and keep them warm, just remember this will keep cooking the egg yolk inside. So it is best if eaten as is, or slightly less warm. It is Pub or Picnic Food after all!.
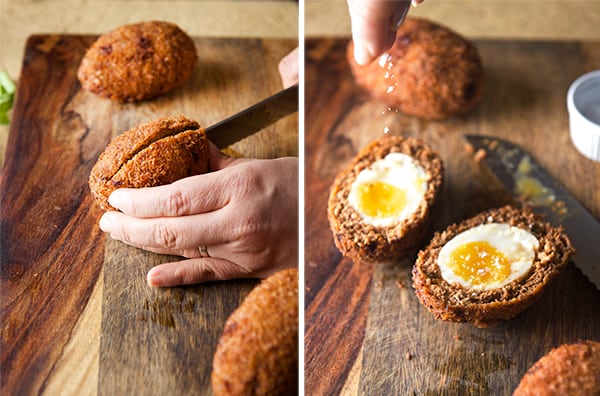
13. Serve by cutting in half and adding some dashes of Malt vinegar. Enjoy!
Enjoy!
If you are in Austin, one of the best eggs we have are from Smith and Smith Farms,
you can find them at the Farmers Markets, rain or shine!… Hi Colby! Thank you for making this world better one egg at the time!!!
