Summer Soba Noodles

Summer Soba Noodles_healthy and delicious

Lusciously light noodles, that’s my description for this dish. Cold soba noodles are a popular summer dish in Japan. The Japanese people are very wise by eating like this; light, savory, vegetable based; a good way to stay cool. The traditional way to serve them is without toppings; just the delicate flavor of the noodle with some dipping sauce on the side. You dip them as you go.
In my version I decided to give the dish a little kick and add some fresh vegetables and tofu. We usually have this for lunch or a light summery dinner. The combination of fresh crunchy vegetables, sweet-savory sauce and creamy tofu cubes, pairs really well with the tender noodle. The preparation could not be easier, and if we measure preparation time versus rewarding flavors it is a winner.
If you think this dish looks complicated, don’t worry, its easy to make. To save you some prep time I recommend you invest on a little kitchen gadget: get yourself a julienne peeler. It is one of my favorite tools. Its fun, easy to use, and easy to clean. You can use this peeler for any other vegetable or fruit. One of the best kitchen gadgets to have. Let’s cook!

Summer Soba Noodles_ sauce ingredientsSummer Soba Noodles_ ingredientsSummer Soba Noodles_Yes,more please!

Summer Soba Noodles

Serves 2-4

3-6  Soba noodle bundles approximately 1 bundle per person. I recommend you to get the Japanese kind. You can get them at any Asian specialty aisle of a supermarket…
2-4  green onions/scallions, finely sliced
2  carrots, shredded, julienned or grated
1  seedless English cucumber, julienned or thinly sliced
1  avocado
1/4-1/2 cup  unshelled and cooked edamame beans, optional
1 block of extra firm Tofu, remove the excess water patting it with paper towels and cut into small cubes

For the sauce:

3  tablespoons soy sauce.
3  tablespoons seasoned rice vinegar
2  tablespoons sesame oil + one extra tablespoon for finishing
2  tablespoons of honey or agave nectar
1  tablespoon brown sugar
1  tablespoon grated fresh ginger
1  garlic clove grated
the juice and the zest of one small orange

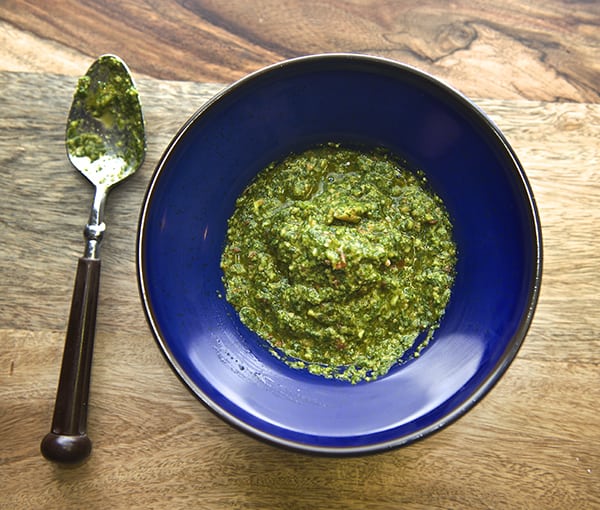
In a bowl Whisk all the ingredients. Reserve 1/3 of the sauce to marinate the tofu squares.

Garnish with:

Thai Basil to garnish
Black or gold sesame seeds
1 red Thai or Serrano chili, thinly sliced

Directions:

1. Start by making your sauce. Place all its ingredients in a bowl and whisk. Set aside 1/3 of the sauce and marinate the tofu. While the tofu is absorbing all the flavors, proceed to cut and prepare your vegetables and garnishes.

2. Bring a large pot of water up to a boil. Unlike regular pasta, you do not need to salt the water. Once the water is boiling place the noodles and monitor constantly, using a pasta spoon to prevent the noodles sticking. Bring the water up to simmering. Do not let it boil. Follow the instructions in the package, taste, it should have some elasticity to it. Usually takes around 4-5 minutes because they cook through quickly . Keep an eye on them to avoid over cooking. When the pasta is ready drain the noodles into a colander. Immediately return them to the pot and fill the pot with cold water. Leave the water running into the pot a bit until the noodles cool down. Gently with your hands rinse the noodles in threads.*( see picture below) until they feel less starchy. Drain them again into a colander and allow them to drain. You can transfer them to a bamboo mat, to remove the excess water.

Summer Soba Noodles_How to prepare soba noodles

3.  In a non-stick pan proceed to saute the marinated tofu until golden brown. A little scorching doesn’t hurt either.
In a large bowl season the noodles with a tablespoon of sesame oil and add sesame seeds.

Summer Soba Noodles_Sautee_marinated_Tofu

4. Divide all noodles evenly into 2 or 4 bowls, garnish with the Juliane carrots, cucumbers, avocado, sautéed tofu, edamame, red chilli.
Serve a small sauce bowl per person for extra dipping the noodles.

Summer Soba Noodles_for two

~Enjoy!~

Music Pairing: Pizzicato Five: Twiggy Twiggy

Summer Soba Noodles

Serves 2-4
Course Brunch, dinner, Lunch
Cuisine Japanese
Prep Time 20 minutes
Cook Time 10 minutes
Total Time 30 minutes
Servings 4

Ingredients

  • 3-6 Soba noodle bundles approximately 1 bundle per person I recommend you to get the Japanese kind. You can get them at any Asian specialty aisle of a supermarket
  • 2-4 green onions/chives – finely sliced
  • 2 carrots shredded, julienne or grated
  • 1 seedless cucumber julienne or thinly sliced
  • ½ avocado
  • 1/4-1/2 cup unshelled and cooked edamame beans optional
  • 1 block of extra firm Tofu remove the excess water patting it with paper towels and cut into small cubes.

For the sauce:

  • 3 tablespoons soy sauce.
  • 3 tablespoons seasoned rice vinegar
  • 2 tablespoons sesame oil + one extra tablespoon for finishing.
  • 2 tablespoons of honey or agave nectar.
  • 1 tablespoon brown sugar
  • 1 tablespoon grated fresh ginger
  • 1 garlic clove grated
  • the juice and the zest of one small orange.

Garnish with:

  • Thai Basil to garnish
  • Black or gold sesame seeds
  • 1 Red chili thinly sliced

Instructions

  1. In a bowl whisk all the sauce ingredients. Reserve 1/3 of the sauce to marinate the tofu squares.
  2. Start by making your sauce. Place all its ingredients in a bowl and whisk. Set aside 1/3 of the sauce and marinate the tofu. While the tofu is absorbing all the flavors, proceed to cut and prepare your vegetables and garnishes.
  3. Bring a large pot of water up to a boil. Unlike regular pasta, you do not need to salt the water. Once the water is boiling place the noodles and monitor constantly, using a pasta spoon to prevent the noodles sticking. Bring the water up to simmering. Do not let it boil. Follow the instructions in the package, taste, it should have some elasticity to it. Usually takes around 4-5 minutes because they cook through quickly. Keep an eye on them to avoid overcooking. When the pasta is ready drain the noodles into a colander. Immediately return them to the pot and fill the pot with cold water. Leave the water running into the pot a bit until the noodles cool down. Gently with your hands rinse the noodles in threads.*( see picture below) until they feel less starchy. Drain them again in a colander and allow them to drain. You can transfer them to a bamboo mat, to remove the excess water.
  4. In a non-stick pan proceed to saute the marinated tofu until golden brown. A little scorching on the edges adds great flavor.

  5. In a large bowl season the noodles with a tablespoon of sesame oil and the sesame seeds.

  6. Divide all noodles evenly into 2 or 4 bowls, garnish with the Juliane carrots, cucumbers, avocado, sautéed tofu, edamame, red chili.
  7. Serve a small sauce bowl per person for extra dipping the noodles. Enjoy!
View Post or View Comments 1

Mango-Basil-Pomegranate Daiquiri

Mango-Manbo~Yes, more please! best rum mango drink!

1, 2, 3, 4, 5, 6, 7, 8…….Maaangoo!..

It’s Friday and even if your week is not over yet, you must chill. I’m gonna be posting one drink every Friday, just for a little reminder that whenever your weekend starts you must relax and try to have some fun. Ian and I we are very homebodies; we like to stay at home relaxing and making our own treats. Don’t get me wrong we do go out every now and then, but the truth is that is always more relaxing to have a drink in the safety of your home.
This Mango-Basil-Pomegranate Daiquiri is refreshing and not too sweet. The basil brings so much freshness and the pomegranate kernels burst and pop in your mouth adding some texture, you’re gonna love it.
Mango-Mambo 2 drinks, 4 drinks, 6 drinks!

Mango-Basil-Pomegranate Daiquiri

Makes 4-6 drinks

2 cups fresh Mango peeled and cubed. If you can not find fresh, frozen mango will be great too.
2 cups of ice
6-8 Basil leaves, I used Thai Basil, you can use any basil you have on hand
2-4 parts of white Cuban rum, more or less …
1 part of Grenadine
a splash of Pomegranate juice
a squeeze of lime
Garnish with fresh pomegranate kernels. ( Little pieces of strawberry will work as well.)

Directions:

In a Blender Place all ingredients, Blend until smooth.
Serve on chilled short glasses.

Cut the straws on a bias for an easier sip,  sprinkle the pomegranate kernels and add a little spoon to eat them as you go.

To get you in the Friday mood put some Mambo music Like Perez Prado, The King of Mambo.
Here is some link to the proper music to play while you prepare your drink!
Also, I have included some Mambo steps just in case you want to shimmy… Have fun, Mangoooo!!!

mambo-steps

Mango-Mambo the best rum drink!

Mango-Basil-Pomegranate Daiquiri

makes 4-6 drinks
Course Drinks
Cuisine Mexican
Prep Time 15 minutes
Servings 4
Author Mariana McEnroe

Ingredients

  • 2 cups fresh Mango peeled and cubed. If you can not find fresh frozen mango works best.
  • 2 cups of ice
  • 6-8 Basil leaves I used Thai Basil, you can use any basil you have on hand.
  • 2-4 parts of white Cuban rum this is up to you!
  • 1 part of Grenadine
  • a splash of Pomegranate juice
  • a squeeze of fresh lime juice
  • Garnish with fresh pomegranate kernels. Little pieces of strawberry will work as well.

Instructions

  1. In a Blender Place all ingredients, Blend until smooth.
  2. Serve on chilled short glasses.
  3. Cut straws on a bias for an easier sip. Sprinkle pomegranate kernels and add a little spoon to eat them as you go. Cheers!

View Post or View Comments 1

Beet Salad, Avocado spread & Pumpernickel crostini

Beet-Salad_avocado-spread_pumpernickel-crostini_table-ready

This weekend Ian and I had really good eats. Beets are one of my favorite root vegetables, My mom used to make steamed beets sliced with a squeeze of lime and salt and served as an afternoon snack for my brother and I when we where kids. As a grownup, I love them in all preparations; raw, shredded over salads, ROASTED, steamed, in soups, chips and one of my favorites is to pickle them. Sometimes I don’t have the patience to wait until they are pickled, so I refer to a recipe like this and it works like a charm.
I made this Beet Salad, with avocado spread and pumpernickel crostini last Sunday with the type of beets they had available at the farmers market, beautiful Golden and Chioggia Red beets. I believe some are sweeter than others; to me, golden beets taste less earthy and less sweet compared to Red beets. Every kind of beet is extremely healthful and full of anti-oxidants, phytonutrients, so use any kind you have available. They can lift up any simple green salad, or become a meal as in this instance. This light vinaigrette works like a charm in combination with the following cooking method: I steamed them for a short time until just al dente, with a little crunch. The contrast in textures between the bread and the avocado spread and the sweet-tangy beet salad is what grabs me the most. The vinaigrette is light and tangy with bright fresh herbs…. done! This is a very easy and full-flavored recipe. You can serve this as an appetizer, light lunch, or with the addition of the avocado in slices and some pecans as a great side salad.

Beet-Salad_avocado-spread_pumpernickel-crostini_-Golden-and-Chioggia-Red-beets.

Beet-Salad_avocado-spread_pumpernickel-crostini_sunnny-winter-salad

Beet Salad, Avocado spread & pumpernickel crostini

Serves 2-4

1 Golden Beet
1 Red Beet
1 small sweet potato ( it adds contrast and creamy texture)
¼ cup seasoned rice vinegar
2 tablespoons of Extra Virgin Olive Oil
1-2 Tablespoons of fresh thyme, tarragon and mint.
(you can replace any of these for dry, but at least use one fresh herb if you can.)

Avocado spread:

1 small avocado smashed
1 small clove of garlic grated
Lemon Juice, salt and pepper.
Pumpernickel Bread
Some butter or extra virgin olive oil to grill the crostini.

Beet-Salad_avocado-spread_pumpernickel-crostini_Tosted-with-butter

Directions:

Scrub and rinse really well. In a double boiler steam the beets whole do not cut them, for 15- 18 minutes*
set them aside and allow them to cool. Once cool, peel them and slice them thin. ( a little less than ¼” inch.) Place them in a Bowl, add the herbs, rice vinegar, oil, salt and pepper. Gently toss these together and set a side.
Smash the avocado with a fork in a small bowl. Add grated garlic, and a squeeze of lemon, with salt and pepper to taste.
For the Crostinis: on a medium-high heat nonstick skillet, add a dab of butter and toast about 4-6 pieces of bread, both sides. ( I highly recommend the butter , it plays so well with the bred and the tangy notes from the beets!… However, the vegetarian or vegan version using the extra virgin olive oil also tastes terrific. Enjoy!
For service there are two options: assemble to serve or serve everything separately and assemble as you eat.(the second option is more fun, and it prevents your crostini from getting soggy.
* note: if you keep your root vegetables in the refrigerator, allow them to come to room temperature before you start cooking them, to ensure they cook evenly.

Beet-Salad_avocado-spread_pumpernickel-crostini

Beet-Salad_avocado-spread_pumpernickel-crostini_table-ready-to-eat!

Beet-Salad_avocado-spread_pumpernickel-crostini_-Golden-and-Chioggia-Red-beets_under-the-sun

~ Enjoy under the sun ~

Music Pairing: THe las Beat of my heart – DeVotchka

https://youtu.be/knsDmfmOnas

Beet Salad, Avocado spread & pumpernickel crostini

Serves 2-4
Course Brunch, Lunch, Snack
Cuisine vegetarian, wholesome
Prep Time 15 minutes
Cook Time 25 minutes
Total Time 40 minutes

Ingredients

  • 1 Golden Beet
  • 1 Red Beet
  • 1 small sweet potato it adds contrast and creamy texture
  • ¼ cup seasoned rice vinegar
  • 2 tablespoons of Extra Virgin Olive Oil
  • 1-2 Tablespoons of fresh thyme tarragon and mint.
  • you can replace any of these for dry, but at least use one fresh herb if you can.

Avocado spread:

  • 1 small avocado smashed
  • 1 small clove of garlic grated
  • Lemon Juice salt and pepper.
  • Pumpernickel Bread
  • Some butter or extra virgin olive oil to grill the crostini.

Instructions

  1. Scrub and rinse really well. In a double boiler steam, the beets whole do not cut them, for 15- 18 minutes* set them aside and allow them to cool. Once cool, peel them and slice them thin. ( a little less than ¼” inch.) Place them in a Bowl, add the herbs, rice vinegar, oil, salt and fresh ground black pepper. Gently toss these together and set aside.
  2. Smash the avocado with a fork in a small bowl. Add grated garlic, and a squeeze of lemon, salt, and fresh ground black pepper to taste.

For the Crostinis:

  1. In a medium-high heat nonstick skillet, add a dab of butter and toast about 4-6 pieces of bread, both sides. ( I highly recommend the butter, it plays so well with the bred and the tangy notes from the beets!… However, the vegetarian or vegan version using the extra virgin olive oil also tastes terrific. Enjoy!
  2. For service there are two options: assemble to serve or serve everything separately and assemble as you eat.(the second option is more fun, and it prevents your crostini from getting soggy.

Recipe Notes

* note: if you keep your root vegetables in the refrigerator, allow them to come to room temperature before you start cooking them, to ensure they cook evenly.

View Post or View Comments 0

Blueberry-Orange Buckwheat Pancakes

Blue Berry Orange Buckwheat Pancakes ~ Yes, more please!

 If I have to choose between pancakes and French toast, I will choose French toast, except when it comes to Buckwheat pancakes. Everything changed the day I tried Buckwheat flour. I’m not gluten intolerant, but in the recent years I’ve noticed how much better I feel when I omit processed white flour. This is huge for me because at one point in time I was really committed to baking as a full time career; I even considered opening a business. Life takes you in mysterious ways, and my body did not like to be in a daily contact with a high content of sugars, white flour, or saturated fats. I always think of the analogy of an alcoholic opening a bar or being a bartender… not the best choice right?…So in my research, changing my habits to better quality foods and whole grains, I stumbled upon buckwheat while I was watching an episode of “No Reservations” with Anthony Bourdain. He was visiting Brittany, France (it is a great episode you should look it up).  It featured the beautiful French peninsula surrounded by the English channel, the Celtic Sea, Atlantic Ocean and the Bay of Biscay; lots of amazing scenery. Buckwheat is a staple of this region, pancakes, galettes, and crepes are made with this type of flour. If I remember well, he was served a galette and my mouth just dropped!. So there I was, trying to find Buckwheat flour and not a lot of stores carry it. I found a brand that I still buy and love: Organic and Whole Grain Bob’s Red Mill Organic Buckwheat Flour. For my friends in Mexico it is “Harina de Alforfón or Trigo Negro”( Im sure you can find it in an ecotienda or Mamá Coneja).
Despite the name, buckwheat is not wheat; not a grain but a fruit seed, It is high in Omega-6, protein, fiber, all the B vitamins, Magnasium, Potassium, Rutin and Selenium. It is easy to digest, and GLUTEN FREE!!! So if you have experienced a burst of sleepiness after eating a short stack of regular white flour pancakes, try this recipe. You will feel great and energized after eating them. No bloating, no crawling for the antacid.
Buckwheat flour makes light and fluffy pancakes with a nutty flavor that goes very well with any fruit, maple syrup, or agave nectar.  This recipe is easy. Listed below is the standard recipe followed by the vegan version, with substitutions. I hope you like it as much as I do!

Pancake abstract ~ Yes, more please!

Blueberry-Orange Buckwheat Pancakes

Makes 6-8 4” small pancakes

dry:

1 cup of buckwheat flour
2 teaspoons of Baking powder
2 tablespoons of coconut sugar
1 good pinch of kosher salt

wet:

1 cup of unsweetened coconut cream
1 egg
2 tablespoons of melted coconut oil, melted butter or a mild extra virgin olive oil.
1/2 teaspoon of vanilla extract
The zest of one whole small orange.
The squeezed juice of ½ an orange, save the other half you will need it later!
Little extra butter for the pan. (You can use soy spread if vegan)
For Vegan pancakes: substitute:
1 tablespoon of ground flax seed + 3 tablespoons of water= 1 egg
1 cup of Soy milk or Almond milk will replace the total dairy.
Other variations: Add a pinch of cinnamon and nutmeg instead of the Orange zest.

Method:

1. In a medium size bowl mix all dry ingredients. Next, whisk all wet ingredients. Proceed and mix wet and dry until well combined; small lumps in the batter are ok. THis batter is a bit on the thicker side, If is too tick feel free to add bot of  water, milk or any non-dairy free will work great.
2. In a separate bowl, rinse and dry blueberries. I usually don’t mix them into the batter, I prefer to place them individually so I can distribute them evenly.
3. Cut fresh strawberries and macerate with the juice of the other ½ orange.
4. Have your Ice cream scooper ready!. I’m a free shape pancake maker, never perfectly round!… but I find it helps portion and shape by pouring the batter with a ice cream scooper *(see picture below) , especially with this batter since its a bit thicker than regular pancake batter.
5. Over a medium heat non-stick pan, proceed and start cooking the pancakes. Add a little butter to pan, wait until bubbly and melted. Place one scoop of batter wait 10 seconds and start adding the blueberries. It takes approximately 1-2 minutes per side, when you start to see burst bubbles on the edge of the pancake is ready to flip. Continue to cook until golden brown. Proceed with the rest of the batter.

Note: Because of the darker color nature of the flour, you will have to monitor the heat a little more than normal, and do not worry if they look a little more than golden brown.

Blue Berry Orange Buckwheat Pancakes _step by step ~ Yes, more please!

Blue Berry Orange Buckwheat Pancakes_you are so fluffy!!! ~ Yes, more please!

Warm up your Maple syrup and serve with the macerated strawberries, fresh blueberries and pistachios.

I love the contrast in flavor between cooked and fresh blueberries so don’t hesitate to double up on them! 

 Can you smell the love?

Blue Berry Orange Buckwheat Pancakes ~ Yes, more please!

Sorry, but I have to say that I will never miss

the refined white flour… No More!… Enjoy!

Blue Berry Orange Buckwheat Pancakes_no bites left! ~ Yes, more please! Music Pairing: The essential-Dave Brubeck

Blueberry-Orange Buckwheat Pancakes

Makes 6-8 4” small pancakes
Course Breakfast, Brunch, dinner
Cuisine wholesome
Prep Time 15 minutes
Cook Time 25 minutes
Total Time 40 minutes
Author Mariana McEnroe

Ingredients

dry:

  • 1 cup of buckwheat flour
  • 2 teaspoons of Baking powder
  • 2 tablespoons of coconut sugar
  • 1 good pinch of kosher salt

wet:

  • 1 cup of unsweetened coconut cream
  • 1 egg
  • 2 tablespoons of melted coconut oil melted butter or a mild extra virgin olive oil.
  • 1/2 teaspoon of vanilla extract
  • The zest of one whole small orange.
  • The squeezed juice of ½ an orange save the other half you will need it later!
  • Little extra butter for the pan. You can use soy spread if vegan
  • For Vegan pancakes: substitute:
  • 1 tablespoon of ground flax seed + 3 tablespoons of water= 1 egg
  • 1 cup of Soy milk or Almond milk will replace the total dairy.
  • Other variations: Add a pinch of cinnamon and nutmeg instead of the Orange zest.

Instructions

  1. In a medium size bowl mix all dry ingredients. Next, whisk all wet ingredients. Proceed and mix wet and dry until well combined; small lumps in the batter are ok. This batter is a bit on the thicker side, If is too tick feel free to add a bit of water, milk or any non-dairy free will work great.
  2. In a separate bowl, rinse and dry blueberries. I usually don’t mix them into the batter, I prefer to place them individually so I can distribute them evenly.
  3. Cut fresh strawberries and macerate with the juice of the other ½ orange.
  4. Have your Ice cream scooper ready!. I’m a free shape pancake maker, never perfectly round!… but I find it helps portion and shape by pouring the batter with an ice cream scooper *(see picture below), especially with this batter since its a bit thicker than regular pancake batter.
  5. Over a medium heat non-stick pan, proceed and start cooking the pancakes. Add a little butter to the pan, wait until bubbly and melted. Place one scoop of batter wait 10 seconds and start adding the blueberries. It takes approximately 1-2 minutes per side when you start to see burst bubbles on the edge of the pancake is ready to flip. Continue to cook until golden brown. Proceed with the rest of the batter.
View Post or View Comments 2

Martini Dos Flores

Martini-Dos-Flores~Yes,-more-please!

Playing with leftovers can be fun. Ian my husband, is a master of drinks and beverages. He can make awesome concoctions in the blink of an eye. Last weekend what we had in our liquor cabinet was not very promising. But sure enough, Ian saw lots of possibilities and he came up with this awesome drink. We named it “Dos Flores” for obvious reasons, the Hibiscus tea and the Elderberry flowers liquor. After drinking the first martini we started joking about the combination of Elderberry flowers and “Jamaica” (in Mexico pronounced -Ha-my-cuh) which is very widely used for Aguas Frescas, popsicles, sauces you name it. Then we started to make comparisons and talking about history. One thing lead to another, and suddenly we where just thinking that this Martini would have been just the thing to drink if Benito Juarez ran into the Emperatriz Carlota; something a little sweet and sour to smooth out the edges of the time of the monarchy back in the day.

Anyway, we were just being silly and it made us laugh to the point that I have to share my mental image. What I know for sure is that it will smooth out the edges of any Friday. Have a great weekend *cling!* cheers!Martini Dos Flores the favorite drink of Benito Juarez & Emperatriz Carlota


Martini-Dos-Flores,-Zip,-refresh,-repeat-Yes,-more-please!

 Martini Dos Flores

1 part Vodka

1 part Extra dry Vermouth

1 part Elderberry Liquor I used St. Germain Liqueur

A splash of concentrated Jamaica “hibiscus tea”,  instructions below…

Splash of bitters

Squeeze of Lime

Ice

Jamaica- Hibiscus concentrated tea:

1/4 cup of hibiscus dry flowers

1 cup of boiling water

Proceed to steep the tea for about 3-4 min.Using a french press makes it really easy, is you don’t own one just make a tea and pass it trough a sieve.

Cool for about 20-30 minutes.

Garnish :

Lime wedges

1 Rehydrated hibiscus flower left over from the concentrated tea making. (optional)

Proceed to:

In a shaker, pour the Vodka, Vermouth, Elderberry liquor, squeeze of lime and the bitters with plenty of ice. Shake vigorously and strain into a chilled martini glass.

Garnish with Lime wedge and pour the concentrated hibiscus tea slowly into the center of the glass to create the marbling effect.

(Add a couple of extra ice cubes, especially if you are in Austin Texas Summer)

Serve in a chilled martini glass. Enjoy!

Martini-Dos-Flores_-unique-and-refreshing!

Cheers!

Music Pairing: Danzon No.2 Marquez Alondra dela Parra


View Post or View Comments 2

Seared Rainbow Trout + Citrus-fennel-potato salad + Cilantro pesto

Seared Rainbow Trout : Citrus-fennel-potato salad & Cilantro pesto_Yes,more please!

This summer my basil plants have not done really well. I think my mistake was not being able to see that I had 3 plants in the same pot. Oh well! I separated them, but they are a bit annoyed with me at this time. If just they knew I love them. The reason I planted them is because I love pesto and without basil my next favorite herb for pesto is cilantro.
Cilantro is really hard to grow but easy to find fresh at the store or market so I decided to give it a shot and it seems I came up with a pretty exciting recipe. It is like a cross between pesto and the Argentinean chimichurri; not too creamy not too oily, right in the middle. I’m loving it. I used fresh cilantro, peanuts, and chilies. A hint of lemon zest and Extra Virgin Olive Oil. I skipped the Parmigiano cheese and still  It’s creamy and light at the same time.

With this premise, I went to the seafood market and run into this gorgeous Rainbow Trout Fillets. Done deal! the perfect pairing for my pesto. Rainbow trout is a delicate fish but with enough character to old up the herb and zesty flavors. Trouts belong to the family of Salmon, so it has a firm flesh and good fatty acids, Therefore lots of flavors.
Fish intimidates a lot of people, and oh my God, “Fishskin” forget it!. Well, it is time for you to get out of your comfort zone and just do it.  Get resources, talk to your vendor, fisherman, fish aficionado, how to choose fish, where to get it in your city, how to choose a good one. For me, there are two clues to go by smell and texture. I do not buy fish that smell like fish and the flesh to the touch needs to be firm. The next intimidating factor comes from the not knowing how to cook it or which method works better. My friends, if you follow these simple instructions you are on your way to have a feast of kings!

Seared Rainbow Trout : Citrus-fennel-potato salad & Cilantro pesto_Rainbow Trout fillets

Seared Rainbow Trout : Citrus-fennel-potato salad & Cilantro pesto_Fresh Rainbow Trout Fillets

Seared Rainbow Trout + Citrus-fennel-potato salad + Cilantro Pesto

Serves 4

For the Cilantro Pesto:

4 cups  about 2 bunches of Cilantro include stems
1/2 cup roasted peanuts
3-4 chilies  2 serranos, 2 red sweet peppers (you can interchange chilies, like habanero, jalapeño, shishito, just add one at a time so you can control the spice level)
3-4  garlic cloves
1/2 – 3/4 cup of Extra Virgin Olive Oil
The juice and zest of 1 lemon
1 teaspoon of salt
1/2 teaspoon of fresh cracked black pepper

Preparation:
Add everything to the blender or food processor, blending and pulsing to desired consistency. You can live it more chunky or smooth is up to you.*

For the Left Over Pesto:
I’ve been using it in avocado sandwiches, pasta, and cucumber salad is a hit!. This recipe makes about 2-1 1/2 cups and stays good for about a week. Keep it in an airtight container and cover with plastic wrap touching the surface of the pesto. This will prevent air from oxidizing it and turn it dark gray.

Seared-Rainbow-Trout_Cilantro-pesto_-ingredients_Yes,more-please!Seared Rainbow Trout : Citrus-fennel-potato salad & Cilantro pesto_Cilantro pesto

For the Potato Fennel Salad:

4-6 medium-small New red potatoes cook al dente.
1/2 a large bulb of fennel finely sliced
1/2 small red onion finely sliced.
1-2 handfuls of frisse (or arugula)
The juice of one medium orange.
A splash of Rice Vinegar
A splash of Extra Virgin Olive Oil.
Salt & Black pepper to taste

Preparation:
Place all salad ingredients in a bowl. Toss well a few minutes before serving so the potatoes can absorb some of the vinaigrette.

Potato-Fennel-Salad_Yes,-more-please!

Potato-Fennel-Salad_-tossing-the-salad

For the Seared Rainbow Trout:

4  Rainbow trout fillets skin on.
Kosher Salt &  fresh cracked Black Pepper
Extra Virgin Olive Oil.

There are five rules to leave by when you are searing skin on trout fillets:

1- HOT skillet, I mean sizzling hot; water droplets dance in the skillet at this temperature.

2- Room temperature fish. Pull the fish out of the refrigerator at least 20 minutes before you gonna start cooking.

3- Pad dry the fish before seasoning.

4-Proper seasoning salt & pepper both sides of the fillet.

5- Skin side hits the pan first. One flip. That’s it! yes, one flip you read it well. So let’s start cooking…

Preparation:
Heat up a non-stick skillet. Place seasoned trout fillets skin side down into the very hot skillet. Do not crowd the pan, so you can ensure the skin of the trout is seared and crispy. Now, avoid the temptation, do not Look at it, don’t flip it, do not move it around. Don’t please!. Wait 1 and a half to 2 minutes, as soon as you start to see that the edges of the fillet are turning white (like a halo all around the perimeter) then carefully flip it with all your conviction in the knowing that ONE flip is enough.
The skin should be golden brown and crispy edges. Once you flip it is over. Give your fillets an extra 1 to 2 minutes tops.
Remove from heat let it rest a bit 40-60 seconds. And your fillets are Ready to serve.

Serve trout skin side up so stays crispy, top it with a generous spoonful of the pesto, roasted chopped peanuts and drizzle some lemon juice to finish it.
Top the trout with the red new potato and fennel salad. You can also serve this dish family style all arranged on a serving platter, take it to the table and A Comer! Serve immediately accompanied by a good glass of Vinho Verdhe like Casal Garcia from Portugal, or an Albarino 2009 La Cana, from Galicia Spain.
Enjoy!

Seared-Rainbow-Trout-with-Cilantro-pesto_How-to-sear-a-trout_filet_Yes,more-please!Seared-Rainbow-Trout-with-Cilantro-pesto_How-to-sear-a-trout_Yes,more-please!

Seared-Rainbow-Trout-with-Cilantro-pesto-ready-to-serve_Yes,more-please!

Seared-Rainbow-Trout-with-Citrus-fennel-potato-salad-&-Cilantro-pesto_Yes,more-please!

Enjoy!

Music Pairing: Ibrahim Ferrer- Buena Vista Social Club

https://youtu.be/l5gsWhNr_Zw

Seared Rainbow Trout + Citrus-fennel-potato salad + Cilantro pesto

Serves 4 There are five rules to leave by when you are searing skin on trout fillets: 1- HOT skillet, I mean sizzling hot; water droplets dance in the skillet at this temperature. 2- Room temperature fish. Pull the fish out of the refrigerator at least 20 minutes before you gonna start cooking. 3- Pad dry the fish fillets before seasoning. 4-Proper seasoning salt & pepper both sides of the fillet. 5- Skin side hits the pan first. One flip. That’s it! yes one flip you read it well.
Course dinner
Cuisine FUSION
Prep Time 20 minutes
Cook Time 35 minutes
Total Time 55 minutes
Author Mariana McEnroe

Ingredients

For the Cilantro Pesto:

  • 4 cups about 2 bunches of Cilantro
  • 1/2 cup roasted peanuts
  • 3-4 chilies 2 Serrano peppers 2 red sweet peppers (you can interchange chilies, like habanero, jalapeño, shishito, just add one at a time so you can control the spice level.)
  • 3-4 garlic cloves
  • 1/2 – 3/4 cup of Extra Virgin Olive Oil.
  • The juice and zest of 1 lemon.
  • 1 teaspoon of salt
  • 1/2 teaspoon of fresh ground black pepper.

For the Potato Fennel Salad:

  • 4-6 medium-small New red potatoes cook al dente.
  • 1/2 a large bulb of fennel finely sliced
  • 1/2 small red onion finely sliced.
  • 1-2 handfuls of frisse or arugula
  • The juice of one medium orange.
  • A splash of Rice Vinegar
  • A splash of Extra Virgin Olive Oil.
  • Salt & Black pepper to taste

For the Seared Rainbow Trout:

  • 4 Rainbow trout fillets skin on.
  • Kosher Salt & Fresh Cracked Pepper
  • Extra Virgin Olive Oil.

Instructions

  1. Make the pesto: Add every pesto ingredient to the blender or food processor, blending and pulsing until a rough paste. Pulse it more times for a smoother consistency. I like it a bit more chunky, small pieces of peanuts still show and the herbs are roughly chopped, but not completely pureed.

  2. For the Left Over Pesto: I’ve been using it on avocado sandwiches, pasta, and cucumber salad is a hit!. This recipe makes about 2-1 1/2 cups and stays good for about a week. Keep it in an airtight container and cover with plastic wrap touching the surface of the pesto. This will prevent air from oxidizing it and turn it dark gray.

  3. Make the potato salad: place all salad ingredients in a bowl and gently toss well a few minutes before serving so the potatoes can absorb some of the vinaigrette.

  4. Sear the fish: 

    Heat up a non-stick skillet. Place trout fillets into the very hot skillet remember the fish enters the pan skin side down. Do not crowd the pan, so you can ensure the skin of the trout is seared and crispy. Now, avoid the temptation, do not Look at it, don’t flip it, do not move it around. Don’t please!. Wait 1 and a half to 2 minutes,  as soon as you start to see that the edges of the fillet are turning white (like a halo all around the perimeter) then carefully flip it with all your conviction in the knowing that ONE flip is enough. 

    The skin should be golden brown and crispy edges. Once you flip it is over. Give your fillets an extra 1 to 2 minutes tops. 

    Remove from heat let it rest a bit 40-60 seconds. And your fillets are Ready to serve.

  5. Serve trout skin side up so stays crispy, top it with a generous spoonful of the pesto, roasted chopped peanuts and drizzle some lemon juice to finish it.

    Top the trout with the red new potato and fennel salad. You can also serve this dish family style all arranged on a serving platter, take it to the table and A Comer!

  6. Serve immediately accompanied by a good glass of Vinho Verdhe like Casal Garcia from Portugal, or an Albarino 2009 La Cana, from Galicia Spain.

    Enjoy!


View Post or View Comments 0

Cauliflower Ceviche

Cauliflower Ceviche_Tostada ready to eat!

The full summer weather is here! Austin, Texas is burning hot! 101-106 Fahrenheit. With this kind of summer temperatures, I can’t even conceive the idea of “grilling”. Can you imagine being outside with 101 on the thermometer in front of a grill trying to light up the charcoal?…Not my cup of tea I prefer the tundra if you ask me. But well these weather conditions fire up the indoors freshly made meals; light, crisp and lots of veggie action.

Cauliflower-Ceviche_cauliflower-florets

I tried to make this ceviche once in my years of college, not so good; it was really mushy and flavorless… but I loved the concept of using the beloved Cauliflower. Cauliflower is the vegetable everybody loves now because of its versatile flavor. It is evident that Cauliflower has a love affair with butter and cream. Mashed cauliflower can replace a good pile of mashed potatoes, cauliflower gratin, cauliflower chowder, griller, roasted, among my favorites. But what I crave in a Summery hot day is something light easy to digest, fresh and no oven or a long cooking time required.

So with this said, I revamped the cauliflower ceviche recipe from my College years by adding diced crunchy vegetables, steaming the cauliflower and lots of good fresh and dry herbs plus a punch of citrus goodness to add extra flavor. That acid, salty umami note that just makes your mouth water, as soon you start reading the recipe…

Cauliflower Ceviche is a great summery meal, for Vegetarian, Vegans and Carnivorus that won’t even care about the difference once they have the first bite!

Margaritas on the side?…Yes, please!…Enjoy!

Cauliflower-Ceviche_ingredients_Yes,-more-please!

Cauliflower Ceviche

Serves 4

1 Cauliflower head, medium size. Remove the core and small diced florets.

Small diced:

2 carrots
1 tomato
½ medium size red onion
2 green onions including the green part.
1 cucumber seedless
1 long celery stalk
1 habanero, or 1 jalapeno, or 1 serrano. (Remove the seeds for a less spicy version.)
2 Tablespoons of finely chopped fresh cilantro
2 Tablespoons of finely chopped fresh parsley
2-3 pinches of dried oregano

The juice of:

2 Limes
1 Lemon
The juice and zest of ½ Orange
2 tablespoon apple cider vinegar
4 tablespoons Extra Virgin Olive Oil
1 teaspoon celery salt
1 teaspoon of  sea salt
Black crushed pepper to taste.

Garnish with:

Radishes, Avocado Slices, Pumpkin seeds, Ketchup,( weird but delicious, it adds some sweet and tangy note)
Cholula hot Sauce, Limes. Serve with Tostadas or crackers.

Directions:

In a medium size pot steam the small diced Cauliflower florets until al-dente, for about 3-5 minutes. Remove from steamer place them on a tray in one single layer and let them cool off. Mean time chop all the vegetables. Place them on a big salad bowl, add the herbs, extra virgin olive oil, the citrus juices and S&P, toss well.  Once the cauliflower florets have cool down, add them to the mix, toss well and let it marinate for 20-45 minutes. Taste and adjust salt and pepper if necessary. Serve with tostadas or crackers, avocado Slices, radish slices, and toasted pepitas (pumpkin seeds), and a dash of your favorite hot sauce…

Cauliflower-Ceviche-Summer-Vegetarian-Vegan-Bliss_-Yes,-more,-please!

Refreshing, Vegetarian Ceviche, Enjoy!

Music Pairing: Mini Skirt, ESQUIVEL- Metropole Orkest

Cauliflower Ceviche

Serves 4-6
Course Brunch, Lunch, Main Course
Cuisine FUSION, Mexican, wholesome
Prep Time 30 minutes
Cook Time 10 minutes
Total Time 40 minutes
Author Mariana McEnroe

Ingredients

  • 1 Cauliflower head medium size. Remove the core and small diced florets.

Small diced:

  • 2 carrots
  • 1 to mato
  • ½ medium size red onion
  • 2 green onions including the green part.
  • 1 cucumber seedless
  • 1 long celery stalk
  • 1 habanero or 1 jalapeno, or 1 serrano. (Remove the seeds for a less spicy version.)
  • 2 Tablespoons of finely chopped fresh cilantro
  • 2 Tablespoons of finely chopped fresh parsley
  • 2-3 pinches of dried oregano

The juice of:

  • 2 Limes
  • 1 Lemon
  • The juice and zest of ½ Orange
  • 2 tablespoon apple cider vinegar
  • 4 tablespoons Extra Virgin Olive Oil
  • 1 teaspoon celery salt
  • 1 teaspoon of sea salt
  • Black crushed pepper to taste.

Garnish with:

  • Radishes Avocado Slices, Pumpkin seeds, Ketchup,( weird but delicious, it adds some sweet and tangy note)
  • Cholula hot Sauce Limes. Serve with Tostadas or crackers.

Instructions

Directions:

  1. In a medium size pot steam the small diced Cauliflower florets until al-dente, for about 3-5 minutes. Remove from steamer place them on a tray in one single layer and let them cool off. Mean time chop all the vegetables. Place them on a big salad bowl, add the herbs, extra virgin olive oil, the citrus juices and S&P, toss well. Once the cauliflower florets have cool down, add them to the mix, toss well and let it marinate for 20-45 minutes. Taste and adjust salt and pepper if necessary. Serve with tostadas or crackers, avocado Slices, radish slices, and toasted pepitas (pumpkin seeds), and a dash of your favorite hot sauce…
View Post or View Comments 3

Heirloom Tomato Crostata

Heirloom-Tomatoe-Crostata-Yes,-more-please!

This is one of the recipes I being waiting to make with the gorgeous tomatoes from the market, Heirloom tomato Crostata!…Last time I went to Boggy Creek Farm,( my favorite urban farm here in Austin, TX.)  I bought about 5 different kinds I could not resist! (honestly, If you have 3-2 or even just one kinds it will be great too) Looking at all this colors and shapes made me turn my sweet crostata dough into a savory one. I read about this tomato pie with Corn Meal, and honestly I’m not very fond of Pies, I love crostata because of the dough-filling ratio. In a pie usually you have thin crusted and lots of filling versus a crostata in which you have little more crust-less filling (which makes it lighter and balanced to eat. The exposed fruit or vegetables or in this case the tomatoes can get a little roasted and it adds lots of character to it.  I hope you like it. Enjoy!Heirloom-Tomatoes-Variety_Corn-Meal-Crostata_Yes,-more-please!

Tomatoe-Crostata_heirloom-tomatoes,-thyme,-great-fresh-seasonal-ingredients

Heirloom Tomato Crostata

Serves 6-8

For the Dough:

2 Cups of Unbleached All-purpose flour
¾ Cup Corn Meal (I used Larry’s Corn Meal from Boggy Creek Farm, I highly recommend to look for a good quality Organic no GMO coarse ground cornmeal it really makes the difference!)
1 teaspoon of kosher salt
1 teaspoon of sugar
2 sticks (1 cup) unsalted butter, cold and cut into small cubes.
1 tablespoon of Greek yogurt
¼ to ½ cup iced water

How to make the crust:

Measure all your ingredients, and place all the dry ingredients in a bowl and mix. Place bowl in the freezer. Meantime cut your cold butter, and Iced water ready to measure. Remove the bowl of dry ingredients from freezer and add the butter. With a pastry blender incorporate the butter and flour until the mixture resembles to a coarse meal, and the butter pieces are small like the size of a pea. Slowly add the cold water and carefully with your hands form a dough that just holds together. Do not work the dough.
Once that the dough barely holds together cut a piece of plastic wrap and place your dough. Wrap it and shape it into a disk.
Refrigerate for at least 1 hour, 4-6 is best.(see pictures )

Tomatoe-Crostata-how-to-make-the-dough-step-by-step!

How-Dough-Texture-should-look-like-for-a-Crostata,-galette-or-free-form-pie

When the dough is ready Preheat Oven at 400 F/ 205C
On a clean work surface, dusted with flour unwrap the dough let sit for a couple of minutes and roll the dough into a 20-22” round and about 1/8 “ thick. Once is rolled place it into a sheet pan lined with parchment paper.

Tomatoe-Crostata_Rolling-the-dough

For the Filling:

4 medium size heirloom tomatoes cut into ¼ inch tomato slices, from at least 2 kinds of heirloom tomatoes. I used green zebra, yellow Oaxacan, prudence and Cherokee. Use whatever is best fresh available at your farmers market.
1/2 cup cherry gold or cherry tomatoes

I used:
1/3 cup of goat cheese.
3 fresh sprigs of thyme.
Sea Salt, freshly ground pepper.
A small drizzle of Extra virgin Olive Oil.

Directions:

Spread ½ of the Goat cheese into the rolled dough, place the tomato slices, thyme, rest of the cheese, sea salt, black pepper and drizzle Extra Virgin Olive Oil all over the tomatoes. Fold the dough edges into circle creating a 2” border.

Brush the edges with egg wash and sprinkle sea salt all around the edge.

Bake at 400 F/ 200C for 35-45 minutes. Serve warm.

Heirloom-Tomato-Crostata_How-to-make-a-Crostata,-Gallete,-Free-form-savory-pie

Heirloom-Tomatoe-Crostata_Tomato-Season-Cornmealcrust

Heirloom Tomatoe Crostata

Music Pairing: Pink Martini- Hang on Little Tomatoe

Heirloom Tomato Crostata

Serves 6-8
Course bakegoods, Brunch, Lunch, Main Course, vegetarian
Cuisine vegetarian, wholesome
Prep Time 20 minutes
Cook Time 35 minutes
Total Time 55 minutes
Author Mariana McEnroe

Ingredients

For the Dough:

  • 2 Cups of Unbleached All-purpose flour
  • ¾ Cup Corn Meal I used Larry’s Corn Meal from Boggy Creek Farm, I highly recommend to look for a good quality Organic no GMO coarse ground cornmeal it makes a huge difference.
  • 1 teaspoon of kosher salt
  • 1 teaspoon of sugar
  • 2 sticks 1 cup unsalted butter, cold and cut into small cubes.
  • 1 tablespoon of Greek yogurt
  • ¼ to ½ cup iced water

For the Filling:

  • 4 medium size heirloom tomatoes cut into ¼ inch tomato slices from at least 2 kinds of heirloom tomatoes. I used green zebra, yellow Oaxacan, prudence, and Cherokee. Use whatever is best fresh available at your farmers market.
  • 1/2 cup cherry gold or cherry tomatoes
  • I used:
  • 1/3 cup of goat cheese.
  • 3 fresh sprigs of thyme.
  • Sea Salt freshly ground black pepper.
  • A small drizzle of Extra virgin Olive Oil.

Instructions

How to make the crust:

  1. Measure all your ingredients, and place all the dry ingredients in a bowl and mix. Place bowl in the freezer. Meantime cut your cold butter, and Iced water ready to measure. Remove the bowl of dry ingredients from frezzer and add the butter. With a pastry blender incorporate the butter and flour until the mixture resembles a coarse meal, and the butter pieces are small like the size of a pea. Slowly add the cold water and carefully with your hands form a dough that just holds together. Do not work the dough.
  2. Once that the dough barely holds together cut a piece of plastic wrap and place your dough. Wrap it and shape it into a disk.
  3. Refrigerate for at least 1 hour.

When the dough is ready Preheat Oven at 400F / 205C

  1. In clean work surface, dusted with flour unwrap the dough let sit for a couple of minutes and roll the dough into a 20-22” round and about 1/8 “ thick. Once is rolled place it into a sheet pan lined with parchment paper.

Assemble the Crostata:

  1. Spread ½ of the Goat cheese into the round rolled dough leaving a 2-3" outside border. Place the tomato slices and halves, fresh thyme, rest of the goat cheese, sea salt and add a few cranks of fresh ground black pepper. Drizzle Extra Virgin Olive Oil all over the tomatoes. Fold the dough edges into the circle, creating a 2” dough border. Brush the edges with egg wash and sprinkle some sea salt all around the edge. 

  2. Bake at 400 F/ 200C for 35-45 minutes. Serve warm.

View Post or View Comments 0

Privacy Policy Contact Us Yes, more please!