Hatch peppers RSS feed for this section

Hatch Fried Chicken

Hatch-friend-chicken_Yes,-more-please!

With a guiltless dance and a smile on my face I implore you to give this hatch fried chicken a “must try” label. This is my new favorite Hatch recipe.

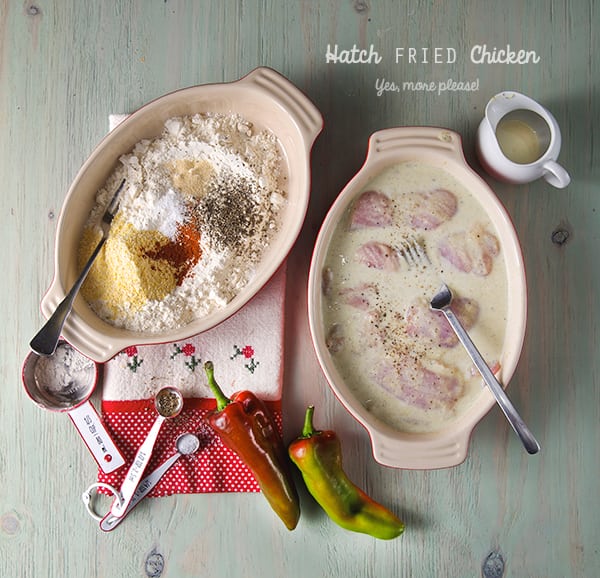
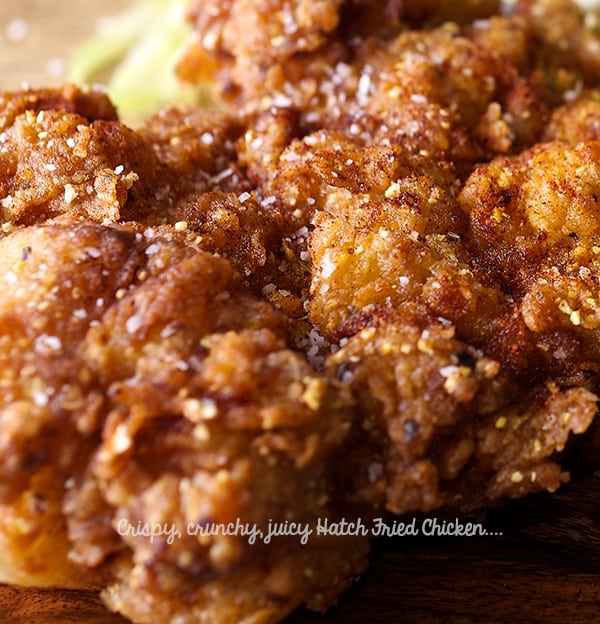
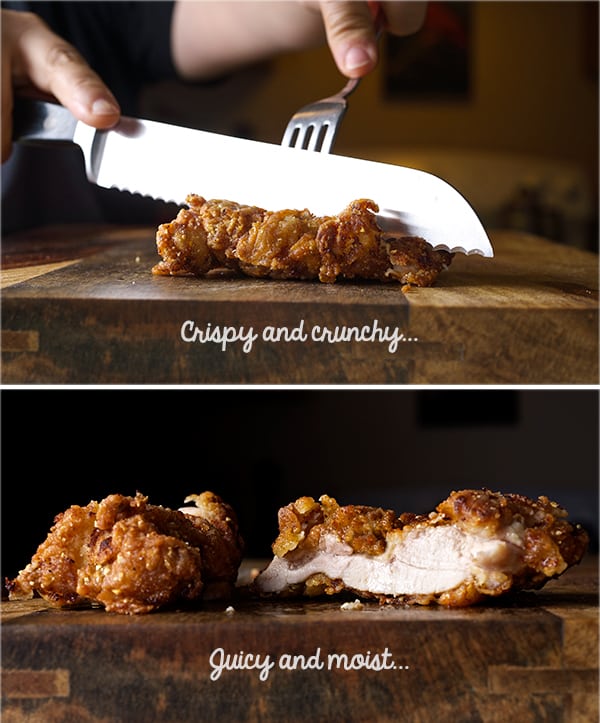
I used skinless chicken thighs and marinated them in a concoction of yogurt, milk and pureed roasted Hatch peppers until the chicken got tender and flavorful. After a quick drench of well seasoned flour I deep-fried them in peanut oil, making the chicken crunchy crusty, crispy, and tender and juicy on the inside.
Why make fried chicken at home? Because I believe it often tastes better, but also It makes you appreciate what you are about to eat.Nothing tastes more rewarding than making the effort to cook an effortless recipe with awesome results!

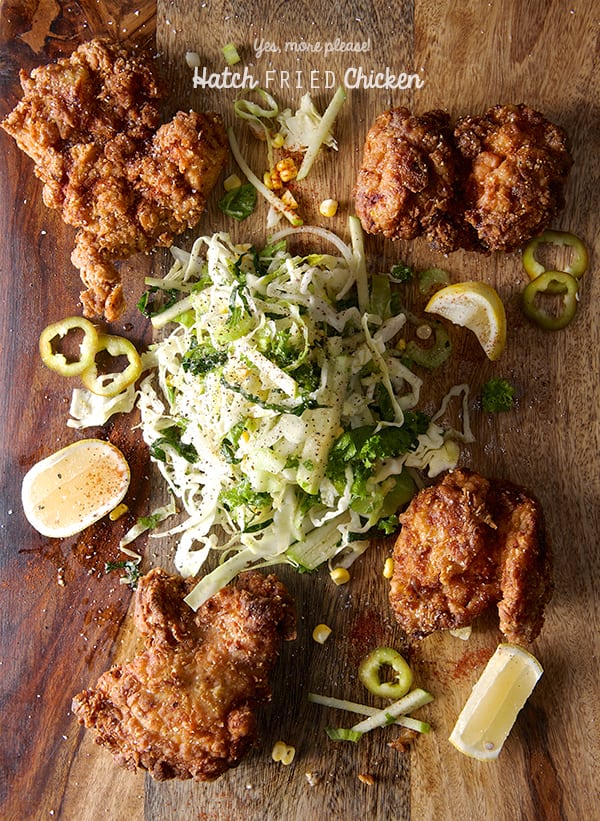
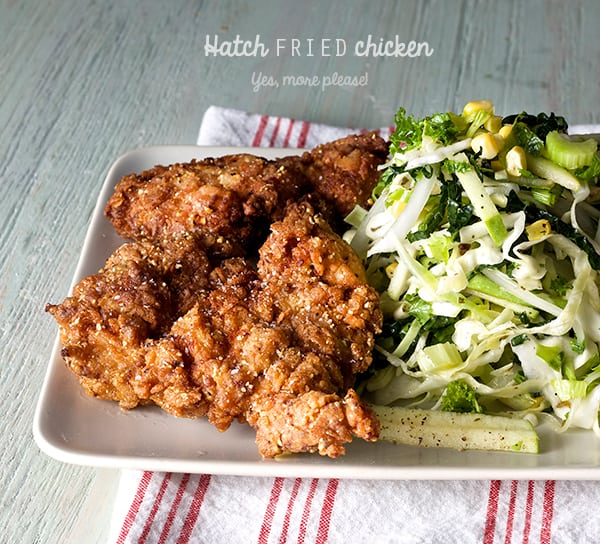
Happiness and bliss have been achieved when these Hatch Fried Chicken thighs come out of the pan and onto your plate beside the greenest green green coleslaw. It’s a balancing the act of rich and a tangy. You will be dancing from the beginning of the recipe to end of your meal. Its richness is a combination of the dry seasonings and the Hatch peppers’ distinctive mild chili note.
I used chicken thighs, they have great flavor and they are so moist that you can use them skinless, But imagine the possibilities!, chicken breast, legs, wings!… quail. Ok… I just got myself in trouble now… I want quail!…

Any way, If you make this recipe, I would love to know how it went and if you enjoyed as much as we did! Juicy, crispy, spicy fried chicken is gonna make you a fried chicken believer.
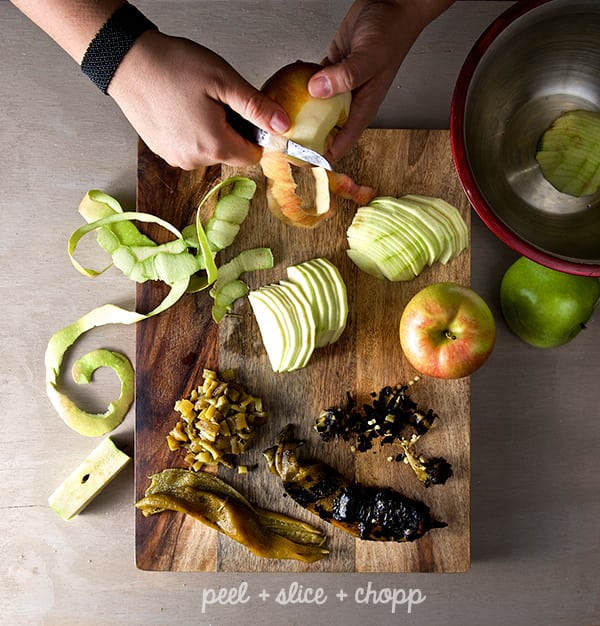
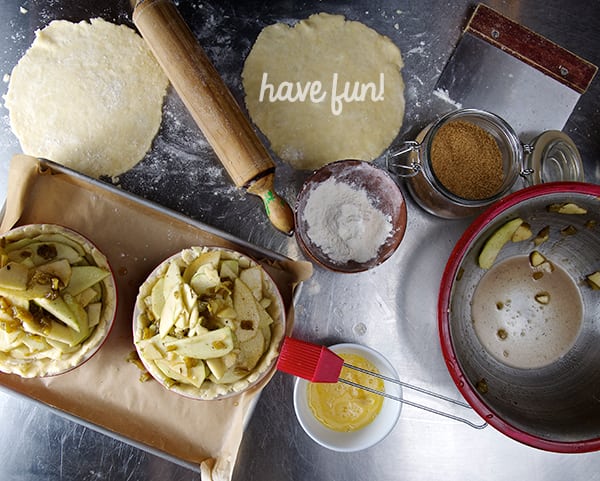
Have fun!

Hatch-friend-chicken_ingredients

Hatch Fried Chicken

Makes 6 chicken thighs and one little happy dance.

1.5 lbs. of organic skinless chicken thighs

For the marinade:

3/4 cup plain Bulgarian or Greek yogurt style.
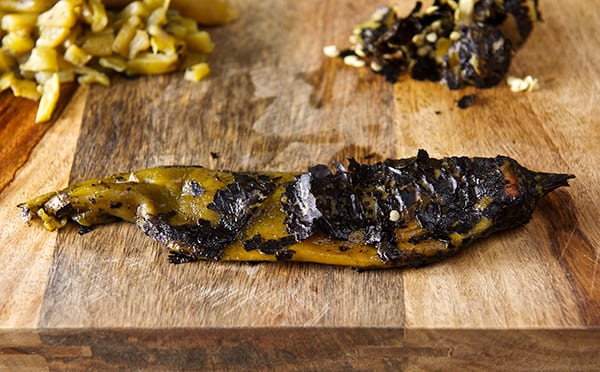
2-3 roasted hatch peppers (remove skins and seeds)* check notes for substitutions at the end of the post.
good 4-5 cranks of freshly ground pepper
1 tsp. kosher salt

For the flour drench:

1 cup unbleached all-purpose flour
1/4 cup corn meal
2 tablespoons cornstarch
1/4 teaspoon paprika
1 teaspoon black pepper
1 teaspoon garlic powder
1 teaspoon salt

For frying:

3 -4 cups – Peanut oil (grape seed oil or corn oil will work too.)
A 10″-12″ heavy bottom enamel pan or a cast iron pan for best results.
1 pair of metal tongs

Preparation method:

1. Puree all the marinade ingredients.

2. Pat dry and trim some of the excess fat on the chicken thighs, if any.
3. In a ceramic or glass dish place the chicken thighs and poor the marinade over them, massage them a little bit, place them in the refrigerator for at least 2-3 hours, over night is best.
4. Next day, Pull the chicken out of the refrigerator 20 minutes before cooking.
5. In a ceramic or glass dish combine all the ingredients for the dredging flour.
6. Start heating the oil. I like to start heating the oil at a low temperature, and slowly turn up the heat. This will ensure your oil will not taste burn and is evenly heated.
***Take care to monitor your oil and your kitchen carefully while deep-frying, never take your attention away from hot cooking oil. No distractions!!***
7. While the oil is slowly heating up, with the help of a fork take one piece of the chicken and tap it a little to remove any excess marinade, dredge into the flour, and with a spoon start covering each piece of chicken really well. Set the dredged flour pieces on a clean dry plate. Proceed with the rest of them one at the time.

Hatch-fried-chicken_drenching-sequence
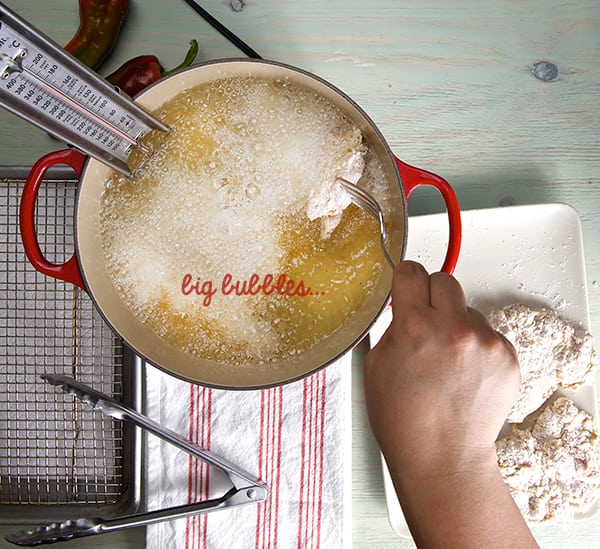
8. Check on your oil. Place a frying thermometer on the edge of the pan, and check for 350F-360F sprinkle a little flour on the oil, you want big bubbles.
9.When the oil reaches 360, start frying your chicken 2 pieces at a time, to avoid lowering down the temperature of the oil. Check the temperature on your thermometer at all times, you want big bubbles around each piece of chicken, and thermometer reads at least 350/360F  to make sure your chicken is not absorbing extra oil, making it soggy and greasy. iaks!

Hatch-friend-chicken_frying

Hatch-Fried-Chicken_salt-and-cooling-rack
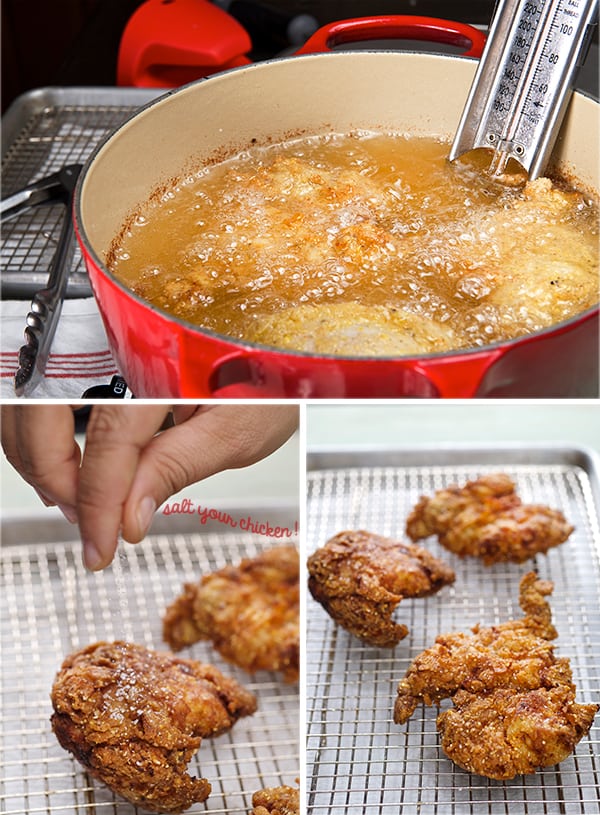
10. Depending on the size of the thighs it will take about 5-6 minutes per side. You want to turn the chicken until you have a rich golden mahogany color on the bottom and the size on the bubbles around the chicken are smaller. This is the right time to gently flip.  Always flip away from you to avoid splatter.
11. Once you flip, lower the temperature a bit to 320F, it might take less time, about 3-4 minutes. Chicken should look golden brown and the bubbles around the chicken are really small. Take the pieces out to drain and check for doneness, the internal temperature of the chicken should read minimum 165F.
12. Drain the chicken on a cooling rack lined on top of a baking sheet and immediately, sprinkle some salt. Placing the chicken on a cooling rack will make sure you the chicken will stay crispy.
13. Adjust the temperature for the next batch and go ahead and fry the rest of the chicken.

14. Ready to eat! Serve the chicken with a great side of coleslaw like this green green coleslaw, check it out is from a previous post, it is tangy crunchy, fresh and so mighty green that I believe it’s the best complement for this spicy hatch fried chicken. Also some lemon wedges, if your brave , maybe some extra dashes of tabasco sauce, or any other vinegary hot sauce. Enjoy!

Hatch-fried-Chicken-Yes,-more-please!
Hatch-fried-Chicken-crispy-and-moist-Yes,-more-please!

Hatch-fried-Chicken-crispy-and-moist-ready-to-serve

Enjoy!

*Note:

I used fresh Hatch peppers and roasted them. Here in Texas you can find them very easily when in season. If you are wondering if you can use canned Hatch peppers, yes you can. Our dear friend and follower Ed who is from El Paso, Texas and he and his family have cooked with hatch peppers for many generations, suggested me two good brands: Victoria and Santa Fé ‘Ole brand (bottled)-Double Fire-Roasted . He assures this brands are first-rate to get when hatch is not in season. Thank you so much Ed, for this great information!…

Remember that freezing the chiles is also a good option. Once you roast, peel and de-seeded them, you can purée, dice them or keep them whole, pack them on freezer bags and freeze them for future recipes. You can even make hatch chile purée ice cubes and add them to soups or stews on the winter season…delish!

Hatch-fried-chicken_hatch-pepper_Yes,-more-please!

Have fun!!!

Music Pairing: Ella & Louis – Cheek to Cheek


View Post or View Comments 2

Hatch Apple Pie

Cheddar-crust-Hatch-Apple-pie_Yes,-more-please!

Last week I went prickly pear hunting with my good friends Andrea and Arin. This involved intense heat, lots of driving, and careful handling of ingredients, and lots of tiny needles. After picking these thorny fruits, we juiced them and they produced a bright pink fragrant juice which tastes like a sweet tart lemonade. Afterwards, we were having a food conversation over our drinks and Hatch chilli’s which are in season became the topic,no matter what we always end up talking about food is inevitable…I love it!. As ingredients go Hatch peppers its one of the gems of the chili world, having a mild heat and great flavor. Andrea’s Hatch mode was contagious. After tossing around some favorite Hatch combinations, I began considering Apple Pie with Hatch peppers. Apple pie is normally reserved for the fall but I am married to a man who can eat it regardless of season. I thought this would be the right time to bake a test batch (which ran on Instagram, which you knew because all of you MUST follow YMP on Instagram) and they turned out splendidly, or at least the eaters of the samples left not a crumb,apple, or chili behind.

Hatch-Apple-pie_Yes,-more-please!

I twisted my classic crostata crust recipe which you can find the step by step in this post (Ian this phrase is just for me!..need to plug the link!) and I added cheddar cheese! Yes you heard well, sharp cheddar cheese. It came to me like a dream. The cheddar adds the savory a bit salty note to the crust, and it makes it airy and flaky. I also tried a new technique when kneading the pie crust, I learned by watching one of the episodes “ The Mind of a Chef ” with Sean Brock and southern baker Lisa Donovan who were making her amazing buttermilk pies. What I learned about her Pate brise type of dough, (which is my favorite kind for pie), is the following: she “flaked the butter” when she was making her dough, instead of leaving those famous “pea size butter chunks”. She squeezes them between her thumb and index finger to create what she called “butter flakes” Genius!!!! So I tried her technique and I added grated cheddar to create more flaking. The result is this utterly buttery and flaky crust, you can see the pictures which do not lie! Omg what a great technique and awesome combination between the fat of the butter and the cheese if I do say so myself.

But where is the hatch? After I chard them, they were hanging out with the apples in a combination of raw sugar, Gause Jaupon honey, Mexican cinnamon, and nutmeg. That’s what the crust had to stand up to! You can only imagine the amazing outcome after all these ingredients colliding in the same universe. Amazing pie. Go for it. Don’t be shy. If you want to comment on your experience with it please e-mail me. If you love the recipe shout it on the streets! …Enjoy!

Hatch-Apple-pie_ingredients-Yes,-more-please!

Hatch Apple Pie

A tongue twister by name and by taste!
Makes 2- 5” baby pies

For the pie filling:

2 green apples
2 red Apples
2-3 hatch chiles charred, skinned , de-seeded and chopped. (I used hot!)
¼ cup honey
½ cup turbinado sugar
1 teaspoon mexican cinnamon grated
¼ teaspoon nutmeg
2 tablespoons of butter
1 teaspoon corn starch
½ teaspoon apple cider vinegar
1 good pinch of salt

For the cheddar cheese crust:

1+1/4 cup unbleached all-purpose flour
1 stick = 4 oz. of european style butter cut into small cubes.
4 oz. sharp cheddar cheese grated
1 pinch of kosher salt
3-4 tablespoons of iced water.

Extra flour for dusting and rolling the dough.
1 egg for egg-wash the pie tops
a little extra turbinado sugar to sprinkle on crust.

Preparation method:

1. Start by making the crust. In a large bowl combine flour and salt. Then add the chilled butter cubes, and the grated cheddar cheese. With you hands start rubbing the flour and butter between your fingers and creating “the flakes” see picture bellow) you want to be gentle and as fast as possible.
2. Once your dough looks flaky and coarse, add the iced water and quickly combine by incorporating the flour with the least kneading possible. (see picture below)
3. The dough will look almost like is not together. Gently press into a flat ball and divide into fours. (you will need two tops, and two bottoms)
4. Wrap each portion in plastic wrap and quickly shape into 4 small disks. Chill them for at least 15-20 minutes in the freezer.

Hatch-Apple-pie
5. Meantime, prepare the apple filling. Peel and thinly slice the apples. In a medium bowl toss the sliced apples, diced roasted hatch peppers, honey, sugar, cinnamon, nutmeg, cornstarch, salt apple cider vinegar. Mix well. Use your hands to well combine every ingredient. Set aside.


Hatch-Apple-pie_peel+slice+chopp

Hatch-Apple-Pie_apple-bowl
6. Time to roll up your dough!.. this is fun! Using 2 small 5” baking pie dishes. Roll each dough piece into a 7- 8” rounds. Rub some butter into the dishes, and then place the bottom disc shaping the dough into the dish with your hands.
7. Fill each pie with half of the apple filling. Arrange the apple pieces in flat layers. You don’t want to be to fussy about it, just pay attention at not leaving apple gaps specially on the bottom layer ; )

Hatch-Apple-pie_have-fun-n-the-kitchen!

Hatch-apple-pie_cover-the-pies
8. Now your pies look like mountains of apples, that’s great! Roll the other two pastry disks into 7”-8” and cover your pies.
9. Crimp the edges of the pie with the help of a fork, make four 1” slits on top of the pie. Beat one egg and 1 teaspoon of water and with a pastry brush, brush the tops of the pies with this egg wash mixture. Sprinkle turbinado sugar on top, and edges of the pie.hatch-apple-pie_sprinkle-some-sugar
10. Line up a baking sheet with a lip with aluminum foil. Place the two pies in the tray. Place the tray in the freezer for about 20 minutes.
11. Place the rack oven into the bottom third of the oven. Preheat your oven at 400F.
12. After 20 minutes, remove the pies from freezer and place them directly into the oven.
13. Bake at 400F for the first 20 minutes. Rotate the pies and lower the temperature to 350F. Bake for another 20-25 minutes.
14. By now your house smell like heaven! Place the pies into a cooling rack let them cool for about 30 minutes. Serve with a scoop of your favorite vanilla ice cream and a dash of ground cinnamon. Enjoy!

Hatch-Apple-pie_cooling-rack

Hatch-Apple-pie_crust

Hatch-Apple-pie_layers_Yes,-more-please!

Life is too short. Make pie. Eat pie. Repeat!

Music Pairing: Nouvelle Vague – Dancing with Myself


View Post or View Comments 5

Pizza Azteca

Pizza-Azteca_Yes,-more-please!

It’s a pizza!…no!
It’s a casserole!….no! It’s a tamale?!…..no!
It’s a Corn Masa Pizza Pie!….Yes!
As silly as it sounds, it is ridiculously delicious!
Call it what you like: Mexican pizza, Corn Masa pizza; Pizza Azteca-its the ultimate summer one pan wonder. This is a great quick meal solution too! To get pizza on board it takes no more than 35 minutes since the masa does not rely on yeast or waiting time to rise.
Let me describe this pizza for you… Imagine a hot cast iron pan filled with corn masa crust, when baked the bottom gets crusty with soft delicious nutty corn masa. Fresh corn kernels add texture, enhance the corn flavor and add moisture to the crust. The top layer load with summer vegetables like zucchini, fresh corn, tomatoes, red onions, hatch peppers, and loads of melty cheese layered on top. The summer vegetables pair great with the flavor of the corn masa, the oregano on the fresh quick base sauce adds the perfect herb note. I made the pizza sauce by grating some fresh tomatoes which adds extra freshness to the pizza. I baked everything on the king of pans, “the cast iron pan”.

When this pizza comes out of the oven you will be fill with warmth and happiness as you experience the comforting smell of cooked corn masa and fresh vegetables. Pizza Azteca is best served with a fresh green salad on the side and will be a sure crowd pleaser.

This Pizza Azteca is what I would offer Moctezuma on a summer afternoon… Pizza Azteca is a meal fit for kings!

Enjoy!

Pizza-Azteca_Yes,-more-please!_ingredients

Pizza Azteca

Makes 1 round 12” pizza, yields 8-10 slices.

For the crust:

2 cups corn masa- Maseca is the brand I like, if you can get fresh masa, use it! you will be in heaven.
2 to 2-1/2 cups warm water
½ teaspoon kosher salt
½ cup fresh corn kernels (white or yellow corn is ok)

For the sauce:

3 medium roma tomatoes grated
1 tablespoon tomato paste
1 teaspoon dry oregano
1 garlic clove grated
1 tablespoon extra virgin olive oil
1 teaspoon kosher salt
Fresh cracked pepper to taste

For the toppings:

1 large or 2 medium zucchini thinly sliced.
1 ear of corn worth of kernels
1 hatch pepper or substitute for 1 good pinch of red pepper flakes.
Use roasted red peppers if you do not care for spicy.
1 cup cherry, sun golds or grape tomatoes sliced in half.
2 cups of grated cheese like Adobera, Oaxaca, Gouda, Mozzarella or Monterrey jack.
Use the cheese you like the most, as long it melts and has a mild flavor so you can taste the rest of the ingredients.
Salt and pepper to taste a little extra virgin olive oil for drizzle.

Preparation:

Preparing the masa:

1. Start by preparing the masa dough. Dissolve the salt into the 2 cups of warm water.
2. In a large bowl place your dry corn masa flour, make a well in the center add half of the water, and start incorporating the flour from the sides. Add corn kernels and the rest of the water. Knead for 2-3 minutes until water is well absorbed by the masa.
3. The masa should feel moist a bit sticky to the touch. You should be able to shape it into a ball and cover with plastic wrap, set aside let it rest while you prepare the rest of your vegetables.
4. Preheat Oven at 450F/ 230F

Pizza-Azteca_how-to-make-the-crust
5. Prepare and slice all your vegetables, grate your cheese and prepare your tomato sauce by grating the tomatoes and adding the oregano, salt, garlic, black pepper and extra virgin olive oil. Set aside.

Pizza-azteca_ingredients

Pizza-azteca_Sauce
6. At this point your masa should be well hydrated and ready to shape into the cast iron pan. Using a 11-12” Cast Iron Pan place your masa dough in the center and with wet hands start by evenly shaping the masa into the pan. Create a  higher rim on the edge of the pan. see photo.

Note: If your cast iron pan is well seasoned do not worry about the crust it will not stick to the pan, if not just apply some neutral oil on a napkin and grease the pan before shaping your crust.

7. Once you have an even layer with a bit of a rim on the outside edges, Place skillet with the crust in the oven, on the bottom rack. Bake for 15 minutes lowering the oven temperature to 425F as soon the crust is in the oven.

Pizza-Azteca_Pizza-crust

Pizza-Azteca,pre-bake-crust
8. Carefully remove the skillet from the oven, place it on top of the stove or a metal trivet and start layering your pizza ingredients. Note: leave the pot holders into the cast iron pan handles at all times!, this will prevent you to try to grab the hot pan by mistake!…believe me I’ve been there…ouch!
9. Layer the ingredients same way you do like on a pizza, starting with tomato sauce on the bottom, half of the cheese, zucchini, corn, onions, tomatoes, peppers, and the rest of the cheese. A pinch of salt and some fresh cracked pepper.
10. Place the cast iron pan into the oven for another 20-25 minutes until cheese is melted and the pizza has some gratin golden brown blisters.

Pizza-Azteca_layers
11. Remove from oven, place the pan on a trivet and wait 5 minutes to cool off a bit before cutting. Sprinkle some fresh cilantro for garnish.
12. Serve and Enjoy!


Pizza-Azteca,-ready-to-serve_slice

Pizza-Azteca,-Yes,-more-please!_slice

Enjoy!

Silly, silly music pairing: Brak’s Pizza Song with the Space ghost…

View Post or View Comments 13

Privacy Policy Contact Us Yes, more please!